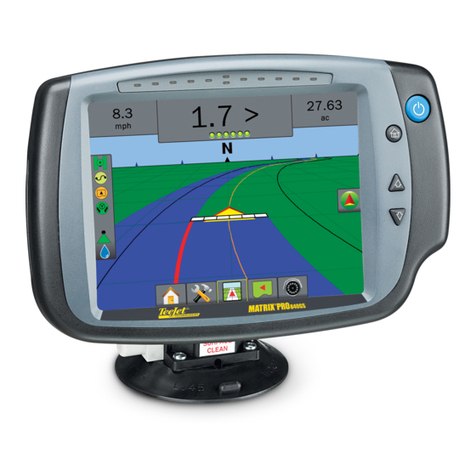
TeeJet MATRIX 570G User manual

USER MANUAL
E
E
E
E
E
R
R
R
R
R
M
M
M
M
M
M
A
A
A
A
A
A
N
N
N
N
N
N
U
U
U
U
U
U
A

i98-05141 R2www.teejet.com
COPYRIGHTS
© 2010 TeeJet Technologies. All rights reserved. No part of this document or the computer programs
described in it may be reproduced, copied, photocopied, translated, or reduced in any form or by any
means, electronic or machine readable, recording or otherwise, without prior written consent from TeeJet
Technologies.
TRADEMARKS
Unless otherwise noted, all other brand or product names are trademarks or registered trademarks of
their respective companies or organizations.
LIMITATION OF LIABILITY
TEEJET TECHNOLOGIES PROVIDES THIS MATERIAL “AS IS” WITHOUT WARRANTY OF ANY KIND,
EITHER EXPRESSED OR IMPLIED. NO COPYRIGHT LIABILITY OR PATENT IS ASSUMED. IN NO
EVENT SHALL TEEJET TECHNOLOGIES BE LIABLE FOR ANY LOSS OF BUSINESS, LOSS OF
PROFIT, LOSS OF USE OR DATA, INTERRUPTION OF BUSINESS, OR FOR INDIRECT, SPECIAL,
INCIDENTAL, OR CONSEQUENTIAL DAMAGES OF ANY KIND, EVEN IF TEEJET TECHNOLOGIES
HAS BEEN ADVISED OF SUCH DAMAGES ARISING FROM TEEJET TECHNOLOGIES SOFTWARE.
AUTO STEERING SAFETY NOTICE
When your Matrix system is connected for FieldPilot auto steering (“assisted steering” mode), you must
observe some common-sense precautions, including:
1. The FieldPilot system must remain OFF whenever the vehicle is operated on a public roadway. If
the system were ON, it could possibly interfere with steering and generate a potentially hazardous
situation.
2. Activating setup and test functions may cause the vehicle’s steering mechanism to move, even when
the vehicle is stationary and no guide line is active. All personnel must be a safe distance from pinch
points in the steering mechanism whenever the FieldPilot system is ON.
3. Activating the autosteer mode at high speeds may cause the vehicle to change direction suddenly
as it aligns with the guideline. The system must not be activated when the operator is not securely
seated and in control of the vehicle.
4. The FieldPilot system will accurately follow its path and help reduce operator fatigue; but it is
NEVER a substitute for an alert operator. The vehicle operator must be seated, alert, and aware of
potential hazards in the path of the vehicle at all times when it is moving.
5. o not operate the system without the seat switch and steering wheel sensor properly connected.
6. The installation of the FieldPilot hydraulic steering valve includes high-pressure hydraulic system
connections. These must be done in accordance with proper safety procedures including materials,
tools, hose routing, system testing, and routine maintenance / inspection.
Table of Contents
CHAPTER 1– PRODUCT OVERVIEW...........................................................1
SYSTEM FEATURES.............................................................................................................................................1
SYSTEM COMPONENTS....................................................................................................................................1
Matrix 570G Console ___________________________________________ 1
Matrix 840G Console ___________________________________________ 2
RealView Camera ______________________________________________ 2
CONFIGURATIONS..............................................................................................................................................5
Speed Out / Sense In Cable _____________________________________ 5
POWER ON/OFF ..................................................................................................................................................7
Start Up Sequence _____________________________________________ 8
GENERAL OPERATION INFORMATION .......................................................................................................8
Page Layout and Navigation ____________________________________ 10
CHAPTER 2 – UNIT SETUP ....................................................................... 11
General Information_________________________________________11
Home Menu_____________________________________________ 11
Lightbar ________________________________________________ 12
LED Spacing _____________________________________________ 12
Display Mode_____________________________________________ 13
LED Brightness___________________________________________ 13
Culture _________________________________________________ 14
Units____________________________________________________ 14
Language________________________________________________ 14
Time Zone _______________________________________________ 15
GPS____________________________________________________ 15
GPS Type ________________________________________________ 15
GPS Port ________________________________________________ 16
External Receiver Minimum Configuration Requirements___________ 16

●ii
GPS Status_______________________________________________ 16
PRN ____________________________________________________ 17
GGARequirements ________________________________________ 17
Console ________________________________________________ 17
Volume __________________________________________________ 17
LCD Brightness___________________________________________ 18
Touch Screen Calibration with Software Version 1.00 to 1.02 _____ 18
Next Power Cycle _________________________________________ 18
Touch Screen Calibration with Software Version 1.03____________ 19
Screenshot ______________________________________________ 19
Enable/Disable____________________________________________ 19
Capture an Image _________________________________________ 20
About/Save ______________________________________________ 20
SaveAbout Information _____________________________________ 20
Video __________________________________________________ 21
Eight Channel VSM ___________________________________________ 21
8 Channel VMS w/OnlyA, B, C & D____________________________ 21
Four Channel VSM____________________________________________ 22
BOOMPILOT/SINGLE BOOM SETUP ..................................................................................... 22
BoomPilot Setup______________________________________________ 22
Overlap ___________________________________________ 23
Delay On_________________________________________________ 23
Delay Off ________________________________________________ 24
#Number of Boom Sections__________________________________ 24
Boom Section Width_______________________________________ 24
Single Boom Setup____________________________________________ 25
Boom Section Width_______________________________________ 25
VEHICLE SETUP............................................................................................................................. 25
Vehicle Type_______________________________________ 26
Antenna Height ___________________________________________ 26
Direction to Boom _____________________________________ 26
Boom Offset Distance______________________________________ 27
TILT GYRO MODULE SETUP ..................................................................................................... 27
Tilt Correction Unavailable___________________________________ 27
Tilt Correction On and Calibrate _____________________________ 27
On/Off___________________________________________________ 27
Level Tilt Position 1 ________________________________________ 28
Level Tilt Position 2 ________________________________________ 28
Tilt Calibration Complete ____________________________________ 28
Tilt Correction Off _________________________________________ 28
FIELDPILOT SETUP ...................................................................................................................... 29
FieldPilot Unavailable ______________________________________ 29
Autosteer _______________________________________________ 29
Valve Setup _____________________________________________ 30
Valve Frequency __________________________________________ 30
Minimum Duty Cycle ___________________________________ 30
Cycle Left________________________________________________ 31
Cycle Right_______________________________________________ 31
Maximum Duty Cycle ______________________________________ 31
Valve Test _______________________________________________ 32
Congure FieldPilot_______________________________________ 32
Coarse Steering Adjustment ________________________________ 33
Fine Steering Adjustment___________________________________ 33
Deadband________________________________________________ 34
Lookahead_______________________________________________ 34
CHAPTER 3 – GUIDANCE ......................................................................... 35
GUIDANCE OPERATION MODES........................................................................................... 35
Straight A-B Guidance_____________________________________ 35

iii 98-05141 R2www.teejet.com
Curved A-B Guidance _____________________________________ 35
Circle Pivot Guidance _____________________________________ 35
Last Pass Guidance _______________________________________ 36
GUIDANCE BAR & STATUS BAR .................................................................................................................. 36
Guidance Bar ________________________________________________ 36
Status Bar ___________________________________________________ 36
VEHICLE VIEW................................................................................................................................37
On Screen Guidance __________________________________________ 37
Button Assistance ____________________________________________ 37
Vehicle View_____________________________________________ 38
Guidance Mode Select ____________________________________ 38
Guidance with SmartCable or SDM____________________________ 38
Straight A-B Guidance _____________________________________ 38
Activate StraightA-B Guidance _______________________________ 38
MarkingAand B Points _____________________________________ 38
A+ Nudge Feature _________________________________________ 38
Curved A-B Guidance______________________________________ 39
Activate CurvedA-B Guidance________________________________ 39
MarkingAand B Points _____________________________________ 39
A+ Nudge Feature _________________________________________ 39
Circle Pivot Guidance______________________________________ 39
Activate Circle Pivot Guidance________________________________ 39
MarkingAand B Points _____________________________________ 40
Last Pass Guidance _______________________________________ 40
Activate Last Pass Guidance_________________________________ 40
Last Pass________________________________________________ 40
Create Field Boundary______________________________________ 40
No Guidance Mode ________________________________________ 41
Clear Guidance Modes _____________________________________ 41
Home Menu_____________________________________________ 41
Zoom In/Out & Perspective ____________________________ 42
BoomPilot ______________________________________________ 42
Guidance with SmartCable or SDM____________________________ 42
Off/Manual & Automatic _______________________________________ 42
All Booms On Mode___________________________________________ 42
FIELD VIEW..................................................................................................................................... 43
On Screen Guidance __________________________________________ 43
Button Assistance ____________________________________________ 43
Field View ______________________________________________ 43
Field Boundary __________________________________________ 43
Return to Point __________________________________________ 44
Marking Return Point_______________________________________ 44
Distance to Established Point ________________________________ 44
Guidance Back to Established Point in Vehicle View_______________ 44
Home Menu_____________________________________________ 45
Zoom In/Out________________________________________ 45
World View______________________________________________ 45
Pan Mode_______________________________________________ 45
REALVIEW GUIDANCE................................................................................................................ 46
On Screen Guidance __________________________________________ 46
RealView Guidance _______________________________________ 46
Full Screen ______________________________________________ 46
Guidance Over Video______________________________________ 47
Steering Angle Indicator ___________________________________ 48

●iv
Home Menu_____________________________________________ 48
Single Camera Selection ___________________________________ 48
No VSM_____________________________________________________ 48
Eight Channel VSM ___________________________________________ 48
Four Channel VSM____________________________________________ 49
Split Camera View ________________________________________ 50
No VSM_____________________________________________________ 50
Eight Channel VSM ___________________________________________ 50
Four Channel VSM____________________________________________ 51
Guideline Adjustment ________________________________ 51
CHAPTER 4 – MONITORING .................................................................... 53
JOB VIEW.......................................................................................................................................... 53
Job Information__________________________________________ 53
Save Information _________________________________________ 53
PDF PDF Report ______________________________________________ 54
KML KML Data ________________________________________________ 54
SHP ESRI Data________________________________________________ 55
Home Menu_____________________________________________ 55
BOOM MONITORING.................................................................................................................. 55
Boom Monitor ___________________________________________ 55
BoomPilot is Unavailable____________________________________ 56
Home Menu_____________________________________________ 56
BoomPilot ______________________________________________ 56
Guidance with SmartCable or SDM____________________________ 56
Off/Manual & Automatic _______________________________________ 56
All Booms On Mode___________________________________________ 56
CHAPTER 5 – APPENDIX.......................................................................... 57
APPENDIX A ICON REFERENCE................................................................................................................ 57
Menu Options ___________________________________________ 57
Unit Setup ______________________________________________ 57
System Setup __________________________________________ 57
BoomPilot/Single Boom Setup_______________________ 58
Vehicle Setup __________________________________________ 58
Tilt Gyro Module Setup___________________________________ 58
FieldPilot Setup ________________________________________ 58
Commandes générales ________________________________________ 58
Guidance Screens _______________________________ 59
Status Bar Icons______________________________________________ 59
Vehicle View Options_____________________________________ 59
Field View Options_______________________________________ 59
RealView Guidance Options_______________________________ 60
Job View________________________________________________ 60
APPENDIX B TIME ZONES .......................................................................................................................... 60
APPENDIX C FACTORY SETTINGS & RANGES..................................................................................... 61
APPENDIX D UNIT SPECIFICATIONS...................................................................................................... 62

198-05141 R2www.teejet.com
Power Button
USB Port with Rubber Cover Rubber Connector
Covers
GPS Antenna
Connection
Integrated RAM Mount
Speaker
Recessed Connectors
Speed Signal Connection
Camera Connection
Power Connection
CHAPTER 1– PRODUCT OVERVIEW
The Matrix™ allows the management of multiple connected modules plus GPS mapping, guidance,
FieldPilot®, BoomPilot®, and data collection in a single console using CAN bus technology. This
replaces multiple consoles in the cab with one robust system.
SYSTEM FEATURES
• RealView™ Guidance Over Video
Guidance information and video displayed simultaneously with up to eight cameras
connections
• BoomPilot®(automated boom section control) can switch off sprayer or spreader sections
automatically reducing overlaps and eliminating skips
• FieldPilot®(assisted steering) can perform on straight or contour paths.
• Easy-to-use, color 3-D graphical guidance that is precise and accurate in all terrain
• Lightbar Guidance for vehicle or swath, plus a graphical display for complete guidance
information
• Coverage mapping/data export in PDF, KML or SHP
• Bright, daylight readable screen in either 14.5 cm (5.7”) or 21.3 cm (8.4”) size.
• Product upgrades include:
- FieldPilot Assisted Steering
- BoomPilot Automatic Boom Section Control
- Tilt Gyro Module
- Video Selection Modules for up to 8 cameras
- External GPS receiver or antenna upgrades
• Handles up to 15 individual sections
• Color 3-D Guidance in Four Modes – Straight A-B, Curved A-B, Circle Pivot and Last Pass
• 13 languages for international use
• Simplified operation of product control and GPS record keeping
• Clear visual icons guide user through the menu selection process
• High-quality internal GPS engine with small external antenna
• Two applied area counters
SYSTEM COMPONENTS
Matrix 570G Console
The Matrix 570G is designed to provide years of service under typical agricultural operating
conditions. A tight fitting enclosure, combined with rubber covers for all connectors mean that typical
dusty environments will not cause operational problems. While occasional splashing of water will
not damage the unit, the Matrix 570G is not designed for direct exposure to rain. Take care not to
operate the Matrix in wet conditions.
Figure 1-1: Console Front & Back
Built In Lightbar
Power Button
USB Port with Rubber Cover
Standard RAM Bracket
Bright Touch Screen

●2
RealView Camera
The TeeJet Technologies RealView camera allows video images
to be displayed on the Matrix screen. The camera can be pointed
forward to enable RealView guidance over video, or it can be
positioned to view other operational aspects of your equipment. The
camera is equipped with a flexible RAM mount, integral sun shade
and provides infrared illumination, allowing clear video images even
in dark conditions.
Figure 1-3: Video Camera
Mounting Bracket
Video Camera
Sun Shade
Nighttime Illumination
Matrix console connection is compatible with AgCam cameras.
Matrix 840G Console
The Matrix 840G is designed to provide years of service under typical agricultural operating conditions. A tight fitting enclosure, combined
with rubber covers for all connectors mean that typical dusty environments will not cause operational problems. While occasional splashing
of water will not damage the unit, the Matrix 840G is not designed for direct exposure to rain. Take care not to operate the Matrix in wet
conditions.
Figure 1-2: Console Front & Back
Built In Lightbar
Power Button
USB Port
with Rubber Cover
Standard RAM Bracket
Bright Touch Screen
Home Button
Zoom In/Out Buttons
Rubber Connector Covers
GPS Antenna Connection
Integrated RAM Mount
Speaker
Speed Signal Connection
Camera Connection
Power Connection

398-05141 R2www.teejet.com
Video Selector Modules
A Video Selector Module (VSM) allows connection of up to 8 video
cameras to your Matrix console. The module is compact and robust,
and can be mounted in any convenient location. No interaction is
required after installation.
Figure 1-4: Video Select Module - 4 Channel
Figure 1-5: Video Select Module - 8 Channel
GPS Antennas
TeeJet offers a full range of high-quality GPS receivers to fit your
precision farming needs.
The RXA-25 or RXA-30 GPS antenna provides a higher quality GPS
receiver that can improve GPS performance in areas of sub-optimal
GPS reception.
Figure 1-6: GPS RXA-25Antenna
Figure 1-7: GPS RXA-30Antenna
The Patch Antenna II provides strong performance in standard
operating conditions. The small size of the patch antenna makes it
easy to mount, and unlikely to be damaged.
Figure 1-8: GPSAntenna
FieldPilot Steering Control Module
The FieldPilot Steering Control Module performs assisted steering
on straight and contour paths. The Matrix system can link with the
FieldPilot system to take precise control of the vehicle position. The
operator manages the automatic steering system with the Matrix –
a benefit of a single, in-cab console. Automatic steering drives
a vehicle with tremendous, repeatable accuracy in both straight
and curved patterns. The ability to operate in fog or dust, day or
night with high levels of accuracy means a better return on capital
investment for equipment, a more effective application and more
attentive, alert operation.
Figure 1-9: FieldPilot Steering Control Module

●4
BoomPilot Section Driver Module
Combined with software built into the Matrix console, the Section
Driver Module (SDM) makes BoomPilot (automatic boom section
control) possible. The SDM should be combined with the appropriate
cable to interface with your BoomPilot system, spray controller and/
or spraying machine for quick and easy installation. Section Driver
Modules and their related cables are designed to control as many
boom sections as the spray controller to which they are connect, up
to a maximum of 15 boom sections.
Figure 1-10: Sections Driver Module
Foot Switch
TeeJet Foot Switch is a convenient method of engaging FieldPilot. It
is connected to the system via the SCM Harness.
Figure 1-11: Foot Switch
Tilt Gyro Module
If your GPS antenna is mounted 12 feet (4 meters) above the
ground, a 10% side slope can cause 2 feet (0.6 meter) of position
error. The new TeeJet Tilt Gyro Compensation Module corrects
GPS position errors caused by side slope conditions. Mounted on a
solid structure on your vehicle, the Tilt Gyro Compensation Module
will intercept GPS signals from your receiver and provide corrected
position data to your guidance device.
• Diagnostic LEDs indicate status of TCM (Power status,
operating status, and status of incoming GPS data)
• Weatherproof electrical connector for trouble-free operation
• Mounting holes built into housing
• Automatically detects GPS sensor baud rate and adjusts output
accordingly
• Compatible with Matrix guidance systems
NOTE: If FieldPilot is being used, a TCM is built into the system.
Figure 1-12: Tilt Gyro Module
Harnesses
TeeJet harnesses are designed for reliable operation in harsh
environments. Shielding and weatherproof connections ensure that
the cables and electrical connections are reliable and trouble free.
Figure 1-13: Harness
Cable Extensions
Cable extensions or extended length cables are available for special
applications. Contact your TeeJet dealer for details if the standard
cables provided with your system are not long enough.
Extended Warranty
TeeJet offers an extended warranty for many guidance products. Not
available in all markets. Contact your TeeJet dealer for details.

598-05141 R2www.teejet.com
CONFIGURATIONS
The following diagrams are reflective of typical Matrix configurations. Due to the variety of possible
configurations, these should be used for reference purposes only.
Figure 1-14: Matrix w/RealView Camera
16-00022: Camera
Connectto
+12v Only
Power Cable
45-05645
Power
Cable, 12V
45-05775
10' Power
Cable, Battery
CAUTIONCONN.
TO +12V ONLY
POWER CABLE
45-05775
DC: XXXX
8 Pos.
4 Pos.
8 Pos.
Speed Cable
Camera
45-05617: 20'
45-05618: 60'
Camera Extension Cable
45-05615 4 Pos.
45-05765 8 Pos.
Speed/Sense Cable
5 Pos.
+12V
32-50008
Switch
78-50155
GPS Ant.
Matrix 570G
75-30055
75-30056 w/ClearPath
Kit, RAM Mount w/Suction Cup
90-02349 (Matrix 570G)
90-02700 (Matrix 840G)
Matrix 840G
75-30070
75-30071 w/ClearPath
Matrix
FieldPilot
BoomPilot
Optional Accessory
Speed Out / Sense In Cable
The Speed Out / Sense In Cable assists the Matrix with two additional connections that::
►Send a radar speed signal to an external device
►Allow the user to operate the area applied function of the Matrix in series with a remote master
connection or existing apply on/off toggle in a single swath manner. However if the previous connections
are not available the supplied toggle switch allows area applied functionality without the need to connect
to a functional application implement.
Connecting to different consoles requires different adapters and calibrations.
• If connecting to TeeJet consoles use speed adapter 45-20042
◄enter calibration # 914 (#1000 in Europe) for 8xx series in RAD mode,
◄enter calibration # 9140 (#10000 in Europe) for below LH 70 Series, LH 85, 500 series, 5000,
6000, IC 24 and IC 34
• If connecting to Mid-Tech consoles no adapter is required,
◄enter calibration # 1000
• If connecting to Raven consoles use speed adapter 45-05508 (do not connect the 12v red wire
from 45-05508)
◄enter calibration # 730 in SP 2
If sensing boom shut-off for applied mapping from an existing console, attach the green wire to the valve
side of the master switch on the console. The red wire is not used.
Figure 1-15: Matrix w/8 Channel or 4 Channel VSM & Multiple RealView Cameras
POWER IN
CAN
RS-232
Power/DATA
45-05626
45-05626
Pwr/CAN/Data
Cable
(included with
FieldPilot and
BoomPilot kits)
3A Fuse
8 Pos.
RS-232 TJ CAN
(Terminated)
CAUTION: CONNECT
TO 12V ONLY
Power Cable
401-0016
DC: xx/xx
WARNING CONNECT
DIRECTLY TO BAT.
401-0016
Battery Adapter
45-08101
CAN Terminator
16-00022
RealView Camera
78-08067
Module, 4CH
Video CAN
78-08068
Video Selector
Module,
8CH Video CAN
to Optional RXA GPS Antenna 45-05678
Cable, SMA-M X SMA-M
4 Pos.
8 Pos.
Speed Cable
Camera
45-05617: 20'
45-05618: 60'
Camera Extension Cable
45-05615 4 Pos.
45-05765 8 Pos.
Speed/Sense Cable
5 Pos.
+12V
32-50008
Switch
78-50155
GPS Ant.
Matrix 570G
75-30055
75-30056 w/ClearPath
Kit, RAM Mount w/Suction Cup
90-02349 (Matrix 570G)
90-02700 (Matrix 840G)
Matrix 840G
75-30070
75-30071 w/ClearPath
Matrix
FieldPilot
BoomPilot
Optional Accessory

●6
Figure 1-16: Matrix w/VSM & Multiple RealView Cameras, FieldPilot and BoomPilot
POWER IN
CAN
RS-232
Power/DATA
45-05626
45-05626
Pwr/CAN/Data
Cable
(included with
FieldPilot and
BoomPilot kits)
3A Fuse
8 Pos.
RS-232 TJ CAN
(Terminated)
78-05077
BoomPilot
Section Driver
Module
(15 sections)
BoomPilot Harness
Part number
dependent on Rate Controller
Console Harness
Rate Controller
Remote ABSC
Status Switch
Connection
45-05381
DC: xx/xx
Connectoto
(+12v)
45-05381
Battery 12'
w/15Amp
Fuses
CAN
Seat Sensor
Steering
Wheel Sense
GPS Power
GPS In
COM 1
Remote
Engage/Disengage
SCM COM 2
Power
SCM Power I/O
45-07703
DC: xx/xx Valve Output 45-10103
DC: xx/xx
Steering
Valve
78-08061
Steering Control
Module (SCM)
45-07708
SCM Harness
45-10103
Harness
Steering
(A+B)
45-07703
SCM Power I/O
Engage / Disengage
32-04020
DC: xx/xx
32-04020
Optional
Footswitch
32-04040
Remote
Engage/
Disengage
Switch
16-00022
RealView Camera
78-08067
Module, 4CH
Video CAN
to Optional RXA GPS Antenna 45-05678
Cable, SMA-M X SMA-M
4 Pos.
8 Pos.
Speed Cable
Camera
45-05617: 20'
45-05618: 60'
Camera Extension Cable
45-05615 4 Pos.
45-05765 8 Pos.
Speed/Sense Cable
5 Pos.
+12V
32-50008
Switch
78-50155
GPS Ant.
Matrix 570G
75-30055
75-30056 w/ClearPath
Kit, RAM Mount w/Suction Cup
90-02349 (Matrix 570G)
90-02700 (Matrix 840G)
Matrix 840G
75-30070
75-30071 w/ClearPath
Matrix
FieldPilot
BoomPilot
Optional Accessory
Figure 1-17: Matrix w/VSM & Multiple RealView Cameras and FieldPilot
POWER IN
CAN
RS-232
Power/DATA
45-05626
45-05626
Pwr/CAN/Data
Cable
(included with
FieldPilot and
BoomPilot kits)
3A Fuse
8 Pos.
RS-232 TJ CAN
(Terminated)
45-05381
DC: xx/xx
Connectoto
(+12v)
45-05381
Battery 12' w/15Amp Fuses
45-08101
CAN Terminator
CAN
Seat Sensor
Steering
Wheel Sense
GPS Power
GPS In
COM 1
Remote
Engage/Disengage
SCM COM 2
Power
SCM Power I/O
45-07703
DC: xx/xx Valve Output 45-10103
DC: xx/xx
Steering
Valve
78-08061
Steering Control
Module (SCM)
45-07708
SCM Harness
45-10103
Harness
Steering
(A+B)
45-07703
SCM Power I/O
Engage / Disengage
32-04020
DC: xx/xx
32-04020
Optional
Footswitch
32-04040
Remote
Engage/
Disengage
Switch
16-00022
RealView Camera
78-08067
Module, 4CH
Video CAN
to Optional RXA GPS Antenna 45-05678
Cable, SMA-M X SMA-M
4 Pos.
8 Pos.
Speed Cable
Camera
45-05617: 20'
45-05618: 60'
Camera Extension Cable
45-05615 4 Pos.
45-05765 8 Pos.
Speed/Sense Cable
5 Pos.
+12V
32-50008
Switch
78-50155
GPS Ant.
Matrix 570G
75-30055
75-30056 w/ClearPath
Kit, RAM Mount w/Suction Cup
90-02349 (Matrix 570G)
90-02700 (Matrix 840G)
Matrix 840G
75-30070
75-30071 w/ClearPath
Matrix
FieldPilot
BoomPilot
Optional Accessory

798-05141 R2www.teejet.com
Figure 1-18: Matrix 570G w/VSM, Tilt Gyro and BoomPilot
POWER IN
CAN
RS-232
Power/DATA
45-05626
45-05626
Pwr/CAN/Data
Cable
(included with
FieldPilot and
BoomPilot kits)
3A Fuse
8 Pos.
RS-232 TJ CAN
(Terminated)
CAN
78-08057
Tilt Gyro
Module (TGM)
45-07716
TGM Harness
78-05077
BoomPilot
Section Driver
Module
(15 sections)
BoomPilot Harness
Part number
dependent on Rate Controller
Console Harness
Rate Controller
Remote ABSC
Status Switch
Connection
16-00022
RealView Camera
78-08067
Module, 4CH
Video CAN
to Optional RXA GPS Antenna 45-05678
Cable, SMA-M X SMA-M
4 Pos.
8 Pos.
Speed Cable
Camera
45-05617: 20'
45-05618: 60'
Camera Extension Cable
45-05615 4 Pos.
45-05765 8 Pos.
Speed/Sense Cable
5 Pos.
+12V
32-50008
Switch
78-50155
GPS Ant.
Matrix 570G
75-30055
75-30056 w/ClearPath
Kit, RAM Mount w/Suction Cup
90-02349 (Matrix 570G)
90-02700 (Matrix 840G)
Matrix 840G
75-30070
75-30071 w/ClearPath
Matrix
FieldPilot
BoomPilot
Optional Accessory
POWER ON/OFF
Press the power button to power on the console. Upon power up, the Matrix will begin its Start Up
Sequence.
Press and briefly hold the power button (until the screen turns black) to power off the console.
Figure 1-19: Power Button
Power Button
USB Port with Rubber Cover
Power Button

●8
Start Up Sequence
The console takes approximately 40 seconds to power up. During
this time the TeeJet Technologies logo will be displayed (LEDs will
power on and off and brightness levels will fluctuate.)
Figure 1-20: Power Up Screen
Once the power up sequence has cycled, the following message is
displayed:
“Would you like to clear the job data and begin a new job?”
1. Press
►No – The previous job will resume.
►Yes – A new job will be established and all data from previous
jobs will be cleared. The message “All job data cleared” is
displayed. Select “OK” to continue.
The splash screen will be displayed for approximately one minute.
The splash screen lists the module’s current software version. The
information is also available on the About screen.
NOTE: Afirm touch is required when selecting or acknowledging a
screen option.
Figure 1-21: Clear Job Data Screens Figure 1-22: Splash Screen
Matrix
v1.0
GENERAL OPERATION INFORMATION
A firm touch is required when selecting a screen icon.
On initial startup, the console will load the Vehicle View screen as
a default. All subsequent power cycles will return to the last page
viewed before powering down.
Icons on guidance screens will be displayed and will fade from the
window after 6 seconds of inactivity. To regain these icons, touch the
screen in any location.
Figure 1-23: With and Without Icons On Screen
Press the icon of any menu item to display a definition of that item.
To remove the information box, press anywhere on the screen.

998-05141 R2www.teejet.com
Figure 1-24: Example of Information Text Box
For rapid adjustment of a setting, press and hold the
►PLUS/MINUS ICONS ,
►UP/DOWN ARROW ICONS
►ZOOM IN/OUT ICONS
►ZOOM IN/OUT BUTTONS (Matrix 840G only).
The Zoom In/Out Buttons on the Matrix 840G will not adjust
Plus/Minus or Up/Down settings.
GPS Status Change – a pop-up warning will be displayed for
approximately 2.5 seconds. To remove a pop-up sooner, press
anywhere on the screen.
Figure 1-25: Example of GPS Status Change
FieldPilot Disengaged – a pop-up warning will be displayed for
approximately 2.5 seconds. To remove a pop-up sooner, press
anywhere on the screen.
Figure 1-26: FieldPilot Disengaged Screen
All changes are saved automatically.
The Matrix is a current job system. Previous jobs cannot be recalled.
The console needs to be cycled off and back on when changing or
attaching equipment to the Matrix system.
Cleaning suggestions – Matrix consoles should be cleaned with mild
cleaners, such as glass cleaner, and a soft cloth. Take care not to rub
dust or other abrasive materials into the touch screen surface.
• Use a soft lint-free cloth.
• The cloth may be used dry, or lightly dampened with a mild
cleaner or Ethanol.
• Be sure the cloth is only lightly dampened, not wet. Never apply
cleaner directly to touch panel surface; if cleaner is spilled onto
touch panel, soak it up immediately with absorbent cloth.
• Cleaner must be neither acid nor alkali (neutral pH).
• Wipe the surface gently; if there is a directional surface texture,
wipe in the same direction as the texture.
• Never use acidic or alkaline cleaners, or organic chemicals such
as: paint thinner, acetone, tolulene, xylene, propyl or isopropyl
alchohol, or kerosene.
• Suitable cleaning products are commercially available pre-
packaged for use; one example of such a product is Klear
Screen™, or commercially available off-the-shelf retail brands
such as Glass Plus® Glass and Surface Cleaner made by
Reckitt-Benckiser.
• Use of incorrect cleaners can result in optical impairment of
touch panel and/or damage to functionality.

●10
Unit Setup Screens
Vehicle View Screens
Field View Screens
Boom Monitoring Screen
Job View Screens
RealView Guidance Screens
Page Layout and Navigation
The Matrix is very simple to navigate. The HOME BUTTON or HOME ICON gives you access to the unit’s 3 functions: Setup, Guidance and Monitoring. The 6 touch screen Menu Options (Unit Setup ,
Vehicle View , Field View , RealView Guidance , Job View and Boom Monitoring ) quickly access all aspects of the unit.
Home
Swath ha
3.570 0.0
Swath ha
3.570 0.0
km/h ha
4.9212.4
Swath ha
10.010 1.3
Swath ha
2.3-2 0.0
km/h ha
6.783.3

11 98-05141 R2www.teejet.com
CHAPTER 2 – UNIT SETUP
Unit Setup is used to configure System Setup, BoomPilot/
Single Boom Setup, Vehicle Setup, Tilt Gyro Module
Setup, and FieldPilot Setup.
NOTE:All settings are automatically saved when selected.
To access the Unit Setup screens:
1. Press HOME BUTTON or press the screen to activate the
icons and select HOME ICON in bottom left corner of screen.
2. Select UNIT SETUP from Home Menu .
3. Select from:
►System Setup – used to configure:
◄Lightbar – used to configure LED Spacing , Display/
Swath Mode and LED Brightness settings.
◄Culture – used to configure Units , Language
and Time Zone .
◄GPS – used to configure GPS
Type and the GPS Port , as well as view GPS
Status information .
◄Console – used to configure
Volume , LCD Brightness , Screen Calibrate and
Screenshot settings, as well as view About information
and Save system software information .
◄Video – used to set up individual cameras ABC
DEFGH.
►BoomPilot/Single Boom Setup – used to configure
Overlap , Delay On , Delay Off , Number of Boom
Sections #and Boom Section Width settings.
►Vehicle Setup – used to configure Vehicle Type ,
Antenna Height , Direction to Boom and Boom Offset
Distance settings.
►Tilt Gyro Module Setup – used to calibrate the Tilt Gyro
Module, allowing for tilt correction for application on hilly or
sloped terrain.
►FieldPilot Setup – used to configure:
◄Enable/Disable FieldPilot .
◄Valve Setup – used to configure Valve Frequency,
Minimum Duty Cycle Left, Minimum Duty Cycle Right
and Maximum Duty Cycle settings.
◄Valve Test – verifies steering is directed correctly and
is used to fine tune the oil flow.
◄Configure FieldPilot – used to configure Coarse
Steering Adjustment, Fine Steering Adjustment,
Deadband, and Lookahead settings.
General Information
Press the icon of any menu item to display a definition of that item.
To remove the information box, press anywhere on the screen.
Figure 2-1: Example of Information Text Box
Home Menu
The Home Button or Home Icon gives you access to the
unit’s three functions: Setup, Guidance and Monitoring. The six
touch screen Menu Options (Unit Setup , Vehicle View ,
Field View , RealView Guidance , Job View and Boom
Monitoring ) quickly access all aspects of the unit.
To view the Home Menu options:
1. Press HOME BUTTON or select HOME ICON in bottom
left corner of screen.
Figure 2-2: Home Menu - Unit Setup

●12
SYSTEM SETUP
System Setup is used to configure Lightbar, Culture,
GPS, Console and Video settings.
1. Select UNIT SETUP from Home Menu .
2. Press SYSTEM SETUP TAB .
3. Select from:
►Lightbar – used to configure LED Spacing, Display Mode
and LED Brightness
►Culture – used to configure Units, Language and Time
Zone
►GPS – used to configure GPS Type and the GPS Port, as
well as view GPS Status information
►Console – used to configure Volume, LCD Brightness,
Screen Calibrate and Screenshot settings, as well as view About
information and Save system software information
►Video – used to set up individual cameras
Figure 2-3: System Setup
Lightbar
Lightbar Setup is used to configure LED Spacing, Display/Swath
Mode and LED Brightness.
1. Press SYSTEM SETUP TAB
2. Press LIGHTBAR ICON .
3. Select from:
►LED Spacing – sets the distance illustrated by the
illuminated LEDs
►Display Mode – determine whether the lightbar represents
the swath or vehicle
►LED Brightness – adjust LED brightness
OR
Press PAGE RIGHT ARROW to cycle through all settings.
NOTE: Options labels are current settings. While in a setting screen,
press icon to view available factory settings and setting
ranges.
Figure 2-4: Lightbar Options
LED Spacing
LED Spacing sets the distance illustrated by the illuminated LEDs.
Range is 0.04 - 9.8 feet / 0.01 - 3.0 meters.
1. Press LIGHTBAR ICON .
2. Press LED SPACING ICON .
3. Use the entry screen to establish LED Spacing.
4. Press
►PAGE RIGHT ARROW to proceed to Display Mode.
►SYSTEM SETUP TAB to return to main System Setup
screen.
Figure 2-5: LED Spacing

13 98-05141 R2www.teejet.com
Display Mode
Display/Swath Mode determines whether the lightbar represents the
swath or vehicle.
1. Press LIGHTBAR ICON .
2. Press DISPLAY ICON .
3. Press UP/DOWN ARROW ICONS to change between:
►Swath – the LEDs represent the guideline location and the
moving LED represents the vehicle.
►Vehicle – the center LED represents vehicle location and the
moving LED represents the guideline.
4. Press
►PAGE RIGHT ARROW to proceed to LED Brightness.
►SYSTEM SETUP TAB to return to main System Setup
screen.
Figure 2-6: Display Mode - Swath
Figure 2-7: Swath Lightbar
Lights illuminated on the
right of the Lightbar require a
steering adjustment to the left.
Lights illuminated on the left of
the Lightbar require a steering
adjustment to the right.
Figure 2-8: Display Mode - Vehicle
Figure 2-9: Vehicle Lightbar
Lights illuminated on the right of
the Lightbar require a steering
adjustment to the right.
Lights illuminated on the left of
the Lightbar require a steering
adjustment to the left.
LED Brightness
LED Brightness adjusts the brightness of the lightbar LEDs. Range
is 0 - 100.
1. Press LIGHTBAR ICON .
2. Press LED BRIGHTNESS ICON .
3. Press the PLUS/MINUS ICONS to adjust LED brightness.
◄Higher the number, the brighter the LEDs.
◄Lower the number, the dimmer the LEDs.
4. Press
►CHECKERED FLAG to complete Lightbar Setup.
►SYSTEM SETUP TAB to return to main System Setup
screen.
NOTE: Press & hold PLUS/MINUS ICONS to quickly adjust
settings.
Figure 2-10: LED Brightness

●14
Culture
Culture is used to configure Units, Language and Time Zone
settings.
1. Press SYSTEM SETUP TAB
2. Press CULTURE ICON .
3. Select from:
►Units – defines the system measurements
►Language – defines the system language
►Time Zone – establishes the local time zone
OR
Press PAGE RIGHT ARROW to cycle through all settings.
NOTE: Options labels are current settings. While in a setting screen,
press icon to view available factory settings and setting
ranges.
Figure 2-11: Culture
Units
Units defines the system measurements (U.S. or Metric).
1. Press CULTURE ICON .
2. Press UNITS ICON .
3. Press UP/DOWN ARROW ICONS to change between:
►U.S.
►Metric.
4. Press
►PAGE RIGHT ARROW to proceed to Language.
►SYSTEM SETUP TAB to return to main System Setup
screen.
NOTE: This setting is required for FieldPilot and Tilt Sensor
Operation, as well as proper BoomPilot operation.
Figure 2-12: Units
Language
Languages defines the system language. Options include Czech,
Danish, Dutch, English, French, German, Hungarian, Italian, Polish,
Portuguese, Russian, Spanish and Swedish.
1. Press CULTURE ICON .
2. Press LANGUAGE ICON .
3. Press UP/DOWN ARROW ICONS to change between
languages.
4. Press
►PAGE RIGHT ARROW to proceed to Time Zone.
►SYSTEM SETUP TAB to return to main System Setup
screen.
NOTE: Press & hold UP/DOWNARROW
ICONS to quickly adjust settings.
NOTE: This setting is required for FieldPilot and Tilt Sensor
Operation, as well as proper BoomPilot operation.
Figure 2-13: Language

15 98-05141 R2www.teejet.com
Time Zone
Time zone establishes the local time zone.
1. Press CULTURE ICON .
2. Press TIME ZONE ICON .
3. Press UP/DOWN ARROW ICONS to select the
appropriate time zone.
4. Press
►CHECKERED FLAG to complete Culture Setup.
►SYSTEM SETUP TAB to return to main System Setup
screen.
NOTE: Press & hold UP/DOWNARROW
ICONS to quickly adjust settings.
Figure 2-14: Time Zone
Time zones are listed alphabetically by continent then city. A list of
the continents and cities is in Appendix B.
GPS
GPS is used to configure GPS Type and the GPS Port, as well as
view GPS Status information.
1. Press SYSTEM SETUP TAB
2. Press GPS ICON .
3. Select from:
►GPS Type – select GPS source transmissions
►GPS Port – sets (D)GPS COM port
►GPS Status – displays information on GGA/VTG (Data
Rates), Num Sat, HDOP, PRN and Quality.
OR
Press PAGE RIGHT ARROW to cycle through all settings.
NOTE: Options labels are current settings. While in a setting screen,
press icon to view available factory settings and setting
ranges.
Figure 2-15: GPS
GPS Type
GPS Type customizes system to accept GPS source or DGPS
source transmissions.
1. Press GPS ICON .
2. Press GPS TYPE ICON .
3. Select
►GPS Only – uncorrected signals
►DGPS Only – differentially corrected signals
►GPS/DGPS – either type of signal
4. Press
►PAGE RIGHT ARROW to proceed to GPS Port.
►SYSTEM SETUP TAB to return to main System Setup
screen.
NOTE: This setting is required for FieldPilot and Tilt Sensor
Operation, as well as proper BoomPilot operation.
Figure 2-16: GPS Type
This manual suits for next models
1
Table of contents
Other TeeJet GPS manuals
