TeeJet RX410p User manual


RX410p
Copyrights
© 2007 TeeJet Technologies Inc. All rights reserved. No part of this document or the computer
programs described in it may be reproduced, copied, photocopied, translated, or reduced in any
form or by any means, electronic or machine readable, recording or otherwise, without prior
written consent from TeeJet Technologies, Inc.
Trademarks
Unless otherwise noted, all other brand or product names are trademarks or registered
trademarks of their respective companies or organizations.
Limitation of Liability
TEEJET TECHNOLOGIES, INC. PROVIDES THIS MATERIAL “AS IS” WITHOUT WARRANTY
OF ANY KIND, EITHER EXPRESSED OR IMPLIED. NO COPYRIGHT LIABILITY OR PATENT
IS ASSUMED. IN NO EVENT SHALL TEEJET TECHNOLOGIES, INC. BE LIABLE FOR ANY
LOSS OF BUSINESS, LOSS OF PROFIT, LOSS OF USE OR DATA, INTERRUPTION OF
BUSINESS, OR FOR INDIRECT, SPECIAL, INCIDENTAL, OR CONSEQUENTIAL DAMAGES
OF ANY KIND, EVEN IF TEEJET TECHNOLOGIES HAS BEEN ADVISED OF SUCH DAMAGES
ARISING FROM TEEJET SOFTWARE.
1801 Business Park Drive, Springfield, Illinois 62703 USA �(217) 753-8424 �www.teejet.com

RX410P
98-05099 R0
i
CHAPTER 1 - INTRODUCTION . . . . . . . . . . . . . . . . . . . . . . . . . . . . . . . 1
FEATURES . . . . . . . . . . . . . . . . . . . . . . . . . . . . . . . . . . . . . . . . . . . . . . . . . . . . . . . . 1
Receiver . . . . . . . . . . . . . . . . . . . . . . . . . . . . . . . . . . . . . . . . . . . . . . . . . . . . . . . . . . . . . . . 1
Antenna . . . . . . . . . . . . . . . . . . . . . . . . . . . . . . . . . . . . . . . . . . . . . . . . . . . . . . . . . . . . . . . 1
INSTALLATION . . . . . . . . . . . . . . . . . . . . . . . . . . . . . . . . . . . . . . . . . . . . . . . . . . . . . 2
Receiver . . . . . . . . . . . . . . . . . . . . . . . . . . . . . . . . . . . . . . . . . . . . . . . . . . . . . . . . . . . . . . . 3
Antenna . . . . . . . . . . . . . . . . . . . . . . . . . . . . . . . . . . . . . . . . . . . . . . . . . . . . . . . . . . . . . . . 4
CABLE INTERFACE . . . . . . . . . . . . . . . . . . . . . . . . . . . . . . . . . . . . . . . . . . . . . . . . . 5
EXTERNAL DEVICE CONNECTIONS . . . . . . . . . . . . . . . . . . . . . . . . . . . . . . . . . . . . 5
Serial Ports . . . . . . . . . . . . . . . . . . . . . . . . . . . . . . . . . . . . . . . . . . . . . . . . . . . . . . . . . . . . . 8
CHAPTER 2 - OPERATION . . . . . . . . . . . . . . . . . . . . . . . . . . . . . . . . . . 9
LEDS . . . . . . . . . . . . . . . . . . . . . . . . . . . . . . . . . . . . . . . . . . . . . . . . . . . . . . . . . . . . . 9
MAIN MENU . . . . . . . . . . . . . . . . . . . . . . . . . . . . . . . . . . . . . . . . . . . . . . . . . . . . . . . 10
DIFFERENTIAL MENUS . . . . . . . . . . . . . . . . . . . . . . . . . . . . . . . . . . . . . . . . . . . . . 15
CHAPTER 3 - GPS OVERVIEW . . . . . . . . . . . . . . . . . . . . . . . . . . . . . . 19
AUTOMATIC TRACKING . . . . . . . . . . . . . . . . . . . . . . . . . . . . . . . . . . . . . . . . . . . . . 19
RECEIVER PERFORMANCE . . . . . . . . . . . . . . . . . . . . . . . . . . . . . . . . . . . . . . . . . 19
DIFFERENTIAL OPERATION . . . . . . . . . . . . . . . . . . . . . . . . . . . . . . . . . . . . . . . . . 19
AUTOMATIC SBAS (WAAS, EGNOS, MSAS, ETC.) TRACKING . . . . . . . . . . . . . . 19
E-DIF . . . . . . . . . . . . . . . . . . . . . . . . . . . . . . . . . . . . . . . . . . . . . . . . . . . . . . . . . . . . 20
L-DIF . . . . . . . . . . . . . . . . . . . . . . . . . . . . . . . . . . . . . . . . . . . . . . . . . . . . . . . . . . . . . 20
OMNISTAR VBS . . . . . . . . . . . . . . . . . . . . . . . . . . . . . . . . . . . . . . . . . . . . . . . . . . . 20
APPENDIX A - TROUBLESHOOTING . . . . . . . . . . . . . . . . . . . . . . . . . 21
APPENDIX B - RX410P SPECIFICATIONS . . . . . . . . . . . . . . . . . . . . . 23

ii

RX410P
98-05099 R0
1
CHAPTER 1 - INTRODUCTION
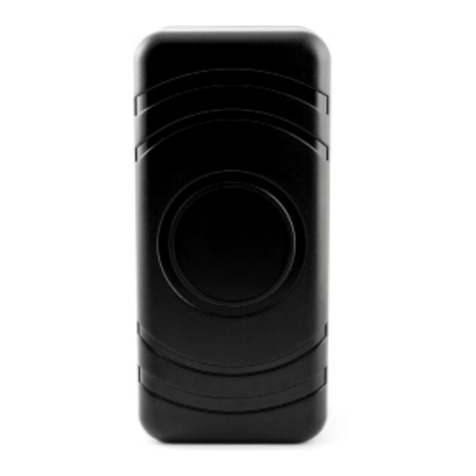
The RX410p is a GPS receiver and antenna system that tracks GPS and SBAS. The high accuracy,
multipurpose receiver is capable of receiving GPS and SBAS signals as well as optional radio bea-
con. This system is upgradeable to output messages up to 20Hz. The menu system provides easy
system configuration and the status LEDs provide quick updates on the receiver condition. The
Smart Antenna offers an affordable, portable solution with professional level accuracy for agricul-
tural, marine, GIS mapping, and other applications. It provides fast start-up and reacquisition times,
23.6 inch / 60 cm accuracy, and an easy-to-see status indicator for power, GPS, and DGPS. The
durable enclosure houses both antenna and receiver. It can be powered through various sources,
making the Smart Antenna ideal for a variety of applications. Dual-serial, CAN, and pulse output
options make this DGPS receiver compatible with almost any interface.
FEATURES
Receiver
• Feature-packed sub-23.6 inch / 60cm DGPS positioning
• Differential options including SBAS (WAAS, EGNOS, etc.), Radio Beacon, OmniSTAR
• Exclusive e-Dif®option where other differential correction signals are not practical
•COAST
TM technology maintains accurate solutions for 40 minutes or more after loss of
differential signal
• Fast output rates of up to 20 times per second provide the best guidance and machine
control
• Compatible with L-DifTM technology for applications requiring accuracy under 7.9 inches /
20cm
• The status lights and menu system make the receiver easy to monitor and configure
Antenna
• Affordable solution for unparalleled sub-meter performance - 23.6 in / 60cm accuracy, 95%
of the time
•COAST
TM stability during temporary differential signal outage
• Exclusive e-Dif®option where other differential signals are not practical
• Compatible with L-DifTM technology for applications requiring accuracy under 7.9 in / 20cm
• Fast output rates of up to 20 times per second provide the best visual guidance and
automated steering signals for all types of applications
• Compact, low-profile design with fixed or magnetic mounting options - ideal for portable
and dynamic applications
• Radar-simulated pulse output provides accurate ground speed

2 Chapter 1 - Introduction
Figure 1-1: Receiver and Antenna
INSTALLATION
Open the shipping box and examine the contents for signs of damage. Please notify the shipper and
TeeJet Customer Support of any damage to the shipping box or its contents immediately. Make sure
all items have been received. Contents may vary depending upon the system ordered. The following
table lists standard components that should arrive with an RX410p system. Please retain the original
invoice and shipping box. These are required if the system needs to be shipped or returned.

RX410P
98-05099 R0
3
Table 1-1: RX410p Components
Receiver
It is not necessary to mount the RX410p receiver. However, if mounting is desired, several thumb
screws, nuts, and brackets are provided in the kit. When choosing a mounting location, please
ensure the menu screen, LEDs, and buttons are visible and accessible. Access to the back panel
must be available for switching out cables and accessing the POWER button. There is an option
within the menu system to switch the direction of the display, so if it is easier to mount the unit upside
down, it may be mounted in that position and can still be easily operated.
NOTE: When mounting the receiver, mount the unit inside and away from the elements and in a
location that minimizes vibration, shock, extreme temperatures, and moisture.
Figure 1-2: RX410p Illustration
RX410p System Components Part Number Quantity
RX410p Receiver Kit 78-50159 1
Base, Antenna, Magnetic Mount 78-50070 1
Receiver, RX410p 78-50161 1
Antenna, RX410p 78-50162 1
Bracket, RX410p 65-05174 1
Cable, Power, 10ft/3m 45-05132 1
Cable, Antenna, 16.4 ft/5m TNC-TNC 45-05134 1
Cable, Computer Interface 117-0500 1
Manual 98-05099 1
Antenna
Receiver
Cable
Cable
To Power Source Cable To Device

4 Chapter 1 - Introduction
To install the brackets for mounting:
1. Slide the nuts through the openings along the sides of the receiver.
2. Place the bracket along the receiver and insert the thumbscrews so they screw into the
nuts.
3. Secure the brackets in the location of choice.
Antenna
Placement of the antenna is crucial to the system’s operation. The GPS engine inside the antenna
computes a position based upon measurements from each satellite to the phase center of the
antenna. Mount the antenna at the desired location of reference. When choosing a mounting loca-
tion, make certain that there is a clear view of the sky. This will ensure that GPS satellites are not
masked by obstructions, potentially reducing system performance.
Mount the antenna on, or as close to, the center point of measurement of the vehicle. The antenna
can be mounted magnetically, on the vehicle’s surface, or on a pole.
Magnetic Mount
The magnetic mount can be secured by screwing it into the bottom of the antenna and mounting it to
any metal surface. A metal disc and foam adhesive is included with each magnetic mount. Use the
foam adhesive to bond the metal disc to the desired mounting location if there is no metal surface
available. To use the metal disc and foam adhesive:
1. Clean and dry the mounting surface on the vehicle.
2. Remove the backing from one side of the foam adhesive and press the metal plate onto the
mounting surface on the vehicle.
3. Remove the backing from the other side of the foam adhesive.
4. Press the metal plate onto the mounting surface of the vehicle.
5. Apply firm pressure to ensure good adhesion.
6. Place the antenna on top of the metal disc.
Surface Mount
As an alternative to the magnetic mount, the antenna is easily attached to the surface with four
machine screws (not included). To surface mount the antenna:
1. Photocopy the bottom of the antenna and use it as a template to plan the mounting hole
locations.
WARNING! Make sure the photocopy is scaled ONE TO ONE with the mounting holes on the
bottom of the antenna!
2. Mark the mounting hole centers as necessary on the mounting surface.
3. Place the antenna over the marks to ensure that the planned hole centers agree with the
true hole centers. Adjust as necessary.
4. Use a center punch on the hole centers in order to guide the drill bit.
5. Drill the mounting holes with a 3/16-inch /4.7625 mm bit appropriate for the surface mount.

RX410P
98-05099 R0
5
6. Place the antenna over the mounting holes and insert the mounting screws through the
bottom of the mounting surface and into the antenna.
WARNING! Install the antenna only hand-tight. Damage resulting from overtightening the antenna
is not covered by warranty.
Pole Mount
The center thread of the antenna is 5/8 inches / 15.875 mm for compatibility with a survey pole (not
included).
CABLE INTERFACE
The power cable must reach an appropriate power source. The data cable may connect to a data
storage device, computer, or other device that accepts GPS data.
When choosing a route for all of the cables:
• Avoid running cables in areas of excessive heat
• Keep cables away from corrosive chemicals
• Do not run the extension cable through door or window jams
• Keep the cable away from rotating machinery
• Do not bend excessively or crimp the cables
• Avoid placing tension on the cables
• Remove unwanted slack from the extension cable at the receiver end
• Secure along the cable route using plastic wrap
WARNING! Cables improperly installed near machinery can be dangerous.
When connecting the various cables to different devices:
1. Connect the power cable to the appropriate power source.
2. Connect the antenna cable from the receiver to the antenna.
3. Connect the data port(s) to any required device.
EXTERNAL DEVICE CONNECTIONS
The serial ports of the RX410p operate at the RS-232C interface level to communicate with external
data loggers, navigation systems, and other devices. The two serial ports are accessible via the
back panel. The serial ports are accessible by two DB9 female connectors. Either serial port can be
used for firmware updates. Figure 1-3 illustrates the numbering for the DB9 connectors (female).

6 Chapter 1 - Introduction
Figure 1-3: DB9 Socket Numbering
Note: For successful communication, the baud rate of the RX410p serial ports must be set to
match that of the devices to which they are connected. Tables 1-2 and 1-3 provide the
pin configuration for the serial ports.
Table 1-2: Port A Pin-Out
Pin Number Function
1Not connected
2Transmit data Port A
3Receive data Port A
4Not connected
5Signal ground
6Event marker
7Not connected
8 Not connected
91PPS

RX410P
98-05099 R0
7
Table 1-3: Port B Pin-Out
Table 1-4: DGPS Options
Table 1-5: Serial Port Settings
Pin Number Function
1Not connected
2Transmit data Port B
3Receive data Port B
4Not connected
5Signal ground
6Not connected
7 Not connected
8 Not connected
9 Not connected
DGPS Options
SBAS (WAAS, EGNOS, MSAS, etc.)
e-Dif®
External RTCM
L-Dif®
Serial Port Baud Rate Data Bits Parity Stop Bits Interface Level
Serial Port A
and B
4800 8 None 1 R2-232C
9600
19200
38400
57600

8 Chapter 1 - Introduction
Table 1-6: GPS Message Output Options
Serial Ports
The RX410p features two serial ports. The ports handle communications to and from the receiver
and antenna. The ports may be configured for a mixture of NMEA 0183, binary data, and RTCM SC-
104 data.
Custom Configuration of the RX410p
All aspects of the RX410p may be configured through the serial port with the use of GPS com-
mands. Many aspects of the receiver may also be configured.
Environmental Considerations
The RX410p receiver is designed to be placed indoors. It is, however, splash proof in case of acci-
dental exposure. The antenna is designed to be used outdoors.
NOTE: The changes made to the RX410p via the serial port will not be saved to memory for subse-
quent power-up unless a save command is issued ($JSAVE). If changes are made via the
menu system, they are saved automatically.
NOTE: Contact your local TeeJet Technologies dealer for additional information regarding the use
of GPS commands and customized configuration.
GPS Message Update Rate Max DGPS Age Elevation Mask
GPS Binary From 1 Hz to 20 Hz 259,200 seconds 5o
NMEA 0183 GGA From 1 Hz to 20 Hz 259,200 seconds 5o
NMEA 0183 GLL From 1 Hz to 20 Hz 259,200 seconds 5o
NMEA 0183 GSA 1 Hz 259,200 seconds 5o
NMEA 0183 GST 1 Hz 259,200 seconds 5o
NMEA 0183 GSV 1 Hz 259,200 seconds 5o
NMEA 0183 RMC 1 Hz 259,200 seconds 5o
NMEA 0183 RRE 1 Hz 259,200 seconds 5o
NMEA 0183 VTG From 1 Hz to 20 Hz 259,200 seconds 5o
NMEA 0183 ZDA 1 Hz 259,200 seconds 5o

RX410P
98-05099 R0
9
CHAPTER 2 - OPERATION
To power up the RX410p:
1. Connect the ends of the RX410p power cable to a clean power source providing between 8
and 36 VDC. The supplied power should be continuous and clean for best performance.
2. Turn on the system by pressing the ON/OFF switch on the back panel.
NOTE: A weather-tight connection and connector is suggested for use if the cable will be
located outside.
WARNING! Be careful not to provide a voltage higher than the input range (36 VDC). This will
damage the receiver and will void the warranty.
WARNING! Do not attempt to operate the RX410p with the fuse bypassed. Such a modification will
void the product warranty.
The RX410p features reverse polarity protection to prevent damage if the power leads are acci-
dently reversed. With the application of power, the RX410p will proceed through an internal start-up
sequence. However, it will immediately be ready for communication.
NOTE: The initial start-up can take from 5 to 15 minutes depending upon location. Subsequent
start-ups will output a valid position within 1 to 5 minutes depending on location and the
amount of time since the last start-up.
NOTE: The RX410p can take up to 5 minutes for a full ionospheric map to be received from
SBAS. Optimum accuracy will be obtained once the RX410p is processing corrected
positions using complete ionospheric information.
LEDS
The RX410p uses three LEDs. The LED functions are defined as:
• Power Indicator LED (red). This LED illuminates when the RX410p is powered.
• GPS Lock Indicator LED (yellow). This LED remains illuminated with the RX410p achieves
a solid GPS lock.
• DGPS Position Indicator LED (solid green). This LED remains illuminated in solid green
when the receiver has achieved a differential position and a pseudo range residual of better
than 32.8 feet / 10.0 meters. If the residual value is worse than the current threshold, the
green LED will blink, indicating that differential mode has been attained but that the residual
has not met the threshold.

10 Chapter 2 - Operation
MAIN MENU
The menu system of the RX410p is designed for easy setup and configuration in the field or in the
office. Most configuration can be completed entirely through the menu system without having to con-
nect to a computer or PDA. The menu software supports many different languages so individuals
with varied backgrounds can easily understand the configuration of the receiver. If at any time the
menu system needs to be reverted to system default, simply hold down the Enter button and power
on until the splash screen disappears.
The Up and Down Arrow buttons are used to navigate through the menu items. The Enter button is
used to enter into a sub-menu item or select the desired menu option.
Figure 2-1: Main Menu A
Figure 2-2: Main Menu B
GPS Position Status
Latitude
Longitude
Height
Heading
Velocity
Age of Differential
SV Count
Horizontal Dilution
of Precision
Position Status
(continued)
Residual RMS
Sigma-a
Sigma-b
Azimuth
Sigma latitude
Sigma longitude
Sigma altitude
GPS Precision

RX410P
98-05099 R0
11
Figure 2-3: Main Menu C
Figure 2-4: Main Menu D
Figure 2-5: Main Menu E
Position Status
(continued)
Carrier Smoothing
Ephemeris Exists
Ephemeris Healthy
Not Used Previously
Above Elevation
Differential Correction
No Differential
GPS Navigation
Condition
Position Status
(continued)
DSP:Carrier Lock
DSP:Bit Error Rate
DSP:DSP Lock
DSP: Frame Sync
DSP: Track Mode
ARM: GPS Lock
ARM: Differential Data
GPS DSP-ARM
ARM: ARM Lock
ARM: DGPS
ARM: Solution
GPS (con-
tinued)
Satellites
Configure
CH-SV EI (Satellite Elevations)
AZ SNR (Satellite Azimuth and
Signal to Noise
Elevation Mask
Maximum DGPS Age
Data Port A
Data Port B
UTC Offset

12 Chapter 2 - Operation
Figure 2-6: Main Menu F
Figure 2-7: Main Menu G
Proceed Wizard
Enter Name
Differential Age
Data PORT A
Data PORT B
Elevation Mask
Maximum DGPS Age
Create New
Port A
Port B
Config Wizard
Proceed
Wizard
Continued
Create New
(Continued)
Save to Location
Save to
Location Not Used 1
Not Used 2
Not Used 3
Not Used 4
Not Used 5
Save Current Enter Name Save to Location
Not Used 1
Not Used 2
Not Used 3
Not Used 4
Not Used 5

RX410P
98-05099 R0
13
Figure 2-8: Main Menu H
Figure 2-9: Main Menu I
Config
Wizard
Continued
Delete Saved
Display Format
Not Used 1
Not Used 2
Not Used 3
Not Used 4
Not Used 5
Not Used 1
Not Used 2
Not Used 3
Not Used 4
Not Used 5
Cancel
System
Setup
Display Apps
Use Previous
In Use
Other
SwapApplications
Display Update
Latitude and Longitude Units
Height Unit
Velocity Unit
Baud Rates PORT A
PORT B

14 Chapter 2 - Operation
Figure 2-10: Main Menu J
Figure 2-11: Main Menu K
GGA
GLL
GSA
GST
GSV
RMC
RRE
System
Setup
(Continued)
VTG
ZDA
Display Logs
Bin1
Bin2
Bin80
Bin93
Bin94
Bin95
Bin96
System
Setup
(Continued)
Bin97
Bin98
Display Logs
(Continued)
Bin99
RCTM
RD1
PCSI,1
Software Disp
Contrast
Animation
Subscription
Flip Display
Language
Menu System
Crescent Application
Serial Number
SBX

RX410P
98-05099 R0
15
DIFFERENTIAL MENUS
The following figures provide the flowcharts for the differential menus.
Figure 2-12: Differential Menu A
Figure 2-13: Differential Menu B
RTCM Port
Latitude
Longitude
Height
Set Reference
Use Current Position
L-Dif
RTCM Baud
Base Station Reference
RTCM Port
External
RTCM RTCM Baud
Differential
BER PRN 1 (Bit Error Rate)
BER PRN 2 (Bit Error Rate)
Ln PRN 1 (Longitude)
Ln PRN 2 (Longitude)
Elev PRN 1 (Elevation)
SBAS Signal Status
Elev PRN 2 (Elevation)
Az PRN 1 (Azimuth)
Az PRN 2 (Azimuth)

16 Chapter 2 - Operation
Figure 2-14: Differential Menu C -1
Figure 2-15: Differential Menu C-2
Figure 2-16: Differential Menu D
Mode
PRN 1
PRN 2
SBAS
(Continued)
Satellites
Differential
F (Frequency)
SS SNR (Signal Strength/Signal to Noise Ratio)
MPT % Q (Maximum Throughput)
Beacon Signal Status
Unselected beacon
ID H
Beacon
(Continued)
Configure
Africa
Tune Asia
Australia
Central America
Europe
North America
Differential
Auto Tune
TuneBeaconName
South America
Table of contents
Other TeeJet GPS manuals
