Fig.10 Fig.11
Fig.12
Fig.8 Fig.9
8 min.
ig.8F ig.9Fig.8 ig.9
ig.10F
8 min.
ig.11Fig.10
8 min.
ig.11
ig.12Fig.12
Fig.13 Fig.14
Fig.15 Fig.16
Fig.17
CLICK!
Fig.18
CC
ig.13Fig.13 ig.14Fig.14
ig.15F
CLICK!
ig.15 ig.16Fig.16
ig.17Fig.17 ig.18Fig.18
www.tefal.com
FR E E M O V E
1800132251 - 20/14 - FTP
65
12
4
2
1
3
8
7
9
11
10
10d
10a
10b
10c
Fig.1
Fig.3
Fig.2
Fig.5Fig.4
Fig.7Fig.6
B
AA
ig.1F
B
ig.1
Fig.3F
ig.2F
ig.4F
ig.2 F
Fig.4
ig.3F
ig.5F
ig.6Fig.6 Fig.7F
Preparation
Using the appliance
Fig.20
Fig.19
Fig.22
Fig.23 Fig.24
Fig.21
DD
ig.19Fig.19 ig.20Fig.20
ig.21F ig.22F
ig.21 ig.22
ig.23Fig.23 ig.24Fig.24
For your safety
• Read the instructions carefully before using your appliance for the first time and retain for future reference.
• This appliance complies with the technical rules and standards for safety currently in force
(Electromagnetic Compatibility, Low Voltage, environment).
• This appliance is not intended for use by persons (including children) with reduced physical, sensory or
mental capabilities, or lack of experience and knowledge, unless they have been given supervision or
instruction concerning use of the appliance by a person responsible for their safety.
• Children should be supervised to ensure that they do not play with the appliance.
• Warning! The voltage of your electrical installation must correspond to that of the iron (220V).
Connecting to the wrong voltage may cause irreversible damage to the iron and will invalidate the
guarantee.
• This appliance must always be plugged into an earthed socket. If using a mains extension lead, ensure
that it is correctly rated (16A), with an earth.
• If the electrical cord becomes damaged, it must be immediately replaced by an Approved Service Centre
to avoid any danger.
• The appliance should not be used if it has fallen, if it has obvious damage, if it leaks or does not operate
correctly. Never dismantle your appliance: have it inspected by an Approved Service Centre, so as to avoid
any danger.
• Never immerse the appliance in water!
• Do not unplug your appliance by pulling on the cord. Always unplug your appliance: before filling or rinsing
the water tank, before cleaning it, after each use.
• Never leave the appliance unattended when it is connected to a power source; if it has not cooled down
for approximately 1 hour.
• The sole plate of your iron and the base plate can become very hot and may cause burns: do not touch
them. Never allow the electrical cord to come into contact with the soleplate of the iron, and always wait
for your appliance to cool down completely before putting it away. Your appliance gives off steam, which
may cause burns, especially when you are ironing on a corner or edge of the ironing board. Never direct
the steam towards people or animals
• The iron should only be used with the base provided.
• The iron must always be placed on the base and never on its heel .
• Your iron and its base must be used and placed on a stable surface. When you place the iron on its base,
ensure that the surface on which the base is placed is stable.
• This product has been designed for domestic use only. Any commercial use, inappropriate use or failure to
comply with the instructions, the manufacturer accepts no responsibility and the guarantee will not apply.
Environment protection first!
iYour appliance contains valuable materials which can be recovered or
recycled.
‹Leave it at a local civic waste collection point.
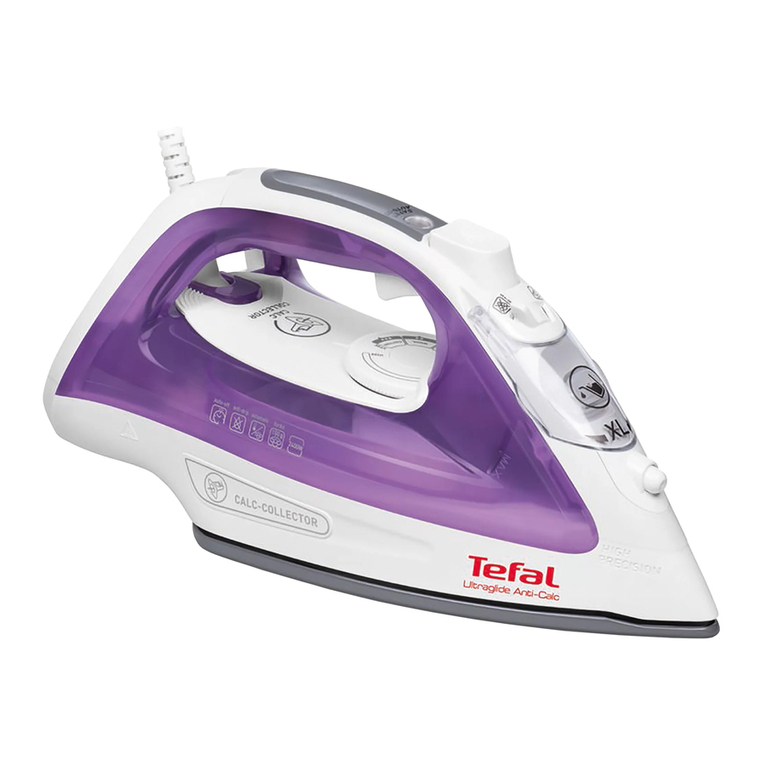
1. Spray nozzle
2. Tank filling inlet
3. Water tank filling flap
4. Anti-scale valve
5. Spray Button
6. Turbo button
7. Variable steam trigger
8. Thermostat control
9. Water tank
10. Display panel
a. Auto-off restart button
b. Green light “Iron ready”
c. Orange light “Auto-off on”
d. Red light “Recharge iron”
11. Base
12.
Ultraglide®Diffusion soleplate
Description
Before first use
• Please read these instructions carefully. Remove any labels from the appliance before first use.
• Before using your iron’s steam functions for the first time, we recommend that you activate the steam
function in a horizontal position for a few moments away from your laundry. Switch the thermostat control
to “MAX” or “•••” and hold down the variable steam trigger. Under the same conditions, press the Turbo
button several times.
• There may be a release of smoke, a harmless odour and a light spray of particles when you use your
appliance for the first time. This has no effect on the use of the iron and will disappear quickly.
Preparation
What water to use?
• Your appliance has been designed to operate using untreated tap water. However, it is necessary to operate
the Self-Clean function regularly in order to eliminate hard water deposits from the steam chamber.
• Heat concentrates the elements contained in water during evaporation. The types of water listed below
may contain organic waste, mineral or chemical elements that can cause spitting, brown staining or
premature wear of the appliance: water from clothes dryers, scented or softened water, water from
refrigerators, batteries, air conditioners, rain water, boiled, filtered or bottled water. These types of water
should not be used in your iron. Also only use distilled or demineralised water as advised below.
• If your water is very hard, it is possible to mix untreated tap water with store-bought distilled or
demineralised water in the following proportions : 50% tap water, 50% distilled or demineralised water.
Filling the water tank
• Fill the tank up to the “MAX”. Never fill the appliance by holding it directly under the tap. Do not
remove the anti-scale valve to fill the water tank.
• Unplug the base from the socket.
• lace the iron on the base.
• Open the tank filling flap and fill the tank up to “MAX” – fig.1.
• Close the tank filling flap.
Using the appliance
Turning on
• Connect the base to a 220V socket
– fig.2.
• Adjust the temperature
– fig.3
. Your iron has the Autosteam Control function. Your iron automatically and
accurately determines the exact temperature and steam flow that are suitable, for each selected fabric, in order
to guarantee the best results.
• The flashing green light
– fig.4
located on the display panel on the back of the base indicates that the iron is
heating up. When the light stops flashing
– fig.5
, the iron is ready to use.
• Do not place the iron on its heel during the resting period, but on its base
– fig.9.
peration of the display panel
• Flashing green light: iron is heating up
– fig.4.
• Fixed green light: iron is ready
– fig.5.
• The flashing red light after around 30s when the iron is not on its base: the iron must be replaced on the base
for recharging – fig.10
.
• Flashing orange light (according to model): Auto-Off function activated (see the section "Auto-Off safety")
– fig.12.
REC MMENDATI NS
• Your iron heats up quickly: start with fabrics that are ironed at a low temperature and finish with those that
require a higher temperature.
• If you lower the thermostat temperature, place the iron on its base and wait (around 10 minutes)
until the temperature drops to avoid burning the fabric.
• If you are ironing a fabric with a mixture of fibres: adjust the ironing temperature to the most delicate fibre.
For delicate fabrics we recommend testing the fabric first on an inconspicious place (eg. Inside the hem).
Steam / Dry Ironing
• Check if there is water in the tank before using the variable steam trigger or the TURB and SPRAY
functions.
• During your ironing session, hold down the trigger located under the handle (at least 5s at a time) to obtain a
constant flow of steam and guarantee the best results
– fig.6.
When the trigger is released, the steam stops.
Using the TURB and SPRAY function
• For the TURBO function, set the thermostat control to “MAX” or “•••”. ress the TURBO button from time to
time – fig.8.
• When you dry or steam iron, press the S RAY button several times to wet the fabric and remove resistant
creases – fig.7.
Vertical steam ironing
• Hold the iron a few centimetres from the fabric to avoid burning delicate fabrics. Every five pulses
return the iron to a horizontal position.
• Hang the garment on a hanger and hold the fabric slightly taut with one hand. The steam is very hot, so you
should always do this with the garment on a hanger – never iron clothes which someone is wearing – fig.11.
• Set the thermostat control to “MAX”.
• ress the turbo button in pulses – fig.8 and move the iron from the top to the bottom – fig.11.
Additional functions
Auto- ff safety
• During normal use, the Auto-off light is off!
• The electronic system cuts the base power supply and the orange light located on the display panel flashes if
the iron remains still for more than eight minutes on the base.
• To restart the iron, simply press the RESTART button on the display panel – fig.12.
Maintenance and cleaning
Cleaning the anti-scale valve (once a month)
• Be careful! Never touch the end of the rod. The iron will not function without the anti-scale valve.
• Disconnect the base and empty the tank– fig.13.
• To remove the anti-scale rod, set the thermostat at “MAX”, press the valve extraction button and pull
gently upwards– fig.14.
• Let the rod soak for four hours in a glass of white vinegar or natural lemon juice – fig.15.
• Rinse the rod under tap water – fig.16.
• Reposition the anti-scale rod; push the valve until it clicks– fig.17.
Self-cleaning
• Self-cleaning delays scaling on the iron. To prolong the life of the iron, perform a self-clean once a
month.
• lug in the base and reconnect your iron.
• Allow the iron to heat up on the base, with the tank full and the thermostat set to maximum.
• When the green light on the display panel stops flashing, take the iron and place it over a sink. Remove the anti-
scale valve (see previous chapter).
• Hold down the variable steam button and shake the iron gently and in a horizontal position, over the sink, until
some of the water (and the impurities) have drained through the soleplate.
• At the end of this operation, put the anti-scale valve back in place; push down until it clicks – fig.17.
• lace the iron back on the base to dry the soleplate.
Cleaning the soleplate
Your steam iron is fitted with an Ultraglide soleplate:
• Never use aggressive or abrasive products.
• When the soleplate is still warm, wipe with a damp cloth– fig.18.
Storing your iron
• Set the thermostat control to “MIN”. Disconnect the base and empty the tank – fig.19 and 20.
• Wait for the soleplate to cool – fig.21. Wind the cord around the iron and its base – fig.22.
• Carry the iron and the base with two hands – fig.23 and 24.
If there is a problem
EN
Cleaning and maintenance Storing the appliance
PR BLEM CAUSES P SSIBLES S LUTI NS
Brown streaks come
through the holes in
the soleplate and
stain the linen.
You are using chemical descaling
agents. Do not add any descaling agents to the water
in the water tank.
You are not using the right type
of water. erform a self-cleaning operation and
consult the section “What water to use?”
Fabric fibres have accumulated in
the holes of the soleplate and are
burning.
erform the self-cleaning operation and clean
the soleplate with a damp sponge. Vacuum
the holes of the soleplate from time to time.
The soleplate is dirty
or brown and can
stain the linen.
Y
ou are ironing with an
inappropriate setting (temperature
too high).
Clean the soleplate as indicated above.
Select the appropriate setting.
Your linen has not been rinsed
sufficiently or you are using starch.
Clean the soleplate as indicated above.
Always spray starch onto the reverse side of
the fabric to be ironed.
Your iron is releasing
little or no
variable/TURBO
steam.
The water tank is empty. Fill the water tank.
The anti-scale valve is dirty. Clean the anti-scale valve.
Your iron has a build-up of scale. Clean the anti-scale valve and carry out a
selfclean.
Your iron has been used dry for
too long. Carry out a self-clean.
Your iron needs recharging. For optimum efficiency, place the iron on its
base to be recharged at each resting period.
You are not using the the variable
steam trigger. Hold the variable steam trigger down while
you iron to obtain a constant flow of steam.
The variable steam has not been
activated.
Gently shake the iron in a horizontal
position, while holding down the steam
trigger until the steam output begins.
The soleplate is
scratched or
damaged.
You have placed your iron flat on
a metallic rest-plate or ironed
over a zip.
You have cleaned your soleplate
with an abrasive or metal pad.
Always set your iron on its base. Try to avoid
ironing over zips. Refer to the chapter “Clean
the soleplate”.
Your soleplate is
releasing particles. Scale is building up on the
soleplate. Carry out a self-clean operation.
Water is running out
of the water tank
flap.
You have not closed the water
tank flap properly. Check that the water tank flap is locked
properly.
Water drips from the
holes in the
soleplate.
You have stored the iron
horizontally, without emptying it
and without setting it to MIN. See the section “Storing your iron”.
The red light on the
display panel flashes
when the iron is on
the base.
Connection problem between
the iron and the base. Check that the iron is pushed back
completely and connected to the base.
The spray does not
spray. There is not enough water in the
water tank. Fill up the water tank.
Your iron is cooling
down. You are not placing it on its base
regularly.
lace the iron on the base during each
resting period while you change your item
of clothing.
For any other problems please contact your local after sales services.
다림질 전 준비하기
사용 방법
다리미 관리요령 다리미 보관하기
1800132251FV99XXK0_297x63023/06/1411:15Page1
