Teka TBBQ 4100 G SS User manual

EN ES PT FR
User Manual
TBBQ 4100 G SS
teka.com

4 BURNER GAS BBQ GRILL
MANUAL MUST BE READ BEFORE OPERATING!
Should you have any questions, please contact us. Contact information can be found on our website teka.com.

WARNINGS
Improper installation, adjustment, alteration, use, or maintenance can cause bodily injury and/or property damage.
Read this instruction manual thoroughly before installing or using this appliance.
1. Do not store or use gasoline or other flammable liquids or vapors in the vicinity of this or any other appliance.
2. A liquid propane tank not connected for use should not be stored in the vicinity of this or any other appliance.
DANGER
If you smell gas:
1. Immediately shut off gas to the appliance.
2. Extinguish any open flame.
3. Open the lid.
4. If the odour continues, keep away from the appliance and immediately call your gas supplier or fire department.
Before using your appliance for the first time, please carefully read the installation and maintenance
instructions included.
Depending on the model, the accessories and features included in your appliance may vary from those
shown in the pictures.
CONTACT US
Should you have any questions, please contact us. Contact information can be found on our website teka.com.

4
TABLE OF CONTENTS
INTENDED USE.....................................................5
SAFETY INFORMATION ........................................5
UNPACKING THE GRILL
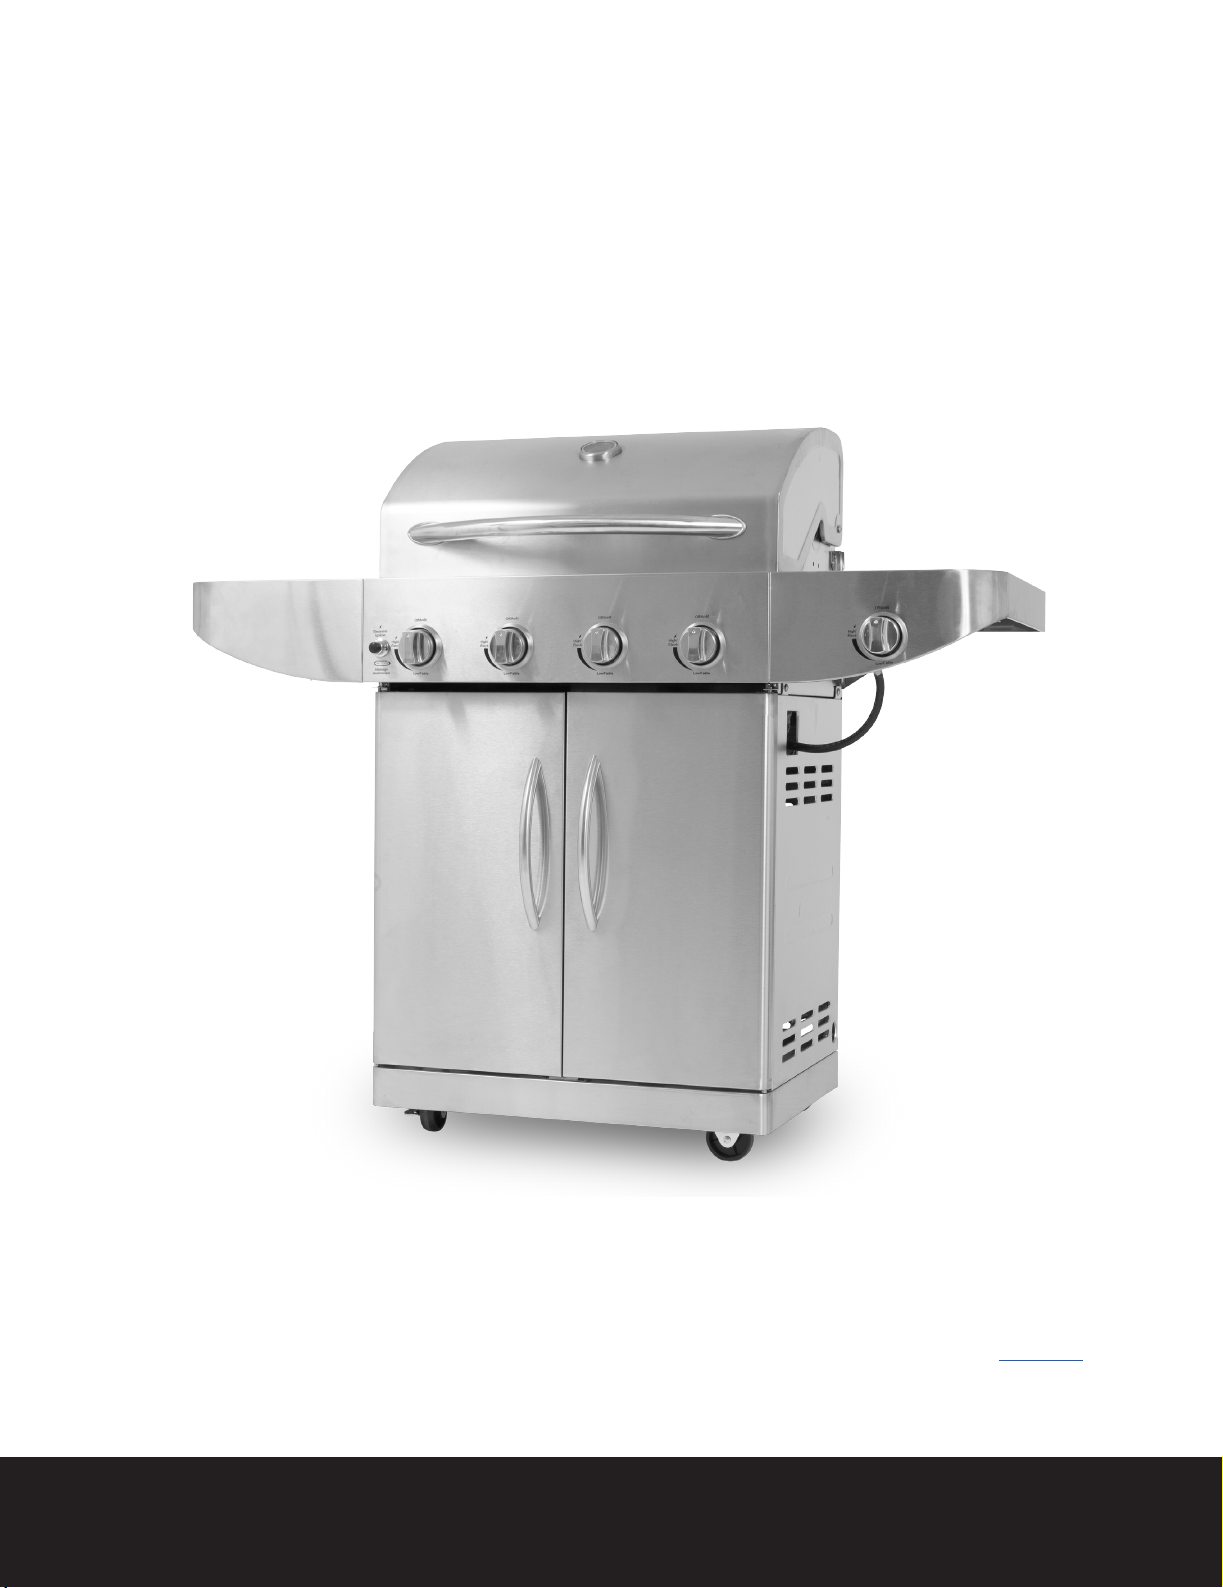
PARTS.......................................................................... 11
PREPARATION ............................................................. 12
ASSEMBLY INSTRUCTIONS
1. ATTACHING THE TANK TRAY BOLT...................... 12
2. INSTALLING THE CASTERS .................................. 13
3. ASSEMBLING THE DOOR CATCH PLATE.............. 13
4. INSTALLING THE CART SIDE PANELS................... 13
5. SECURING THE CART BACK PANEL ..................... 13
6. INSTALLING THE LP TANK BARRIER BAR............. 14
7. SECURING THE CART SUPPORT BEAM ............... 14
8. INSTALLING THE CART SUPPORT BRACKETS ...... 14
9. MOUNTING THE CART HEAT SHIELD.................. 14
10. SECURING THE GRILL HEAD TO CART................. 15
11. PLACING THE GREASE TRAY ............................... 15
12. INSTALLING THE GREASE CUP............................ 15
13. CONNECTING THE BACK GRILL HEAD COVER..... 15
14. ASSEMBLING THE CABINET DOOR HANDLES..... 16
15. INSTALLING THE CABINET DOORS...................... 16
16. ASSEMBLING THE SIDE SHELVES........................ 16
17. INSTALLING THE SIDE SHELVES .......................... 17
18. CONNECTING THE SIDE BURNER VALVE............. 17
19. INSTALLING THE COOKING COMPONENTS ........ 18
20. INSERTING THE BATTERY ................................... 18
CONNECTING TO GAS SUPPLY
GAS TANK CONNECTION............................................. 19
GAS REQUIREMENTS .................................................. 21
GAS CONSUMPTION................................................... 21
SAFE GRILLING ENVIRONMENT.................................. 21
OPERATING INSTRUCTIONS
FIRST USE – PRIMING THE GRILL ................................ 21
PREHEATING ............................................................... 21
COOKING TIPS ............................................................ 22
ELECTRONIC LIGHTING INSTRUCTIONS...................... 22
MANUAL LIGHTING INSTRUCTIONS ........................... 22
REPLACING THE BATTERY ........................................... 23
LID POSITIONING – OPEN OR CLOSE .......................... 23
TESTING FOR GAS LEAKS ............................................ 23
MAINTENANCE AND CLEANING
CLEANING THE BURNERS ........................................... 24
CLEANING THE IGNITION HEAD.................................. 24
CLEANING THE DRIP TRAY .......................................... 25
MAINTAINING BARBECUE SURFACES AND LIDS ......... 25
LIQUID PROPANE GAS SAFETY.................................... 26
CARE AND MAINTENANCE TIME TABLE...................... 27
REPLACING THE MAIN BURNER.........................28
TROUBLESHOOTING ..........................................29
REPLACEMENT PARTS........................................30
WASTE DISPOSAL...............................................32
DECLARATION OF CONFORMITY........................32

5
INTENDED USE
This gas grill is intended for heating up, cooking and grilling different kinds of foodstuff in well-ventilated outdoor areas.
The appliance must be operated with low pressure liquid propane gas (LP gas). It may not be supplied with natural gas.
This product is intended for private use only and may not be used for any commercial or industrial purposes.
This appliance must only be used as described in this user manual. Any other use will be considered improper and may
cause property damage and personal injury.
The manufacturer is not liable for any damage resulting from improper use.
SAFETY INFORMATION
SAFETY SYMBOLS
Danger! (High risk)
Failure to observe this precaution can result in fatal injuries.
Warning! (Medium risk)
Failure to observe this precaution can result in property damage.
Caution! (Low risk)
Precaution that should be taken into account when handling the appliance.
General safety information
GENERAL SAFETY INSTRUCTIONS
These safety instructions must be observed during every use.
–Use outdoors only!
–Read the instructions before using the appliance.
–WARNING! Accessible parts may be very hot. Keep young children away.
–This appliance must be kept away from flammable materials during use.
–Do not move the appliance during use!
–Turn off the gas supply at the gas cylinder after use.
–Do not modify the appliance.
GENERAL BARBECUE WARNINGS
1. WARNING! Danger of carbon monoxide poisoning! Never operate the appliance in enclosed areas such as garages or sheds, as
this leads to a carbon monoxide build-up resulting in personal injury or death.
2. WARNING! Danger of explosion! Never operate the appliance in enclosed areas such as garages or sheds, as this leads to gas
accumulation in case of a leakage which may result in an explosion.
3. Always lock the wheels with their brakes (if available) prior to use.
4. Do not attempt to move the appliance while it is in use.
5. Do not attempt to modify the appliance in any way. Only use attachments and accessories recommended by the manufacturer.
Any alterations made to the appliance, improper use, or non-compliance with the instructions lead to danger.
6. Do not use the appliance in the immediate presence of aerosol cans, flammable liquids, volatile gases, or other flammable
substances. Keep open flames such as candles or torches away from the appliance.
7. Do not store any flammable liquids or volatile gases near the appliance.

6
8. Do not leave the appliance unattended during use.
9. Do not use liquid fuels with this appliance.
10. Never lean over the cooking surface while igniting the appliance or during cooking.
GAS BARBECUE WARNINGS
1. This appliance is configured to work with liquid propane gas. Do not use natural gas supply.
2. Open the cover before igniting the appliance.
3. Use caution when opening the cover when the appliance is being used. Hot steam could collect inside the cover and may be
ejected quickly when opened. Do not open the cover too quickly.
4. Do not touch hot surfaces. Use the handle only for lifting the cover.
5. Cover the appliance only when it has completely cooled down completely.
6. Never obstruct the ventilation openings of the cylinder compartment.
7. Never use charcoal or other solid fuels in this appliance.
8. It is recommended minimum clearances of the grill to any combustible materials must be 182.88 cm.
9. Do not place anything on the top for the cover while the appliance is in use!
GAS CONNECTIONS / GAS CYLINDER / PRESSURE REGULATOR WARNINGS
1. Check the appliance and all connections regularly and each time the gas cylinder is replaced for possible gas leaks.
2. Never check for gas leaks using a match or any other open flame.
3. Never alter or modify the pressure regulator or gas supply assembly.
4. Always turn the gas supply off on the gas cylinder or the pressure regulator and disconnect the gas hose after use.
5. Never store gas cylinders indoors or close to heat sources.
6. Always store gas cylinders in the upright position, never in a horizontal position which could cause the gas cylinder to leak or
the gas to leak into the gas hose.
7. Never use the appliance without the pressure regulator.
8. Only use pressure regulators approved for liquid petroleum gas (LPG) and complying with national regulations.
GAS HOSE WARNINGS
1. Inspect the gas hose(s) prior to and after each use: look for any cuts, cracks, excessive wear, or other damage. The gas hose(s)
shall be replaced every one to two years by a qualified technician or the retailer only. Replace brittle gas hoses and their
connections. If in doubt, ask a local specialist.
2. Protect the gas hose(s) against damages. Do not let it / them hang over sharp edges. Do not twist, squeeze or bend it / them.
Keep the gas hose(s) away from hot surfaces and ensure that nobody can trip over it / them.
3. Only use gas hoses approved for liquid petroleum gas (LPG) and complying with national regulations.
4. Every kind of work or replacement of the hoses is to be conducted according to the manufacturer’s instructions by qualified
personnel or specialists.
The maximum length of the hose shall not exceed 1.5m.
IF YOU SMELL GAS
1. Never light the appliance if you smell gas.
2. Immediately turn the gas supply off on the appliance as well as on the gas cylinder and / or the pressure regulator.
3. Extinguish all open flames near the appliance such as candles and torches. Switch off all electrical appliances in the
surroundings.
4. Make sure the area is well ventilated with fresh air.
5. Open the cover of the appliance in order to let the gas escape. Should you still smell gas, do not use the appliance any longer
and have it repaired by an authorized professional only.

7
SAFETY INSTRUCTIONS
Danger! Risk of fire!
The grill parts become very hot during use and can cause fire.
- Always have a ready-to-use fire extinguisher and a first aid kit at hand in the event of an accident or fire.
- Place the grill on a secure, non-flammable, flat, level, stable, heat-resistant and clean surface away from any heat source prior
to use.
- Ensure that the grill is set up at least 1 m away from highly combustible materials such as awnings, wooden terraces or
furniture.
- Do not move the grill during use.
- Some foods produce flammable fats and juices. Clean the grill on a regular basis, preferably after each use.
- Do not leave the operating grill unattended.
Danger! Risk of fire!
Never attempt to switch on/light the grill with the lid closed.
- Only operate the gas grill with the lid closed at a low flame.
Danger! Risk of burns and accidents!
This appliance is not intended for use by persons (including children) with reduced physical, sensory or mental
capabilities, or lack of experience and/or knowledge.
- This group of people must be informed about the dangers associated with the use of the appliance and must be supervised by
a person responsible for their safety.
- Supervise children at all times to ensure that they do not play with the appliance.
- Any modifications to the product may be extremely hazardous and are therefore prohibited. Do not attempt to make
unauthorized modifications to the appliance. In the event of damage, repairs or other problems with the grill, please contact
our service center or a local dealer.
- Keep the appliance away from children and pets.
Do not touch the grill, flame burner and food being grilled during use as they become extremely hot and can cause severe burns.
- Keep sufficient distance from hot parts since any contact can cause severe burns.
- Always wear grill or oven gloves (e.g. Category II heat-resistant gloves rated according to DIN-EN 407) when grilling.
- Use only long-handled grill utensils with heat-resistant grips.
- Do not wear clothing with wide sleeves.
- Allow the grill to cool down completely before cleaning it or stowing it away.
Danger! Risk of deflagration!
When poured into the flames, flammable liquids create flashes or deflagrations.
- Never use flammable fluids such as gasoline or spirit.
Danger! Risk of poisoning!
Gas is odorless and can be deadly in enclosed spaces!
- The grill is intended for outdoor use only.
Danger! Health risk!
Do not use paint solvents or thinners to remove stains. These substances are hazardous to health and must not come
into contact with food.:
Danger! Risks to children!
Children playing with the packaging film can get caught in it, which can result in suffocation.
- Do not let children play with the packaging film.
- Do not let children put small assembly parts into their mouths as these present a choking hazard. The parts can cause choking
if swallowed.

8
Danger! Risk of injury!
Both the grill and individual parts have some sharp edges.
- Individual parts of the grill must be handled with care to prevent accidents or injuries during assembly and use. Wear safety
gloves where necessary.
- Do not set up the grill near entryways or high-traffic zones.
- Utmost care must be exercised when grilling. You may lose control of the appliance if distracted.
- Always be attentive to and aware of what you are doing. Do not use this product if you are unfocused or tired, or if you are
under the influence of drugs, alcohol, or medicines. Just one moment of carelessness during use of the product can cause
serious injuries.
Warning! Risk of damage!
During use, the screws can loosen slowly and impair the grill's stability.
- Check the tightness of screws before each use. If necessary, retighten all screws to ensure the grill stands stable at all times.
Warning! Risk of damage!
Do not use any strong or abrasive solvents or scouring pads as these can damage the surfaces and leave scuff marks.
Danger! Risk of burns and accidents!
Caution! If you smell gas:
- Immediately shut off gas to the appliance.
- Extinguish any open flame.
- Open the lid.
- If odour continues, keep away from the appliance and immediately call your gas supplier or fire department.
Danger! Risk of burns and accidents!
The grill must be stored away from fuels (e.g. gasoline) or other flammable liquids or gases.
- Gas cylinders must be stored separately from the gas grill.
- Gas cylinders must be stored away from the gas grill.
- Do not place gas cylinders directly under the gas grill.
Danger! Risk of fire!
This appliance must be kept away from flammable materials during use.
- Do not obstruct the ventilation openings of the cylinder compartment.
- Changing the gas cylinder must be carried out away from any source of ignition.
- Gas cylinders must never be stored at temperatures exceeding 50 °C. On extremely hot days, efforts should be made to keep
the cylinders in the shade.

9
BATTERY SAFETY INFORMATION
1. WARNING: KEEP BATTERY OUT OF REACH OF CHILDREN. Swallowing can lead to chemical burns, perforation of soft
tissue, and death. Severe burns can occur within two hours of ingestion. Seek medical attention immediately.
2. If you think the battery might have been swallowed or placed inside any part of the body, seek immediate medical
attention.
3. Do not allow children to replace the battery without adult supervision.
4. Exhausted batteries should be immediately removed from the equipment and properly disposed of.
5. Do not dispose of the batteries in fire. Do not expose batteries to heat or fire. Avoid storage in direct sunlight.
6. If the battery should leak, remove it with a cloth from the battery compartment. Dispose of battery according to
regulations. If battery acid has leaked, avoid contact to skin, eyes, and mucous membranes. Rinse affected areas
immediately after contact with the acid and wash with plenty of clean water. Visit a physician.
7. Do not encapsulate and/or modify batteries.
8. Before you discard the appliance, dispose of batteries in an environmentally safe manner.
9. Always insert batteries correctly with regard to polarity (+ and –) marked on the battery and in the battery
compartment. When batteries are inserted in reverse they might be short-circuited or charged. This can cause
overheating, leakage, venting, rupture, explosion, fire, and personal injury.
10. Only use the battery type indicated in this manual.
11. Do not short-circuit batteries. When the positive (+) and negative (–) terminals of a battery are in electrical contact
with each other, the battery becomes short-circuited. For example, loose batteries in a pocket with keys or coins can be
short-circuited. This can result in venting, leakage, explosion, fire, and personal injury.
12. Do not charge alkaline batteries. Attempting to charge a non-rechargeable (primary) battery can cause internal gas
and/or heat generation resulting in leakage, venting, explosion, fire, and personal injury.
13. Do not subject batteries to mechanical shock.
14. Do not dismantle, open or shred batteries.
15. WARNING: Used batteries must not be disposed of in the household rubbish. Take them to a designated disposal/
collection site.

10
UNPACKING THE GRILL

11
PARTS
PART QTY DESCRIPTION PART QTY DESCRIPTION
A 1 Warming Rack T 1 Cart Heat Shield
B 2 Cooking Grate U 2 Cart Support Bracket
C 4 Flame Tamer V 2 Locking Caster
D 1 Right Shelf Base W 1 Cart Base
E 1 Right Shelf Front X 1 Cart Support Beam
F 1 Right Shelf Bracket Y 1 Door Catch Plate
G 1 Control Knob Bezel Z 2 Caster
H 1 Control Knob A1 1 Right Cabinet Door
I 1 Cart Back Panel B1 1 Right Side Cart Panel
J 1 Back Grill Head Cover C1 1 Grease Cup
K 1 Grill Head D1 1 Grease Tray
L 1 Left Shelf Base E1 1 Side Burner Plate
M 1 Left Shelf Bracket AA 16 Screw - 0.4-32 x 0.95 cm
N 1 Left Shelf Front BB 26 Screw - 0.64-20 x 1.27 cm
O 1 LP Tank Barrier Bar CC 23 Screw - 0.64-20 x 0.95 cm
P 1 Left Side Cart Panel DD 22 Lock Washer - 0.64 cm-20
Q 1 Left Cabinet Door EE 10 Screw - 0.64-20 x 0.79 cm
R 2 Door Handle FF 1 Allen Wrench
S 4 Door Handle Grommet GG 1 AA Battery

12
PREPARATION
Before beginning assembly of product, make sure all parts are present. Compare parts with package contents list and
hardware contents list. If any part is missing or damaged, do not attempt to assemble the product.
Contact the dealer from whom you purchased the appliance if you find that parts are missing or show damage.
Do not use the appliance unless missing parts have been delivered in addition or defective parts have been replaced.
Using an incomplete or damaged appliance leads to personal injury and property damage.
Remove and safely discard any packaging material or promotional labels attached to the set.
Tools required for assembly: Phillips Screwdriver (not included).
ASSEMBLY INSTRUCTIONS
Danger! Risk of injury!
Follow all assembly instructions listed here. Failure to follow these instructions can lead to problems and risks
while using the grill.
1. Assemble the appliance completely and make all required adjustments prior to operation.
2. Follow the assembly and operation instructions closely. Use the figures as a visual guide.
3. Pay attention to small parts such as screws and nuts that are loosened or removed for assembly or during
adjustments. Keep them safe in order to avoid losing them.
4. The appliance is large. It is recommended to assemble by two people.
WARNING!
Use the appliance only after it has been completely assembled and adjusted!
IMPORTANT: Parts sealed by the manufacturer or the manufacturer's agent shall not be manipulated by the user.
NOTE: For all of the following steps, do not tighten any screws completely until all screws for that step have been
installed. Once all screws have been installed, then tighten them securely.
1. ATTACHING THE TANK TRAY BOLT
Parts Required:
1 x Cart Base (W)
Installation:
• Detach the preassembled tank tray bolt from the interior of the
cartbase (W), then reinstall from the exterior as shown.
1

13
2. INSTALLING THE CASTERS
Parts Required:
2 x Casters (Z)
2 x Locking Casters (V)
16 x Screw - 0.64-20 x 1.27 cm (BB)
16 x Lock Washers (DD)
Installation:
• With the cart base (W) laying upside down, attach the 2 casters (Z) as
shown to the left side of the cart base (W) using 8 screws (BB) and 8
lock washers (DD).
• Next, install the 2 locking casters (V) to the right side of the cart base (W)
using 8 screws (BB) and 8 lock washers (DD).
3. ASSEMBLING THE DOOR CATCH PLATE
Parts Required:
1 x Door Catch Plate (Y)
2 x Screw - 0.4-32 x 0.95 cm (AA)
Installation:
• Flip over the cart base (W) and lock the locking casters (V).
• Attach door catch plate (Y) to cart base using 2 screws (AA).
4. INSTALLING THE CART SIDE PANELS
Parts Required:
1 x Left Cart Side Panel (P)
1 x Right Cart Side Panel (B1)
6 x Screw - 0.64-20 x 0.95 cm (CC)
Installation:
• Attach left cart side panel (P) to cart base (W) using 3 screws (CC).
• Attach right cart side panel (B1) to cart base using 3 screws (CC).
5. SECURING THE CART BACK PANEL
Parts Required:
1 x Cart Back Panel (I)
7 x Screw - 0.64-20 x 0.95 cm (CC)
Installation:
• Attach cart back panel (I) to cart base (W) using 1 screw (CC). Fasten
cart back panel (I) to the left side cart panel (P) and right side cart
panel (B1) using 6 screws (CC). Fasten the top screw on either side,
then move downward.
2
3
4
5

14
6. INSTALLING THE LP TANK BARRIER BAR
Parts Required:
1 x LP Tank Barrier Bar (O)
2 x Screw - 0.4-32 x 0.95 cm (AA)
Installation:
• Attach the LP tank barrier bar (O) diagonally to the cart back panel (I)
and the cart base (W) using 1 screw (AA) at each end.
NOTE: The threaded end of the LP tank barrier bar should point to the
cart back panel, fastening from the outside of the cart.
7. SECURING THE CART SUPPORT BEAM
Parts Required:
1 x Cart Support Beam (X)
4 x Screw - 0.64-20 x 0.95 cm (CC)
Installation:
• Attach the cart support beam (X) to the left and right side cart panels (P
and B1) using 4 screws (CC).
NOTE: The magnets on the cart support beam (X) should be facing
outward, and the holes should face downward while assembling.
8. INSTALLING THE CART SUPPORT BRACKETS
Parts Required:
1 x Cart Support Brackets (U)
4 x Screw - 0.4-32 x 0.95 cm (AA)
Installation:
• Attach the cart support brackets (U) to the corners of the cart support
beam (X) and each side cart panels (P and B1) using 4 screws (AA).
9. MOUNTING THE CART HEAT SHIELD
Parts Required:
1 x Cart Heat Shield (T)
4 x Screw - 0.4-32 x 0.95 cm (AA)
Installation:
• Attach the cart heat shield (T) to the cart back panel (I) using 2 screws
(AA). Ensure the heat shield installs under the lip of the cart back
panel (I) as shown in illustration.
• Next, attach the cart heat shield (T) to the cart support beam (X) using
2 screws (AA). Ensure the cart heat shield (T) installs on top of the lip
of the cart support beam (X).
6
7
8
9

15
10. SECURING THE GRILL HEAD TO CART
Parts Required:
1 x Grill Head (K)
4 x Screw - 0.64-20 x 1.27 cm (BB)
Installation:
• Using a minimum of two people, place the grill head (K) on top of the
grill cart. Secure the grill head (K) to the left and right side cart panels
(P and B1) using 4 screws (BB).
NOTE: Failure to use two people could result in injury or damage to the
part.
11. PLACING THE GREASE TRAY
Parts Required:
1 x Grease Tray (D1)
Installation:
• Remove the preinstalled screw (“a”) from the right of the grease tray
(D1).
• From the back of the grill, slide the grease tray (D1) onto the ledges of
the grill head. Once the grease tray is slid all the way in, it will rest
securely between ledge stops.
• From the front of the grill, reinstall the screw (“a”) into the grease tray
(D1) through the supporting ledge. This will prevent the grease tray
from shifting during transport.
12. INSTALLING THE GREASE CUP
Parts Required:
1 x Grease Cup (C1)
Installation:
• Insert the grease cup (C1) onto the ledges of the grease tray (D1) from
underneath the grill head.
NOTE: The handle needs to be tilted down slightly in order to slide
onto the ledges properly.
13. CONNECTING THE BACK GRILL HEAD COVER
Parts Required:
1 x Back Grill Head Cover (J)
6 x Screw - 0.64-20 x 0.95 cm (CC)
Installation:
• Align the back grill head cover (J) with the holes on the cart back
panel (I). Secure using 6 screws (CC).
10
11
12
13

16
14. ASSEMBLING THE CABINET DOOR HANDLES
Parts Required:
1 x Left Cabinet Door (Q)
1 x Right Cabinet Door (A1)
2 x Door Handle (R)
4 x Door Handle Grommets (S)
4 x Screw - 0.64-20 x 0.79 cm (EE)
Installation:
• Attach the cabinet door handle (R) to the left cabinet door (Q) using 2
door handle grommets (S) and 2 screws (EE). Note the illustration.
• Repeat same installation for right cabinet door (A1).
15. INSTALLING THE CABINET DOORS
• Install the right cabinet door (A1) by placing the hole of the door into
the pivot on the right side of the cart base (W). Next, depress the
spring pin on the top of the door and insert into the top pivot bracket
of the grill head (K).
• Repeat same installation for left cabinet door (Q).
16. ASSEMBLING THE SIDE SHELVES
Parts Required:
1 x Right Shelf Base (D)
1 x Right Shelf Bracket (F)
1 x Right Shelf Front (E)
1 x Left Shelf Base (L)
1 x Left Shelf Bracket (M)
1 x Left Shelf Front (N)
4 x Screw - 0.4-32 x 0.95 cm (AA)
6 x Screw - 0.64-20 x 0.79 cm (EE)
Installation:
• Attach the left shelf front (N) to the left shelf base (L) using 3 screws
(EE). Then, attach the left shelf bracket (M) using 2 screws (AA). Note
the illustration 16A.
• Attach the right shelf front (E) to the right shelf base (D) using 3
screws (EE). Then, attach the right shelf bracket (F) using 2 screws (AA)
Note the illustration 16B.
NOTE: Remove the side burner grate before assembling the right side
shelf.
14
15
16A
16B

17
17. INSTALLING THE SIDE SHELVES
Parts Required:
6 x Screw - 0.64-20 x 1.27 cm (BB)
6 x Lock Washer (DD)
Installation:
• Starting with the right side, loosen the 2 preinstalled bottom screws
(marked “a” and “c” in illustration), and completely remove screw “b”.
• Using the shelf keyhole slots, slide the right shelf onto the 2 loosened
screws “a” and “c”.
• From the inside of the grill, secure the right side shelf using 3 screws
(BB) and lock washers (DD).
• Reinstall the previously removed screw “b”. Tighten all other shelf
screws.
• Repeat same installation for left shelf.
18. CONNECTING THE SIDE BURNER VALVE
Parts Required:
1 x Control Knob (H)
1 x Control Knob Bezel (G)
1 x Side Burner Plate (E1)
1 x Allen Wrench (FF)
Installation:
• Loosen – but do not remove – the two preinstalled screws from the
side burner valve. Insert the side burner valve screws through the
keyhole slots in the front of the side burner shelf, then slide the valve
upward so the screws rest in the small section of the keyhole slots.
• Place the control knob bezel (G) keyhole slots over the side burner
valve screws. Slide down, then re-tighten the two screws.
• With the side burner cooking grate still removed, unscrew and remove
the wing nut that secures the side burner plate (E1). Connect the side
burner tube to the side burner valve opening, and reattach the wing
nut to secure. Reinstall the side burner cooking grate into place.
• From the front of the shelf, push the control knob (H) onto the side
burner control valve stem, then secure using the Allen wrench (FF)
from underneath.
• Connect the electronic ignition wire to the side burner electrode
located under the side shelf. The side burner is now fully connected.
17A
17B
18A
18B 18C

18
19. INSTALLING THE COOKING COMPONENTS
Parts Required:
1 x Warming Rack (A)
2 x Cooking Grate (B)
4 x Flame Tamer (C)
Installation:
• Install the 4 flame tamers (C) into the notches directly over the main
burners of the grill head (K).
• Place the cooking grates (B) onto the ledges above the flame tamers.
• Insert the legs of the warming rack (A) into the 4 holes in top of the
grill head (K) side panels. Note the illustration.
20. INSERTING THE BATTERY
Parts Required:
1 x AA Battery (GG)
Installation:
• Unscrew the electronic igniter battery cap from the front left side
of the control panel. Insert the AA battery (GG) with the positive
terminal facing outward.
• Reinstall the electronic igniter battery cap.
IMPORTANT – SPARK CHECK
Test the ignition system for sparks before first use. With the gas OFF,
push the electrical igniter. This will help assure a trouble-free ignition
when you turn on the gas.
19
20

19
CONNECTING TO GAS SUPPLY
WARNING! Be aware of flashbacks!
Make sure there is no debris, spiders, small insects, or webs inside the head of the gas cylinder, pressure regulator,
burner(s), burner tube(s), or hose before any connection is made. They can obstruct the gas flow, which could result in
a fire in and around the burner tube. This kind of fire is known as “flashback” and can cause serious damages. Check
and clean (refer to "MAINTENANCE AND CLEANING" on page 24.) all the parts of the appliance before assembling it,
to reduce the chance of its occurrence.
GAS TANK CONNECTION
Warning! Risk of damage!
Do not use any strong or abrasive solvents or scouring pads as these can damage the surfaces and leave
scuff marks.
IMPORTANT: The grill can be operated with liquid propane gas only! Use only a 20 lb. (9.07 kg) gas tank.
From the front of the cart, place a 20 lb. (9.07 kg) gas tank onto the bottom panel. Make sure the tank valve is in OFF
position. Before installing the gas tank, lift up the safety tank ring (Fig. A). Ensure the tank is completely upright, as it is
unsafe to operate the grill if the gas tank is not installed properly. Note incorrect positioning in Fig. B. Use only a 20 lb.
(9.07 kg) gas tank. The gas tank must be manufactured in accordance with an established European Directive relating
to gas cylinders. The LP Gas hose must be replaced if damaged and when national conditions require it. Contact your
dealer for replacement.
FIG. A FIG. B
Dimensions of a 20 lb. (9.07 kg) gas cylinder are displayed in the following diagram:
Diameter: 353 mm
Height: 457 mm
WARNING: The type I connective coupling (see below) supplied with your grill must not be replaced with a different
type of grill/tank connection system. Removal will result in loss of warranty, gas leakage, fire and severe bodily harm.

20
Type I Valve
Propane
Regulator
Hand Wheel External Thread Thermally Sensitive Nut
The liquid propane tank valve connection supplied with this grill incorporates four important safe guards: Hand
assembly, hand disassembly, excess flow control and temperature-activated shut-off.
SAFEGUARD 1 - HAND ASSEMBLY
1. Make certain the tank valve and all the appliance valves are in the “OFF” position.
2. When connecting the regulator/burner valve assembly to the tank valve, turn the large plastic nut clockwise
until it stops.
3. Gas will not flow unless the plastic nut is completely connected.
4. HAND TIGHTEN ONLY.
SAFEGUARD 2 - HAND DISASSEMBLY
1. Make certain the tank valve and all the appliance valves are in the “OFF” position.
2. Turn the large plastic nut counterclockwise until it is disassembled.
3. HAND TIGHTEN ONLY.
SAFEGUARD 3 - EXCESS FLOW CONTROL
The propane regulator assembly incorporates an excess flow device designed to supply the grill with sufficient gas
flow under normal conditions yet control excess gas flow. Rapid changes in pressure can trigger the excess flow device
providing a low flame and low temperature. If the tank valve is turned open to allow gas flow while a burner valve
is open, the surge of pressure will cause the device to activate. The device will remain closed until the pressure is
equalized. This should occur within 5 seconds.
To ensure this does not cause difficulty in lighting the grill, follow these instructions:
1. Make sure all burner valves are ”OFF.”
2. Open the tank valve and wait 5 seconds.
SAFEGUARD 4 - TEMPERATURE-ACTIVATED SHUT-OFF
The large plastic nut on the regulator assembly is designed in coordination with a check valve in the tank valve to shut
off the flow of gas when exposed to temperatures between 115-148oC. In the event of a fire or hose break, one of
the safeguards will function to control or stop the flow of gas from the propane tank. Never attempt to use damaged
equipment.
IMPORTANT: Before using a fresh tank of gas, please check leakage around the connection system to make sure there
is no leakage or vapor accumulation in the cabinet. Make sure all openings around side walls are not blocked.
IMPORTANT: Place dust cap on cylinder valve outlet whenever the cylinder is not in use. Only use the type of dust
cap on the cylinder valve outlet that is provided with the cylinder valve. Other types of caps or plugs may result in
leakage.
Other manuals for TBBQ 4100 G SS
1
Table of contents
Other Teka Grill manuals
Popular Grill manuals by other brands

dellonda
dellonda DG22 manual

Magma
Magma Catalina II GOURMET Series owner's manual

George Foreman
George Foreman Champ GR10ABWCAN owner's manual

TTM
TTM Party Instructions for use

George Foreman
George Foreman GRP100CAN The Next Grilleration use and care manual

YAKINIKU
YAKINIKU LUXURY OUTDOOR KITCHEN FRAME 80X70CM instruction manual