117-0815-0029
WARNING!!!
DO NOT ATTEMPT TO USE THIS FACILITY TO GRIP BOWL BLANKS
WHICH HAVE NOT BEEN FULLY TURNED INSIDE AND OUTSIDE. THE
RE-CHUCKING FACILITY CANNOT BE USED AS A GRIPPING METHOD
TO DO MAJOR RE-SHAPING WORK OVER THE WHOLE OUTER
SURFACE OF THE BOWL. ALWAYS USE A CAUTIOUS AND
CONSERVATIVE APPROACH. USE CORRECT CHISEL TECHNIQUES
TO AVOID CHISEL DIG-INS WHICH COULD DISLODGE THE BOWL. DO
NOT USE HEAVY CUTS WHICH COULD ALSO DISLODGE BOWLS.
If you want to mount another accessory jaw set (e.g. 50mm, 75mm,100mm)
onto the Cole Jaws use the four longer M6x20mm screws provided. Note the
25mm jaws and pin jaws are not designed for use with Cole Jaws.
Only when both the inside and outside of the bowl have been turned (these
operation can all be performed with the Cole Jaws in conjunction with
another optional accessory jaw set) can the bowl be re-chucked to rework
the bottom (outside) surface. Bowls up to 240mm (9.45”) in diameter for
Cole Jaws, and bowls up to 171mm (6 ¾”) in diameter for Mini Cole Jaws,
can be re-chucked gripping the rim in the contracting mode. If re-chucking is
required to achieve a smooth under surface of the bowl, it is best to have
previously held the bowl by foot mounting (contracting mode) as it is much
easier turn off a foot rather than a recessed dovetail, for example. Foot
mounting method is best achieved with the Step Jaw or 100mm (Cole Jaws
only) Jaw Set.
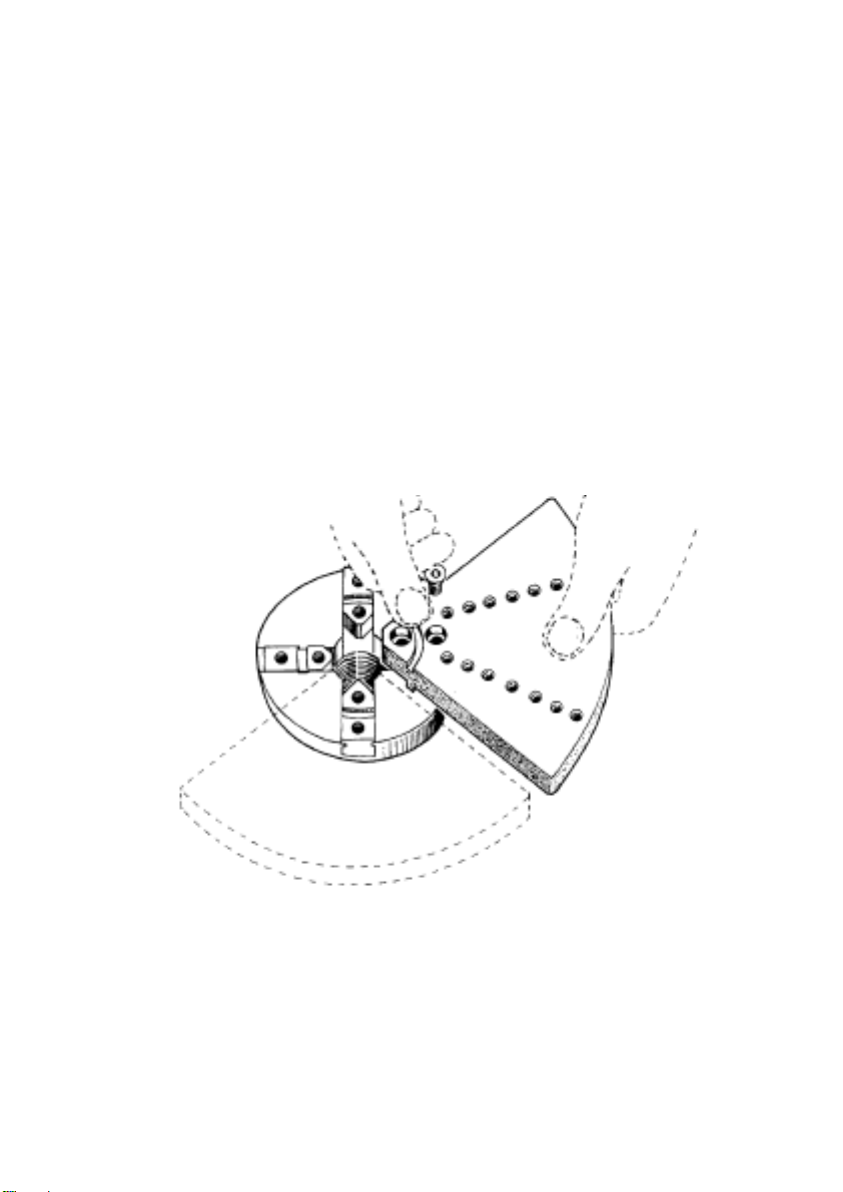
C. Mounting Bowls
There are several radial positions available. The assembled rubber stoppers
need to be fastened so that they are screwed in flush against the jaw surface.
They need to be equally spaced at the same radial position on each segment
to achieve an even gripping of the bowl. The rubber stoppers will grip around
the rim of the bowl and contract downward. Refer to the directions in your
chuck manual for the contracting mode. Make sure the whole rim of the bowl
is seated flush against the jaw surface so that it is being well supported and
evenly gripped.