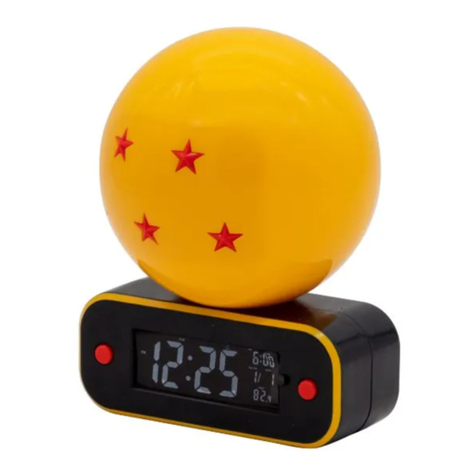
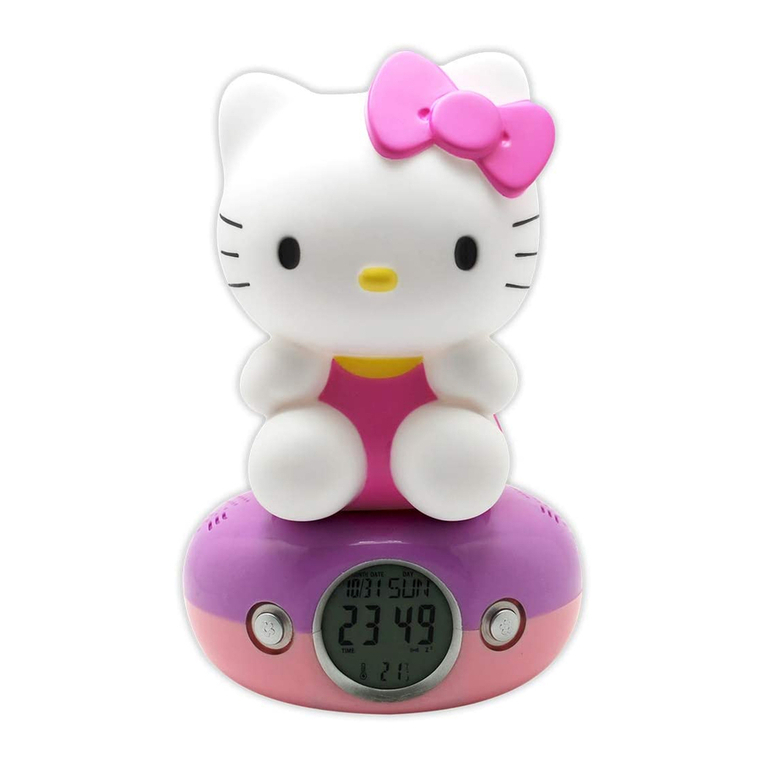
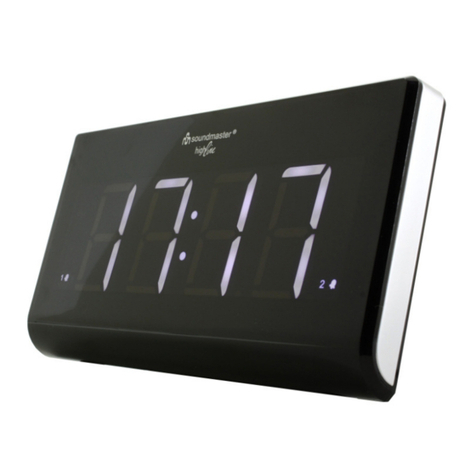
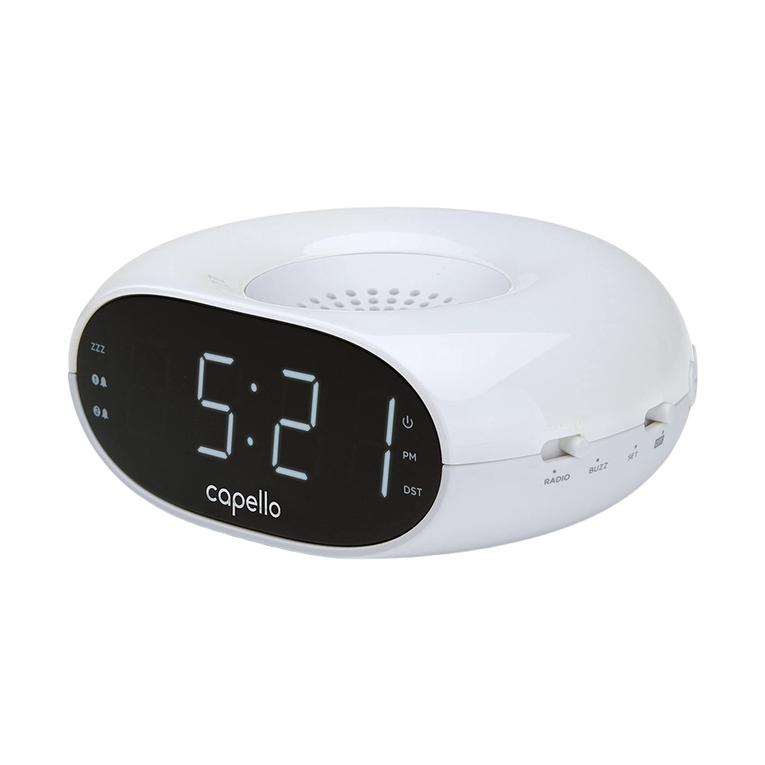
Teknofun 811 327 User manual

811 327, 811 606, 811 607, 811 638
RÉVEIL DIGITAL
GUIDE UTILISATEUR
AVANT D’UTILISER CE PRODUIT, VEUILLEZ LIRE LES INSTRUCTIONS CI-DESSOUS. VEILLEZ A ENREGISTRER CETTE BROCHURE POUR RÉFÉRENCE FUTURE.
ATTENTION : POUR ÉVITER LES RISQUES DE FEU OU DE CHOCS ÉLECTRIQUES, NE PAS EXPOSER L’APPAREIL A LA PLUIE OU A L’HUMIDITÉ.
FONCTIONS :
1. RÉGLAGE LED 5. DIMINUER
2. MODE 6. 12/24H
3. SET 7. RÉGLAGE RÉTROÉCLAIRAGE ÉCRAN
4. AUGMENTER
USB secteur : 5V-0.5A 2,5 W LED : 1W (max)
Fonctionne avec 3 piles AAA, utiliser des Alcaline pour un meilleur fonctionnement
Mode Heure :
Lorsque l'appareil est sous tension, l'heure normale est affichée sous la forme AM 12:00 dans une horloge de 12 heures.
Le symbole de l’éclair fléché
dans un triangle équilatéral
est destiné à alerter
l’utilisateur de la présence de
tension dangereuse et non-
isolée dans l’enceinte du
produit qui peut être d’une
ampleur suffisante pour
constituer un risque
d’électrocution.
ATTENTION
RISQUE D’ÉLECTROCUTION
NE PAS OUVRIR
ATTENTION : POUR RÉDUIRE LE
RISQUE DE CHOC ÉLECTRIQUE, NE
PAS RETIRER LE COUVERCLE (OU LE
PANNEAU ARRIERE).
AUCUNE PIECE RÉPARABLE PAR
L’UTILISATEUR. CONFIEZ
L’ENTRETIEN A UN PERSONNEL
QUALIFIÉ.
LE POINT D’EXCLAMATION DANS
UN TRIANGLE ÉQUILATÉRAL EST
DESTINÉ A ALERTER
L’UTILISATEUR DE LA PRÉSENCE
D’INSTRUCTIONS D’EMPLOI ET
D’ENTRETIEN IMPORTANTES
DANS LA DOCUMENTATION
ACCOMPAGNANT L’APPAREIL.
Fr
6+

Réglage de l'heure :
Appuyez sur la touche SET pour accéder aux réglages de l'heure et de la date. Appuyez sur la touche UP et la touche C/F (DOWN) pour régler
l'heure, la minute, l'année, le mois, le jour, dans l'ordre, respectivement.
Une fois la date réglée, le jour de la semaine (du lundi au dimanche) est automatiquement modifié en conséquence.
Appuyez sur la touche MODE pour quitter le réglage de l'heure, ou bien il quitte automatiquement le réglage de l'heure après une minute sans
appuyer sur une touche.
Mode réveil et répétition de réveil :
Appuyez sur la touche MODE pour accéder au mode Réveil :
Réglage de l'alarme :
Appuyez sur la touche SET pour accéder aux réglages du réveil et de la répétition de réveil, et réglez l'heure, les minutes et la répétition de
réveil respectivement dans l'ordre en appuyant sur la touche UP et la touche C/F (DOWN).
Appuyez sur la touche MODE pour quitter le réglage de l'alarme, ou bien il quitte automatiquement le réglage de l'alarme après une minute
sans appuyer sur aucune touche.
Pour activer la fonction d'alarme et de répétition de réveil, appuyez sur la touche UP ou la touche C/F (DOWN) pour activer, les logos de
l'alarme s'affichent lorsqu'ils sont activés.
Lorsque le réveil atteint l'heure programmée, il retentit pendant 1 minute et le voyant clignote. Lorsque la durée de l'intervalle de répétition
est atteinte, l'alarme retentit deux fois, elle retentit chaque minute jusqu'à ce que l'alarme soit désactivée en appuyant sur la touche SET ou
sur n'importe quelle touche pour faire une pause.
Réglage de la durée de l'intervalle de répétition de réveil : 1~60 minutes (60 minutes par défaut)
Lorsque les logos de l'alarme et de la répétition de réveil ne s'affichent pas à l'écran, cela signifie que l'alarme et la répétition de réveil sont
désactivées. Si seul le signe de l'alarme s'allume, il n'y a pas de fonction de répétition de réveil. Pour avoir la fonction de répétition de réveil,
les logos de l'alarme et de la répétition de réveil doivent être allumés en même temps.
Conversion du mode 12/24 :
Appuyez sur la touche 12/24 pour passer du mode 12 heures au mode 24 heures.
Réglage de la température :
Elle peut couvrir l'affichage Celsius/Fahrenheit en appuyant sur la touche DOWN, C/F, la plage de mesure normale est de 0°C-50°C (32°F-
122°F), et la précision peut atteindre 0,5°C.
Réglage de la luminosité du rétroéclairage :
Appuyez sur le bouton de réglage du rétroéclairage (qui se trouve sous l'écran d'affichage) pour régler la luminosité du rétroéclairage, haute
(100 %) - moyenne (50 %) et faible 10 %. Vous pouvez simplement appuyer sur la figurine pour activer le bouton de réglage du rétroéclairage.
Fonction d'éclairage LED :
Pour allumer les LED appuyer sur la touche LED.
GARANTIE
Ce produit est couvert par notre garantie de deux ans. Pour toute mise en œuvre de la garantie ou du service après-vente, vous devez vous adresser à votre
revendeur muni de votre preuve d’achat. Notre garantie couvre les défauts de matériaux ou d’assemblage causés par le fabricant à l’exclusion de toute
détérioration provenant de non-respect de la notice d’utilisation ou toute intervention intempestive sur le produit (telle que démontage, exposition à la chaleur
ou à l’humidité).
Note : veuillez garder ce mode d’emploi, il contient d’importantes informations.
Fabriqué en RPC
© 2022 Teknofun Tous droits Réservés
© 2022 Madcow Entertainment France Tous Droits Réservés

811 327, 811 606, 811 607, 811 638
RELOJ DESPERTADOR DIGITAL
GUÍA DEL USUARIO
ANTES DE USAR EL PRODUCTO, LEA LAS INSTRUCCIONES DE ABAJO. ASEGURESE DE GUARDAR ESTE FOLLETO COMO REFERENCIA EN EL FUTURO.
PRECAUCIÓN: PARA EVITAR EL RIESGO DE INCENDIO O DESCARGA ELÉCTRICA, NO EXPONGA LA UNIDAD A LA LLUVIA O A LA HUMEDAD.
Funciones :
1. AJUSTE DEL LED 5. ABAJO(C/F)
2. MODE 6. 12/24H
3. SET 7. AJUSTES DE LA LUZ DE FONDO DE LA PANTALLA
4. ARRIBA
Alimentación USB: alimentación de 5V-0,5A 2,5 W LED : 1W (max)
Funciona con 3 pilas AAA, utilice alcalinas para un mejor rendimiento
Modo de hora :
Cuando se enciende, la hora normal se muestra como AM12:00 en un reloj de 12 horas.
El símbolo del rayo dentro de
un triángulo equilátero tiene
por objeto alertar al usuario
de la presencia de voltaje
peligroso y no aislado dentro
del producto que puede ser
de magnitud suficiente para
constituir un riesgo de
descarga.
ATENCION
DESCARGAS ELECTRICAS
NO ABRA
ADVERTENCIA: PARA REDUCIR EL
RIESGO DE DESCARGA ELECTRICA,
NO QUITE LA TAPA (O EL PANEL
POSTERIOR).
NO HAY PIEZAS REPARABLES POR EL
USUARIO EN EL INTERIOR. CONFIE
EL MANTENIMIENTO AL PERSONAL
CUALIFICADO.
EL PUNTO EXCLAMATIVO DENTRO
DEL TRIANGULO EQUILATERO
TIENE POR OBJETO ALERTAR AL
USUARIO DE LA PRESENCIA DE
INSTRUCCIONES DE USO Y
MANTENIMIENTO IMPORTANTES
EN LA UNIDAD DOCUMENTACION
ADJUNTA AL APARATO.
6+
Sp

Ajuste de la hora :
Pulse la tecla SET para entrar en la configuración de la hora y la fecha. Presione la tecla ARRIBA y la tecla C/F (ABAJO) para ajustar la hora, los
minutos, el año, el mes y el día, en orden, respectivamente.
Después de ajustar la fecha, el día de la semana (de lunes a domingo) se cambia automáticamente en consecuencia.
Pulse la tecla MODE para salir de la configuración de la hora, o sale automáticamente de la configuración de la hora después de un minuto sin
pulsar ninguna tecla.
Modo de alarma y snooze:
Pulse la tecla MODE para entrar en el modo de alarma :
Ajuste de la alarma :
Pulse la tecla SET para entrar en la configuración de la alarma y el snooze, y ajuste la hora, los minutos y el snooze respectivamente en orden
pulsando la tecla UP y la tecla C/F (DOWN).
Pulse la tecla MODE para salir de la configuración de la alarma, o saldrá automáticamente de la configuración de la alarma después de un
minuto sin pulsar ninguna tecla.
Para activar la función de alarma y snooze, pulse la tecla ARRIBA o la tecla C/F (ABAJO) para activarla, los logotipos de la alarma se mostrarán
cuando esté activada.
Cuando el despertador llega a la hora fijada, sonará durante 1 minuto y la luz parpadeará. Cuando se alcanza la hora del intervalo de snooze, la
alarma sonará dos veces, sonará cada minuto hasta que se apague la alarma pulsando la tecla SET o pulse cualquier tecla para pausar.
Ajuste del intervalo de duración del snooze: 1~60 minutos (por defecto 60 minutos)
Cuando los logotipos de la alarma y del snooze no aparecen en la pantalla, significa que la alarma y el snooze están apagados. Si sólo se
enciende el símbolo de la alarma, no hay función de repetición. Para tener la función snooze, los logos de alarma y snooze deben estar
encendidos al mismo tiempo.
Conversión del modo 12/24 :
Pulse la tecla 12/24 para cambiar entre los modos de 12 y 24 horas.
Ajuste de la temperatura:
Puede cubrir la pantalla Celsius/Fahrenheit pulsando la tecla DOWN, C/F, el rango de medición normal es de 0°C-50°C (32°F-122°F), y la
precisión puede alcanzar los 0,5°C.
Ajuste del brillo de la luz de fondoPulse el botón de ajuste de la luz de fondo (que se encuentra debajo de la pantalla) para ajustar el brillo de la
luz de fondo, alto (100%) - medio (50%) y bajo 10%. Para activar el botón de ajuste de la retroiluminación basta con pulsar la figura hacia
abajo.
Función de luz LED :
Para encender la luz pulsando la tecla LED.
GARANTIA
Este producto está cubierto por nuestra garantía de dos años. Para la ejecución de la garantía o de servicio post-venta, debe ponerse en contacto
con su distribuidor local provisto con el comprobante de compra. Nuestra garantía cubre los defectos de material o de montaje causados por el
fabricante excluyendo los daños causados por el incumplimiento de las instrucciones de uso o la manipulación no autorizada del producto (tales
como el desmontaje, la exposición al calor o la humedad).
Nota : Conserve este manual, que contiene información importante.
Fabricado en PRC
© 2022 Teknofun Todos los Derechos Reservados
© 2022 Madcow Entertainment France Todos los Derechos Reservados

.
811 327, 811 607, 811 606, 811 638
DIGITAL-WECKER
BENUTZERHANDBUCH
VOR DER INBETRIEBNAHME DIESES PRODUKTES, LESEN, VERSTEHEN UND BEFOLGEN SIE DIESE ANWEISUNGEN. SICHER, DIESE BOOKLET FÜR DIE ZUKUNFT AUF
ZU SPAREN.
WARNUNG: UM DIE GEFAHR VON FEUER ODER STROMSCHLAG , SETZEN SIE DAS GERÄT REGEN ODER FEUCHTIGKEIT AUS.
Funktionen:
1. LED-EINSTELLUNG 5. AB(C/F)
2. MODUS 6. 12/24H
3. EINSTELLEN 7. EINSTELLUNG DER HINTERGRUNDBELEUCHTUNG
4. AUF
USB-Netzteil: Stromversorgung 5V-0.5A 2,5W LED : 1W (max)
Funktioniert mit 3 AAA-Batterien, verwenden Sie Alkaline-Batterien für einen besseren Betrieb.
Zeitmodus:
Wenn das Gerät eingeschaltet ist, wird die normale Uhrzeit als AM12:00 in einer 12-Stunden-Uhr angezeigt.
Der Blitz mit dem
Pfeilsymbol blinkt, wenn
ein gleichseitiges Dreieck
um den Benutzer über die
Anwesenheit von
gefährlichen Spannung im
Gehäuse des Produkts
aufmerksam machen soll,
die stark genug sein kann,
ein Risiko eines
elektrischen Schlags für
Personen darzustellen.
AUFMERKSAMKEIT
GEFAHR EINES ELEKTRISCHEN SCHLAGS,
NICHT ÖFFNEN
VORSICHT: UM DIE GEFAHR EINES
ELEKTRISCHEN SCHLAGS AUSZUSETZEN,
NEHMEN SIE NICHT DIE ABDECKUNG
(RÜCKSEITE), KEINE INSIDE WARTENDEN
TEILE USER. LASSEN SIE DAS
FACHPERSONAL.
DIE AUSRUFUNGSZEICHEN IN
EINEM DREIECK SOLL DER
BENUTZER DES VORHANDEN
WICHTIGE BETRIEBS- UND
WARTUNGSHINWEISE
(REPARATUR) IN DER MIT
DIESEM GERÄT AUFMERKSAM
MACHEN.
Dl
6+

Zeiteinstellung:
Drücken Sie die SET-Taste, um die Zeit- und Datumseinstellungen aufzurufen. Drücken Sie die UP-Taste und die C/F (DOWN)-Taste, um Stunde,
Minute, Jahr, Monat und Tag einzustellen.
Nachdem das Datum eingestellt wurde, wird der Wochentag (Montag bis Sonntag) automatisch entsprechend geändert.
Drücken Sie die MODE-Taste, um die Zeiteinstellung zu beenden, oder sie beendet die Zeiteinstellung automatisch nach einer Minute, ohne
dass eine Taste gedrückt wird.
Wecker und Schlummermodus:
Drücken Sie die MODE-Taste, um den Weckmodus zu aktivieren:
Weckeinstellung:
Drücken Sie die SET-Taste, um die Weck- und Schlummereinstellungen aufzurufen, und stellen Sie die Stunde, die Minute und die
Schlummerzeit durch Drücken der Tasten UP und C/F (DOWN) in der entsprechenden Reihenfolge ein.
Drücken Sie die MODE-Taste, um die Weckeinstellung zu beenden, oder beenden Sie die Weckeinstellung automatisch nach einer Minute,
ohne eine Taste zu drücken.
Um die Weck- und Schlummerfunktion einzuschalten, drücken Sie die Taste UP oder die Taste C/F (DOWN), um sie zu aktivieren.
Wenn der Wecker die eingestellte Zeit erreicht, ertönt ein 1-minütiger Ton und das Licht blinkt. Wenn die Schlummerintervallzeit erreicht ist,
ertönt der Alarm zweimal, er ertönt jede Minute, bis der Alarm durch Drücken der SET-Taste ausgeschaltet wird oder eine beliebige Taste zum
Anhalten gedrückt wird.
Einstellbereich der Schlummerintervalldauer: 1~60 Minuten (Standardeinstellung: 60 Minuten)
Wenn die Weck- und Schlummerlogos nicht auf dem Bildschirm angezeigt werden, bedeutet dies, dass der Wecker und die
Schlummerfunktion ausgeschaltet sind. Wenn nur das Weckersymbol angezeigt wird, gibt es keine Schlummerfunktion. Um die
Schlummerfunktion zu nutzen, müssen das Weck- und das Schlummerlogo gleichzeitig eingeschaltet sein.
12/24-Modus-Umschaltung:
Drücken Sie die Taste 12/24, um zwischen 12- und 24-Stunden-Modus umzuschalten.
Temperatureinstellung:
Durch Drücken der Taste DOWN, C/F kann die Anzeige auf Celsius/Fahrenheit umgeschaltet werden, der normale Messbereich beträgt 0°C-
50°C (32°F-122°F), die Genauigkeit liegt bei 0,5°C.
Einstellung der Helligkeit der HintergrundbeleuchtungDrücken Sie die Taste zur Einstellung der Hintergrundbeleuchtung (die sich unter dem
Display befindet), um die Helligkeit der Hintergrundbeleuchtung einzustellen: hoch (100%) - mittel (50%) und niedrig (10%). Sie können einfach
die Figur nach unten drücken, um die Taste für die Einstellung der Hintergrundbeleuchtung zu aktivieren.
LED-Licht-Funktion:
Zum Einschalten des Lichts durch Drücken der LED-Taste.
GARANTIE
Dieses Produkt wird durch unsere Garantie von zwei Jahren abgedeckt. Zur Umsetzung der Garantie oder After-Sales-Service,
sollten Sie Ihren Händler mit Ihren Kaufnachweis in Verbindung. Unsere Garantie deckt Mängel in Material oder Montage durch
Hersteller mit Ausnahme von Schäden, die durch Nichteinhaltung der Anweisungen für die Verwendung mit dem Produkt
Manipulationen (wie Abbau, Belichtung oder Feuchtigkeit zu heizen).
Notiz : Bitte bewahren Sie diese Bedienungsanleitung, sie enthält wichtige Informationen.
Made in PRC
© 2022 Teknofun All Rights Reserved
© 2022 Madcow Entertainment France All Rights Reserved

811 327, 811 607, 811 606, 811 638
SVEGLIA DIGITALE
MANUALE UTENTE
PRIMA DI UTILIZZARE IL PRODOTTO, LEGGERE, COMPRENDERE E SEGUIRE QUESTE ISTRUZIONI. ASSICURARSI DI SALVARE QUESTO LIBRETTO PER FUTURE.
ATTENZIONE: PER RIDURRE IL RISCHIO DI INCENDI O SCOSSE ELETTRICHE, NON ESPORRE L'APPARECCHIO A PIOG.
Funzioni:
1. Impostazione del LED 5. GIÙ(C/F)
2. MODO 6.12/24H
3. IMPOSTAZIONE 7. IMPOSTAZIONI RETROILLUMINAZIONE
4. SU
Alimentazione USB: 5V-0,5A 2,5 W LED : 1W (max)
Funziona con 3 batterie AAA, utilizzare quelle alcaline per ottenere le migliori prestazioni.
Modalità ora:
All'accensione, l'ora normale viene visualizzata come AM12:00 in un orologio a 12 ore.
Il fulmine con punta a freccia,
con un triangolo equilatero
avverte l'utente della
presenza di tensione
pericolosa non isolata
all'interno del contenitore
del prodotto che possono
essere di intensità sufficiente
per costituire un rischio di
scossa elettrica per le
persone.
ATTENZIONE
RISCHIO DI SCOSSE ELETTRICHE,
NON APRIRE
ATTENZIONE: PER RIDURRE IL
RISCHIO DI SCOSSE ELETTRICHE,
NON RIMUOVERE IL COPERCHIO
(O LA PARTE POSTERIORE), NON
CONTIENE PARTI RIPARABILI
ALL'INTERNO. RIVOLGERSI A
PERSONALE QUALIFICATO.
IL PUNTO ESCLAMATIVO ALL'INTERNO
DEL TRIANGOLO EQUILATERO SERVE
PER AVVERTIRE L'UTENTE DELLA
PRESENZA DI MANUTENZIONE
(ASSISTENZA) NELLA
DOCUMENTAZIONE CHE
ACCOMPAGNA IL APPARECCHIO
OPERATIVI IMPORTANTI E.
It
6+

Impostazione dell'ora:
Premere il tasto SET per accedere alle impostazioni di ora e data. Premere i tasti UP e C/F (DOWN) per impostare rispettivamente ora, minuti,
anno, mese e giorno.
Dopo l'impostazione della data, il giorno della settimana (da lunedì a domenica) viene automaticamente modificato di conseguenza.
Premere il tasto MODE per uscire dall'impostazione dell'ora, oppure l'impostazione dell'ora esce automaticamente dopo un minuto senza
premere alcun tasto.
Modalità sveglia e snooze:
Premere il tasto MODE per accedere alla modalità sveglia:
Impostazione della sveglia:
Premere il tasto SET per accedere alle impostazioni della sveglia e dello snooze e impostare rispettivamente l'ora, i minuti e lo snooze in ordine
premendo i tasti UP e C/F (DOWN).
Premere il tasto MODE per uscire dall'impostazione della sveglia, oppure uscire automaticamente dall'impostazione della sveglia dopo un
minuto senza premere alcun tasto.
Per attivare la funzione sveglia e snooze, premere il tasto SU o C/F (GIÙ) per attivarla.
Quando la sveglia raggiunge l'ora impostata, suona per 1 minuto e la luce lampeggia. Quando si raggiunge l'intervallo di snooze, la sveglia
suona due volte, ogni minuto fino a quando non si spegne la sveglia premendo il tasto SET o premendo un tasto qualsiasi per mettere in pausa.
Impostazione della durata dell'intervallo di snooze: 1~60 minuti (l'impostazione predefinita è 60 minuti). Quando i loghi della sveglia e dello
snooze non sono visualizzati sullo schermo, significa che la sveglia e lo snooze sono disattivati. Se si accende solo il simbolo della sveglia, non
c'è la funzione snooze. Per avere la funzione snooze, i loghi della sveglia e della snooze devono essere accesi contemporaneamente.
Conversione della modalità 12/24:
Premere il tasto 12/24 per passare dalla modalità 12 a quella 24 ore.
Impostazione della temperatura:
Può convertire il display Celsius/Fahrenheit premendo il tasto DOWN, C/F; l'intervallo di misurazione normale è 0°C-50°C (32°F-122°F) e la
precisione può raggiungere 0,5°C.
Regolazione della luminosità della retroilluminazione
Premere il pulsante di regolazione della retroilluminazione (situato sotto lo schermo) per regolare la luminosità della retroilluminazione: alta
(100%) - media (50%) e bassa 10%. È sufficiente premere la statuetta verso il basso per attivare il pulsante di regolazione della
retroilluminazione.
Funzione luce LED:
Per accendere la luce premendo il tasto LED.
GARANZIA
Questo prodotto è coperto dalla nostra garanzia di due anni. Per l'attuazione della garanzia o servizio post-vendita, è necessario contattare il rivenditore con la
prova di acquisto. La garanzia copre i difetti di materiale o di assemblaggio a causa di produttore con l'eccezione di eventuali danni da mancato rispetto delle
istruzioni per l'uso manomissione del prodotto (ad esempio, lo smontaggio, esposizione al calore o umidità).Nota: Si prega di tenere presente manuale, contiene
informazioni importanti.
Made in PRC
© 2022 Teknofun All Rights reserved
© 2022 Madcow Entertainment France All Rights reserved

811 327, 811 607, 811 606, 811 638
DIGITALE WEKKER
HANDLEIDING
VOORDAT U DIT PRODUCT LEEST, BEGRIJPT, EN VOLG DEZE INSTRUCTIES. BEN ZEKER OM TE SPAREN DIT BOEKJE VOOR TOEKOMSTIG GEBRUIK.
WAARSCHUWING : OM EEN ELEKTRISCHE SCHOK TE VOORKOMEN, BREDE PEN VAN DE STEKKER. IN DE BREDE STEKEN.
Functies:
1. LED-INSTELLINGEN 5. OMLAAG (C/F)
2. MODE 6. 12/24H
3. SET 7. INSTELLING ACHTERGRONDVERLICHTING
4. UP
USB netvoeding: 5V-0,5A 2,5 W LED : 1W (max)
voeding Werkt op 3 AAA batterijen, gebruik Alkaline voor de beste prestaties
Tijdmodus:
Bij het inschakelen wordt de normale tijd weergegeven als AM12:00 in een 12-uurs klok.
De bliksemschicht met
pijlpunt, met een gelijkzijdige
driehoek is bedoeld om de
gebruiker op de
aanwezigheid van niet-
geïsoleerde gevaarlijke
spanning binnen de
behuizing van het product,
die voldoende groot kunnen
zijn om een risico op
elektrische schokken te
vormen waarschuwen.
AANDACHT
RISICO OP ELEKTRISCHE
SCHOKKEN, NIET OPEN
LET OP: OM HET RISICO OP
ELEKTRISCHE SCHOK BINNEN TE
VOORKOMEN, DEKSEL (OF RUG)
NIET VERWIJDEREN, GEEN
ONDERDELEN. LAAT ONDERHOUD
AAN GEKWALIFICEERD
ONDERHOUDSPERSONEEL.
HET UITROEPTEKEN IN EEN
GELIJKZIJDIGE DRIEHOEK IS BEDOELD
OM DE GEBRUIKER DE
AANWEZIGHEID VAN BELANGRIJKE
BEDIENINGS- EN ONDERHOUD
(REPARATIE) IN DE HANDLEIDING VAN
HET TOESTEL.
Nl
6+

Tijd instellen:
Druk op de SET toets om de tijd en datum instellingen te openen. Druk op de UP toets en de C/F (DOWN) toets om respectievelijk het uur, de
minuten, het jaar, de maand en de dag in te stellen.
Nadat de datum is ingesteld, wordt de dag van de week (maandag t/m zondag) automatisch overeenkomstig gewijzigd.
Druk op de MODE toets om het instellen van de tijd te verlaten, of het zal automatisch het instellen van de tijd verlaten na een minuut zonder
een toets in te drukken.
Wekker en sluimerfunctie:
Druk op de MODE toets om de wekkermodus binnen te gaan:
Alarm instelling:
Druk op de SET toets om de wekker en snooze instellingen te openen, en stel het uur, de minuten en de snooze in door op de UP toets en C/F
(DOWN) toets te drukken.
Druk op de MODE toets om de wekkerinstelling te verlaten, of de wekkerinstelling wordt automatisch verlaten na een minuut zonder een toets
in te drukken.
Om de wekker- en sluimerfunctie in te schakelen, drukt u op de UP toets of de C/F (DOWN) toets om deze in te schakelen; de alarmlogo's
verschijnen op het scherm wanneer de wekker is ingeschakeld.
Wanneer de wekker de ingestelde tijd bereikt, zal hij gedurende 1 minuut afgaan en zal het licht knipperen. Wanneer de sluimer interval tijd is
bereikt, zal de wekker twee keer afgaan, het zal elke minuut afgaan totdat de wekker wordt uitgezet door op de SET toets te drukken of druk
op een willekeurige toets om te pauzeren.
Snooze interval tijdsduur instelling: 1~60 minuten (standaard is 60 minuten)
Wanneer de alarm- en snooze-logo's niet op het scherm verschijnen, betekent dit dat het alarm en de snooze zijn uitgeschakeld. Als alleen
het alarmsymbool aan staat, is er geen snooze-functie. Om de snooze-functie te hebben, moeten het alarm- en het snooze-logo tegelijkertijd
aan staan.
Omschakeling 12/24-stand:
Druk op de 12/24 toets om te schakelen tussen de 12- en 24-uurs modus.
Temperatuurinstelling:
Het kan de Celsius/Fahrenheit weergave omzetten door op de DOWN, C/F toets te drukken, het normale meetbereik is 0°C-50°C (32°F-122°F),
en de nauwkeurigheid kan 0,5°C bereiken.
Instellen van de helderheid van de achtergrondverlichting
Druk op de backlight aanpassingstoets (die zich onder het display bevindt) om de helderheid van de achtergrondverlichting aan te passen,
hoog (100%) - medium (50%) en laag 10%. U kunt het beeldje gewoon naar beneden drukken om de knop voor het aanpassen van de
achtergrondverlichting te activeren.
LED Licht functie:
Om het licht aan te zetten door op de LED toets te drukken.
GARANTIE
Dit product wordt gedekt door onze garantie van twee jaar. Voor de uitvoering van de garantie of after sales service, moet u contact opnemen met uw dealer
met uw aankoopbewijs. Onze garantie dekt defecten in materialen of montage als gevolg van fabrikant met uitzondering van eventuele schade als gevolg van
niet-naleving van instructies voor het gebruik knoeien met het product (zoals demontage, blootstelling aan hitte of vochtigheid).Opmerking: Bewaar deze
handleiding, het bevat belangrijke informatie.
Made in PRC
© 2022 Teknofun All Rights Reserved© 2022 Madcow Entertainment France All Rights Reserved

811 327, 811 607, 811 606, 811 638
DIGITAL ALARM CLOCK
USER MANUAL
BEFORE OPERATING THIS PRODUCT, READ, UNDERSTAND, AND FOLLOW THESE INSTRUCTIONS. BE SURE TO SAVE THIS BOOKLET FOR FUTURE REFERENCE.
WARNING : TO REDUCE THE RISK OF FIRE OR ELECTRIC SHOCK, DO NOT EXPOSE THE APPLIANCE TO RAIN OR MOISTURE.
FUNCTIONS :
1. LED SETTING 5. DECREASE
2. MODE 6. 12/24H
3. SET 7. BACKLIGHT SETTING
4. INCREASE
Mains USB: Power supply 5V-0.5A 2,5 W LED : 1W (max)
Operates with 3 AAA batteries, use Alkaline for best performance
Time mode :
When the unit is powered on, the normal time is displayed as AM 12:00 in a 12-hour clock.
The lightning flash with
arrowhead symbol, with an
equilateral triangle is
intended to alert the user of
the presence of uninsulated
dangerous voltage within the
product’s enclosure that may
be of sufficient magnitude to
constitute a risk of electric
shock to persons.
CAUTION : TO REDUCE THE RISK
OF ELECTRIC SHOCK, DO NOT
REMOVE COVER (OR BACK), NO
USER SERVICEABLE PARTS INSIDE.
REFER SERVICING TO QUALIFIED
SERVICE PERSONNEL.
THE EXCLAMATION POINT WITHIN AN
EQUILATERAL TRIANGLE IS INTENDED
TO ALERT THE USER OF THE PRESENCE
OF IMPORTANT OPERATING AND
MAINTENANCE (SERVICING)
INSTRUCTIONS IN THE LITERATURE
ACCOMPANYING THE APPLIANCE.
En
6+

Setting the time :
Press the SET key to enter the time and date settings. Press the UP and C/F (DOWN) keys to set the hour, minute, year, month, day, in order,
respectively.
Once the date is set, the day of the week (Monday to Sunday) is automatically changed accordingly.
Press the MODE button to exit the time setting, or it will automatically exit the time setting after one minute without pressing any button.
Alarm mode and snooze mode :
Press the MODE button to enter the alarm mode:
Setting the alarm :
Press the SET key to enter the alarm and snooze settings, and set the hour, minute and snooze respectively in sequence by pressing the UP and
C/F (DOWN) keys.
Press the MODE key to exit the alarm setting, or it will automatically exit the alarm setting after one minute without pressing any key.
To activate the alarm and snooze function, press the UP or C/F (DOWN) key to activate, the alarm logos will be displayed when activated.
When the alarm clock reaches the set time, it will sound for 1 minute and the indicator will flash. When the snooze time is reached, the alarm
will sound twice, it will sound every minute until the alarm is turned off by pressing the SET key or any key to pause.
Setting the snooze interval time: 1~60 minutes (default 60 minutes)
When the alarm and snooze logos do not appear on the display, it means that the alarm and snooze are disabled. If only the alarm sign lights
up, there is no snooze function. To have the snooze function, the alarm and snooze logos must be on at the same time.
12/24 mode conversion :
Press the 12/24 button to change from 12-hour to 24-hour mode.
Setting the temperature :
It can cover the Celsius/Fahrenheit display by pressing the DOWN, C/F button, the normal measurement range is 0°C-50°C (32°F-122°F), and
the accuracy can be up to 0.5°C.
Adjusting the backlight brightness :
Press the backlight adjustment button (which is located below the display screen) to adjust the backlight brightness, high (100%) - medium
(50%) and low 10%. You can simply press the figure to activate the backlight adjustment button.
LED lighting function:
To turn on the LEDs press the LED button.
WARRANTY
This product is covered by our warranty of two years. For implementation of the warranty or after sales service, you should contact your dealer with your proof
of purchase. Our warranty covers defects in materials or assembly due to manufacturer with the exception of any damage from non-compliance with instructions
for use tampering with the product (such as dismantling, exposure to heat or humidity).
Note : please keep this manual, it contains important information.
Teknofun states that the alarm clock complies with the essential requirements and other relevant provisions of directive 2014/53/UE. The declaration of
conformity can be requested at hotline@teknofun-entertainment.eu or 15 rue beaujon 75008 PARIS France
Made in PRC
© 2022 Teknofun All Rights reserved
© 2022 Madcow Entertainment France All Rights reserved
This manual suits for next models
3
Table of contents
Languages:
Other Teknofun Alarm Clock manuals

