Tektite Massey Ferguson GC1725M User manual

Massey Ferguson GC1725M ROPS Cab
* Shown with optional equipment *
Please note: Cab is shown in photo with optional accessories.
www.tektite.ca
Massey Ferguson GC1725M ROPS Cab
This ROPS cab is designed and built to fit the Massey Ferguson GC1725M and GC1723E
tractor.
Designed and Built by:
Tektite Manufacturing Inc:
427 Buffalo Street
P.O. Box 639
Winkler, MB
R6W 4A8
Canada
PH: 204-331-3463
Fax: 204-331-4159
www.tektite.ca
One year standard product warranty provided by Tektite.
June 2021© Massey GC1725M ROPS Cab Installation Manual

DO NOT PROCEED FURTHER UNTIL YOU HAVE READ THE INFORMATION BELOW
1) Always wear personal protective equipment
2) A minimum of two people is necessary to safely install the cab
3) This ROPS cab is heavy. A lift assist device such as an overhead
hoist or high lift forklift is required.
4) Ensure your work area is well ventilated. The installation
requires the starting of the tractor which will produce
dangerous carbon monoxide fumes.
5) Read through the entire installation manual first.
6) Follow the installation instructions in order.
7) Reading the operators manual prior to using the ROPS cab.

Tektite Manufacturing Incorporated thanks you for purchasing a Massey Ferguson GC1725M
ROPS cab! Tektite has worked very hard to design and build this ROPS product and we hope
that it provides you with many years of ROPS protection.
Tektite’s ROPS products are designed to provide safe and dependable service during operation
when they are properly maintained according to the instructions. Please read this installation
manual carefully before installing and using this ROPS product.
The photos/illustrations provided in this manual may not provide all the detail needed, and are
for reference only.
All directions provided are from the reference point of the tractor seat facing the steering
wheel. All left and right references are from this view point.
For reference, please fill in the information below. This will assist your dealer in providing
service for this ROPS. It is advisable that this information be provided to your insurance
company as well in the event that the tractor is lost or damaged.
Vehicle Model: _________________________________________________________
ROPS Serial Number: ___________________________________________________
Date of Purchase: _______________________________________________________
Dealer Name: ___________________________________________________________
June 2021© Massey GC1725M ROPS Cab Installation Manual
Parts List Standard Cab:
Description
Qty
Left Pedal Floormat
1
Right Pedal Floormat
1
Step Bolt, ¼” x 1”, MB
2
Flange Nut, ¼”, MB
2
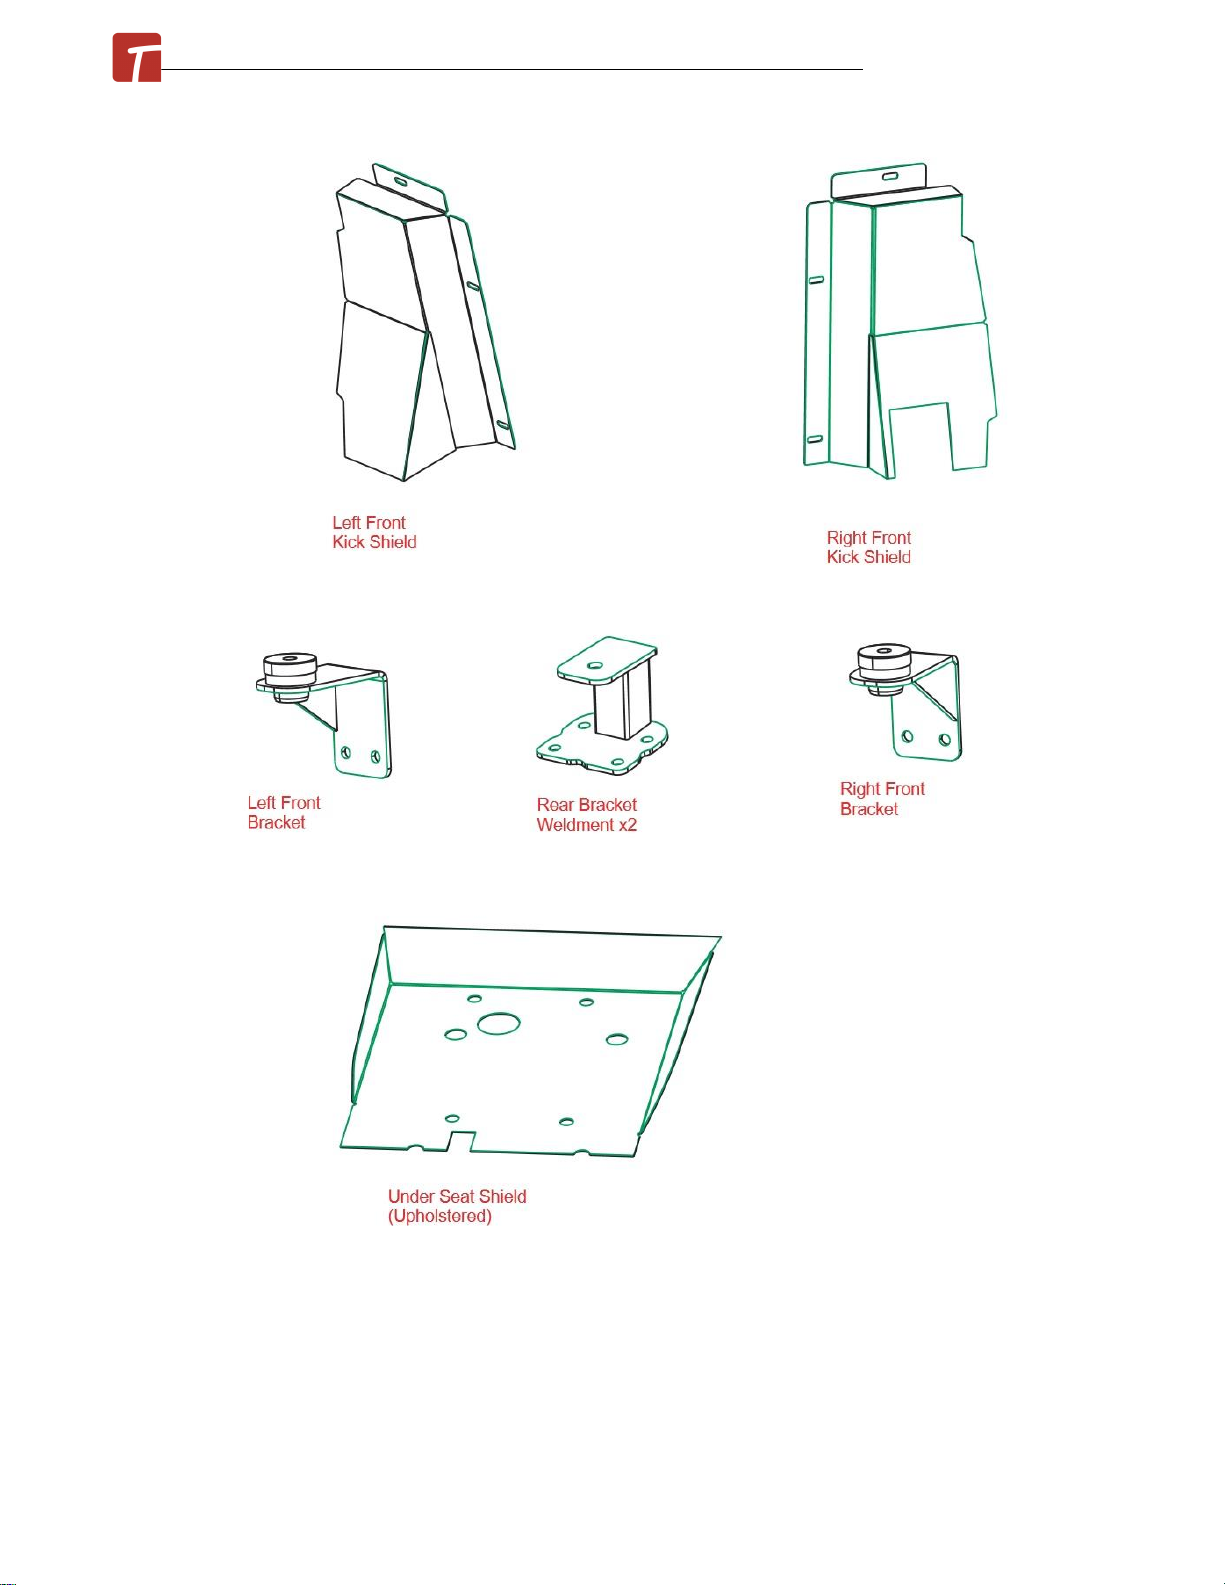
Under-seat shield (pre-upholstered)
1
Front Mounting Brackets
L&R
Rear Mounting Brackets (Pre-installed on cab)
2
Bolt, Hex, 5/8” x 3”, Gr. 8, YD
2
Washer, Flat, ¼” thick
2
Nut, Flange, 5/8”, Gr. 8, YD
2
Bolt, Hex, ½” x 4 1/2”, Gr. 8
2
Bolt, Hex, ½” x 1 ½”, YD, Gr. 8
4
Nut, Flange, ½”, YD, Gr. 8
4
Fuel Hose, 90 degree (3" cut off tractor side) installed on cab w/fuel fill weldment
1
Wire Loop, 1/4”
2
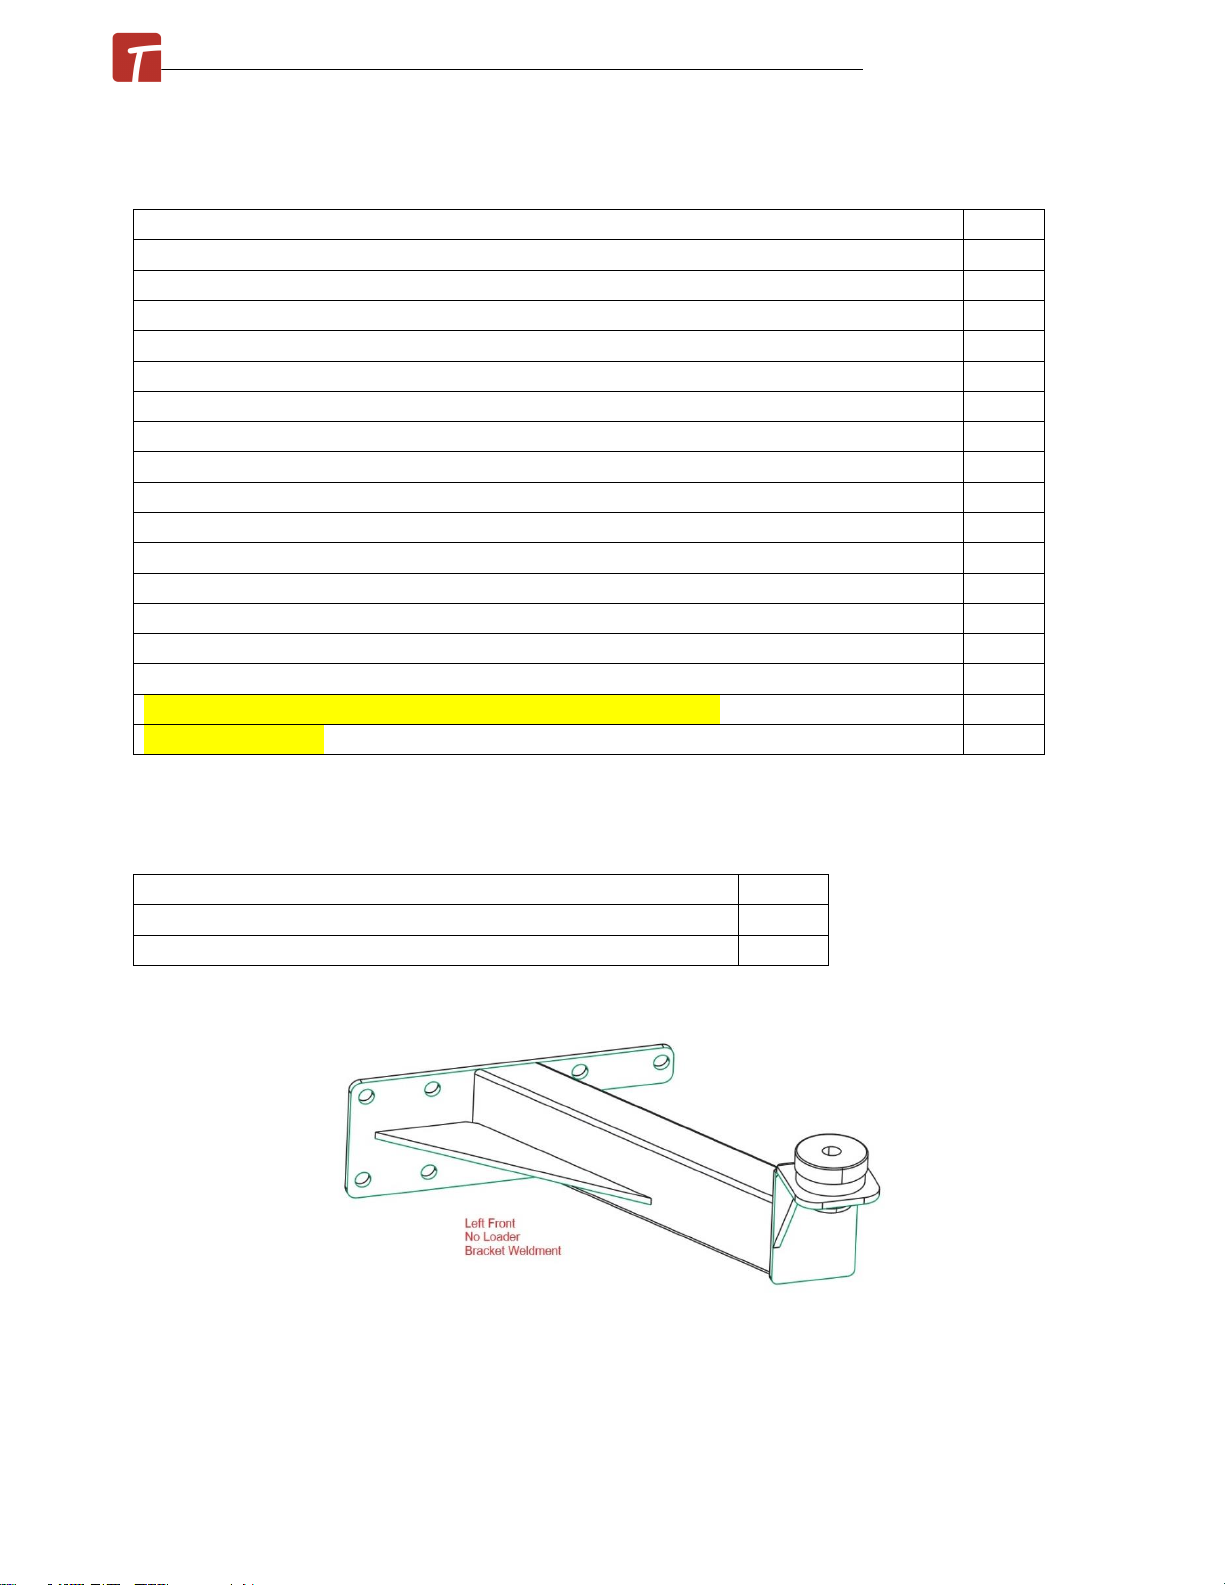
Bolt, Flange, M12 x 35, Gr. 10.9, Yellow (NO LOADER ONLY)
14
No Loader Bracket
L&R
Parts List Water Heater Kit:
Description
Qty
Hose Clamps, HS-6
2
Zip Ties
6
June 2021© Massey GC1725M ROPS Cab Installation Manual
June 2021© Massey GC1725M ROPS Cab Installation Manual

Standard Cab Installation Instructions:
. Disconnect rear flasher light harness and remove two-post ROPS from machine. Save
fasteners to re-use later. Disconnect the battery.
. Remove the seat and seat tracks from the tractor.
. Take the provided under-seat shield and position it in the area under the seat. Tuck the outer
side edges of the upholstery under the tractor sheet-metal.
. Re-install the tractor seat.
June 2021© Massey GC1725M ROPS Cab Installation Manual
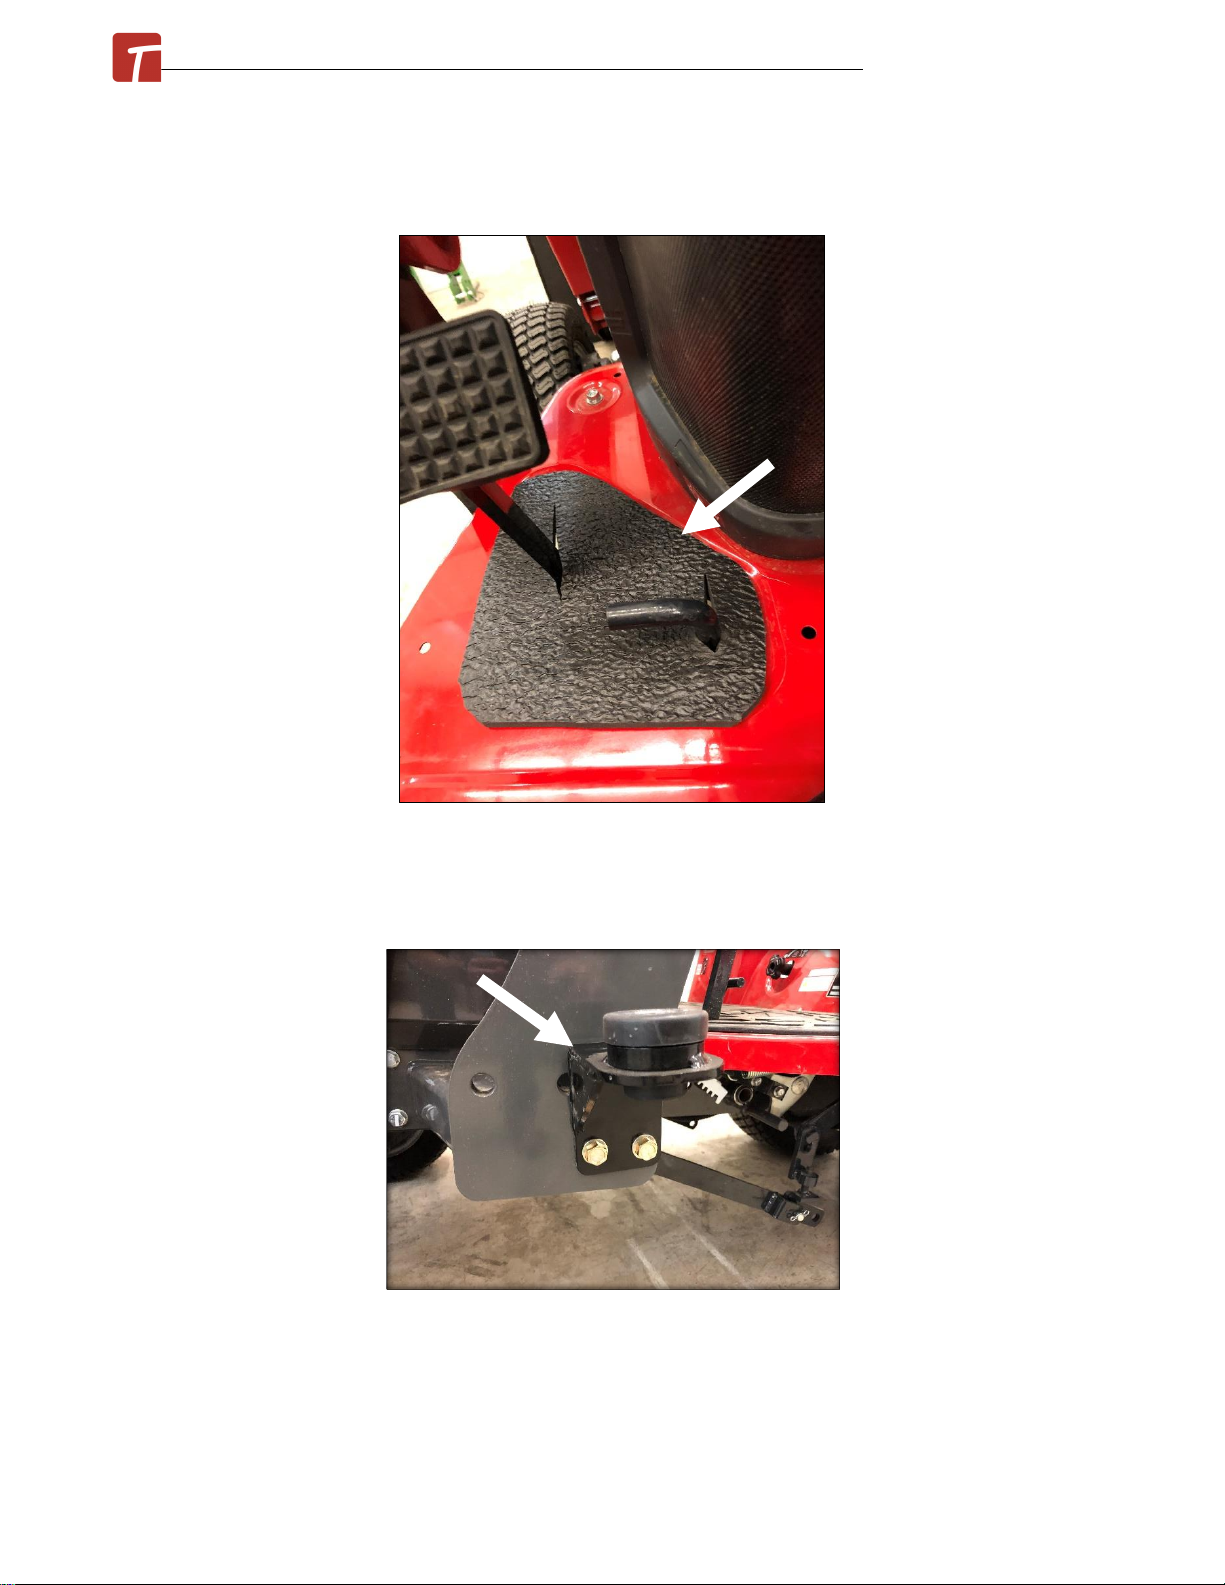
. Pull the factory floormat back from the left side of the platform. Position the left pedal
floormat provided through the two pedals as shown. Re-install factory floormat over top.
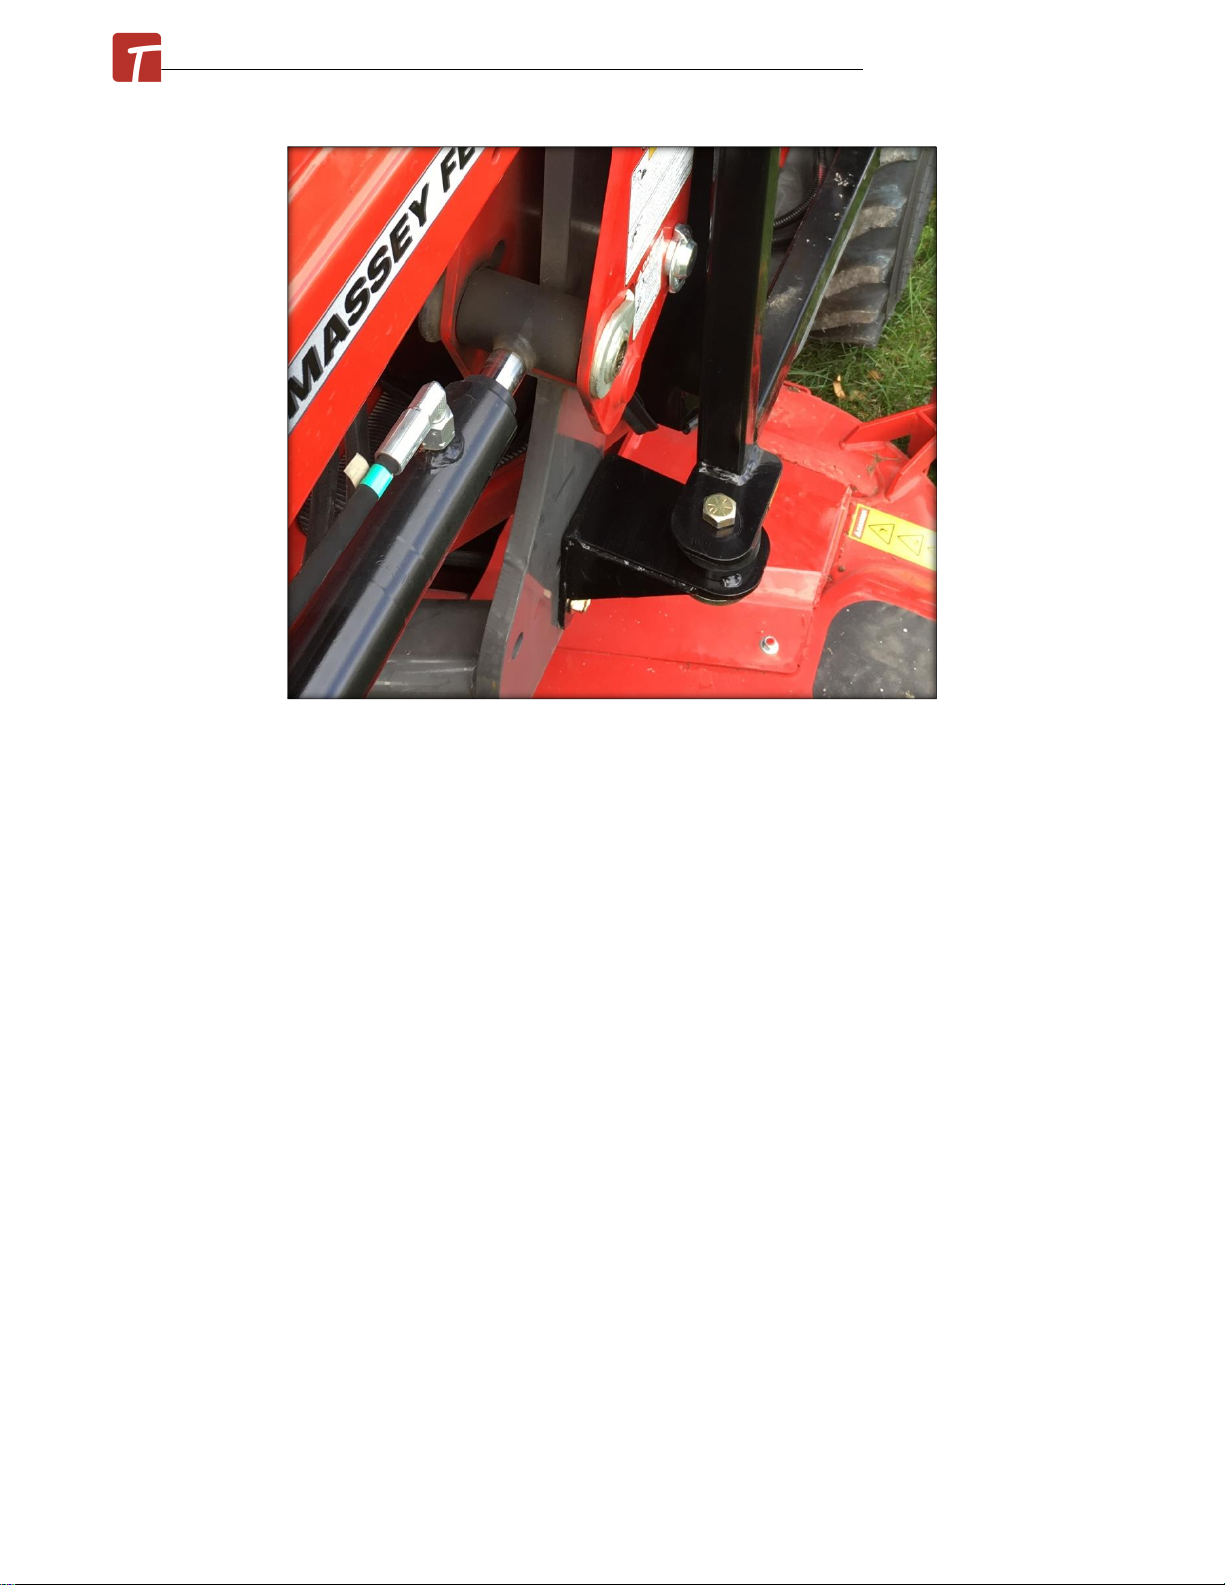
. Take the left front bracket and position it on the two holes in the loader sub-frame. Bolt into
place with the provided ½” x 1 ½” bolts and flange nuts. The gusset support on the bracket will
be at the front of the bracket when installed (arrow location).
. Take the right front bracket and position it on the two holes in the loader sub-frame. Bolt into
place with the provided ½” x 1 ½” bolts and flange nuts. The gusset support on the bracket will
be at the front of the bracket when installed (arrow location).
June 2021© Massey GC1725M ROPS Cab Installation Manual

** If tractor is equipped without front end loader, use the provided no loader bracket and M12
x 35 flange bolts. Position left front bracket against tractor bell housing where 7 fastener
pattern is, around mid-mower mount. Loosely fasten into place with provided M12 hardware.
Repeat for the RIGHT side.
. Take the left rear bracket and put into the pocket where the 2-post ROPS was mounted. The
cab mount plate should be facing forward when installed. Re-use the factory fasteners.
June 2021© Massey GC1725M ROPS Cab Installation Manual

. Take the right rear bracket and put into the pocket where the 2-post ROPS was mounted. The
cab mount plate should be facing forward when installed. Re-use the factory fasteners.
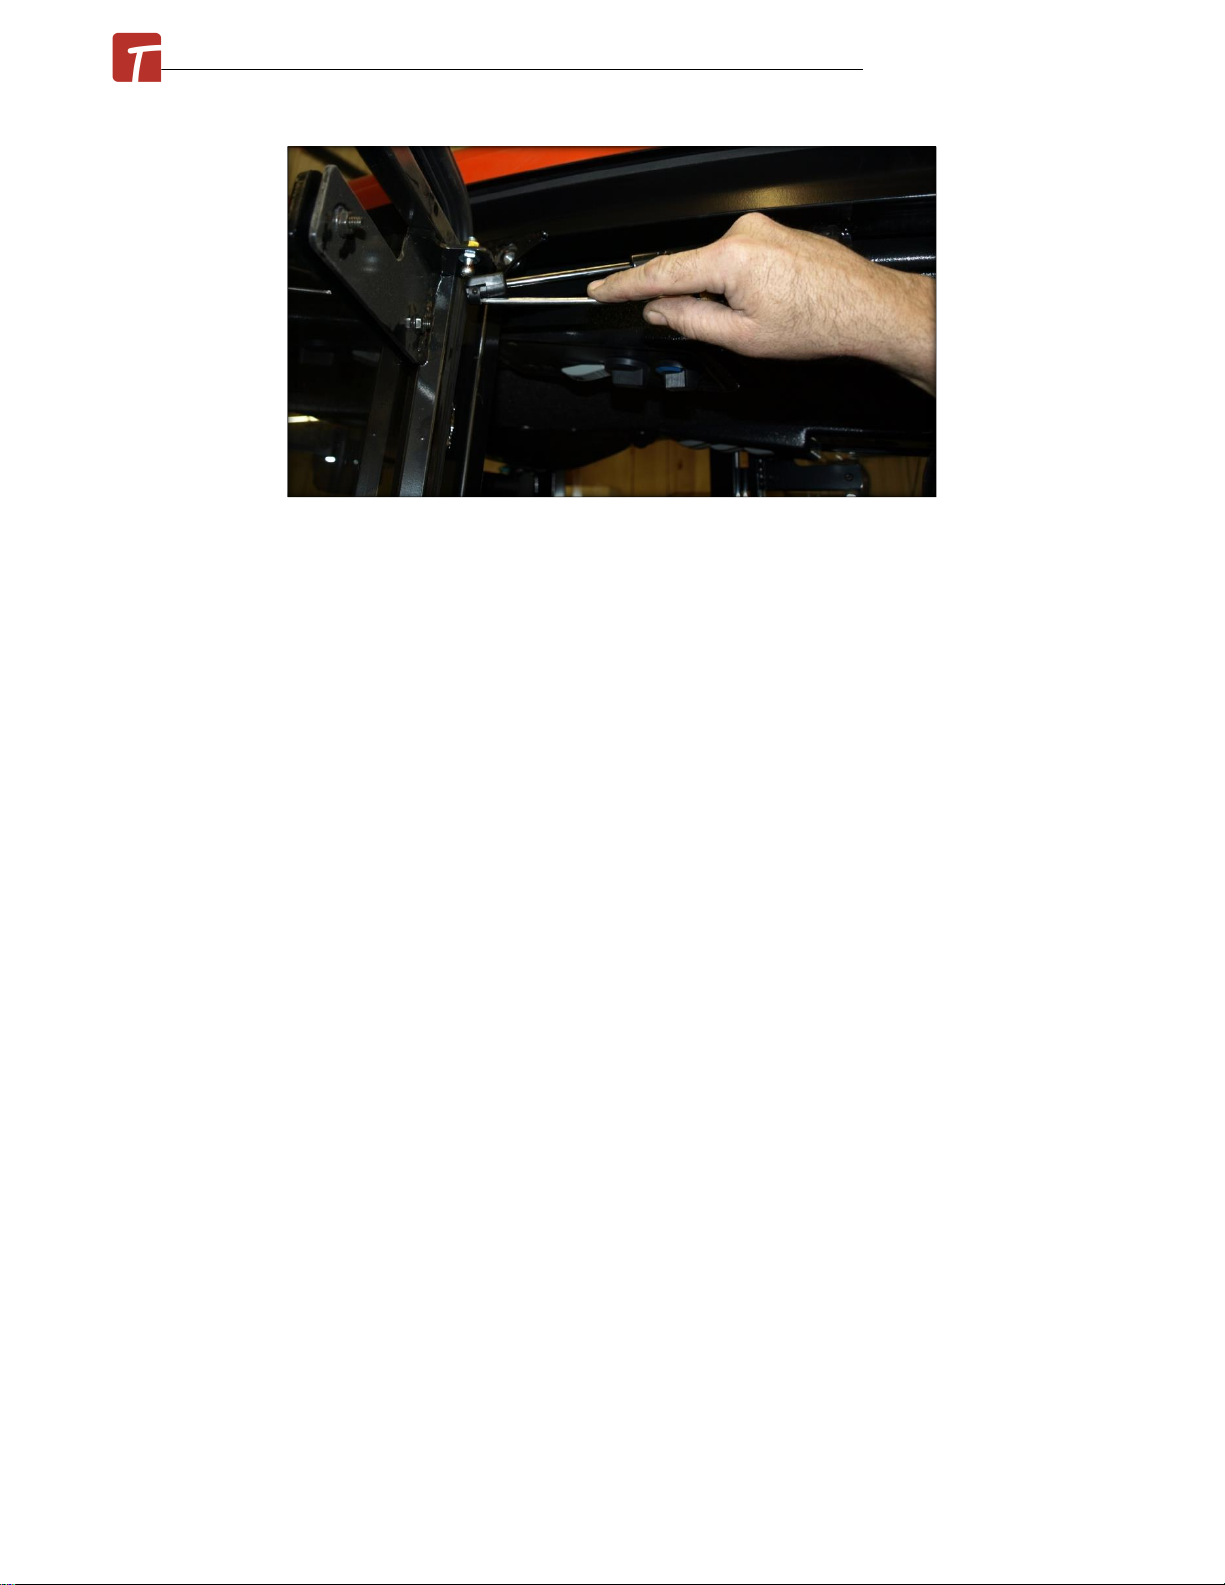
. Return to the cab to install lift brackets next. To remove the gas shock on the left cab door,
slide a flat screwdriver underneath the small clip on the end cap that must be pulled UP order
to pop the shock off the ball stud. The shock will release very easily when this is accomplished.
Lift the door assembly straight up and off the cab and put aside for now. Remove right door as
well. Un-bolt and remove both under-hood shields from cabs.
June 2021© Massey GC1725M ROPS Cab Installation Manual
. Take one of the provided cab lift bolts, a ½” x 4 ½”hex bolt, and bolt to the tab in the top
upper corner of the door opening; weld nut is located behind the tab. Repeat for the other
side.
. Use a lift strap or chain, and connect the lift bolts together. Attach to an over-head hoist or
fork lift and prepare to lift the cab off shipping pallet. Remove the bolts attaching cab to
shipping bracket and then lift cab up.
. Position the cab straight above the tractor and slowly lower down onto the tractor until the
isolators are contacting the steel mounting plates. REAR MOUNTS MUST BE INSTALLED FIRST,
do not get front mounts started until after the rears are in!!!! Use the provided 5/8” x 3” hex
bolts, heavy flat washer and flange nuts, and start all four mounting bolts. The heavy flat
washer needs to be located properly to ensure proper fastening. It is located between nut and
the isolator from underneath. If front mounts go in first, it will be VERY difficult to get rears
started.
June 2021© Massey GC1725M ROPS Cab Installation Manual
. Once all ROPS bolts are started, torque all fasteners to required torques. For 5/8” fasteners,
apply 205 ft-lbs of torque, for ½” fasteners, apply 102 ft-lbs.
. Remove cab lift straps/chains and bolts. Store for future use if removing cab in summer.
. Take the left front kick shield and the provided ¼” x ¾” flange bolts, and position against hood.
Ensure good seal and then fasten into place. From inside of the cab. NOTE: the flanges for
mounting are on the INSIDE of the cab.
June 2021© Massey GC1725M ROPS Cab Installation Manual
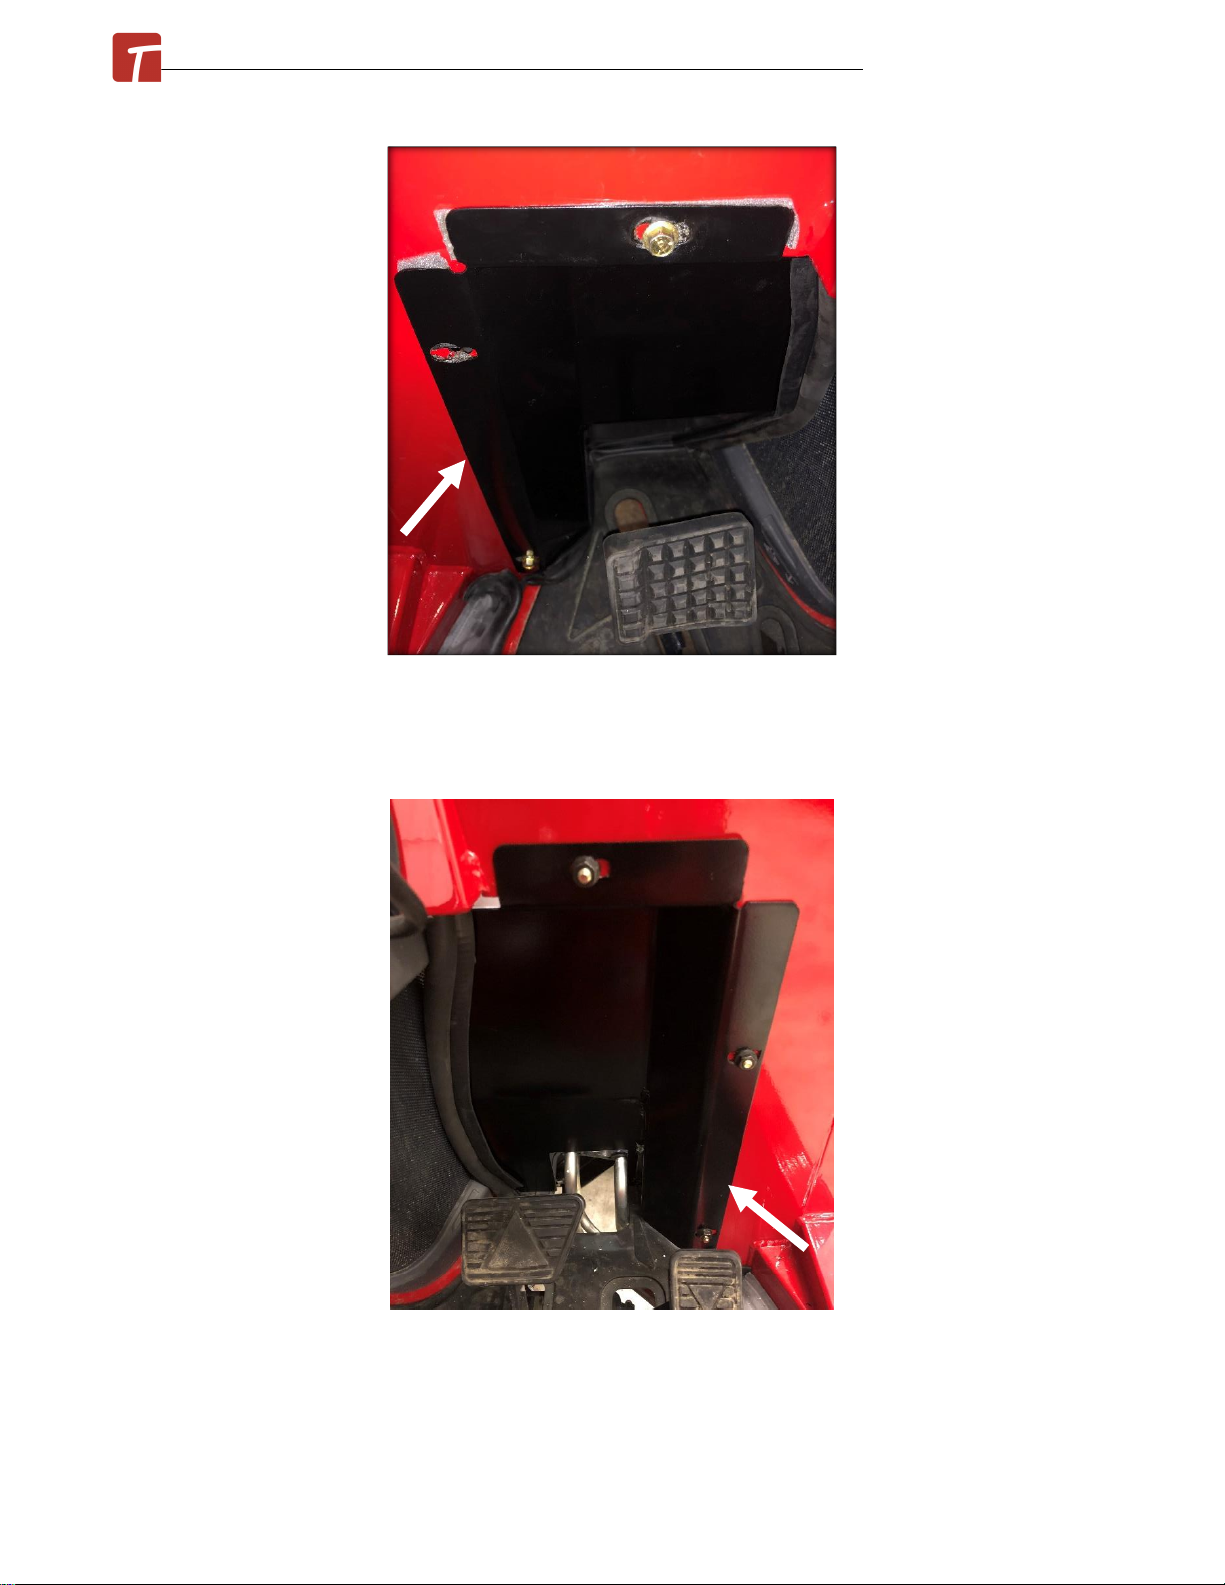
. Take the right front kick shield and the provided ¼” x ¾” flange bolts, and position against
hood. Ensure good seal and then fasten into place. From inside of the cab. NOTE: the flanges
for mounting are on the INSIDE of the cab.
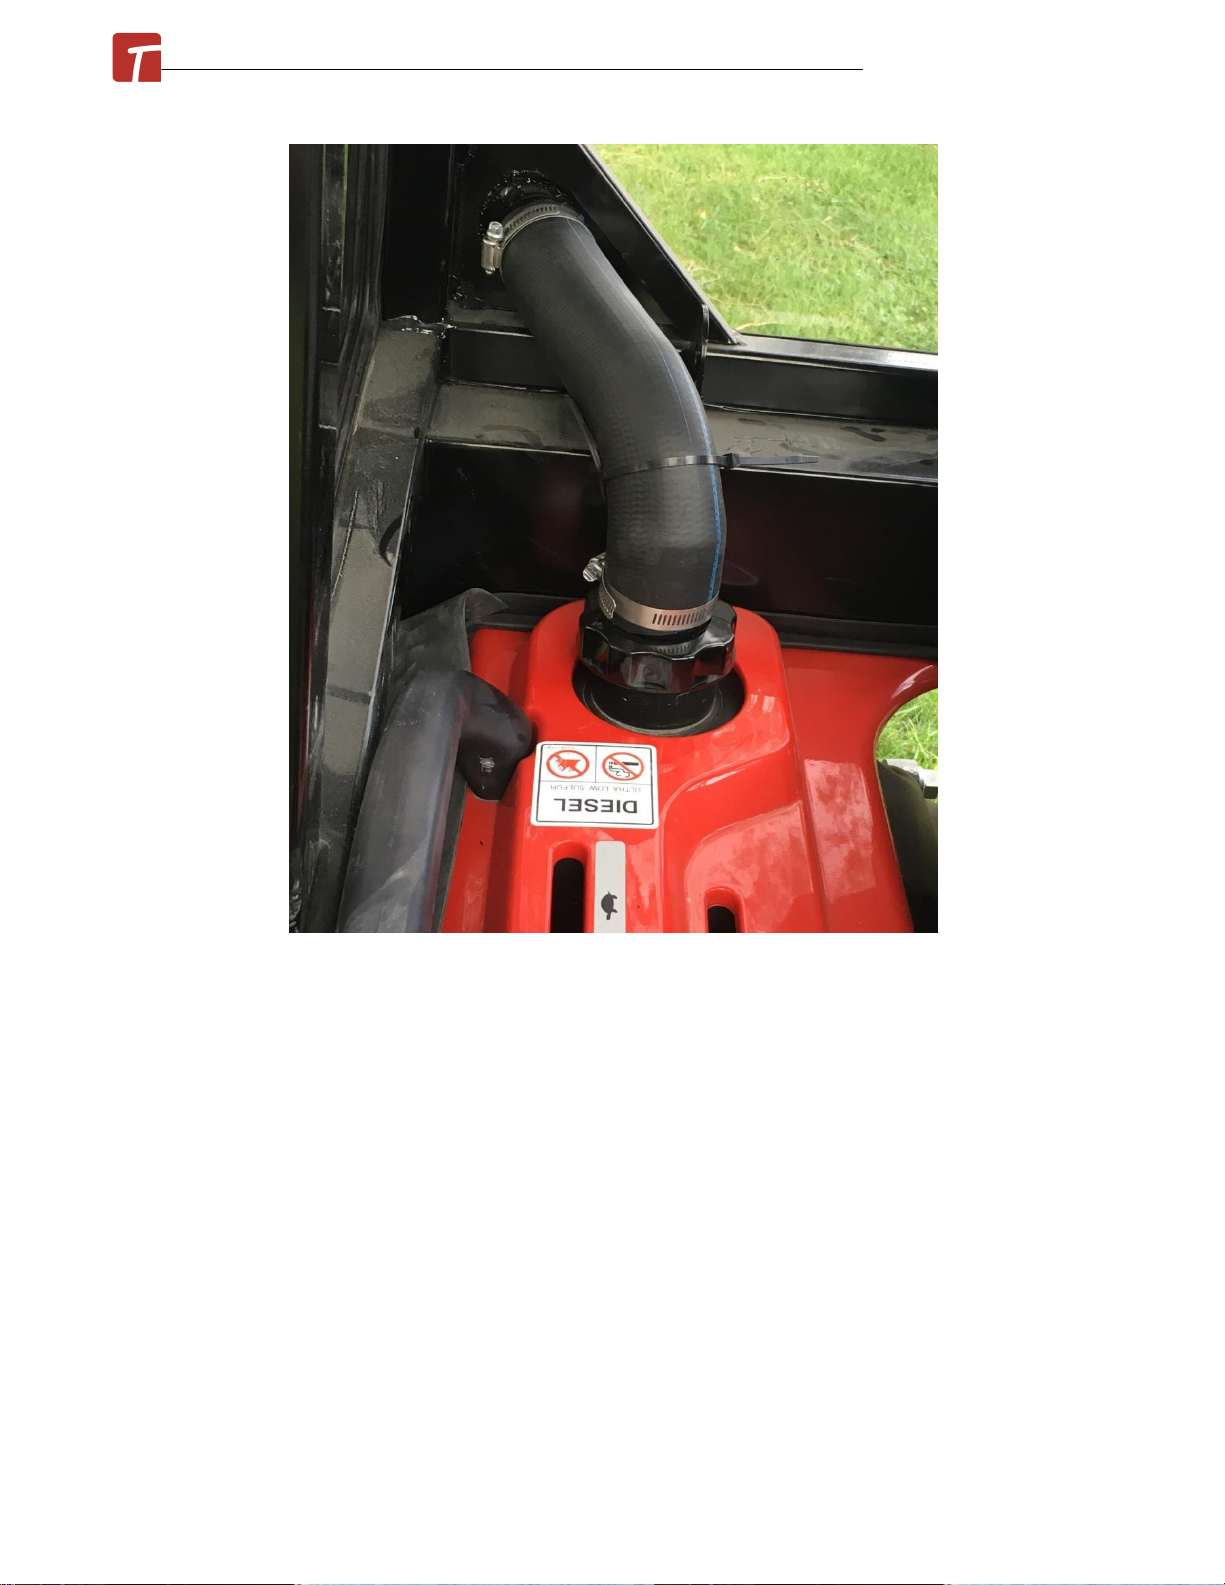
. Unscrew the fuel cap. Take the provided fuel cap with fuel fill pipe installed on cab, and screw
down fuel cap.
June 2021© Massey GC1725M ROPS Cab Installation Manual
. Locate the wire harness located at the bottom of the left A-post. Route under the hood.
Connect the heavy red wire to the battery with provided 1/4" loop. Shorten wire if necessary,
then solder connector to wire. Connect the heavy black wire to the battery ground with
provided 1/4" loop. Shorten wire if necessary, then solder connector to wire.
June 2021© Massey GC1725M ROPS Cab Installation Manual
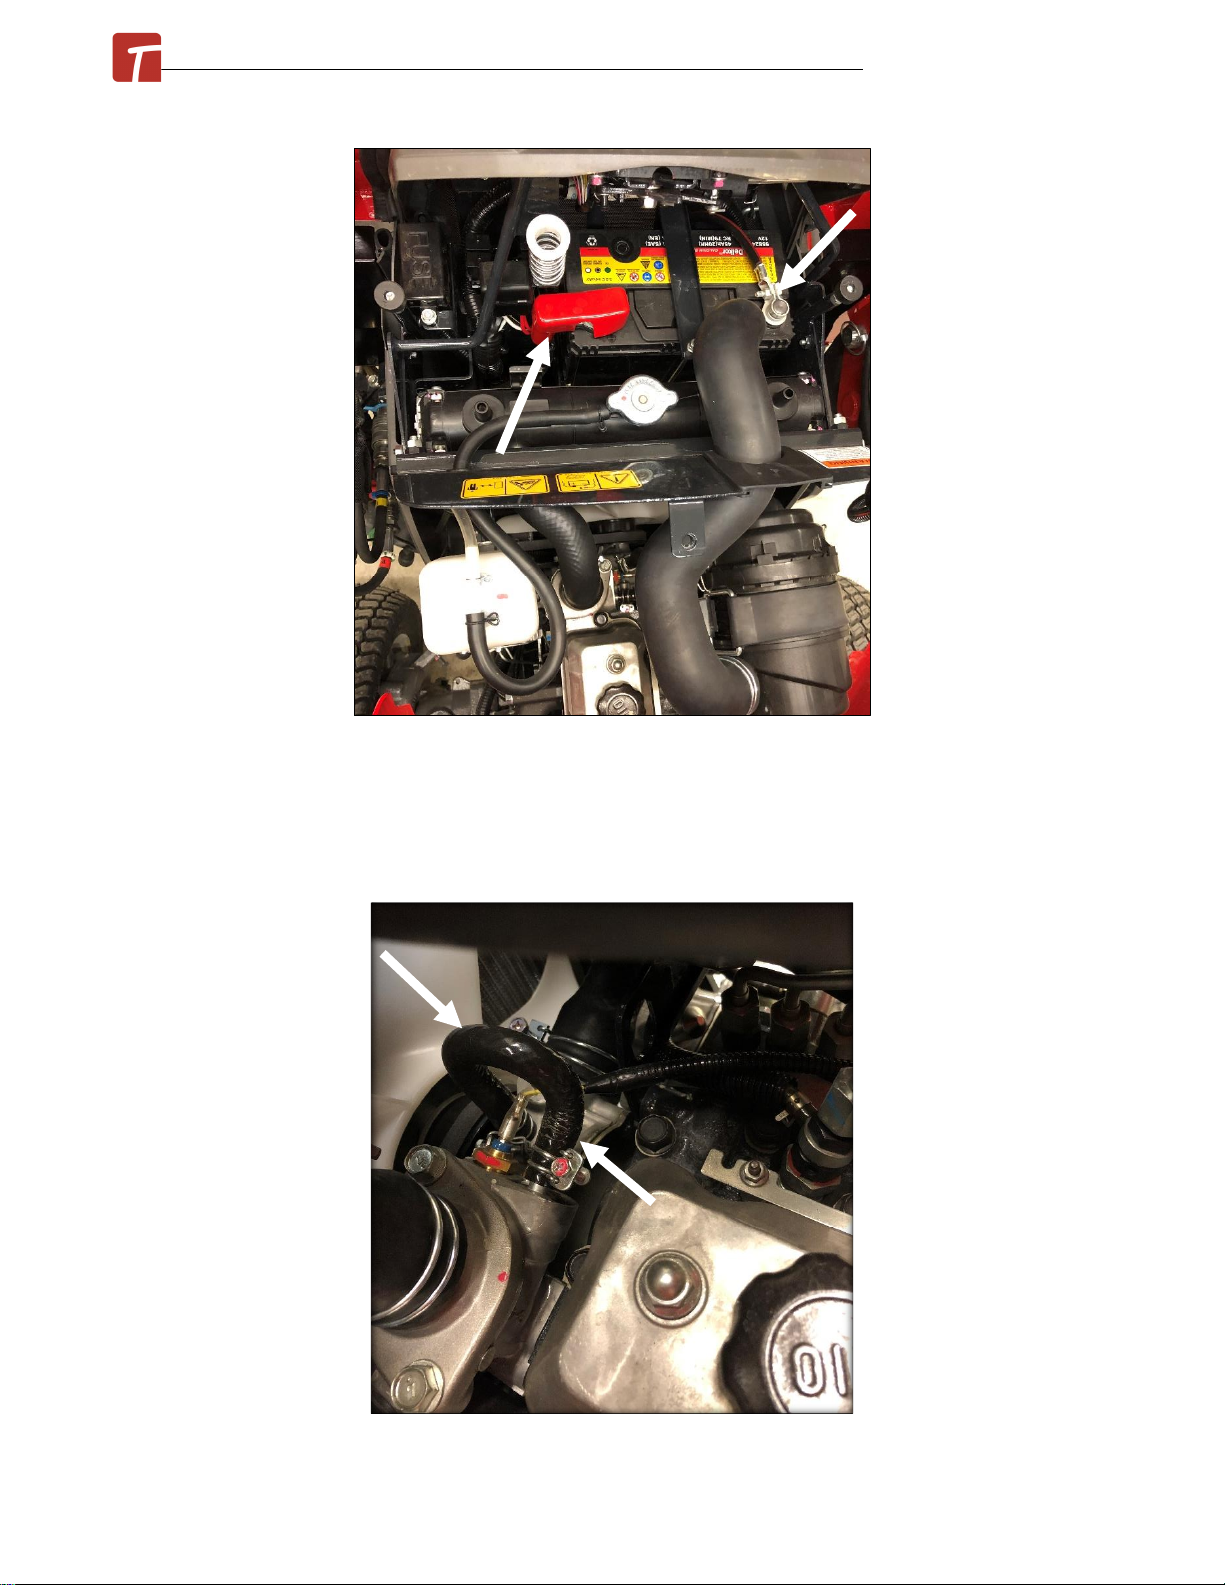
If tractor is equipped with a heater, proceed with the following steps.
. Drain the engine coolant.
. Locate the bypass hose as shown below.
June 2021© Massey GC1725M ROPS Cab Installation Manual
. Remove the bypass hose.
. Connect one end of the heater hose to one the ports and the remaining heater hose to the
other open port.
. Re-fill the engine radiator with coolant.
. Proceed with radiator air purging in a well ventilated area. Ensure the cab heater vents are
opened fully, and the fan switch is turned to the on position. Open the radiator cap, start the
engine and run at a high throttle position to encourage the thermostat to open and close
repeatedly. Re-fill the radiator as necessary to top up radiator coolant.
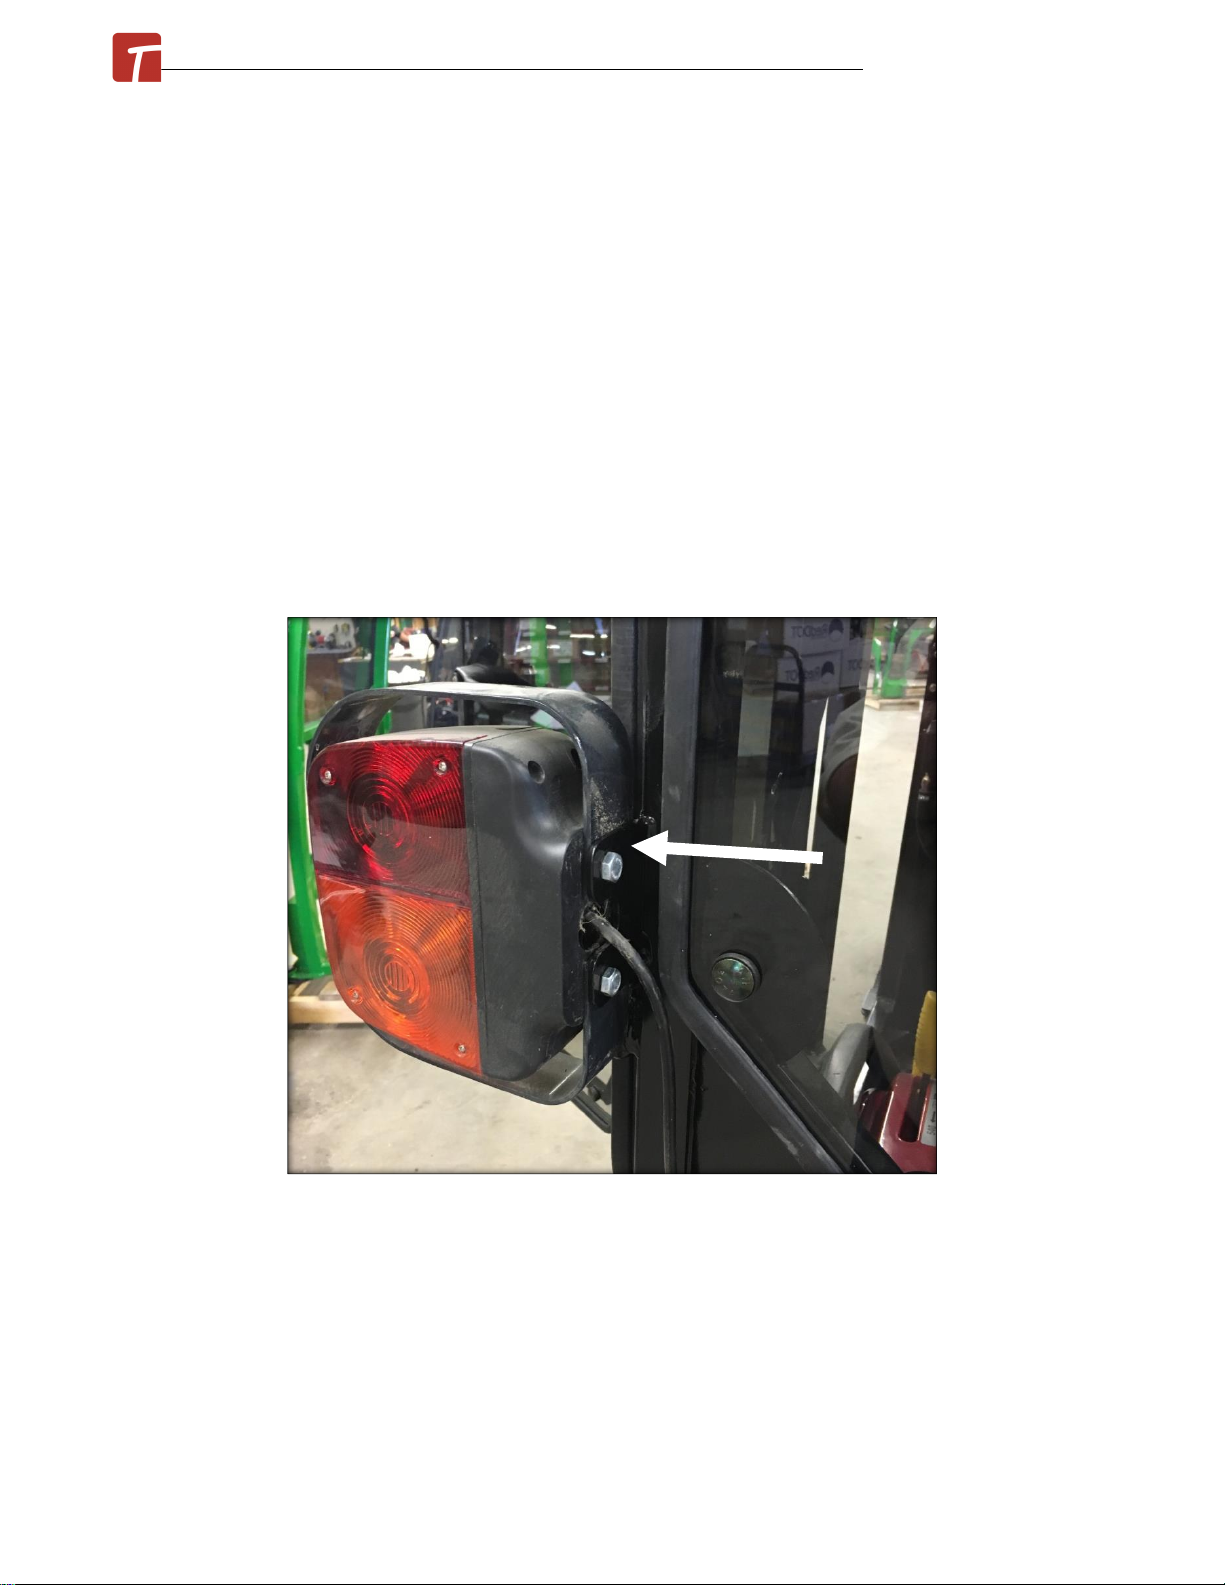
. Take the left rear tractor flasher, steel mounting bracket, factory bolts, and attach to the outer
mount tab on the tractor cab. Route the wiring harness down through the hole in the rear
fender and re-connect.
. Take the right rear tractor flasher, steel mounting bracket, factory bolts, and attach to the
outer mount tab on the tractor cab. Route the wiring harness down through the hole in the
rear fender and re-connect. Ensure work light is also re-connected if equipped.
June 2021© Massey GC1725M ROPS Cab Installation Manual

. Remove both seat belt brackets from the 2-post ROPS.
. Take the left side bracket, and using the factory hardware, attach to the left tab beside the
rear mount plate.
. Take the right side bracket, and using the factory hardware, attach to the right tab beside the
rear mount plate.
. Use the provided fir tree fasteners to retain the flat 3" weather seal into place on the side of
the tractor. Drill a small 1/4" pilot hole through rubber and into tractor sheet-metal in order to
install the fasteners.
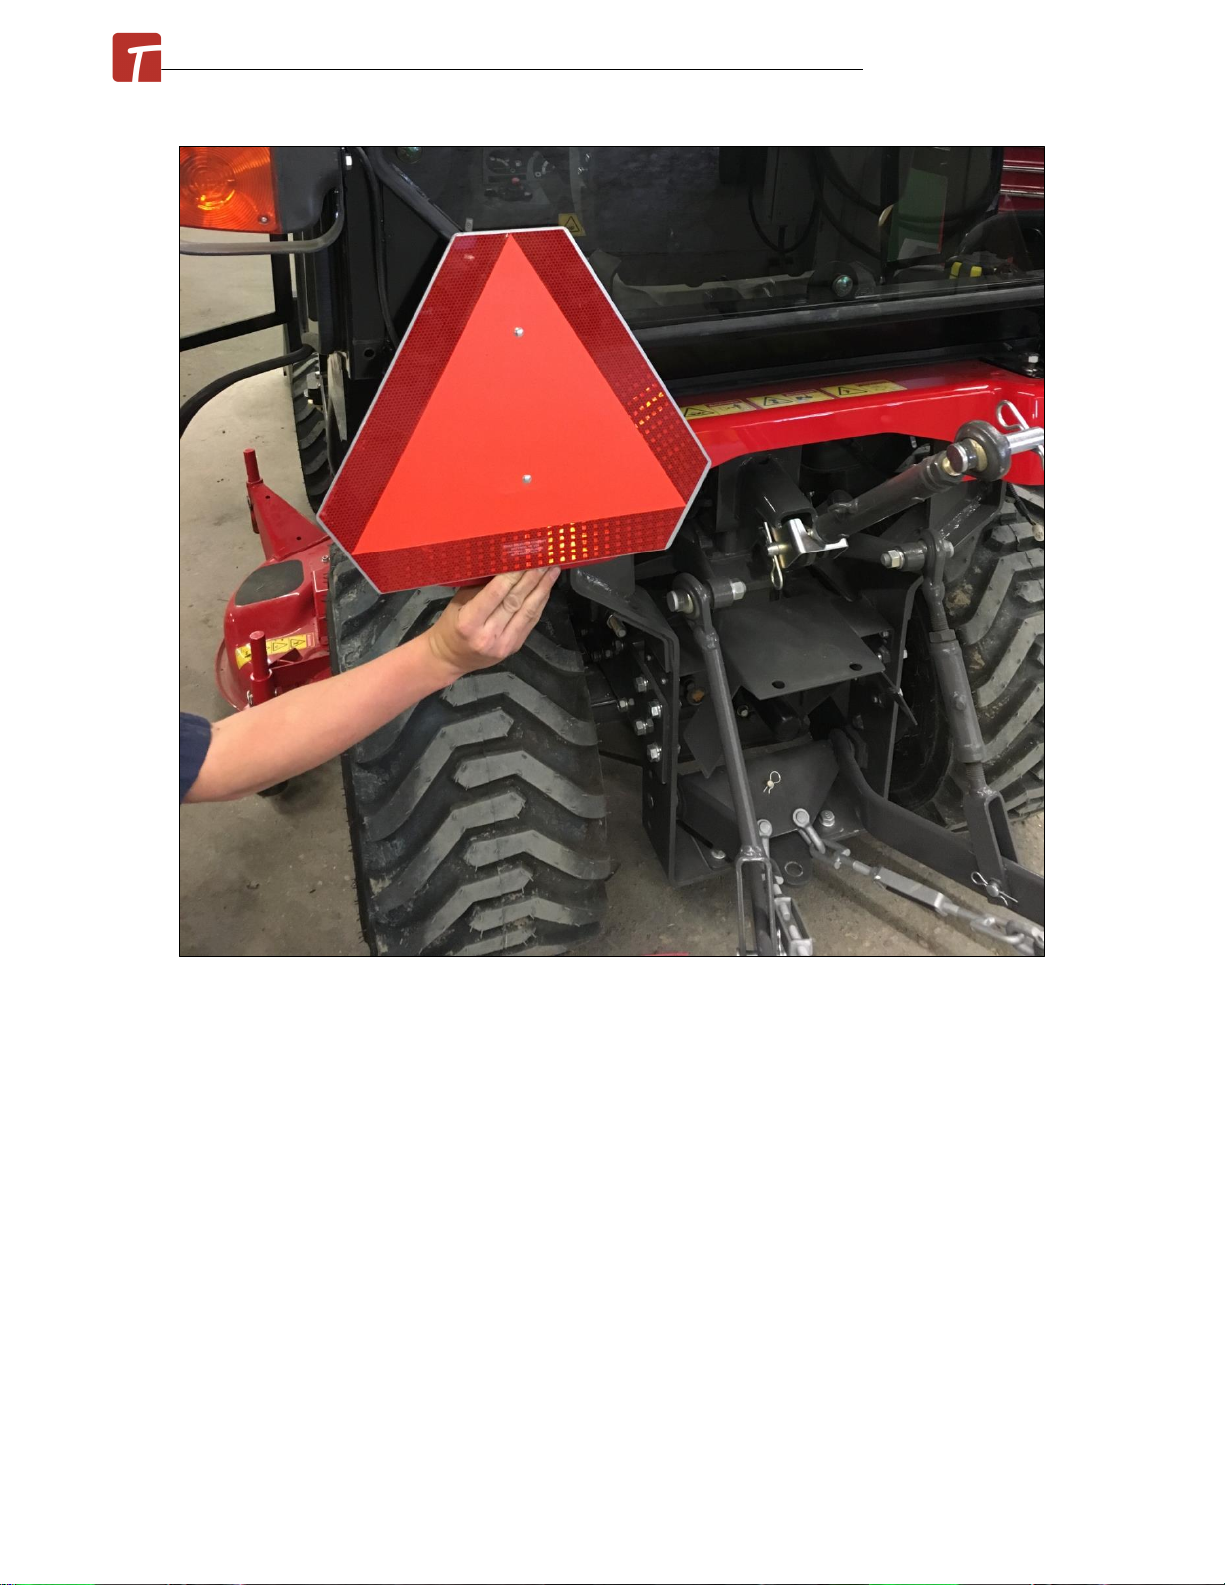
. Un-bolt and remove the SMV sign from the 2-post ROPS.
. Position the SMV sign mount against the left rear tractor fender and mark the location of the
two holes that are in the SMV sign bracket. Line the sign up with the bottom of the fender as
shown.
June 2021© Massey GC1725M ROPS Cab Installation Manual

. Drill two 1/4" holes through the fender.
. Fasten the SMV retainer bracket to the fender with the provided 1/4" x 1" step bolts and
flange nuts provided. It will be necessary to bend the sign bracket in order to orient it
vertically.
June 2021© Massey GC1725M ROPS Cab Installation Manual
. Take the right pedal floormat and place on top of factory floormat on right side. Slide through
pedal slits and up front of cab. Use contact cement to secure floormat to the cab and to the
floormat.
June 2021© Massey GC1725M ROPS Cab Installation Manual

June 2021© Massey GC1725M ROPS Cab Installation Manual

Massey Ferguson GC1725M Cab
*Shown with optional equipment *
Please note: Cab is shown with optional accessories.
Massey GC1725m Cab
This ROPS cab is designed and built to fit the Masey Ferguson GC1712E and GC1725M
tractor.
Designed and Built by:
Tektite Manufacturing Inc:
427 Buffalo Street
P.O. Box 639
Winkler, MB
R6W 4A8
Canada
PH: 204-331-3463
Fax: 204-331-4159
www.tektite.ca
One year standard product warranty provided by Tektite.
June 2021© Massey GC1725M ROPS Cab Operation Manual
This manual suits for next models
1
Table of contents
Other Tektite Tractor Accessories manuals


