Tekvox Wunderbar User manual

www.tekvox.com
Wunderbar UHD All-In-One Conference Bar
All Rights Reserved
Version: 79068-WB_2020V1.0

www.tekvox.com
Preface
Read this user manual carefully before using the product. Pictures shown in this manual are for
reference only. Different product model specifications may vary.
This manual is only for operation instruction, please contact the local distributor for maintenance
assistance. The functions described in this version were updated October 2020. In order to continue
improving the product, we reserve the right to make function or parameter changes without notice or
obligation. Please refer to the dealers for the latest details.
FCC Statement
This equipment generates, uses and can radiate radio frequency energy and, if not installed and used
in accordance with the instructions, may cause harmful interference to radio communications. It has
been tested and found to comply with the limits for a Class A digital device, pursuant to part 15 of
the FCC Rules. These limits are designed to provide reasonable protection against harmful
interference in a commercial installation.
Operation of this equipment in a residential area is likely to cause interference, in which case the
user at their own expense will be required to take whatever measures may be necessary to correct
the interference.
Any changes or modifications not expressly approved by the manufacture would void the user’s
authority to operate the equipment.

www.tekvox.com
Table of Contents
1. Safety Precautions.......................................................................................................................4
2. Package List ................................................................................................................................5
3. Dimensions & Interface ................................................................................................................5
3.1 Dimensions..........................................................................................................................................5
3.2 Interface...............................................................................................................................................6
4. Product Introduction ....................................................................................................................7
4.1 Features...............................................................................................................................................7
5. Specifications & Installation.........................................................................................................9
5.1 Specifications......................................................................................................................................9
5.2 Installation .........................................................................................................................................10
5.2.1 Wall-Mount Instructions ..........................................................................................................10
5.2.2 Source Layout...........................................................................................................................11
6. Remote Control ..........................................................................................................................12
6.1 Remote Control Pairing ....................................................................................................................12
6.2 Remote Control Layout.....................................................................................................................13
6.3 Remote Control Operation................................................................................................................13
7. GUI Settings...............................................................................................................................14
7.1 Menu ..................................................................................................................................................14
7.2 Settings..............................................................................................................................................14
7.3 Noise Reduction................................................................................................................................15
7.4 Information........................................................................................................................................15
7.5 Restore Default .................................................................................................................................16
8. Maintenance & Troubleshooting.................................................................................................16
8.1 Maintenance......................................................................................................................................16
8.2 Troubleshooting................................................................................................................................16

www.tekvox.com
1. Safety Precautions
To ensure the best performance from the product, please read all instructions carefully before using
the device. Save this manual for further reference.
•Unpack the equipment carefully, and save the original box and packing material for possible
future shipment
•Follow basic safety precautions to reduce the risk of fire, electrical shock and injury to persons
•Do not dismantle the housing or modify the module (electrical shock or burn hazard)
•Using supplies or parts not meeting the products’ specifications may cause damage,
deterioration or malfunction
•Refer all servicing to qualified service personnel
•To prevent fire or shock hazard, do not expose the unit to rain, moisture or install this product
near water
•Do not put any heavy items on the product’s power cable
•Do not remove the housing of the device as opening or removing housing may expose you to
dangerous voltage or other hazards
•Install the device in a place with sufficient ventilation to avoid damage caused by overheating
•Keep the module away from liquids
•Spillage into the housing may result in fire, electrical shock, or equipment damage. If an object
or liquid falls or spills on to the housing, unplug the module immediately.
•Do not twist or pull by force ends of the optical cable. It can cause malfunction.
•Do not use liquid or aerosol cleaners to clean this unit. Always unplug the power to the device
before cleaning.
•Unplug the power cord when left unused for a long period of time
•Information on disposal for scrapped devices: do not burn or mix with general household
waste, please treat them as normal electrical wastes

www.tekvox.com
2. Package List
•Camera
•Power adapter
•Power cable
•Remote control
•USB cable
•Wall bracket
•User manual
Note: Please contact your distributor immediately if any damages or defects in the components are
found.
3. Dimensions & Interface
3.1 Dimensions
3.5”
Ø.39”
Ø2.42”
7.77”
23.66”
4.54”
5.25”
5.56”
4.54”

www.tekvox.com
3.2 Interface
No.
Description
1
DC 12V Interface
2
USB 3.0 Interface
3
Reset Button
4
HDMI Interface
5
USB 2.0 Interface

www.tekvox.com
4. Product Introduction
4.1 Features
Application
This product is specially designed for small and medium-sized meeting rooms, namely for huddle
rooms with 4 to 6 people.
All-in-one Design
The three-in-one design of a 4K ultra HD camera, beamforming microphone, and full-frequency
loudspeaker reduces wiring and allows for easier video communication.
Bluetooth 5.0
This product can be connected to mobile phone via Bluetooth as a microphone and speaker, and can
connect mobile phone calls to audio and video conferences.
4K UHD
The camera uses a 1/2.5 inch, 8.51M pixel high quality CMOS sensor for a 4K (3840x2160) @ 60fps
clear image, and is downward compatible with 1080P, 720P and other resolutions. It can meet the
needs of users for different video experiences, and can provide clearer, smoother, and more accurate
communication.
Wide Field-of-View (FoV)
With a 121° wide field of view (110° horizontal field of view), 5x zoom, optical lens customized for
conferences, and built-in electric head (horizontal and pitch ±15° motion range), there is no need to
worry about camera position as the camera will follow participants automatically.
Beamforming Microphone
The Beamforming (BF) microphone is built-in, with a pickup distance of ~20 feet. The low-distortion
transverse beamforming algorithm can direct the microphone directly to the speaker, which allows
for superior sound and clearer communication.
Audio 3A Algorithm
A Built-in audio 3A algorithm (AEC/AGC/ANS) can meet the communication needs of different room
layouts. Whether sitting at a conference table, sitting against a wall, or standing, users can expect a
comfortable calling experience.
Full Frequency Speaker
The full frequency Hi-Fi loudspeaker, with its professional acoustics design, reduces noise
interference and provides an outstanding sound quality.

www.tekvox.com
Plug and Play Type
Through the plug-and-play USB interface, connecting to the computer or business display screen is
easier than ever. Less wiring and convenient video communication makes the device easy to set up
and use.
Intelligent Analysis
A Built-in intelligent analysis algorithm listens to the speaker’s position, while automatic participant-
framing and speaker tracking switches the speaker’s screen to ensure that the speaker is always
clearly in the picture.
Rich Interfaces
Supports HDMI 2.0 and USB 3.0 audio/video outputs simultaneously.
Easy Installation
Flexible installation options for countertops, walls, and TV/display screens are available for quick
installation and deployment.

www.tekvox.com
5. Specifications & Installation
5.1 Specifications
Camera
Video Resolution
4K@60fps, 4K@30fps, 1080P@60fps, 1080P@30fps, 720P@60fps,
720P@30fps, etc
Sensor
1/2.5 inch, CMOS, 8.51M pixel
Lens
120° (DFOV), 110° (HFOV)
5x digital zoom
Pan Tilt: ±15°
PTZ
MPT + EPTZ
Digital Noise Reduction
2D & 3D Digital Noise Reduction
Signal-to-Noise Ratio
(SNR)
≥55dB
Back-Light
Compensation (BLC)
Supported
Audio
Full-Frequency Speaker
96dB Sound Pressure Level (SPL) @ 0.5m
Microphone Array
Beamforming microphone
Pick-up distance: Up to 20 feet (6m)
USB Features
Connection Type
USB 3.0 (compatible with USB 2.0)
Video Compression
Format
YUY2 / MJPG / NV12
USB Audio
32k sampling rate
Supports UAC 2.0
USB Communication
Protocol
UVC 1.1 ~ 1.5
UVC PTZ Control
Supported
Input/Output Interface
1 HDMI (19-pin, Female, Version 2.0)
1 USB 3.0 (Type-C)
1 USB 2.0 (Type-A)
Power Input
DC 12V, 1.5A (max)
General
Control Method
2.4G Remote Controller
Installation Method
Desktop, wall, TV, or other display device
Operating Temperature
32 ~ 104°F (0 ~ 40°C)
Storage Temperature
-40 ~ 140°F (-40 ~ 60°C)
Product Dimensions
23.7” (601mm) x 5.6” (141mm) x 4.5” (151mm)
Product Weight
5.5 lbs. (2.5kg)
Specifications are subject to change without notice

www.tekvox.com
5.2 Installation
5.2.1 Wall-Mount Instructions

www.tekvox.com
5.2.2 Source Layout
(Supplied)
(Supplied)
(Not Supplied)
(Not Supplied)
(Supplied)

www.tekvox.com
6. Remote Control
6.1 Remote Control Pairing
Note: The remote control has been paired with the device when it leaves the factory, and it can be used
normally without special operations. If the remote control needs to be re-paired, users can follow the
steps below.
Step 1
Connect the camera to the power supply and wait for the camera initialization to complete. The
camera will then output video normally.
Step 2
Clear the paired status of the remote control. Then, press and hold the remote-control pairing & OK
buttons at the same time, and continue to hold until the remote control indicator shows a steady red
light. Release the buttons to successfully clear the remote control paired status.
Step 3
Trigger the camera to enter remote-control pairing mode. Use a paperclip to press the camera’s
reset button, and the camera's LED light will turn blue when it enters the pairing mode.
Note: Each time you enter pairing mode, there will only be a 15s operation time. After the timeout, the
pairing mode will automatically exit and the LED will no longer be blue. If you need to pair again, you
will need to press the reset button again to enter the remote control pairing mode.
Step 4
To begin pairing, take the remote control whose pairing status has been cleared, and then press and
hold the pairing buttons on the remote control and wait for matching to finalize. When pairing is
successful, the camera's LED light will turn blue and flash on and off. After pairing is successful, the
camera can be operated normally via the remote control. If the pairing fails, repeat steps 2-4 until
matching is successful.

www.tekvox.com
6.2 Remote Control Layout
6.3 Remote Control Operation
No.
Name
Function Description
1
Camera Power
Press to turn camera on or off
2
Call
Answer/initiate call/enter call interface
3
Camera Control
Press to pan or tilt camera in the direction indicated by the
arrow; press [OK] button to return to the middle position
4
Volume
+ Volume up, - Volume down
5
Return
After pressing, the OSD menu returns to the previous menu
6
Track Mode
Press to turn auto-tracking mode on or off
7
Preset 1
Long press to set preset 1, short press to call preset 1
8
Preset 2
Long press to set preset 2, short press to call preset 2
9
Standby
Long press to standby, short press to return to normal
10
Hang Up
Hang up the call/Leave the meeting
11
OK
Confirm current selection
12
Microphone Mute
Turn the microphone on/off
13
Zoom
Zoom in [+]; zoom out [-]
14
Speaker Mute Key
Turn the speaker on/off
15
Menu Key
Press to enter or exit the OSD menu
16
Remote Control Pairing Key
Press to begin wireless pairing
17
Bluetooth Key
Turn Bluetooth on/off

www.tekvox.com
7. GUI Settings
7.1 Menu
Press [MENU] key; the screen will display menu content.
7.2 Settings
Move the cursor to "Setting" in the main menu, and press [OK] to enter the Setting page, as shown in
the below figure.
Language: English, Chinese (Default: English)
EPTZ: On, Off (Default: On)
Zoom Limit: 1.5x, 2x, 3x, 4x, 5x (Default: 3x)
HDMI Format: 1080P30, 1080I60, 4K@30, 4K@30 PIP (Default: 1080P30)
Tracking Mode: Off, Participants, Speaker (Default: Off)
Tracking Effect: Smooth, Instantaneous (Effective only in Participants or Speaker of Tracking Mode)
Tracking Speed: Slow, Normal, Fast (Effective only in Participants or Speaker of Tracking Mode)

www.tekvox.com
7.3 Noise Reduction
Move the cursor to "Noise Reduction" in the main menu, and press [OK] to enter the Noise Reduction
page, as shown in the below figure.
2D NR: Close, Auto, 1 ~ 5 (Default: Auto)
3D NR: Close, Auto, 1 ~ 8 (Default: 2)
7.4 Information
Move the cursor to "Information" in the main menu, and press [OK] to enter the Information page, as
shown in the below figure.

www.tekvox.com
7.5 Restore Default
Move the cursor to "Restore Default" in the main menu, and press [OK] to enter the Restore Default
page, as shown in the below figure.
Yes / No: Confirm or cancel restore factory settings.
8. Maintenance & Troubleshooting
8.1 Maintenance
•If the camera will not be used for a long time, disconnect the power switch after use.
•Use a soft cloth or cotton paper to remove dust from the camera housing.
•When cleaning the camera lens, use a dry soft cloth to wipe. If there is substantial dust, use a
neutral cleaning agent. Do not use a strong or corrosive detergent, as it may scratch the lens
and affect image quality.
•Avoid aiming the camera at particularly bright light sources, such as sunlight, lights, etc.
•Do not use the camera under unstable lighting conditions as it will cause the image to flash.
•Do not use around facilities that transmit high-power radio waves, such as a television or radio-
transmitting station.
8.2 Troubleshooting
If the video has jittering:
•Check whether the camera is installed in a stable position
•Check whether there is vibrating equipment near the camera
Table of contents
Other Tekvox Conference System manuals
Popular Conference System manuals by other brands
Enabling Devices
Enabling Devices Basic Talk 4047B user guide
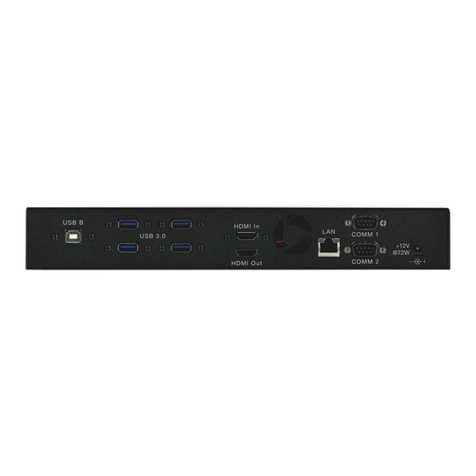
Pointmaker
Pointmaker CR-100 quick start guide
Yealink
Yealink MVC Series Deployment guide
Cisco
Cisco TelePresence IX5000 Quick start user guide
Adaptivation
Adaptivation WIRELESS PAL PAD instruction manual
TANDBERG
TANDBERG Codec C90, Codec C60, Codec C40 Administration guide
