Teledyne RCP2-1100 User manual

209351 REV B ECO 17314 08/27/2013
Redundant System Controllers
RCP2-1100/RCP2-1200
FPRC-1100/FPRC-1200
Operations Manual
Teledyne Paradise Datacom LLC Phone: (814) 238-3450
328 Innovation Blvd., Suite 100 Fax: (814) 238-3829
State College, PA 16803 USA Web: www.paradisedata.com
RCP2-1100, 1:1 Redundant System Controller
FPRC-1100, 1:1 Phase Combined System Controller
FPRC-1200, 1:2 Phase Combined System Controller
RCP2-1200, 1:2 Redundant System Controller

2 209351 REV B Operations Manual, Redundant System Controllers
© 2013 Paradise Datacom LLC
Printed in the USA
Teledyne Paradise Datacom, a Teledyne Telecommunications company, is a single source for high
power solid state amplifiers (SSPAs), Low Noise Amplifiers (LNAs), Block Up Converters (BUCs), and
Modem products. Operating out of two primary locations, Witham, United Kingdom, and State College,
PA, USA, Teledyne Paradise Datacom has a 20 year history of providing innovative solutions to enable
satellite uplinks, battlefield communications, and cellular backhaul.
Teledyne Paradise Datacom Teledyne Paradise Datacom
328 Innovation Blvd., Suite 100 2&3 The Matchyns, London Road, Rivenhall End
State College, PA 16803 USA Witham, Essex CM8 3HA United Kingdom
(814) 238-3450 (switchboard) +44 (0) 1376 515636
(814) 238-3829 (fax) +44 (0) 1376 533764 (fax)
Information in this document is subject to change without notice. The latest revision of this document
may be downloaded from the company web site: http://www.paradisedata.com.
No part of this document may be reproduced or transmitted in any form without the written permission of
Teledyne Paradise Datacom.
All rights are reserved in this document, which is property of Teledyne Paradise Datacom. This
document contains proprietary information and is supplied on the express condition that it may not be
disclosed, reproduced or transmitted in any form without the written permission of Teledyne Paradise
Datacom.
All other company names and product names in this document are property of the respective
companies.

Operations Manual, Redundant System Controllers 209351 REV B 3
Table of Contents .....................................................................................................................3
Section 1: General Information ...............................................................................................9
1.0 Introduction ...............................................................................................................9
1.1 Description ................................................................................................................9
1.2 Equipment Supplied..................................................................................................9
1.3 Specifications.......................................................................................................... 10
1.3.1 Outline Drawings......................................................................................10
1.4 Safety Considerations.............................................................................................11
1.4.1 High Voltage Hazards ..............................................................................11
1.4.2 High Current Hazards ..............................................................................11
1.4.3 Electrical Discharge Hazards ...................................................................12
Section 2: Description............................................................................................................13
2.0 Introduction .............................................................................................................13
2.1 Inspection................................................................................................................ 13
2.2 Mounting .................................................................................................................13
2.3 Storage and Shipment ............................................................................................ 13
2.4 Prime Power Connection (J1, J2) ........................................................................... 13
2.5 Cable Connections..................................................................................................14
2.5.1 Control Cable Connector (J3) - MS3112E16-23S....................................14
2.5.2 Serial Port, Main (J4) - DB9 (F)................................................................14
2.5.3 Serial Port, Local (J5) - DB9 (M) ..............................................................15
2.5.4 Program Port (J6) - DB25 (M) ..................................................................15
2.5.5 Parallel I/O Connector (J7) - DB37 (F).....................................................15
2.5.6 External Alarm Port (J8) - DB9 (F) [IO Board Version 001]......................17
2.5.7 Ethernet Port (J9) - RJ45 (F)....................................................................17
2.6 Removable Power Supply Modules ........................................................................18
2.6.1 24V Power Supply Module.......................................................................18
2.6.2 24V Power Supply Module, High Power option .......................................19
2.6.3 48V Power Supply Module.......................................................................20
Section 3: Front Panel Overview & Operation .....................................................................21
3.0 Introduction .............................................................................................................21
3.0.1 System Identification ...............................................................................21
3.0.2 Fault Indicators ........................................................................................21
3.0.3 Signal Path Mimic Display .......................................................................21
3.0.4 Amplifier Select Keys ..............................................................................22
3.0.5 Vacuum Fluorescent Display ..................................................................22
3.0.6 Main Menu Key .......................................................................................22
3.0.7 Local / Remote Key .................................................................................23
3.0.8 Auto / Manual Key ...................................................................................23
3.0.9 Display Navigation Keys .........................................................................23
3.0.10 Enter Key ..............................................................................................23
3.1 Local / Remote control ............................................................................................24
3.2 Methods of switching .............................................................................................. 24
3.2.1 Manual Mode ..........................................................................................24
Table of Contents

4 209351 REV B Operations Manual, Redundant System Controllers
3.2.2 Auto Mode ...............................................................................................24
3.2.3 Physically Rotating Transfer Switch ........................................................24
3.3 Local (Front Panel) Menu Structure........................................................................25
3.3.1 Sys Info ....................................................................................................26
3.3.1.1 Sys Info - Page 1.......................................................................27
3.3.1.2 Sys Info - Page 2 ......................................................................27
3.3.1.3 Sys Info - Page 3 .....................................................................28
3.3.1.4 Sys Info - Page 4 .....................................................................29
3.3.1.5 Sys Info - Page 5 .....................................................................29
3.3.1.6 Sys Info - Page 6 .....................................................................30
3.3.1.7 SSPA Subsystem Information - Pages 1-5...............................31
3.3.1.8 IP Info - Page 1 ........................................................................31
3.3.1.9 IP Info - Page 2 ........................................................................31
3.3.1.10 IP Info - Page 3 ......................................................................32
3.3.1.11 IP Info - Page 4 ......................................................................32
3.3.2 Serial Communication Parameters ..........................................................33
3.3.2.1 Protocol ................................................................................... 33
3.3.2.2 Baud Rate ...............................................................................33
3.3.2.3 Sys. Address ............................................................................34
3.3.2.4 Interface ...................................................................................34
3.3.2.5 IP Setup....................................................................................34
3.3.3 Operations Menu......................................................................................34
3.3.3.1 System ..................................................................................... 34
3.3.3.2 Buzzer ...................................................................................... 34
3.3.3.3 Control ......................................................................................35
3.3.3.4 Switching .................................................................................. 35
3.3.3.5 Priority .....................................................................................35
3.3.3.6 Stby. Select .............................................................................35
3.3.4 Fault Setup...............................................................................................35
3.3.4.1 MjrFaults ..................................................................................36
3.3.4.2 AuxFaults ................................................................................36
3.3.4.3 RFSw.Faults ............................................................................36
3.3.4.4 Fault Logic.................................................................................36
3.3.4.5 Fault Latch................................................................................36
3.3.5 Options Menu...........................................................................................37
3.3.5.1 Backup ....................................................................................37
3.3.5.2 Restore ....................................................................................37
3.3.5.3 Lamp Test ...............................................................................37
3.3.5.4 Password .................................................................................37
3.3.5.5 Reset .......................................................................................38
3.3.5.6 More ........................................................................................38
3.3.5.7 Fault Tolerance .......................................................................38
3.3.5.8 Sys ID ......................................................................................38
3.3.5.9 VFD Light .................................................................................38
3.3.5.10 SSPA .....................................................................................38
3.3.6 Calibration Menu ......................................................................................39
3.3.6.1 Flt. Window ..............................................................................39
3.3.6.2 LNA/LNB PS ............................................................................39
3.3.6.3 Calibrate ..................................................................................39
3.3.6.4 View LNA .................................................................................40

Operations Manual, Redundant System Controllers 209351 REV B 5
Section 4: System Setup & Control with RCP......................................................................41
4.0 Introduction .............................................................................................................41
4.1 Operation of 1:1 System with RCP2-1100 ..............................................................41
4.1.1 LNA / LNB 1:1 Redundant System Operation.........................................42
4.1.1.1 LNA/LNB Fault Tracking............................................................43
4.1.1.2 LNA / LNB Current Calibration ..................................................43
4.1.2 SSPA 1:1 Redundant System Operation ................................................. 44
4.1.2.1 External Alarm Tracking ............................................................44
4.2 Operation of 1:2 System with RCP2-1200 ..............................................................45
4.2.1 LNA / LNB 1:2 Redundant System Operation.......................................... 45
4.2.1.1 LNA/LNB Fault Tracking............................................................47
4.2.1.2 LNA / LNB Current Calibration ..................................................47
4.2.2 SSPA 1:2 Redundant System Operation ................................................. 48
4.2.2.1 External Alarm Tracking ............................................................48
4.3 Operation of 1:1 Fixed Phase Combined System with FPRC-1100 .......................49
4.4 Operation of 1:2 Fixed Phase Combined System with FPRC-1200 .......................50
4.5 RCP Remote Control of System SSPAs .................................................................51
4.5.1 Configuring the RCP for Remote Control Mode.......................................52
4.5.2 Using M&C features of RCP to control a SSPA system...........................54
4.5.2.1 Change Mute State ...................................................................54
4.5.2.2 Change Attenuation Level .........................................................54
4.5.2.3 Change Switch mute option value.............................................55
4.5.2.4 Units ..........................................................................................55
4.6 View SSPA System Info..........................................................................................56
4.7 Advanced system level troubleshooting with RCP..................................................57
4.7.1 Scenario 1 ................................................................................................ 57
4.7.2 Scenario 2 ................................................................................................ 58
Section 5: Theory of Operation.............................................................................................59
5.0 Design Philosophy ..................................................................................................59
5.0.1 Redundant Power Supplies......................................................................59
5.0.2 Digital Core Board....................................................................................60
5.0.3 I/O Board Assembly .................................................................................61
5.0.4 Vacuum Fluorescent Display ...................................................................61
5.0.5 Front Panel Mimic Display .......................................................................62
5.1 Control Cable Considerations ................................................................................. 62
Section 6: Maintenance & Troubleshooting.........................................................................65
6.0 Introduction .............................................................................................................65
6.1 Fuse Replacement.................................................................................................. 65
6.2 Firmware Programming ..........................................................................................66
6.2.1 Hardware Interface...................................................................................66
6.2.2 RCP Flash Upgrade .................................................................................66
6.3 Restoring Factory Pre-set Settings on RCP2/FPRC...............................................68
6.3.1 Automatic restore ..................................................................................... 68
6.3.2 Manual restore .........................................................................................68
6.4 Identifying and Replacing a Failed Power Supply...................................................69
6.4.1 Removing a Faulted Power Supply Module .............................................70
6.4.2 Installing a New Power Supply Module....................................................70

6 209351 REV B Operations Manual, Redundant System Controllers
Section 7: Remote Control Interface.....................................................................................71
7.0 Overview .................................................................................................................71
7.1 Remote Control - Parallel .......................................................................................72
7.1.1 Control Outputs .......................................................................................72
7.1.2 Control Inputs ..........................................................................................73
7.2 Serial Communication.............................................................................................74
7.2.1 Header Packet .........................................................................................74
7.2.1.1 Frame Sync Word .....................................................................74
7.2.1.2 Destination Address ..................................................................74
7.2.1.3 Source Address.........................................................................75
7.2.2 Data Packet..............................................................................................75
7.2.2.1 Protocol ID.................................................................................75
7.2.2.2 Request ID ................................................................................75
7.2.2.3 Command..................................................................................75
7.2.2.4 Data Tag....................................................................................76
7.2.2.5 Data Address / Error Status / Local Port Frame Length............ 77
7.2.2.6 Data Length...............................................................................78
7.2.2.7 Data Field ..................................................................................78
7.2.3 Trailer Packet ........................................................................................... 79
7.2.3.1 Frame Check Sequence............................................................79
7.2.4 Timing issues ...........................................................................................80
7.3 Accessing optional SSPA subsystem through Packet Wrapper technique.............81
7.4 Examples ................................................................................................................86
7.4.1 Example 1 ................................................................................................86
7.4.2 Example 2 ................................................................................................88
7.4.3 Example 3 ................................................................................................89
7.4.4 Example 4 ................................................................................................90
7.5 Terminal Mode Serial Protocol................................................................................91
7.6 Ethernet Interface ................................................................................................... 95
7.6.1 Overview ..................................................................................................95
7.6.2 IPNet Interface .........................................................................................95
7.6.2.1 General Concept .......................................................................95
7.6.2.2 Setting IPNet interface ..............................................................96
7.6.3 Using the RCP2 Web Interface ................................................................98
7.6.4 SNMP interface ......................................................................................100
7.6.4.1 Introduction..............................................................................100
7.6.4.2 SNMP MIB tree .......................................................................101
7.6.4.3 Description of MIB entities.......................................................105
7.6.4.4 Configuring RCP2 unit to work with SNMP protocol................106
7.6.4.5 Connecting to a MIB browser ..................................................107
Section 8: Maintenance Switch Controller.........................................................................109
8.0 Introduction ...........................................................................................................109
8.1 Operation Modes .................................................................................................109
8.1.1 Directing the Output Signal to the System Output .................................109
8.1.2 Directing the Output Signal to the Dummy Load ..................................109

Operations Manual, Redundant System Controllers 209351 REV B 7
Appendix A: Ethernet Interface Quick Set-Up ...................................................................111
Appendix B: Proper 10/100 Base-T Ethernet Cable Wiring ..............................................115
Appendix C: RCP Control with Paradise Datacom Universal M&C..................................119
Appendix D: Firmware Revision History ............................................................................123
Appendix E: Documentation................................................................................................125
Figures
Figure 1-1: Outline Drawing, RCP2-1100 Redundant System Controller ..................... 10
Figure 2-1: RCP2/FPRC-1100/1200 Rear Panel ..........................................................14
Figure 2-2: Rear panel view of J3, MS3112E16-23S....................................................14
Figure 2-3: Removable Power Supply Module .............................................................18
Figure 2-3: Removable Power Supply Module, High Power Option .............................19
Figure 2-5: 48V Removable Power Supply Module ......................................................20
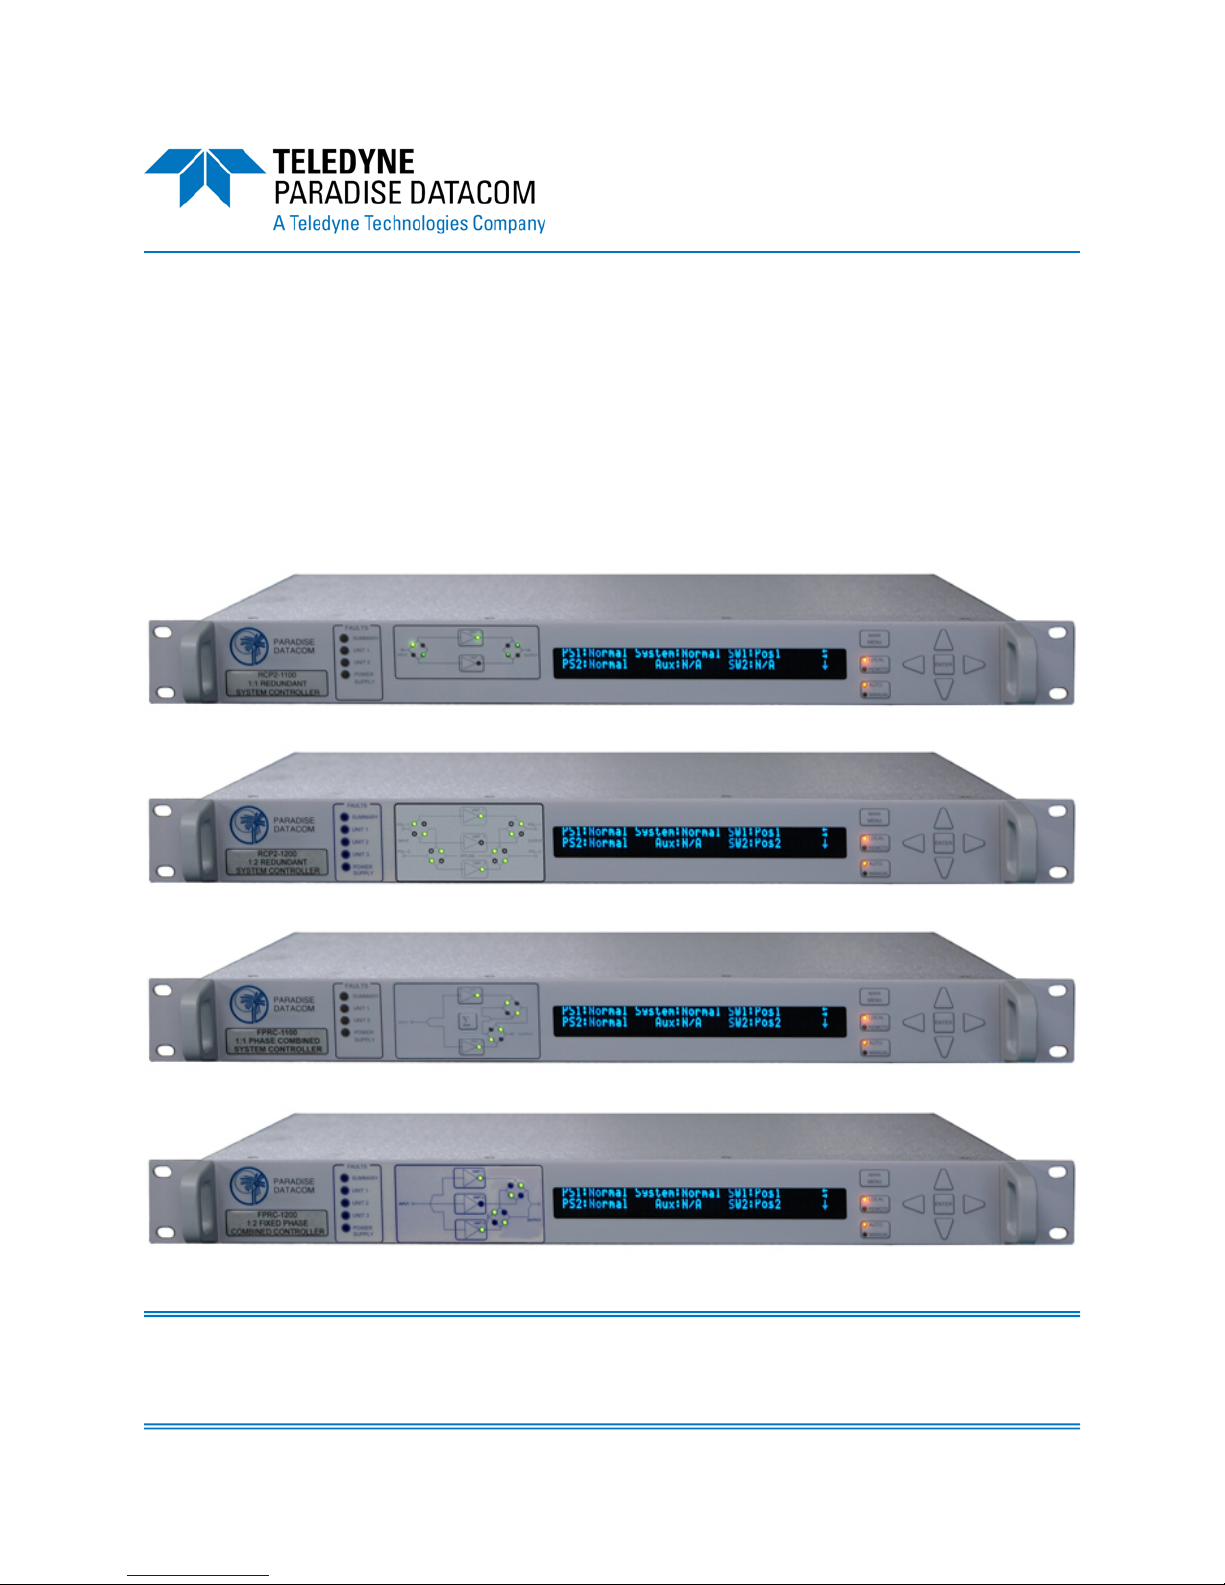
Figure 3-1: RCP2/FPRC Front Panel, showing RCP2-1200 Mimic Display..................21
Figure 3-2: Fault Indicators ...........................................................................................21
Figure 3-3: Signal Path Mimic Display .......................................................................... 22
Figure 3-4: Main Menu Initial Menu Selection...............................................................25
Figure 3-5: System Information Menu Structure ...........................................................26
Figure 3-6: Serial Communication Parameters Menu...................................................33
Figure 3-7: Operation Parameters Menu ......................................................................34
Figure 3-8: Fault Setup Parameters Menu....................................................................35
Figure 3-9: Options Parameters Menu..........................................................................37
Figure 3-10: Calibration Parameters Menu...................................................................39
Figure 4-1: Block Diagram, 1:1 Redundant System......................................................41
Figure 4-2: Indoor/Outdoor Components, 1:1 Redundant System ...............................42
Figure 4-3: Typical Schematic, 1:1 Redundant LNA System........................................43
Figure 4-4: Schematic, Typical 1:1 Redundant SSPA System .....................................44
Figure 4-5: Block Diagram, 1:2 Redundant System......................................................45
Figure 4-6: System Components, 1:2 Redundant LNA System.................................... 46
Figure 4-7: Schematic, Typical 1:2 Redundant LNA System........................................47
Figure 4-8: Block Diagram, 1:2 SSPA Redundant System ...........................................48
Figure 4-9: Block Diagram, 1:1 Fixed Phase Combined System..................................49
Figure 4-10: Block Diagram, 1:2 Fixed Phase Combined System................................50
Figure 5-1: Block Diagram, Power Supply Configuration..............................................60
Figure 5-2: Block Diagram, RCP Digital Core Board ....................................................61
Figure 5-3: Cable Losses to Transfer Switch................................................................63
Figure 6-1: Controller Internal Part Identification and Rear Panel Fuse Location.........65
Figure 6-2: Firmware Upgrade Terminal Window .........................................................67
Figure 7-1: RCP2 Remote Control Interface Stack.......................................................71
Figure 7-2: Parallel I/O Form C Relay ..........................................................................72
Figure 7-3: Opto-Isolated Parallel I/O Input .................................................................. 73
Figure 7-4: Basic Communication Packet.....................................................................74
Figure 7-5: Header Sub-Packet .................................................................................... 74
Figure 7-6: Data Sub-Packet ........................................................................................ 75
Figure 7-7: Trailer Sub-Packet...................................................................................... 79
Figure 7-8: Packet Wrapper access to SSPA subsystem.............................................80
Figure 7-9: Connection Description ..............................................................................93
Figure 7-10: Communication Port Selection ................................................................. 93
Figure 7-11: Communication Properties .......................................................................93
Figure 7-12: ASCII Setup..............................................................................................93

8 209351 REV B Operations Manual, Redundant System Controllers
Figure 7-13: Terminal Mode Example...........................................................................94
Figure 7-14: UDP Redirect Frame Example .................................................................96
Figure 7-15: Web interface screen................................................................................98
Figure 7-16: GetIF Application Parameters Tab .........................................................107
Figure 7-17: Getif MBrowser window, with update data in output data box................107
Figure 8-1: Press POS1 key to direct signal to system output....................................109
Figure 8-2: Press POS2 key to direct signal to dummy load ......................................109
Figure A-1: TCP/IP Properties Window ......................................................................111
Figure B-1: Modular Plug Crimping Tool.....................................................................115
Figure B-2: Transmission Line ....................................................................................115
Figure B-3: Ethernet Cable Pin-Outs ..........................................................................116
Figure B-4: Ethernet Wire Color Code Standards.......................................................117
Figure B-5: Wiring Using 568A Color Codes ..............................................................117
Figure B-6: Wiring Using 568A and 568B Color Codes ..............................................117
Figure C-1: New RCP2 Dialog Window ......................................................................119
Figure C-2: Status Window ......................................................................................... 120
Figure C-3: Faults Window .........................................................................................120
Figure C-4: Settings Window ......................................................................................121
Figure C-5: IP Setup Window .....................................................................................121
TablesTable 2-1: J3 Switch Connector, MS3112E16-23S ......................................................14
Table 2-2: Main Serial Port Pin Out ..............................................................................15
Table 2-3: Local Serial Port Pin Out .............................................................................15
Table 2-4: Parallel I/O Signals ......................................................................................16
Table 2-5: External Alarm Port Pin Out.........................................................................17
Table 2-6: Ethernet Port (J9) pin outs...........................................................................17
Table 4-1: Compact Outdoor SSPA Wiring................................................................... 52
Table 4-2: Rack Mount SSPA Wiring............................................................................53
Table 4-3: vBUC Wiring ................................................................................................53
Table 5-1: Commonly Used Waveguide Transfer Switches .........................................62
Table 5-2: Maximum Cable Length for Selected Switches (Single Switch Systems)....63
Table 7-1: Command Byte Values ................................................................................76
Table 7-2: Data Tag Byte Values..................................................................................77
Table 7-3: Error Status Byte Values .............................................................................78
Table 7-4: Request Frame Structure ............................................................................81
Table 7-5:. Response Frame Structure.........................................................................82
Table 7-6: System Settings Data Values ......................................................................83
Table 7-7: System Condition Data Values ....................................................................84
Table 7-8: System Threshold Data Values ...................................................................85
Table 7-9: ADC (Analog-Digital Converter) Addressing................................................85
Table 7-10: OSI Model for RM SSPA Ethernet IP Interface .........................................97
Table 7-11: Detailed Settings......................................................................................102
Table 7-12: Detailed Thresholds................................................................................. 103
Table 7-13: Detailed Conditions..................................................................................104
Table D-1: Firmware revision history ..........................................................................123

Operations Manual, Redundant System Controllers 209351 REV B 9
Section 1: General Information
1.0 Introduction
This section provides the general information for the Teledyne Paradise Datacom LLC
line of Redundant Control Panels. The RCP2-1100 and RCP2-1200 are used for 1:1
and 1:2 redundant systems, respectively. The FPRC-1100 and FPRC-1200 are used
for Phase Combined Solid State Power Amplifier (SSPA) systems.
This section describes the supplied equipment and safety precautions.
1.1 Description
The RCP2/FPRC controller is used to monitor and control amplifiers configured in 1:1
and 1:2 redundant systems. The RCP2-1100 and FPRC-1100 controllers provide
control of two amplifiers and their corresponding transfer switch. The RCP2-1200 and
FPRC-1200 controllers monitor and control three amplifiers and two switches.
The RCP/FPRC Series of redundant controller can be used in LNA, LNB, and SSPA
systems as well as frequency converter systems. A mimic display on the front panel
indicates the RF path and the fault status of the equipment. User interface and control
is provided in three forms:
• Front Panel, Local Control
• 37 pin Parallel Control Port with Contact Closures and Opto-Isolated Inputs
• Serial Data Control via RS232 or RS485 (4-wire)
Additional features include:
• Universal Input, Power Factor Corrected Power Supply
• User Friendly Front Panel LCD Display for Local Monitor & Control
• Dual AC Mains Entries with removable power supplies.
1.2 Equipment Supplied
The following equipment is supplied with each unit:
• The RCP2/FPRC Redundant Controller
• (2) IEC Line Cord Sets
• Redundant Controller Operations Manual

10 209351 REV B Operations Manual, Redundant System Controllers
Optional Equipment includes:
• Rack Slides
• 100 ft. (30 m ) Control Cable
• Switch Plate Mating Connector
• DC Operation
1.3 Specifications
Refer to the specification sheets in Appendix E for complete specifications on the
RCP2/FPRC Redundant System Controllers.
1.3.1 Outline Drawings
Figure 1-1 shows an outline drawing of an RCP2-1100 redundant controller. The
outline drawings for the RCP2-1200 and FPRC units are the same in dimension, with
differences only in the signal path mimic display and the number of fault indicators.
Figure 1-1: Outline Drawing, RCP2-1100 Redundant System Controller

Operations Manual, Redundant System Controllers 209351 REV B 11
1.4 Safety Considerations
Potential safety hazards exist unless proper precautions are observed when working
with this unit. To ensure safe operation, the user must follow the information, cautions
and warnings provided in this manual as well as the warning labels placed on the unit.
1.4.1 High Voltage Hazards
High Voltage for the purpose of this section is any voltage in
excess of 30 volts. Voltages above this value can be hazardous
and even lethal under certain circumstances. Care should be tak-
en when working with devices that operate at high voltage.
• All probes and tools that contact the equipment should be
properly insulated to prevent the operator from coming in contact with the voltage.
• The work area should be secure and free from non-essential items.
• Operators should never work alone on high voltage devices. There should always
be another person present in the same work area to assist in the event of an
emergency.
• Operators should be familiar with procedures to employ in the event of an
emergency, i.e., remove all power, CPR, etc.
An AC powered unit will have 115 VAC or 230 VAC entering through the AC power
connector. Caution is required when working near this connector, the AC circuit break-
er, or the internal power supply.
1.4.2 High Current Hazards
Many high power devices are capable of producing large surges
of current. This is true at all voltages, but needs to be
emphasized for low voltage devices. Low voltage devices provide
security from high voltage hazards, but also require higher
current to provide the same power. High current can cause injury
from burns and explosion. The following precautions should be
taken on devices capable of discharging high current:
• Remove all conductive personal items (rings, watches, medals, etc.)
• The work area should be secure and free of non-essential items.
• Wear safety glasses and protective clothing.
• Operators should never work alone on high risk devices. There should always be
another person present in the work area to assist in the event of an emergency.
• Operators should be familiar with procedures to employ in the event of an
emergency, i.e., remove all power, CPR, etc.

12 209351 REV B Operations Manual, Redundant System Controllers
1.4.3 Electrical Discharge Hazards
A spark can not only create ESD reliability problems, it can also
cause serious safety hazards. The following precautions should
be taken when there is risk of electrical discharge:
• Follow all ESD guidelines
• Remove all flammable material and solvents from the area.
• All probes and tools that contact the equipment should be properly insulated to
prevent electrical discharge.
• The work area should be secure and free from non-essential items.
• Operators should never work alone on hazardous equipment. There should always
be another person present in the same work area to assist in the event of an
emergency.
• Operators should be familiar with procedures to employ in the event of an
emergency, i.e., remove all power, CPR, etc.

Operations Manual, Redundant System Controllers 209351 REV B 13
2.0 Introduction
This section provides information for the initial inspection, installation, and external
connections for the RCP2/FPRC series redundant system controllers.
2.1 Inspection
When the unit is received, an initial inspection should be completed. First ensure that
the shipping container is not damaged. If it is, have a representative from the shipping
company present when the container is opened. Perform a visual inspection of the
equipment to make sure that all items on the packing list are enclosed. If any damage
has occurred or if items are missing, contact:
Teledyne Paradise Datacom LLC
328 Innovation Blvd., Suite 100
State College, PA 16803 USA
Phone: +1 (814) 238-3450
Fax: +1 (814) 238-3829
2.2 Mounting
The Teledyne Paradise Datacom Redundant Control Panel is designed to be mounted
in a standard EIA 19 inch equipment rack. The depth of the chassis, excluding rear
panel connectors, is 13.19 inches (335 mm). The height of the RCP2/FPRC chassis is
1.7 inches (44 mm) or 1 rack unit. Optional 22 inch (559 mm) rack slides with
extensions are available.
2.3 Storage and Shipment
To protect the RCP2/FPRC during storage or shipping, use high quality commercial
packing methods. Reliable commercial packing and shipping companies have the
facilities and materials to adequately repack the equipment.
2.4 Cable Connections
The RCP2/FPRC controller has a wide range of I/O interconnections available at the
rear panel. The controller rear panel is shown in Figure 2-1.
Section 2: Description
Figure 2-1: RCP2/FPRC-1100/1200 Rear Panel

14 209351 REV B Operations Manual, Redundant System Controllers
2.4.1 Control Cable Connector (J3) - MS3112E16-23S
The primary connection between the controller and the LNA/LNB (Low Noise Amplifier/
Low Noise Block Converter) switch plate or SSPA (Solid State Power Amplifier) switch
assembly is through J3. The connector is a 23-pin circular connector, type MS3112E16
-23S (See Figure 2-2 and Table 2-1). For external waveguide switches, a standard
100 ft. (30m) cable, L201061 should be used.
2.4.2 Serial Port, Main (J4) - DB9 (F)
The main serial port is for connection with any host computer. This port contains both
RS-232 and RS-485 communication in half duplex. For convenience a set of Form C
relay contacts are available at this port as a Service Request. The Service Request is
essentially a Summary Alarm for any system faults that occur. The baud rate and other
communication parameters are selectable via the front panel menu.
The pin-out is shown in Table 2-2. Note that the pin-out is standard DTE; a null modem
is not required when connecting to a standard PC serial port.
If required, a 120 ohm RS-485 termination resistor is provided at pin 9. It should be
connected to pin 4 to provide a 120 ohm termination on the RS-485 bus.
Figure 2-2: Rear
panel view of J3,
MS3112E16-23S.
Pin Function Pin Function
L Power Supply #1 +13-17 VDC, 900mA
or +26V, 1.5A (-HP version only) F Switch Common, +26 VDC, 5A max
J Power Supply #2 +13-17 VDC, 900mA
or +26V, 1.5A (-HP version only) H Switch Common, +26 VDC, 5A max
G Power Supply #3 +13-17 VDC, 900mA
or +26V, 1.5A (-HP version only) T Switch #2, Position 1 (Rx)
E Switch Common, +26 VDC, 5A max V Switch #2, Position 1 (Rx) (primary)
B AMP Support GND N Switch #2, Position 2 (Rx)
D Switch Common, +26 VDC, 5A max R Switch #2, Position 2 (Rx) (primary)
W Switch #1, Position 1 (Tx) (primary) A AMP Support GND
U Switch #1, Position 1 (Tx) C AMP Support GND
P Switch #1, Position 2 (Tx) K Switch Common, +26 VDC, 5A max
S Switch #1, Position 2 (Tx) (primary) M Switch Common, +26 VDC, 5A max
Table 2-1: J3 Switch Connector, MS3112E16-23S
Table 2-2: Main Serial Port (J4) Pin Out
Function Pin Notes
RS-485 TX+ 1
RS-232 Out or RS-485 TX- 2
RS-232 In or RS-485 RX- 3
RS-485 RX+ 4
Ground 5
Service Request 1 6 Closed on Fault
Service Request 2 8 Open on Fault
Service Request Common 7 Form C Common
Termination (120 Ohm) 9 Connect to pin 4 to terminate unit on end of bus

Operations Manual, Redundant System Controllers 209351 REV B 15
2.4.3 Serial Port, Local (J5) - DB9 (M)
The local serial port is used to support special transceiver systems and remote control
panels. The baud rate of this port is fixed at 9600 Baud and cannot be changed. J5 is
permanently configured for RS-485 half duplex communication. Table 2-3 details the
local serial port pin-out.
2.4.4 Program Port (J6) - DB25 (M)
The program port allows for flash firmware upgrades of the RCP controller. Using the
Teledyne Paradise Datacom Flash Upgrade software and a connection between the
PC’s printer port and J6 allows the RCP firmware to be easily upgradeable. The
procedures for performing firmware upgrades is covered in Section 6, Maintenance.
2.4.5 Parallel I/O Connector (J7) - DB37 (F)
The RCP controller has a full compliment of parallel monitor and control lines. A 37-pin
D sub-style connector is used for the parallel I/O signals, which are detailed in Table
2-4. Ten Form-C relays are used for converter, switch position, and mode control.
Each Form-C contact has a rating of 30 VDC @ 0.5 A, 110 VDC @ 0.3 A, and 125
VAC @ 0.5 A. The inputs and ground pins are isolated from the rest of the unit’s cir-
cuitry. Inputs are activated by pulling it down to the isolated ground pin. In order to fully
utilize the built-in inputs protection, it is recommended to keep the input’s ground iso-
lated from the chassis ground.
Table 2-3: Local Serial Port (J5) Pin Out
Function Pin Notes
RS-485 RX+ 1
RS-485 RX- 2
RS-485 TX- 3
RS-485 TX+ 4
Ground 5
Termination (120 Ohm) 9 Connect to pin 1 to terminate unit on end of bus

16 209351 REV B Operations Manual, Redundant System Controllers
Table 2-4: Parallel I/O Signals
Identification Signal Pin Function Notes
Amp 1 Alarm Output
1 Closed on Fault Relay Contacts: 30VDC @ 0.5A
20 Common
2 Open on Fault
Amp 2 Alarm Output
21 Closed on Fault Relay Contacts: 30VDC @ 0.5A
3 Common
22 Open on Fault
Amp 3 Alarm Output
4 Closed on Fault
23 Common
5 Open on Fault
Auto / Manual Mode Output
24 Closed on Manual
6 Common
25 Closed on Auto
Local / Remote Mode Output
7 Closed on Local
26 Common
8 Closed on Remote
Switch #1 Position Output
27 Switch #1, Position 1
9 Common
28 Switch #1, Position 2
Switch #2 Position Output
10 Switch #2, Position 1
29 Common
11 Switch #2, Position 2
Power Supply #1
Alarm Output
30 Closed on Fault
12 Common
31 Open on Fault
Output
13 Closed on Fault
32 Common
14 Open on Fault
Priority Setting Output
33 Closed on Priority 2
15 Common
34 Closed on Priority 1
Fault Clear Input 37 Ground to Activate 5mA max current on all inputs
Priority Select Input 17 Ground to Activate Toggle Function
Auto / Manual Input 16 Ground to Activate Toggle Function; Alt Funct.: Ext. Mute Input
Amp 3 Standby Input 36 Ground to Activate
Amp 2 Standby Input 35 Ground to Activate
Amp 1 Standby Input 18 Ground to Activate
Inputs Ground (isolated) Common 19
Power Supply #2
Alarm

Operations Manual, Redundant System Controllers 209351 REV B 17
2.4.6 External Alarm Port (J8) - DB9 (F) [IO Board Version 001]
An external alarm port is provided to allow maximum flexibility of configurations. This
allows the user to interface with the alarm output of other equipment into the RCP
controller. Inputs are protected against ESD of ±15 kV using the Human Body model;
against ESD of ±8kV using the Contact Discharge method specified in IEC1000-4-2;
and against ESD of ±15 kV using the Air Gap method described in IEC1000-4-2. Table
2-5 shows the external alarm pin-out.
2.4.7 Ethernet Port (J9) - RJ45 (F)
This is a RJ45 connector with integrated magnetics and LEDs. This port becomes the
primary remote control interface when the Interface option is selected to “IPNet” as
described in Section 7.6.2.2. This feature allows the user to connect the RCP to a
10/100 Base-T office Local Area Network and have full-featured Monitor & Control
functions through a web interface. See Table 2-6 for Ethernet pin outs.
Note: IP address, Gateway address, Subnet mask, IP port and IP Lock
address all need to be properly selected prior to first use (see Appendix B
for details).
LED lamps on the connector indicate network status. A steady Green light indicates a
valid Ethernet link; a flashing Yellow LED indicates data transfer activity (on either the
Transmit and Receive paths).
Table 2-6: Ethernet Port (J9) pin outs
Pin # Function / Description
1 TX+
2 TX-
3 RX+
6 RX-
4,5,7,8 GND
Table 2-5: External Alarm Port (J8) Pin Out
Function Pin Notes
External Alarm 1 1
Closure to Ground, 5mA max short circuit current, 5 VDC open circuit
voltage
External Alarm 2 2
External Alarm 3 3
Ground 4,8,9
Auxiliary Alarm 1 5 Closure to Ground, 5mA max short circuit current, 5 VDC open circuit
voltage
Auxiliary Alarm 2 6
Auxiliary Alarm 3 7

18 209351 REV B Operations Manual, Redundant System Controllers
2.5 Prime Power Connection (J1, J2)
Two separate removable power supplies are provided for fully redundant operation.
Either of the two supplies is capable of operating the system and its associated switch-
es. Two AC power connectors are provided on the rear panel (J1,J2).
2.6 Removable Power Supply Modules
The RCP unit has a redundant power supply array consisting of two modules. A failed
power supply module may be removed from the RCP chassis by loosening the two
captured thumbscrews and sliding the module out of the chassis, then unplugging the
quick-disconnect power pole connectors.
2.6.1 24V Power Supply Module
Figure 2-3 shows an outline drawing of a power supply module.
The following list comprises the specifications for the standard power supply module:
Plug: IEC, 250V, 10A, Male plug with wire-form AC Cable Clamp
Fuse: 2 Amp 5x20mm
Power Supply: 85-264 V input, 28V output, 175W
Connector to RCP chassis: Quick-connect Power pole
See Section 6.4 for directions on identifying and replacing a failed power supply
module.
Figure 2-3: Removable Power Supply Module

Operations Manual, Redundant System Controllers 209351 REV B 19
2.6.2 24V Power Supply Module, High Power option
Figure 2-4 shows an outline drawing of a power supply module for units utilizing the
High Power (-HP) option.
The following list comprises the specifications for the standard power supply module:
Plug: IEC, 250V, 10A, Male plug
Fuse: 2 Amp 5x20mm
Power Supply: 85-264 V input, 28V output, 175W
Fan: 40mm, 24V, 4.9 CFM
Connector to RCP chassis: Quick-connect Power pole
See Section 6.4 for directions on identifying and replacing a failed power supply
module.
Figure 2-4: Removable Power Supply Module, High Power option

20 209351 REV B Operations Manual, Redundant System Controllers
2.6.3 48V Power Supply Module
Figure 2-5 shows an outline drawing of a 48V power supply module.
The following list comprises the specifications for the 48V power supply module:
Plug: MS3112E10-6P Circular MIL connector, 6-pin (MS3116F10-6S mating)
Circuit Breaker: 6 Amp
Power Supply: 48V, 150W
Connector to RCP chassis: Quick-connect Power pole
See Section 6.4 for directions on identifying and replacing a failed power supply
module.
Figure 2-5: 48V Removable Power Supply Module
Other manuals for RCP2-1100
2
This manual suits for next models
3
Table of contents
Other Teledyne Recording Equipment manuals
Popular Recording Equipment manuals by other brands

TC Electronic
TC Electronic Studio Konnekt 48 user manual

Kentec Electronics
Kentec Electronics Vizulinx K85000 quick start guide

TDK-Lambda
TDK-Lambda HFE1600 SERIES user manual

Fortinet
Fortinet FIM-7921F Guide

RedPlate
RedPlate TweedyVerb+ Operation manual

Feig Electronic
Feig Electronic OBID ID RW02.ABCD-A Mounting instruction