Telemotive AG blue PiraT2 Installation manual
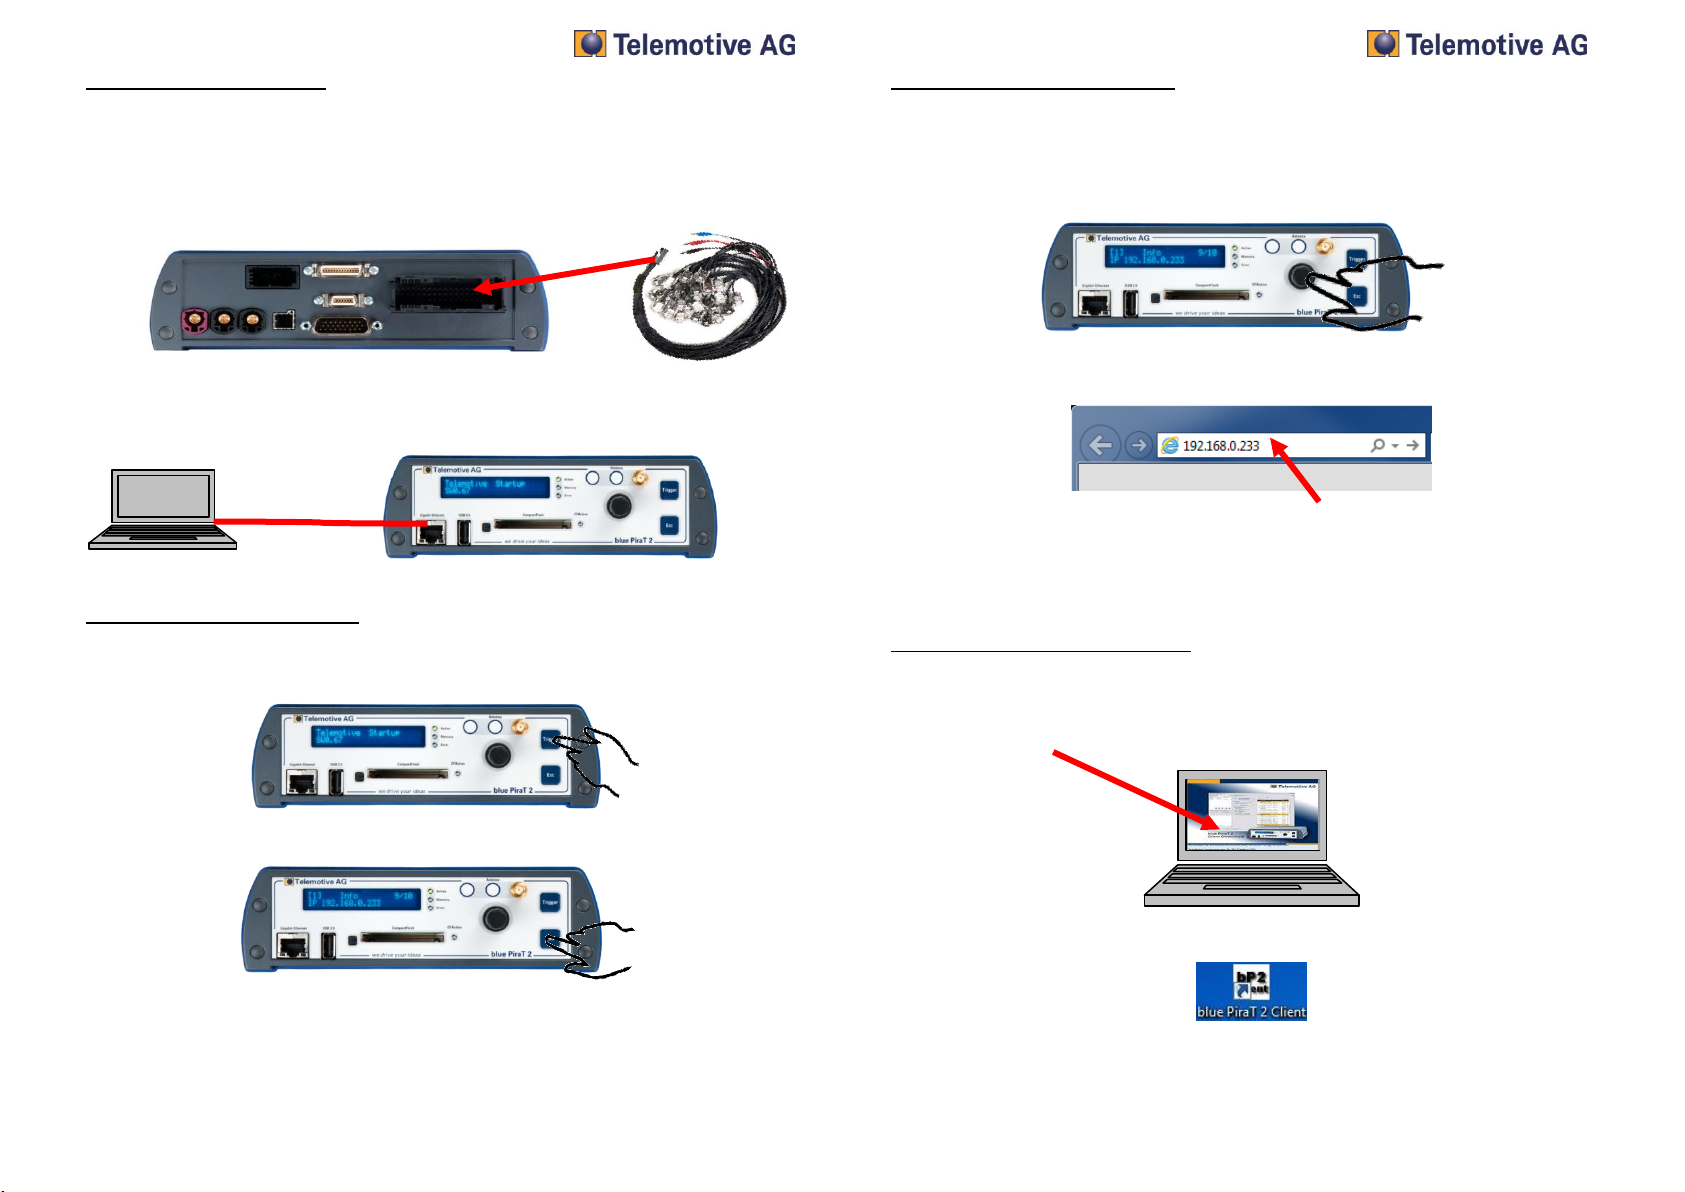
1. Hook up the blue PiraT2
Step 1: Connect the blue PiraT2 to the vehicle battery or a power supply via the power harness
(red/+/clamp30 and black/GND/-/clamp31)..
ATTENTION: If you have ordered an external antenna eg. for GPS, the connector has to be bolt
only by hand, NOT with any tools!
Step 2: Connect the Gigabit-Ethernet port with the Ethernet port of your computer by using a
crosslink Ethernet cable. (Note: By default the blue PiraT2 is configured as DHCP-Server!)
2. Power on/off the blue PriaT2
Step 3: Switch on the blue PiraT2 by pressing the [Trigger] button and wait until the logger is ready.
The Telemotive-Logo changes into showing the available CAN and LIN ports..
To switch off the blue PiraT2 please press the [Esc] button for a few seconds.
3. Connecting to the blue PiraT2
Step 4: By pressing the rotary button you will enter the operation menu. Here you can navigate by rotating
and pressing the rotary button.
Please choose here the Menu [1] Info navigate to Infoscreen 9/10 IP
The shown IP address will be needed in the next step.
Step 5: Open your Internet browser, enter the IP address from step 4 and confirm.
Note:
Make sure your network settings will be set to “apply IP address automatically”
The 32-bit version of Java Runtime Environment 7 (JRE 7) is necessary to run the client
The connection between logger and computer will be established.
4. Installing the blue PiraT2 Client
Step 6: Please click on the blue PiraT2 image to start the client download (~40MB). The installation setup
can be started by pressing [Execute]. Follow the instructions, choose a destination directory and finalize
the installation by pressing [Install].
Step 7: After successful installation you will find the “blue Pirat2 Client” icon on your desktop. Double-click
the icon to start the application.

5. Using the blue PiraT2 Client
Step 8: In the Network logger window you will find the connected data logger (with the IP address from step
4/5). By pressing one of the five icons you can choose the desired of the listed functions below.
connected
blue PiraT2
available applikations
Available applications:
1. Data download
2. Data conversion
3. Configuration menu
4. Firmware/License menu
5. Bug report menu
Please find more detailed manuals in our servicecenter
Contact
Telemotive AG
Office München
Frankfurter Ring 115a
80807 München
Tel.: +49 89 357 186-0
Fax.: +49 89 357 186-520
E-Mail: info@telemotive.de
Web: www.telemotive.de
Sales
Tel.: +49 89 357 186-550
Fax.: +49 89 357 186-520
E-Mail: sales@telemotive.de
Support
Tel.: +49 89 357 186-518
E-Mail: produktsupp[email protected]
ServiceCenter: https://sc.telemotive.de/bluepirat
© by Telemotive AG, 2014
blue PiraT2
Start Up
Version 1.9.1 - 30.01.2014
Other manuals for blue PiraT2
2
Other Telemotive AG Data Logger manuals


