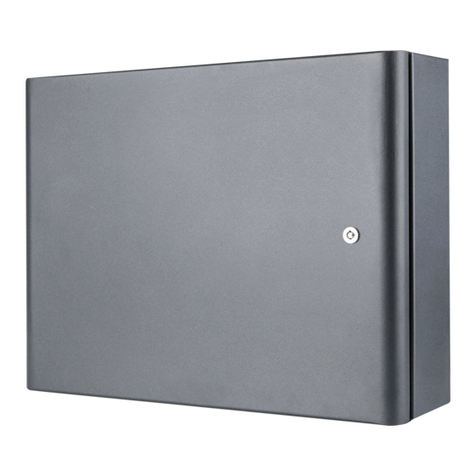
Teletek electronics PS1210 12V 1A User guide

REGULATED DC POWER SUPPLY
• PS1210 12V 1A
• PS1220 12V 2A
• PS1230 12V 3A
INSTALLER’S MANUAL
WARNING
This manual contains information on limitations regarding product use and function and information on the
limitations as to liability of the manufacturer. The entire manual should be carefully read.
All specifications are subject to change without notice.
- 1 -

- 2 -
Guarantee
During the guarantee period the manufacturer shall, at its sole discretion, replace or repair any defective
product when it is returned to the factory. All parts replaced and/or repaired shall be covered for the remainder
of the original guarantee, or for ninety (90) days, whichever period is longer. The original purchaser shall
immediately send manufacturer a written notice of the defective parts or workmanship, which written notice
must in all cases be received prior to expiry of the guarantee.
International Guarantee
Foreign customers shall enjoy the same guarantee rights as those enjoyed by any customer in Bulgaria,
except that manufacturer shall not be liable for any related customs duties, taxes or VAT, which may be
payable.
Guarantee Procedure
This guarantee will be granted when the appliance in question is returned. The manufacturer shall accept no
product whatsoever, of which no prior notice has been received.
Conditions for waiving the guarantee
This guarantee shall apply to defects in products resulting only from improper materials or workmanship,
related to its normal use. It shall not cover:
Damages resulting from transportation and handling;
Damages caused by natural calamities, such as fire, floods, storms, earthquakes or lightning;
Damages caused by incorrect voltage, accidental breakage or water; beyond the control of the
manufacturer;
Damages caused by unauthorized system incorporation, changes, modifications or surrounding
objects:
Damages caused by peripheral appliances (unless such peripheral appliances have been supplied by
the manufacturer:
Defects caused by inappropriate surrounding of installed products;
Damages caused by failure to use the product for its normal purpose; Damages caused by improper
maintenance;
Damages resulting from any other cause, bad maintenance or product misuse.
In the case of a reasonable number of unsuccessful attempts to repair the product, covered by this guarantee,
the manufacturer’s liability shall be limited to the replacement of the product as the sole compensation for
breach of the guarantee. Under no circumstances shall the manufacturer be liable for any special, accidental
or consequential damages, on the grounds of breach of guarantee, breach of agreement, negligence, or any
other legal notion.
Waiver
This Guarantee shall contain the entire guarantee and shall be prevailing over any and all other guarantees,
explicit or implicit (including any implicit guarantees on behalf of the dealer, or adaptability to specific
purposes), and over any other responsibilities or liabilities on behalf of the manufacturer. The manufacturer
does neither agree, nor empower, any person, acting on his own behalf, to modify or alter this Guarantee, nor
to replace it with another guarantee, or another liability with regard to this product.
Unwarranted Services
The manufacturer shall repair or replace unwarranted products, which have been returned to its factory, at its
sole discretion under the conditions below. The manufacturer shall accept no products for which no prior
notice has been received.
The products, which the manufacturer deems repairable, will be repaired and returned.
The manufacturer has prepared a price list and those products, which can be repaired, shall be paid
for every repaired appliance.
The closest equivalent product, available at the time, shall replace the products manufacturer deems
unrepairable. The current market price shall be charged for every replaced product.

- 3 -
Contents
1. PURPOSE...........................................................................................4
2. STANDARDS......................................................................................4
3. TECHNICAL SPECIFICATIONS ........................................................4
4. INSTALLATION..................................................................................5
5. CONNECTION SCHEME....................................................................7
6. TROUBLESHOOTING........................................................................8

- 4 -
1. PURPOSE
Provides regulated 12V/7Ah battery accumulated backup power supply to security
systems.
2. STANDARDS
The product complies with the essential requirements of the following Directives:
89/336/EEC for EMC
73/23/EEC for LV
and observes the following standards:
EN 50131-6
EN 55022 class B
EN 50130-4: 1998
EN 60950: 1999-2000 (3rd revision)
3. TECHNICAL SPECIFICATIONS
3.1. Input voltage - 230V+/-10% AC, 50-60Hz
3.2. Battery - 12V/7Ah, accumulator
3.3. Rated input voltage - 13.8VDC, variable
3.4. Maximum output current - PS1210 – 1A*
- PS1220 – 2A*
- PS1230 – 3A*
*includes charging current
3.5. Rated output current - 80% of maximum current
3.6. Electronic protection against short circuit at output
3.7. Single LED display on cover
Color of display Green – basic power supply is on,
battery charged
Orange – basic power supply is on,
no or low level battery charge
Red – basic power supply is off
and low level battery charge
No display – basic power supply is off,
battery charged
No display – basic power supply is off,
no backup power supply
3.8. Output: “mains supply” +I - 13 to 20 mA
3.9. Output: “discharged battery” +F - 12 mA
Trigger off level - 10.5V
3.10. Mains power supply fuse. - 0.315А(PS1210), 0.63А
3.11. Battery fuse - 1A(PS1210), 2A(PS1220),
3A(PS1230)
3.12. Double action tamper, installed in the box.
3.13. Designed only to operate indoors at temperature range between –30 and
+500Сand relative humidity of air up to 93% at +400 С.
3.14. Storage temperature (no battery) from –40 to +85 0С.

4. INSTALLATION
Select a mounting location away from heat and
humidity. Cut out the profile board (1). Drill
through the marked places (2).
1 2
Undo the two screws (1). Turn off the LED prior
to removing the cover (2).
3
Mount the box on the middle screw, placed in advance (1) and do the remaining four screws (2).
- 5 -

4
Adjust the tamper (1). Connect the mains cable, according to the sticker (2). Mount additional modules and
devices (3). Connect the output voltage to the devices and modules (5). Connect the tamper to the device
input, e.g. expander (8). The information outputs may also be used – “+I” for mains supply availability and
“+F “ for battery discharge. Mount and connect the battery. (6). Turn on the LED cable. (7). The LED will light
in red for Ubatt<10.5V. Turn on the mains (9). The LED should light in green. Should it light in orange, leave
the battery to charge for at least one hour.
Where necessary adjust Uout. using the trimmer potentiometer (4).
5
Place the cover (1) back and do the two screws at its lower end (2).
- 6 -

5. CONNECTION SCHEME.
- 7 -

6. TROUBLESHOOTING.
Problem Cause and Remedy
The LED does
not display green,
despite mains power
supply.
1. Blown fuse. Before changing fuse find out the possible cause! If the
new fuse also blows out, the device must be dismantled and taken to the
producer’s service station to be repaired.
No voltage at
output when mains
power supply is off.
No LED indication.
1. Fault in battery.
2. Blown fuse of accumulating supply. Before changing the fuse, find
out the possible cause! Most probably the maximum charge current has
been exceeded. The battery needs to have at least 60 % capacity charge
before it can be used as a backup power source.
Low voltage at
output. LED lights in
green.
1. The battery is being charged with maximum current. Turn off the
cable to the battery. If the voltage restores, leave the battery to charge and
check it again in about 15 minutes.
2. Maximum output current has been exceeded (1A for PS1210, 2Аfor
PS1220, 3Аfor PS1230). Check the consumed charging current. If it is
greater than the reference, there could be a fault in any of the powered
modules or devices.
3. If the voltage remains low, despite the low level of the current
consumed, the device must be dismantled and taken to the producer’s
service station to be repaired.
Higher output
voltage.
Immediately turn off the device and take it to the producer’s service
station to be repaired.
WARNINGS:
1. The device normally operates only when the LED displays the green light. Any other indication
suggests operator’s interference.
2. A red LED means lack of basic power supply and backup supply below rated limits. In order to
ensure normal operations of the modules and devices, powered from the unit, change the storage
battery with one that is charged, until the basic mains power supply is restored.
18020329 rev.A 07/2004
- 8 -
This manual suits for next models
2
Table of contents
Other Teletek electronics Power Supply manuals
Popular Power Supply manuals by other brands

AMX
AMX NXA-UPS9510 Specifications

Stahl
Stahl ispac 9143 operating instructions

Helios Power Solutions
Helios Power Solutions KH4c user manual

VICOR
VICOR MicroPAC user guide

Topward
Topward 6302A, 6302AR, 6302D, 6302DR, 6303A, 6303AR, 6303D,6303DR, 6306A, 6306AR, 6306D, 6306DR, 6603A, 6603AR, 6603D, and... Operation manual

Panasonic
Panasonic PK-A789S operating instructions