Telos Alliance Zephyr iPort User manual

Connecting Telos Z/IP ONE and Zephyr iPORT
November, 2017
Products
2001-00305 Zephyr iPort
2001-00286 Z/IP ONE
This document assumes that you are familiar with port forwarding. If you are unsure how to do this,
refer to the Z/IP ONE manual “When an IT Department is Not Available,” or contact Telos Alliance 24/7
support via support@telosalliance.com or +1 (216) 622-0247.
Z/IP ONE sending to iPort (one direction)
This one is the special case, so we’ll cover it first.
1. Choose a codec. On the Z/IP ONE, set up your codec and bit rate as you would for any other
call. You must choose a codec compatible with the iPort:
AAC-HE
AAC-LD
AAC
MP2-AAC
aptX (except 16-bit mono)
24-bit PCM
2. Enable auto-redial. This will ensure that if there is power loss or some other event that causes
a reboot, the Z/IP ONE will continue streaming as soon as possible
3. Configure the iPort. Now, configure your iPort’s decoder channel and set up port forwarding
so that it is accessible. If streaming over the internet, we recommend using a UDP port far
away from the default of 9150 to prevent port scanners from finding the open audio port. iPort
codec port numbers are always sequential, but you can define the base they count up from on
the iPort’s Codec Configuration webpage, in the page accessed by the Global Options button.
On the Z/IP ONE, dial the iPort’s decoder port. Set the call type to RTP, and set the address and
port of your iPort’s decoder instance. Click Connect, and verify that the audio flows as
intended.

4. Save the connection info. Once you verify the audio, switch to the History tab and save the call
to your phonebook. This way, if you need to manually stop and restart the call sometime, you
can do so easily.
iPort sending to Z/IP ONE (one or two direction)
Sending from the iPort to the Z/IP ONE takes the same steps whether you want the final call to be one
direction or two. The only difference is the port used on the Z/IP ONE.
1. Configure the Z/IP ONE. First, configure your Z/IP ONE’s RTP port and set up port forwarding
so that it is accessible. If streaming over the internet, we recommend using a UDP port far
away from the default of 9150 to prevent port scanners from finding the open audio port.
On the Z/IP ONE, there are four different RTP ports, which trigger different behavior on the
Z/IP ONE. Look for the RTP Push Configuration section on the Z/IP ONE’s Streaming webpage
If your Z/IP ONE will only receive audio from the iPort without sending a return stream (single
direction, iPort to Z/IP ONE), then you will use the base RTP port (in this example, 28000). The
other three “reply” ports will be discussed later.
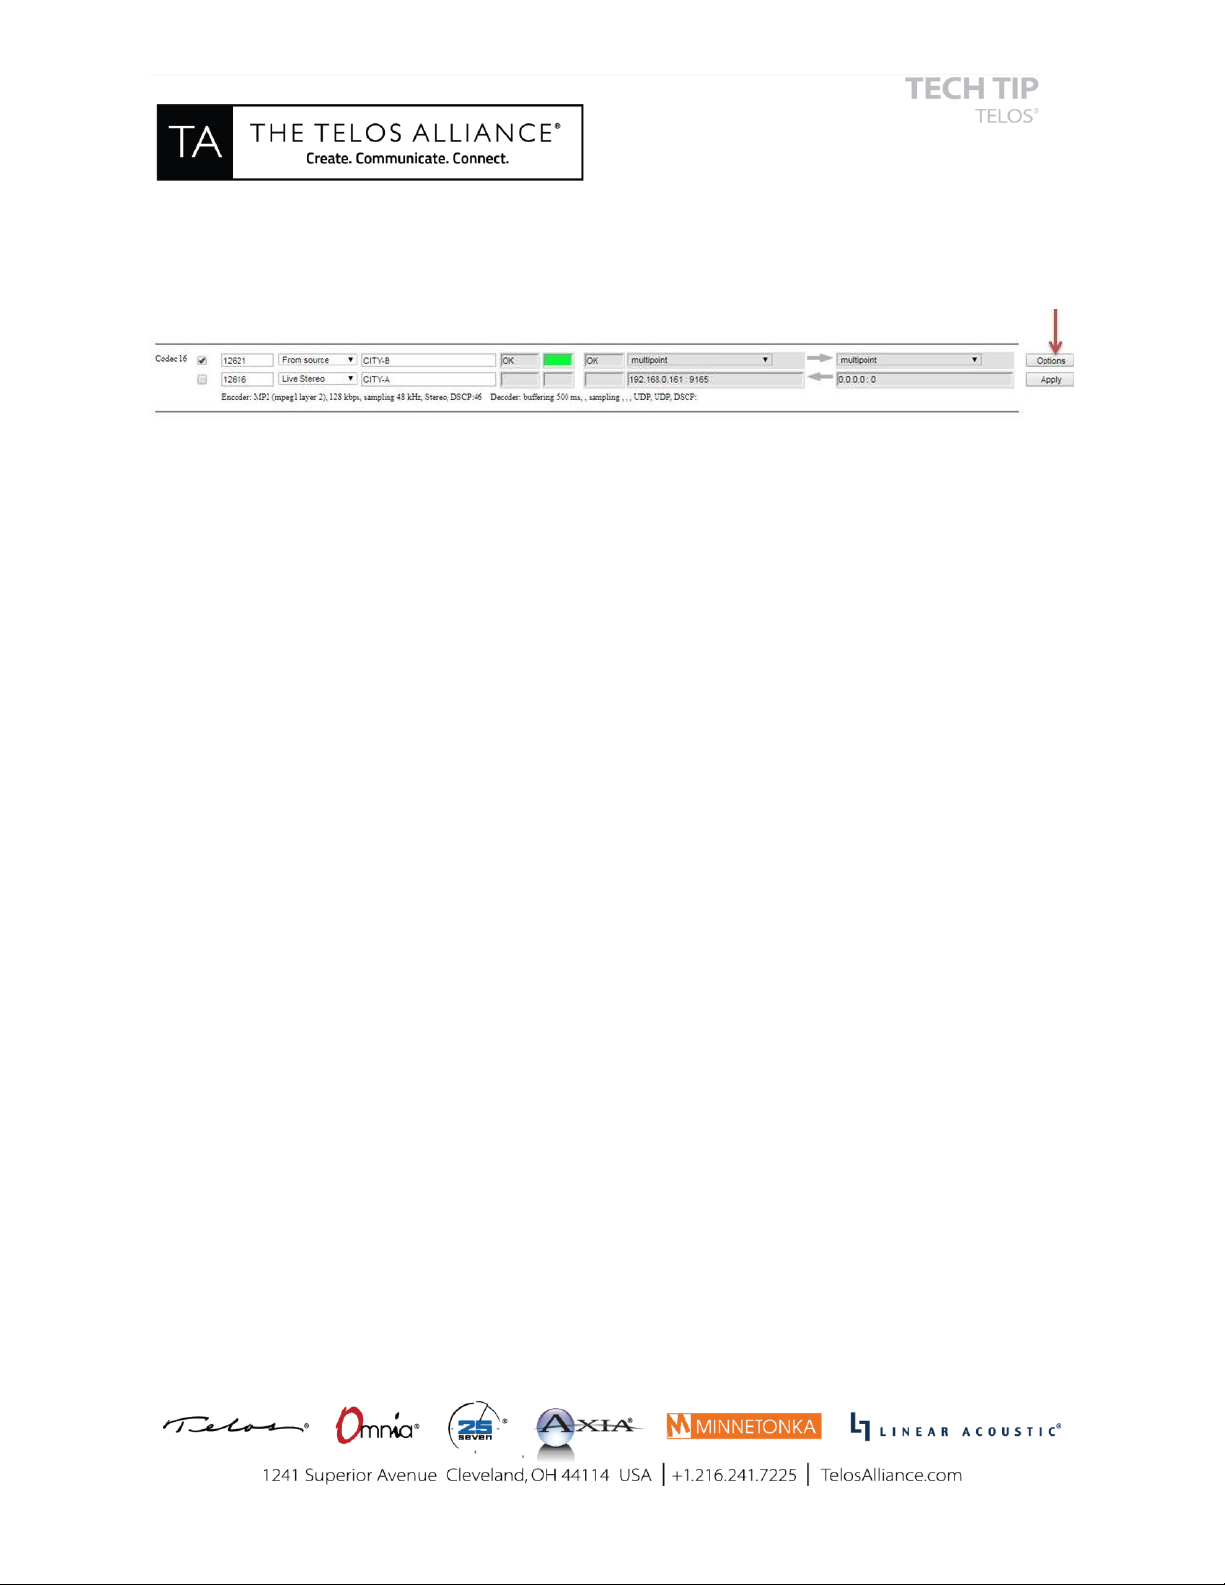
2. Configure iPort Codec. Next, configure your iPort encoder channel. On the iPort’s Codec
Configuration webpage, find your codec channel, and on the far right side of the screen, click
Options
On the next screen, set up the encoder Select a codec and bit rate as you would for any other
connection. You must choose a codec compatible with the Z/IP ONE
AAC
AAC-LD
AAC-HE
AAC-HEv2
MP2
aptX Enhanced (except 16-bit)
Uncompressed
3. Configure iPort output stream. While on this screen, also set up the iPort’s output channel. Set
the protocol type to UDP, and enter your Z/IP ONE’s IP and port information. If you are sending
a one-way stream from the iPort to the Z/IP ONE, use the Z/IP ONE’s base RTP port, configured
above.
If you want the Z/IP ONE to send a stream in return, you have 2 options.
If you want to return the same codec as Z/IP One receives from the iPort, use the third
RTP setting (two ports higher than the base RTP port).
If you want to return a stream with the codec selected on the Z/IP ONE’s codec page,
use the fourth RTP setting (three ports higher than the base RTP port)
In both cases, you will want to consult the above lists and make sure that both ends of the
connection are using a codec that the other end can decode.
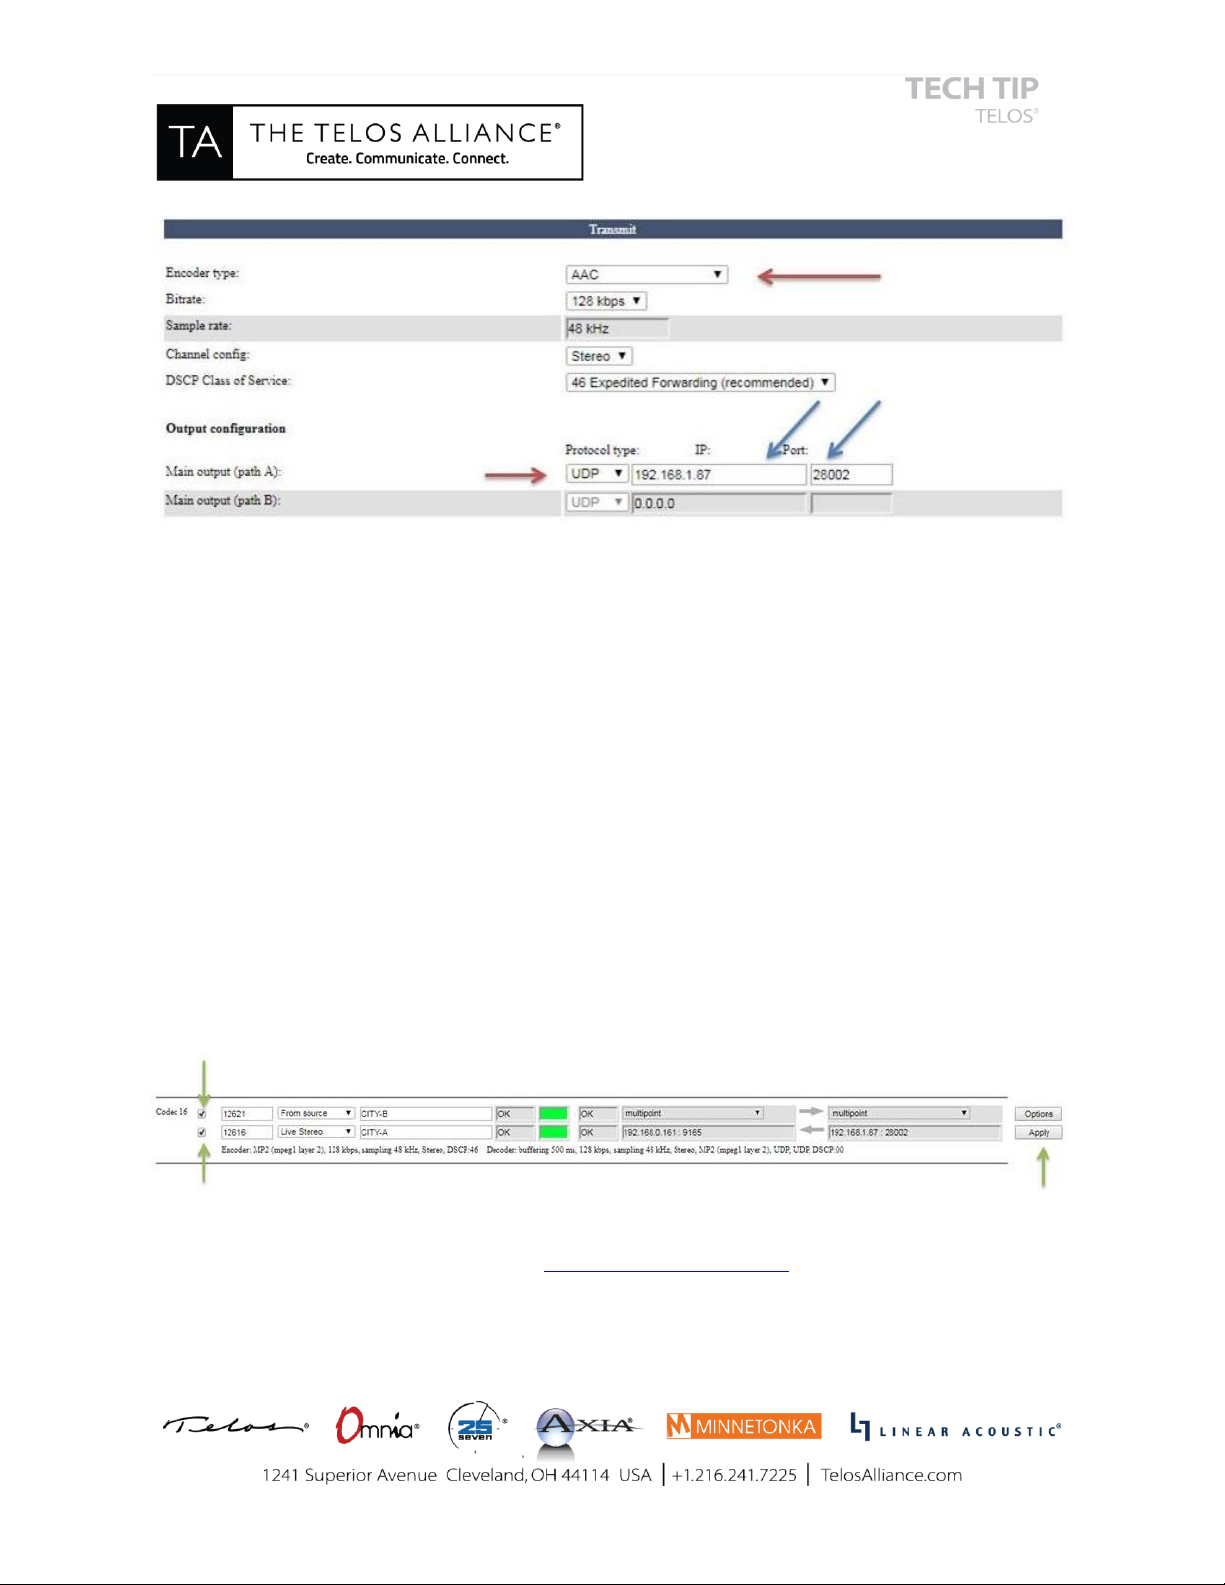
In this example, the Z/IP ONE’s RTP base port is 28000. Send a stream here if you do not want a
reply.
Send a stream to UDP port 28002 to make the Z/IP ONE return a stream of the same codec. If
you send to 28003, the Z/IP ONE will reply with whatever it is configured for on its own codec
page.
Note: In this example, a stream sent to the Z/IP One’s first reply port, 28001 (the base
port +1), will cause the Z/IP ONE to reply with G.722. The iPort cannot decode this, so
this port should only be used with other streaming devices (for example, Luci Live Lite).
4. Start the Stream. Finally, return to the iPort Codec Configuration page and enable the stream
you just configured. There will be two checkboxes to the left of the codec channel in the list.
Toggle each of these so that they both have checkmarks present. On the far right, click the
Apply button associated with that channel. Soon, you should have audio in both directions.
Refresh the Codec Configuration web page, and you should see two green indicators on this
channel. This shows that the output stream is enabled, and the input stream has a decoder
lock.
You now should be successfully connected to your Z/IP One. If you need further assistance please
reach out to Telos Alliance 24/7 support via support@telosalliance.com or +1 (216) 622-0247.
This manual suits for next models
3
Table of contents


