Telpo UC1000 User manual

Telp
Telepower Communication Co., Ltd.
Address: Room 201,Building A5, Hantian technology park, Foshan City, Guangdong, China
1
Telp
o UC1000 IP PBX
User Manual
Telepower Communication Co., Ltd.
Tel: +86 0757-86299753
website: www.telpouc.com
Email: t[email protected]
Fax: +86 0757-86337898-770
Address: Room 201,Building A5, Hantian technology park, Foshan City, Guangdong, China
Latest Revision: 2018-09-11
Revision Number:
V1.01
Address: Room 201,Building A5, Hantian technology park, Foshan City, Guangdong, China

2
Content
I. BRIEF INTRODUCTION ............................................................................................................. 4
1.1 ABOUT THE MANUAL ........................................................................................................................ 4
1.2 WEB LOGIN.................................................................................................................................... 4
1.3 MODIFY THE PASSWORD OF ADMINISTRATOR ........................................................................................ 5
1.4 OPERATION TO ADD SYSTEM USERS .................................................................................................... 5
II. PBX SETTINGS CLASSIFICATION ............................................................................................... 7
2.1 EXTENSION SETTINGS ....................................................................................................................... 7
2.1.1 Add SIP Extensions ............................................................................................................... 7
2.1.2 Add Analog Extensions ....................................................................................................... 12
2.1.3 Modify Information of Users .............................................................................................. 15
2.1.4 Query Information of Users ................................................................................................ 16
2.1.5 Delete Users ....................................................................................................................... 17
2.1.6 Registration of SIP Users .................................................................................................... 19
2.1.7 Registration of Analog users (Here only explain for Telpo FXS device) ............................... 19
2.1.8 Bulk Add Users via Excel Import Method ........................................................................... 21
2.2 BASIC SERVICE SETTING................................................................................................................... 22
2.2.1 Call Transfer ....................................................................................................................... 22
2.2.2 DND .................................................................................................................................... 25
2.2.3 Ringback tones ................................................................................................................... 25
2.2.4 Secretary Service ................................................................................................................ 27
2.2.5 Selection Groups ................................................................................................................ 29
2.2.6 Abbreviated Dial ................................................................................................................. 34
2.2.7 Call Restrictions .................................................................................................................. 36
2.2.8 Black/White List ................................................................................................................. 44
2.2.9 Pickup service .............................................................................................................. 52
2.2.10 Alarm clock .................................................................................................................. 53
2.2.11 Service function code .................................................................................................. 53
2.3 ADD-VALUE SERVICES ..................................................................................................................... 53
2.3.1 Voicemail ............................................................................................................................ 53
2.3.2 Query on Bills/Records ....................................................................................................... 56
2.3.3 CTI ...................................................................................................................................... 58
2.4 COMMON CONFIGURATIONS ............................................................................................................ 59
2.4.1 Voice Files Management .................................................................................................... 59
2.4.2 SIP settings ......................................................................................................................... 60
2.4.3 VOIP Configuration............................................................................................................. 65
2.4.4 Change Numbers ................................................................................................................ 69
2.4.5 Routing ............................................................................................................................... 83
2.5 DIAL RULES ................................................................................................................................... 92
2.6 AG SERVICES .......................................................................................................................... 94
2.6.1 Basic settings ............................................................................................................... 94
2.6.2 Registration information ............................................................................................. 94

3
2.6.3 Service features ........................................................................................................... 95
2.6.4 Voice characteristics .................................................................................................... 95
2.6.5 Gain settings ............................................................................................................... 96
2.6.6 Voice parameters ........................................................................................................ 96
2.6.7 AG login management ................................................................................................ 97
2.6.8 Card status .................................................................................................................. 98
2.6.9 NTP Server settings ..................................................................................................... 98
2.6.10 DNS/Server NAT ........................................................................................................... 99
2.7 CDR ...................................................................................................................................... 99
2.8 E1 CONFIGURATION ............................................................................................................... 100
III. SYSTEM CONFIGURATIONS ................................................................................................ 101
3.1 SECURITY .................................................................................................................................... 101
3.1.1 Firewall Setting ................................................................................................................ 101
3.1.2 Page Management ........................................................................................................... 102
3.2 NETWORK .................................................................................................................................. 105
3.2.1 NTP Server Configuration ................................................................................................. 105
3.2.2 Remote Configuration ...................................................................................................... 106
3.2.3Network Configuration ..................................................................................................... 106
3.2.4. Ping Configuration .......................................................................................................... 107
3.3 DEVICE MANAGEMENT ................................................................................................................. 108
3.3.1 Board Information ............................................................................................................ 108
3.3.2 Port Management ............................................................................................................ 108
3.3.3 License Information .......................................................................................................... 109
IV. SYSTEM MAINTENANCE ..................................................................................................... 110
4.1 SYSTEM MAINTENANCE................................................................................................................. 110
4.1.1 System Reboot .................................................................................................................. 110
4.1.2 System Shutdown ............................................................................................................. 110
4.1.3 System Update ................................................................................................................. 111
4.2 LOGS MANAGEMENT .................................................................................................................... 111
4.2.1 System Logs Setting .......................................................................................................... 111
4.2.2 System Logs Download..................................................................................................... 112
4.2.3 Operation Logs Enquiry .................................................................................................... 113
4.2.4 Signaling Tracking ............................................................................................................ 114
4.3 SYSTEM STATUS QUERY ................................................................................................................. 114
4.3.1 Load Monitor .................................................................................................................... 114
4.3.2 SIP Resources .................................................................................................................... 115
4.4 DATA BACKUP AND RECOVERY ........................................................................................................ 115
4.4.1 Backup File Information ................................................................................................... 115
4.4.2 Data Backup Mode ........................................................................................................... 116
4.4.3 Data Restore & Rollback ................................................................................................... 116
4.5 WARNING MANAGEMENT ............................................................................................................. 117
4.5.1 Current Warnings ............................................................................................................. 117
4.5.2 Warning Inhibition ........................................................................................................... 117
V. APPENDIX .......................................................................................................................... 118

4
5.1 RULES OF SERVICE FUNCTION CODE ................................................................................................ 118
I. Brief Introduction
1.1 About the manual
Thanks for choosing Telpo UC1000 IPPBX.
This manual is written for administrators who need to configure and operate UC1000 IPPBX.
In this manual, we describe every detail on the system functionality, routing rules and service
configuration of the IPPBX. We begin by assuming that you are familiar with networking and other
IPPBX disciplines. And all the operations of service registration and cancellation are configured on
UC1000 IPPBX WEB.
1.2 WEB Login
In the address bar of a browser, input the IP address of UC1000, input the username and password,
and then click OK to login.
● The original IP address of UC1000: WAN port: 192.168.10.235 LAN port: 172.16.10.1
● The input format in the browser: hps://192.168.10.235:8008
● Default username of the administrator: admin
● Default password of the administrator: psw.voip

5
1.3 Modify the Password of Administrator
Enter the [System Configuration] / [Pages] interface, click the menu of “Change password” and
you can modify the password of administrator admin. After the password modification, you will be
forced to log out Web, and you need to enter the new password to login.
Note: users are not allowed to modify the username of administrator.
1.4 Operation to Add System Users
Enter the [System Configuration] / [Pages] interface, click the menu of account management, and
you can view the existing user information. Click the Add button, and the interface of adding users
will pop up, as shown in Figure 1.3.1:
● Username: The username for login.
● User password: The password for login.
● User roles: controlling the access permission, divided into normal users and visitors.
●Real name: fill in your name.
●Email: fill in your mailbox.
● Phone: fill in your mobile phone number.
● Valid start me: set the me when the account comes into effect.
Valid end time: set the time when the account is expired.
●IP white list: set the IP addresses that are allowed to log in Web.

6
Figure0.1Account Management

7
II. PBX Settings Classification
2.1 Extension Settings
The users are divided into two types, SIP users and affiliated AG users. Log in IPPBX WEB to
add, modify, query and delete user information.
2.1.1 Add SIP Extensions
1. The Basic Information of Extension
Login IPPBX WEB, select [PBX Settings Classification] / [Extension Mgn.] as shown in Figure
2.1.1, and click <Add> on the bottom left
Figure0.1 Extension Setting
The interface shown in Figure 2.1.2 will pop up where the items marked with * are necessary.

8
Figure0.2 Add SIP User Information
Parameter configuration instruction
● A simple adding of an SIP user only needs to configure the necessary options (items marked
with symbol *), including “Extensions”, “Username” and “Password”, and the “Authentication”
switch is on by default.
● Change No. rules index: matches with the "Change No. rules index" value in the “Change
Numbers” settings in this manual.
● Current status: whether this extension number is enabling.
● Call permissions: the maximum call permission that the SIP user gets. Including “Internal calls”,
“Local calls”, “DDD” and “International calls”.
● Activate services: the call permissions that the user has currently. The activate services cannot
be higher than the permission of the IPPBX.
● Call limits by time: an attribute of caller function, valid when the caller is communicating with
an outside user via the routing or IMS platform.
● Local extension: to set this extension number to be local extension or not.
● Proxy register mode: Three types, Manual register, Auto register, and the default is Not
Enabled.
1)Not Enabled means this kind of extension number is internal extension number of the switch;
which is not binding with the proxy register. Such numbers will not be registered to SBC;

9
2)Manual register means user need to configure all proxy information of the extension number.
3)Auto register means that the proxy will triggered to register to SBC after the extension number
binding to the proxy register to the IPPBX automatically, besides that, the registration cycle of the
extension number is not relevant to the proxy registration cycle, and they are independent of each
other. Similarly, the cancellation of the extension number will trigger the cancellation to SBC.
● Proxy register number: fill in the user numbers assigned by the IMS platform or other
platforms.
● IMS Authentication: add the domain name information to the user number assigned by the IMS
platform or other platforms and fill it in here.
● IMS Authentication Password: fill in the IMS authentication password corresponding to the IMS
authentication account.
● IP bind status: user can choose No binding or Binding. After choose Binding, then the Bind IP
should be needed.
● Bind IP: Input the bind IP of the extension number if user chooses IP binding.
● Position: the location of the set AG board.
● Port: the AG port corresponding to the set user number.
Click <submit>, and the result shown in Figure 2.1.3 will pop up, indicating the success in adding SIP
proxy user.
Figure0.3 Success on Adding Extension Setting
Click <OK>, and the added extension information as shown in Figure 2.1.4 will pop up.
Figure0.4 Interface of Extension User Information Management
2. Extension call functions
Parameter Configuration Instruction
● ALL Permissions: switch it on then all call functions will be enabled.

10
● Three-part conference: after enabled, the Three-part Conference service can be realized.
● Do not disturb: aer enabled, the Do not disturb service in both internal and external lines can
be realized by default.
● Call Forwarding Uncondional: aer enabled, you need to set up the forwarding number in
[Home page] /[PBX Setting Classification ] / [Call Transfer].
● Call forwarding on busy: after enabled, you need to set the forwarding number in [Home page]
/[PBX Setting Classification ] / [Call Transfer].
● Call forwarding no reply: after enabled, you need to set the forwarding number in [Home page]
/[PBX Setting Classification ] / [Call Transfer].
● Caller ID idenficaon restriction: after enabled, the caller can be anonymous (restricted to
internal extension calls).
●Caller ID idenficaon restricon exceed: aer enabled, the callee id will be forced to display
though the caller enable the Caller ID identification restriction (restricted to internal extension
calls).
● Secretary Service: enable the secretary service, allow the secretary number to pick up when call
incoming.
● Call barring: restrict the extension number to call out.
● Password call authencaon: restrict the extension number to call out without the password set
previously.
● Call back when busy: aer enabled, the service of Call back when Busy can be realized.
● Pick up: after enabled, the Extension Pick up service can be realized.
● Call transfer: aer enabled, the Call Transfer service can be realized (blind transfer/aended
transfer).
● Call recording: aer enabled, the Call Recording service can be realized.
● Operator: after enabled, the Broadcast service can be realized.
● Polyphonic ringtone: aer enabled, the service of Extension CRBT can be realized.
● Speed dial: Users record Speed dial numbers for those person with
whom users contact frequently, and users can just dial the Speed dial numbers directly to reach
them.
● Out-going call of black list setting: after enabled, this extension number will be restricted to call

11
out numbers in the black list.
● In-coming call of black list setting: after enabled, the calls from calling numbers in the black list
will be restricted.
● Out-going call of while list setting: after enabled, this extension number can call out numbers in
the white list though the numbers also in the blacklist.
● In-coming call of white list setting: after enabled, the calls from calling numbers in the white list
can be got through though the numbers also in the blacklist.
● Voice mail: aer enabled, the Voice mail service can be realized.
1. Bulk Add
Click the <Bulk Add> button on the bottom left in Figure 2.1.1, and the interface shown in
Figure 2.1.5 will pop up. Input "Add number" and determine the numbers of SIP users to make bulk
adding. Batch step: refers to the batch increment interval, it is 1 by default. Other configuration
information is in accordance with the parameters in adding single user.

12
Figure0.5 Interface of Bulk Add
2.1.2 Add Analog Extensions
1. Add Single User
UC1000 IPPBX has three board slots; user can insert FXS board, and configure the analog
extension information in the [PBX Settings Classification] / [Extension Mgn.] interface. Outside FXS
device also can be connected with UC1000 via LAN port, and be detected by UC1000 automatically;
user can configure the analog extensions for FXS board and outside FXS device also.
Log on IPPBX WEB, select [PBX Settings Classification] / [Extension Mgn.], as shown in Figure
2-1-1.Click <Add>on the bottom left corner, and the interface as shown in Figure 2-1-6 will pop up,
where items marked with *are necessary. Input the basic information of the analog user in the
configuration parameter check box, and select the position which FXS board/device locates, and
then select the FXS port of board/device. Click <OK>, and the result shown in Figure 2-1-7 will pop
up, indicating the success in adding analog user.
Note: Before adding analog users, you need to add FXS board/device information first. The
interface refres to “Board info.”.

13
Figure0.6 Add Analog User Information
Figure0.7 Success in Adding Extension Setting
2. Bulk Add
Click the <Bulk Add> button on the bottom left in Figure 2-1-1, and the interface shown in
Figure 2-1-8 will pop up. Input "the number of input numbers" and determine the number of
analog users bulk added. Batch step: refers to the batch increment interval that is 1 by default.
Other configuration information is in accordance with the parameters in adding single user.

14
Figure0.8 Bulk Add Extension Information
When configuring parameters “Position”, “Port”, users can select [System Configuration] / [Port
Management] to query the port number corresponding to the Analog device and its occupancy.
There are three query options: position, port and user number. Users can input specific parameters
to query. With all three options unfilled, it means query all the port information. Figure 2-1-9 shows
the sample of query result of POTS port information.
Figure 2.1.9
Explanation of position and port query result:
(1) Position: one Analog board/device is a position.
(2) Port: for example, one 32 FXS Analog device has 32 FXS channels, and the port range is 0-31 in

15
sequence.
(3) Extension: the extension number configured in this channel.
(4) Channel Status:
"Occupied" means this channel has been configured with a number;
"Unoccupied" means this channel has not been configured with a number;
"Unavailable" means this channel is closed.
"On-hook", "Off-hook" and "Ringing" mean this channel is being used and show the using status of the
telephone.
The position is the only identifier of Analog board/FXS device. Select [System Configuration] /
[Board Info], and the interface shown in the figure will pop up. The interface shows the position,
type, status, MAC address, LAN port IP, analog board/FXS device static IP and other basic
information contained in the system.
Note: If a port has been occupied with an existed extension, connect it with extension number again,
error information will pop up directly.
2.1.3 Modify Information of Users
1. Modify Information of Single User
Extension information can be modified, such as username, extension, password, Change NO.
rules index and whether authenticated or not.
Select [PBX Settings Classification] / [Extension Mgn.] as shown in Figure 2.1.1. Click Modify in
the column of the user information that needs modifying with the operation icon " ", and the
interface shown in Figure 2.1.10 will pop up where items marked with * are necessary.
Input the modified value after the corresponding user information parameter. Unfilled ones

16
will not be modified.
Figure0.10 Modify User Information
Click <Submit>, and the result in Figure 2.1.11 will pop up, indicating that the modification of user
information is successful.
Figure0.11 Success in Modifying Extension Setting
2.1.4 Query Information of Users
Select [PBX Settings Classification] / [Extension Mgn.] as shown in Figure 2.1.22. If the
parameters are unfilled, then all the user information will be queried. Users can also select user
type to query user information of a certain type. Then click <Query>.
Figure0.22 Query Operation
Query Parameter Instruction:

17
● User Type: divided into two types, namely local SIP user and GW user.
● Reg. status: divided into two types, namely offline and online.
● Registration Proxy status: divided into four types, namely Not registered, Registered,
registration error and registration timeout.
● Extension Permissions: divided into four types, namely internal calls, local calls, DDD and
international call.
Figure0.23 Interface of User Information Query
2.1.5 Delete Users
1. Delete Single User
Select [PBX Settings Classification] / [Extension Mgn.] as shown in Figure 2.1.1. Click Delete in
the column of the user information that needs deleting with the operation icon " ", and the
dialog box of deletion confirmation shown in Figure 2.1.24 will pop up. Click <OK> to confirm the
deletion or click <Cancel> to exit the deletion operation.
Figure 0.64 Dialog Box of Deletion Confirmation
1. Bulk Delete Users
Select [Basic Configuration / Extension Setting] as shown in Figure 2.1.1. Click <Bulk Delete> on
the bottom left, and the interface shown in Figure 2.1.25 will pop up. Input the user number.

18
Figure0.75 Interface of Bulk Deleting User Numbers
Click <Submit> to return the operation result, as shown in Figure 2.1.26.
Figure0.86 Dialog Box of Deletion Confirmation
Explanation: Bulk delete users: Input wildcard in the column of user number, such as "^108!.!" that
means deleting all the numbers starting with 108 or "^1080![0-5].!" that means deleting the
numbers whose beginning is 108 and the fifth number is 0-5.
1. Delete Selection
Select [PBX Settings Classification] / [Extension Mgn.], and tick to select the extensions to
delete. If the option in the red box is ticked, it means that all the extensions on this page are
selected, as shown in Figure 2.1.27.
Figure0.97 Interface of Tick Selection
As shown in Figure 2.1.1, click <Delete Selection> on the bottom left, and the interface shown
in Figure 2.1.28 will pop up. Click <OK> to complete the deletion operation.

19
Figure0.108 Dialog of Deletion Confirmation
2.1.6 Registration of SIP Users
Configure SIP extension’s register IP and PORT via WEB or SIP telephone operation. The
original default registration port for our system users is 5060. This port can be configured, and after
the port is modified successfully, it will come into effect after the IPPBX restarts.
For detailed configuration of SIP telephone, refer to the configuration manuals provided by the
manufacturers of all types of telephones.
2.1.7 Registration of Analog users (Here only explain for Telpo FXS device)
For Telpo FXS device:
Log in Telpo FXS device WEB, and select [NMS] / [S10AG Setting] as shown in Figure 2.1.29 to
enable S10AG mode. After saving, select [System Maintenance / Device Reboot], as shown in Figure
2.1.220. Click the "confirm" button to restart the Telpo FXS device..
错误!未找到引用源。29 Interface of Telpo FXS device Setting

20
错误!未找到引用源。30 Restart FXS device
Log in UC1000 IPPBX WEB, select [System Configuration] / [Board Info], and click the "Add" button
to enter the interface of adding board/FXS device, as shown in Figure 2.1.31. After the data
configuration is complete, click "Submit" to return to the interface of board card information, as
shown in Figure 2.1.32.
错误!未找到引用源。31 Add Board Information
Available boards: After the Telpo FXS device enables S10AG mode, it will be added here
Table of contents
Popular Telephone manuals by other brands
Polycom
Polycom VVX 201 Quick tips

Panasonic
Panasonic KX-TG6700B - Cordless Phone - Operation Service manual

CEECO
CEECO HOB-531-X Service manual

Beyerdynamic
Beyerdynamic SPACE Disassembly instructions
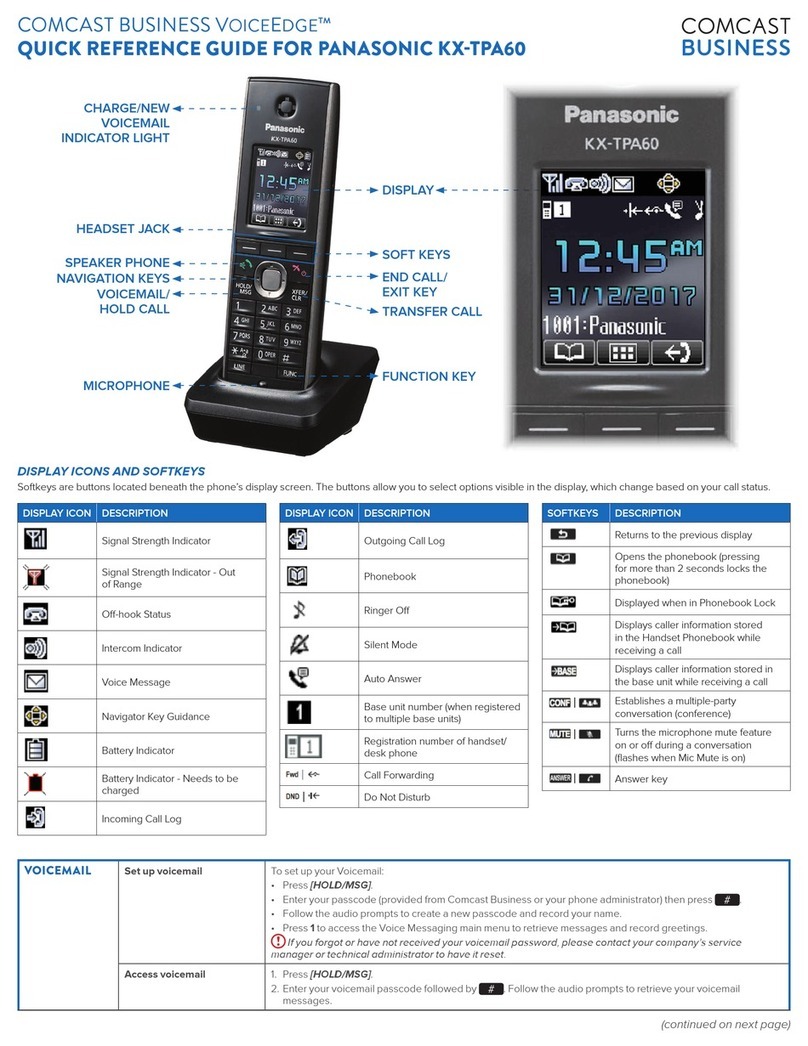
Comcast
Comcast Business VoiceEdge Quick reference guide
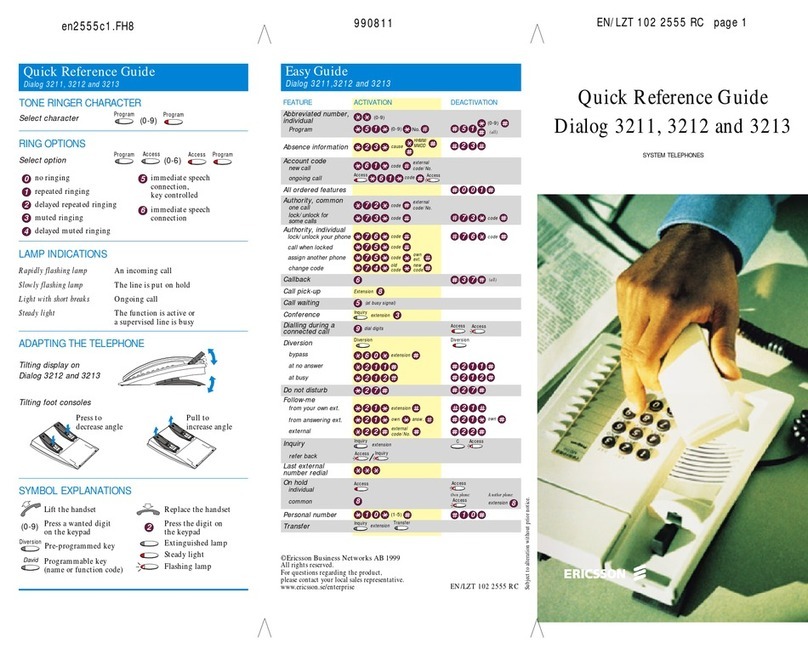
Ericsson
Ericsson Dialog 3211 Quick reference guide


