manuals.online logo
Brands
  1. Home
  2. •
  3. Brands
  4. •
  5. Yealink
  6. •
  7. Telephone
  8. •
  9. Yealink W56 User manual

Yealink W56 User manual

UG_YEALINKW56_0120 | ©2020 VONAGE 1
User Guide Yealink W56
Voicemail
Entering your Mailbox for the first time
To set up your mailbox for the first time, follow these steps:
1. Dial *99
2. Enter 1234 (default pin).
3. Press 1 for New Messages, Press 2 for Saved Messages
Options while listening to voicemail:
Voicemail Greetings
After entering your mailbox options (call *99 or *100 from
your phone and choose option 4):
• Dial *99
• Enter voicemail PIN
• Press 4 for Mailbox Options
Record Voicemail Greetings
1. Press 1 to record Unavailable greeting
• Press 2 to record Busy greeting
• Press 3 to record Name greeting (Company Directory)
• Press 4 to record Temporary greeting (Vacation/Holiday)
2. After the tone, record your greeting and press # when
finished.
3. Press 1 to Save
• Press 2 to re-record
5Repeats voicemail from the beginning
6 Go to next message
7Deletes voicemail
8Forward voicemail to another extension
9Saves voicemail
*Skips call information
#Back to voicemail menu
Basic Functions
Making a Phone Call
1. For local calls and long distance: dial the area code and
number (i.e. 404-555-1212).
2. For international calls: dial 011 + country code + number
(i.e. 011-xx-xxx-xxxxx).
Making a Call
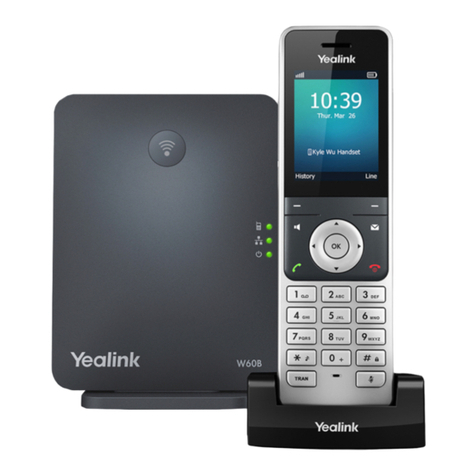
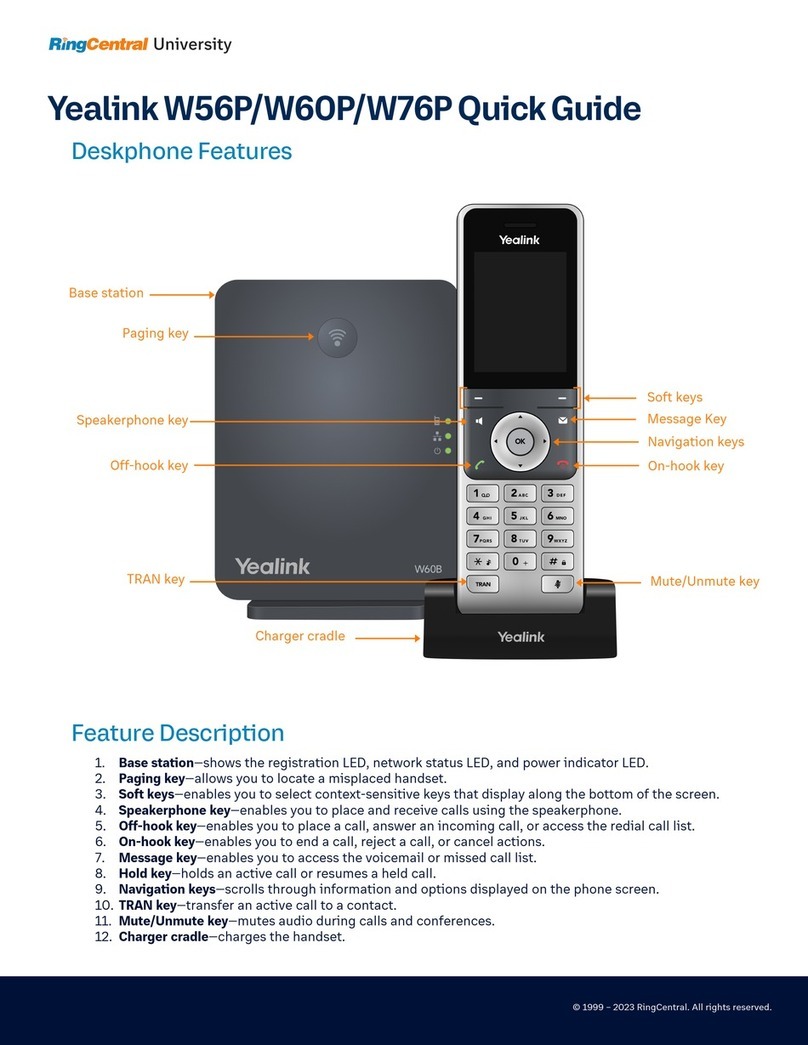
1. Pick up the handset, dial desired number and press
either the green phone icon key or the OK button.
2. To use speakerphone, press the speaker icon
(top left of the handset)
3. If there are multiple lines assigned to the handset as out
going lines, select the Line softkey to choose the desired
line and then press the OK button.
4. If no line is selected, the default outgoing line will be used.
Redial last number dialed
1. Press the green phone icon
2. Press green phone icon again
3. A call to the last dialed number is placed.
Redial previously dialed number
1. Press the green phone icon. Screen will display recently
dialed numbers.
2. Use the up/down directional keys to highlight the desired
number.
3. Press green phone icon to place the call.
Configure Call Waiting
1. Press OK to enter the main menu.
2. Select the Call Features icon and select Call Waiting.
3. Use left and right directional keys to set the Status value.
4. Use left and right directional keys to set the Tone value.
5. Press Save soft key to accept changes
Answer Call Waiting
1. Press the Accept soft key to answer the new call
2. The original call is placed on hold.
Configure Call Waiting
1. Press the History soft key while handset is idle.
2. Use the up/down arrow keys to choose All Calls, Outgoing
Calls, Missed Calls or Accepted Calls and press OK.
3. Use the up/down arrow keys to highlight the desired entry
and press the View soft key to display detailed information.
Quick Reference Guide
*67 - Block Caller ID (for single call)
*82 - Unblock Caller ID (for single call)
*90 - Extension Login (Call Queue)
*91 - Extension Logout (Call Queue)
*99/*100 - Access Voicemail Box (from your own extension)
*101 - Access Virtual Mailbox (to access any voicemail box
*102 - Internal Dial by Name Directory
911 - Emergency Services (availability based on location)
411 - Directory Assistance ($1.99 per-call)
** + Extension Number | Blind transfer a call straight into an
extension’s voicemail
Please Note: *Codes must be dialed prior to placing call
UG_YEALINKW56_0120 | ©2020 VONAGE 2
User Guide Yealink W56
Basic Functions (Continued)
Place a Call on Hold
1. During an active call, press the Options soft key.
2. Select Hold
3. Call is placed on hold and a Pause icon is displayed on the
LCD screen.
4. To resume, press either the Resume soft key, the speaker
icon key or the green phone icon key.
*For multiple calls on hold, use the up/down arrow keys or the
Swap soft key to toggle between them.
Blind Transfer
1. While on an active call, press the Options soft key and select
Transfer or press the Rbutton.
2. Enter the extension or phone number you would like to
transfer to.
3. Select the Transfer soft key or press the R button.
4. “Call Transferred” will display on the LCD screen.
Attended Transfer
1. While on an active call, press the Options soft key and
select Transfer or press the Rbutton.
2. Enter the extension or phone number you would like to
transfer to.
3. Press the green phone icon to dial out.
4. Once the 3rd party answers, press Ror the Transfer soft
key to complete the transfer.
5. “Call Transferred” will display on the LCD screen.
Start a Conference Call
1. Place a call to the first party.
2. Press the Options soft key and select Conference.
3. Enter the number of the 2nd party to be added to the
conference.
4. Press either the green phone icon, the OK button or the
Conference soft key to dial out.
5. Once the 2nd party answers, press the Conference soft
key again to join all parties.
Add New Party to Conference Call
1. While on an active conference, press the Ext.Call soft key
2. Enter the desired number in the Call To field
3. Press either the green phone icon or the OK button to dial
4. Once the new party answers, press the Options soft key
and select Conference to join the new party to the call.
Do Not Disturb
1. Press OK to enter the main menu.
2. Select Call Features and then select Do Not Disturb.
3. All lines assigned to the handset will display on the
LCD screen.
4. Use the up/down arrow keys to highlight the desired
line and press OK.
5. Use the left/right arrow keys to select Enabled from
the Status field.
6. Press OK. A red DND icon will display on the status line.
Online Account
First Time Login
• A New user email is sent to the email address associated with
the user profile.
• Email contains username and a one-time password setup link
which will expire after 24 hours.
• Click the link to set your permanent password and security
question.
Logging In
• Visit https://app.vonage.com
• Username and password are case sensitive
Change Voicemail PIN
1. Select Settings from left navigation
2. Select the Voicemail tab
3. Enter desired PIN (4-10 digits)
4. Click Save
Voicemail to Email
1. Select Settings from left navigation
2. Select the Voicemail tab
3. Select Send Voicemail to Email checkbox
4. Enter email address voicemail attachment will be sent to
5. Click Save
Never Miss a Call
1. Select Settings from left navigation
2. Select Never Miss a Call tab
3. Choose desired configuration
• Send to Voicemail – If no answer after X seconds, call is
sent to your Unavailable Voicemail Greeting.
• Forward All Calls – Extension will not ring. Calls are
immediately forwarded to designated extension or number.
• Follow Me – Incoming calls ring up to 5 numbers or
extensions in the sequence that you specify. Unanswered
calls will be routed to the voicemail of your choosing.*
• Simulring – Incoming calls ring up to 5 numbers at the
same time. Unanswered calls will be sent to the originating
extension voicemail.*
*Calls may be routed to an alternate voicemail box if the
ring time on any Follow Me or Simulring number is less
than that of the extensions voicemail.
4. Click Save
Additional Support
• For full Yealink W56P/W56H User Guides, visit the Preferred
Phones support article.
• For additional assistance in setting up for Vonage service,
please visit the Getting Started support page.
Other Yealink Telephone manuals

Yealink HV.Select T48S User manual

Yealink

Yealink HV.Select T48S User manual

Yealink EXP40 Instruction manual

Yealink

Yealink EXP40 Instruction manual

Yealink T46U User manual

Yealink

Yealink T46U User manual

Yealink T54W User manual

Yealink

Yealink T54W User manual

Yealink SIP-T54S User manual

Yealink

Yealink SIP-T54S User manual

Yealink T46G Skype For Business Edition User manual

Yealink

Yealink T46G Skype For Business Edition User manual

Yealink W56P Telesystem User manual

Yealink

Yealink W56P Telesystem User manual

Yealink T33G User manual

Yealink

Yealink T33G User manual

Yealink T46S Skype for Business User manual

Yealink

Yealink T46S Skype for Business User manual

Yealink T19P-E2 User manual

Yealink

Yealink T19P-E2 User manual

Yealink W60P Telesystem User manual

Yealink

Yealink W60P Telesystem User manual

Yealink SIP-T58A User manual

Yealink

Yealink SIP-T58A User manual

Yealink SIP-T41S User manual

Yealink

Yealink SIP-T41S User manual

Yealink T48G User manual

Yealink

Yealink T48G User manual

Yealink SIP-T46U User manual

Yealink

Yealink SIP-T46U User manual

Yealink T54W User manual

Yealink

Yealink T54W User manual

Yealink SIP-T54W User manual

Yealink

Yealink SIP-T54W User manual

Yealink T31P User manual

Yealink

Yealink T31P User manual

Yealink CP900 Instruction Manual

Yealink

Yealink CP900 Instruction Manual

Yealink T Series User instructions

Yealink

Yealink T Series User instructions

Yealink T55A Teams User manual

Yealink

Yealink T55A Teams User manual

Yealink SIP-T57W Instruction manual

Yealink

Yealink SIP-T57W Instruction manual

Yealink EXP50 User manual

Yealink

Yealink EXP50 User manual

Yealink T54W User manual

Yealink

Yealink T54W User manual

Popular Telephone manuals by other brands

Clarity P300 user guide

Clarity

Clarity P300 user guide

Anker PowerConf+ user manual

Anker

Anker PowerConf+ user manual

Fortinet FortiFone FON-C75 quick start guide

Fortinet

Fortinet FortiFone FON-C75 quick start guide

Aastra OpenPhone 71 user guide

Aastra

Aastra OpenPhone 71 user guide

Dictaphone Connexions quick reference

Dictaphone

Dictaphone Connexions quick reference

AVer FONE540 user manual

AVer

AVer FONE540 user manual

Widex 6272 quick guide

Widex

Widex 6272 quick guide

france telecom 4020 user guide

france telecom

france telecom 4020 user guide

Auerswald COMfortel D-600 Advanced information

Auerswald

Auerswald COMfortel D-600 Advanced information

Vodavi Starplus Triad-S installation manual

Vodavi

Vodavi Starplus Triad-S installation manual

Kraun KR.PH quick guide

Kraun

Kraun KR.PH quick guide

US Robotics USR809610A Quick installation guide

US Robotics

US Robotics USR809610A Quick installation guide

V-tech DECT 6.0 CS6114 user manual

V-tech

V-tech DECT 6.0 CS6114 user manual

Shenzhen Proolin VoIP Tech Media Phone Quick user guide

Shenzhen Proolin VoIP Tech

Shenzhen Proolin VoIP Tech Media Phone Quick user guide

Sony SPP-SS955 - Cordless Telephone Service manual

Sony

Sony SPP-SS955 - Cordless Telephone Service manual

NEC Dterm I Series Quick user guide

NEC

NEC Dterm I Series Quick user guide

SuddenLink business class phone user guide

SuddenLink

SuddenLink business class phone user guide

Panasonic KX-NT400 user manual

Panasonic

Panasonic KX-NT400 user manual

manuals.online logo
manuals.online logoBrands
  • About & Mission
  • Contact us
  • Privacy Policy
  • Terms and Conditions

Copyright 2025 Manuals.Online. All Rights Reserved.