TELUS VMO also offers TELUS Extension Mailboxes. The following section provides instructions
on how to personalize these mailbox types.
Extension mailbox service
Extension mailboxes allow up to 4 users to share a single mailbox. Each user can have their own greeting
and password. The mailbox capacity (i.e. number of messages) will be split between the users.
Setting up your extension mailbox
Before you start the TELUS tutorial, it is a good idea to draft your introductory greeting, as you will
be able to use this as the Primary Greeting via the tutorial (i.e. You have reached ABC Company.
If you would like to leave a message for Mary – press ; for Bob – press ; and for Bill – press ).
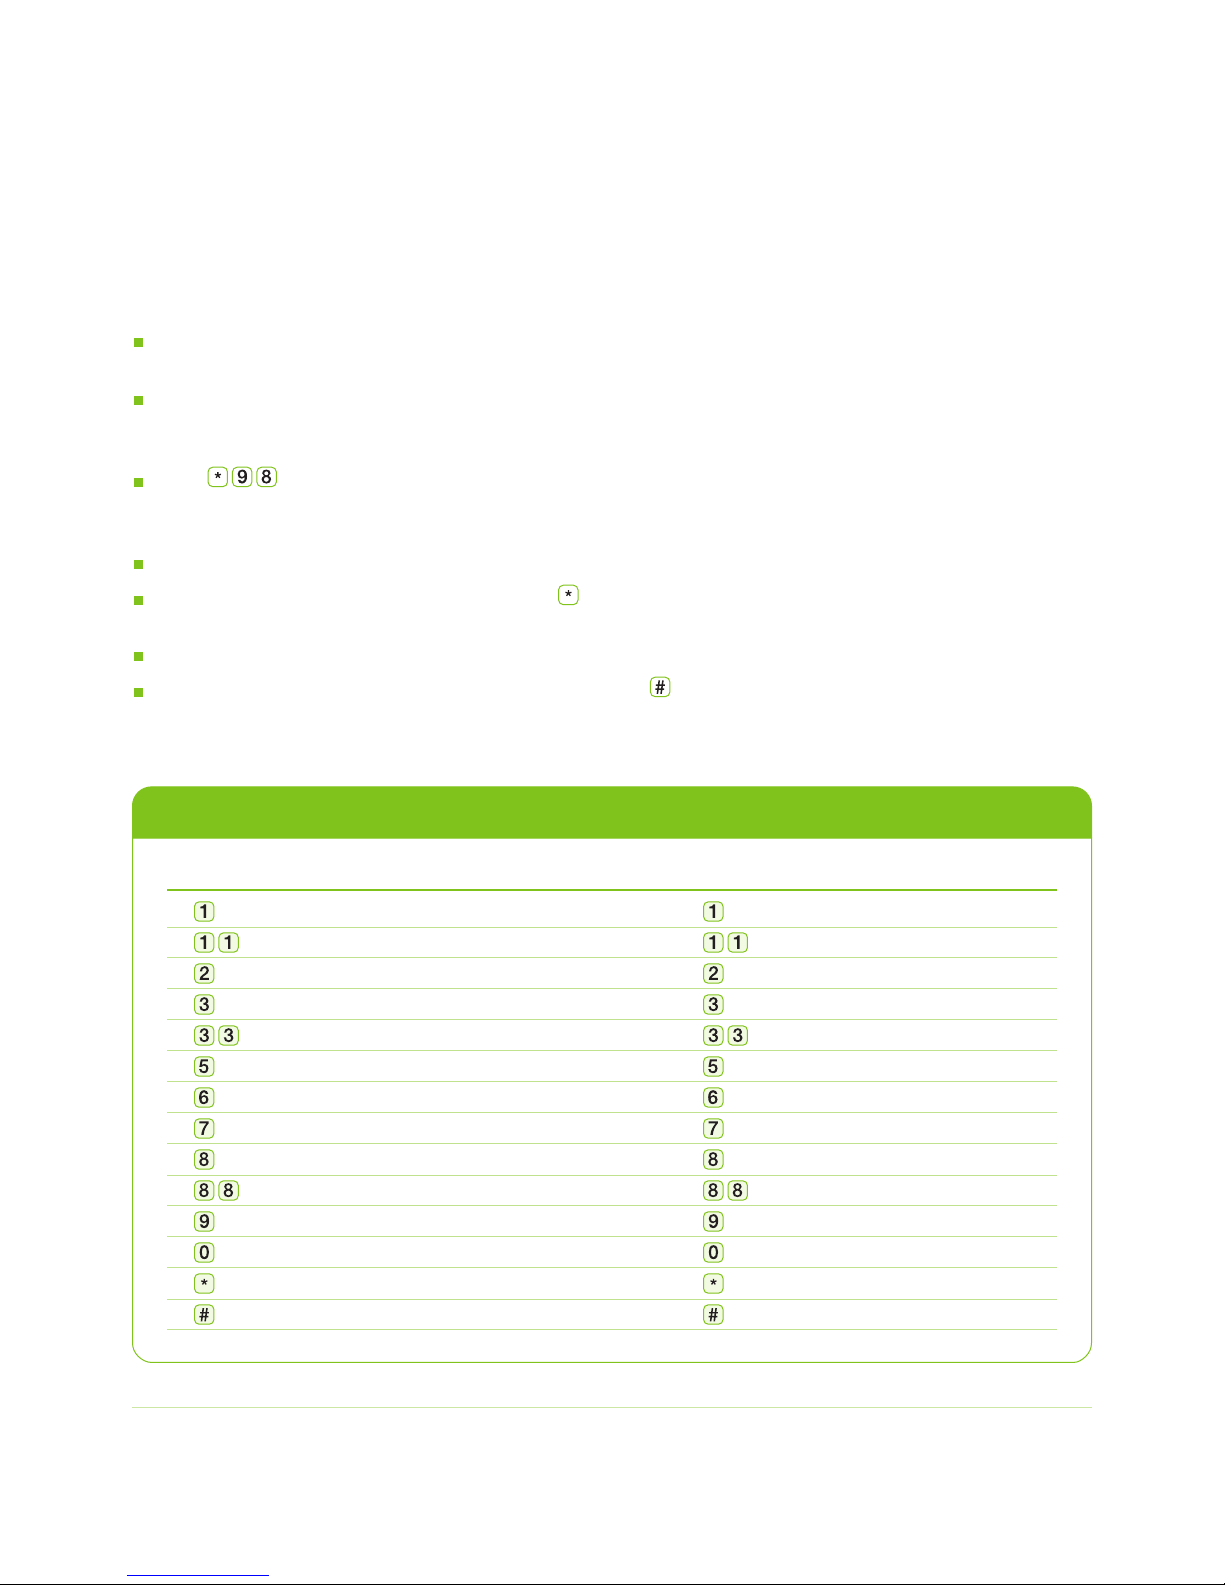
From your own office phone
1. Access mailbox – Dial or 310-9898.
2. Temporary Password – The tutorial will prompt you to enter your temporary password, which
is your 10 digit phone number, followed by .
3. Permanent Password1– You will then be prompted to create your permanent password.
After you have created your Password, press . To accept your new Password, press .
4. Personal Name – You will be prompted to start recording your personal name (tip – say your
name slowly) by pressing . When you have finished recording your name, press .
To accept your recorded Personal Name, press .
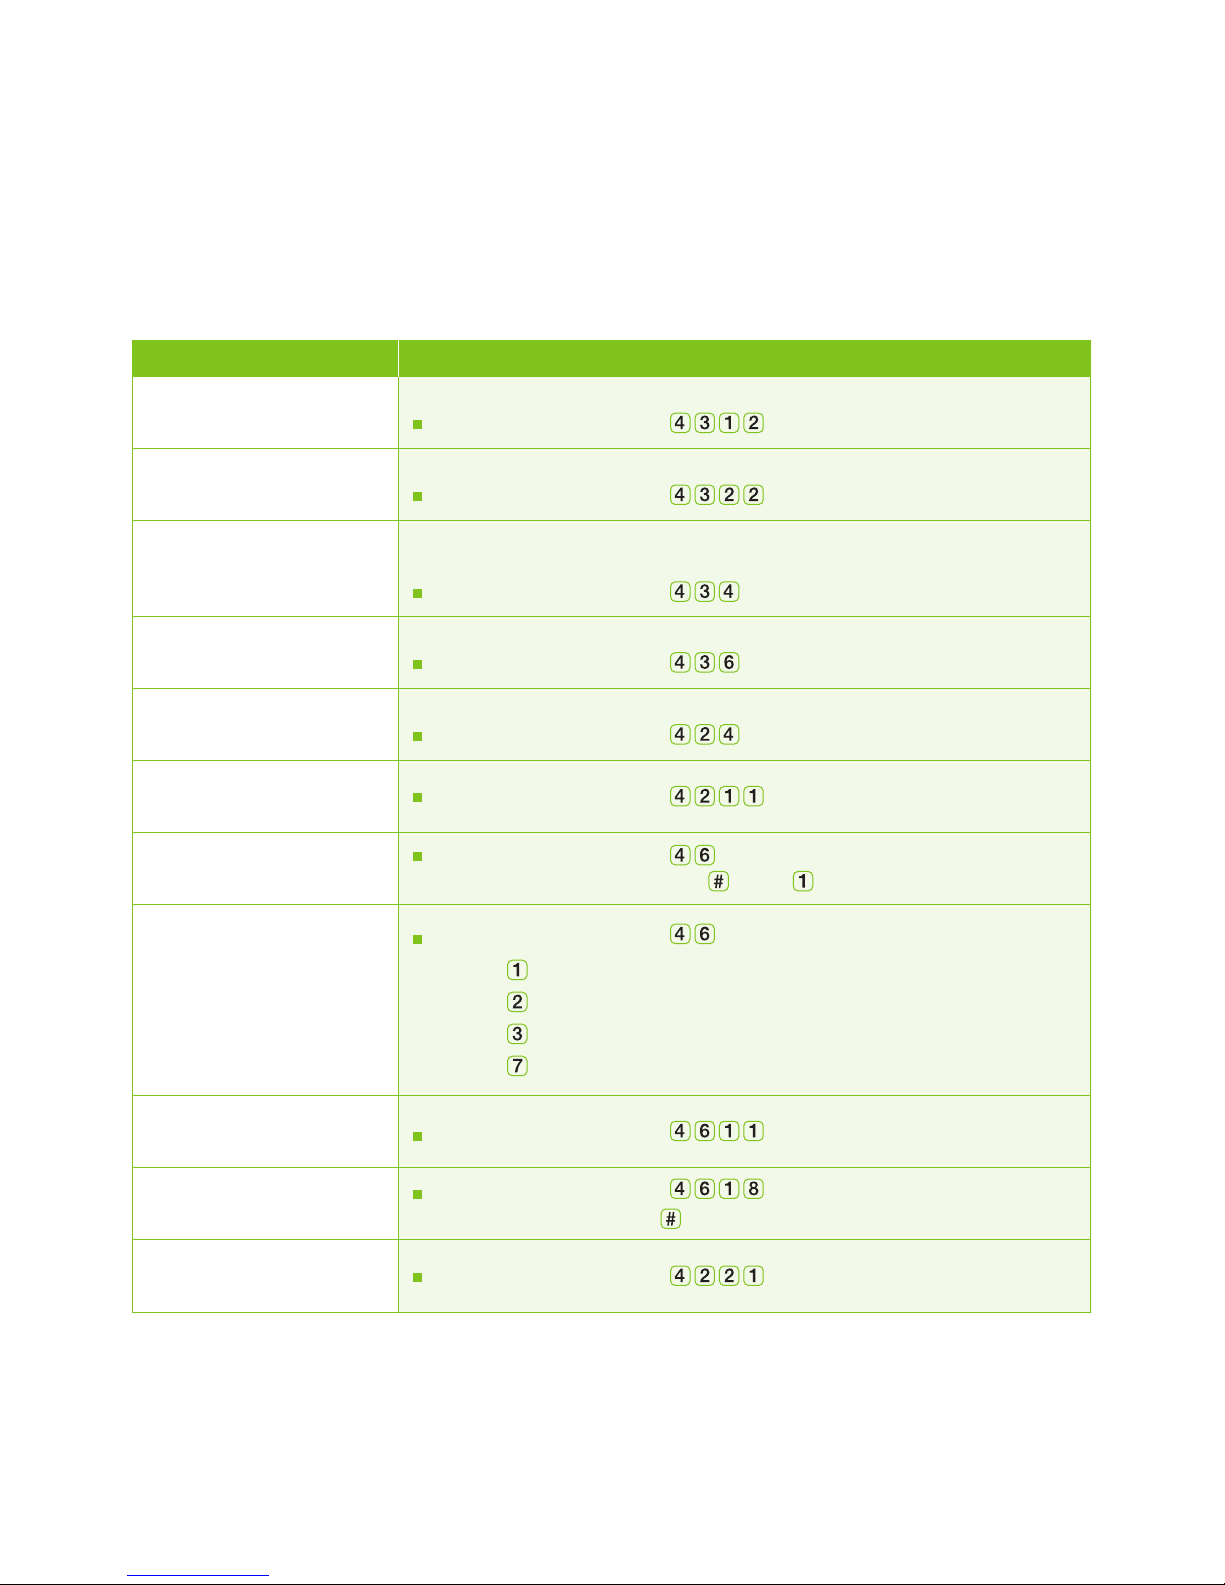
5. Personal Greeting, Main mailbox2– You will be prompted to start recording your personal greeting
by pressing . When you have finished recording your greeting, press . To accept your recorded
personal greeting, press .
6. Extension Mailboxes & Passwords3,4 – You will be prompted to press , to listen to the extension
mailboxes administration tutorial. To create your first extension mailbox, press . You will then be
prompted to enter a mailbox number for this extension (e.g. 1, 2, or 3). If this is your first extension
mailbox, press . The voice mail system will confirm that it’s your first extension mailbox, then
Notes:
1 Use the guidelines mentioned in the Access Numbers and Password – Permanent Password section in this document.
2 This greeting is what callers hear before they leave a message for you.
3 The temporary password for each extension mailbox is your 10 digit mailbox number with the numbers: 1, 2, or, 3
appended to the end of it, depending on how many extension mailboxes are created.
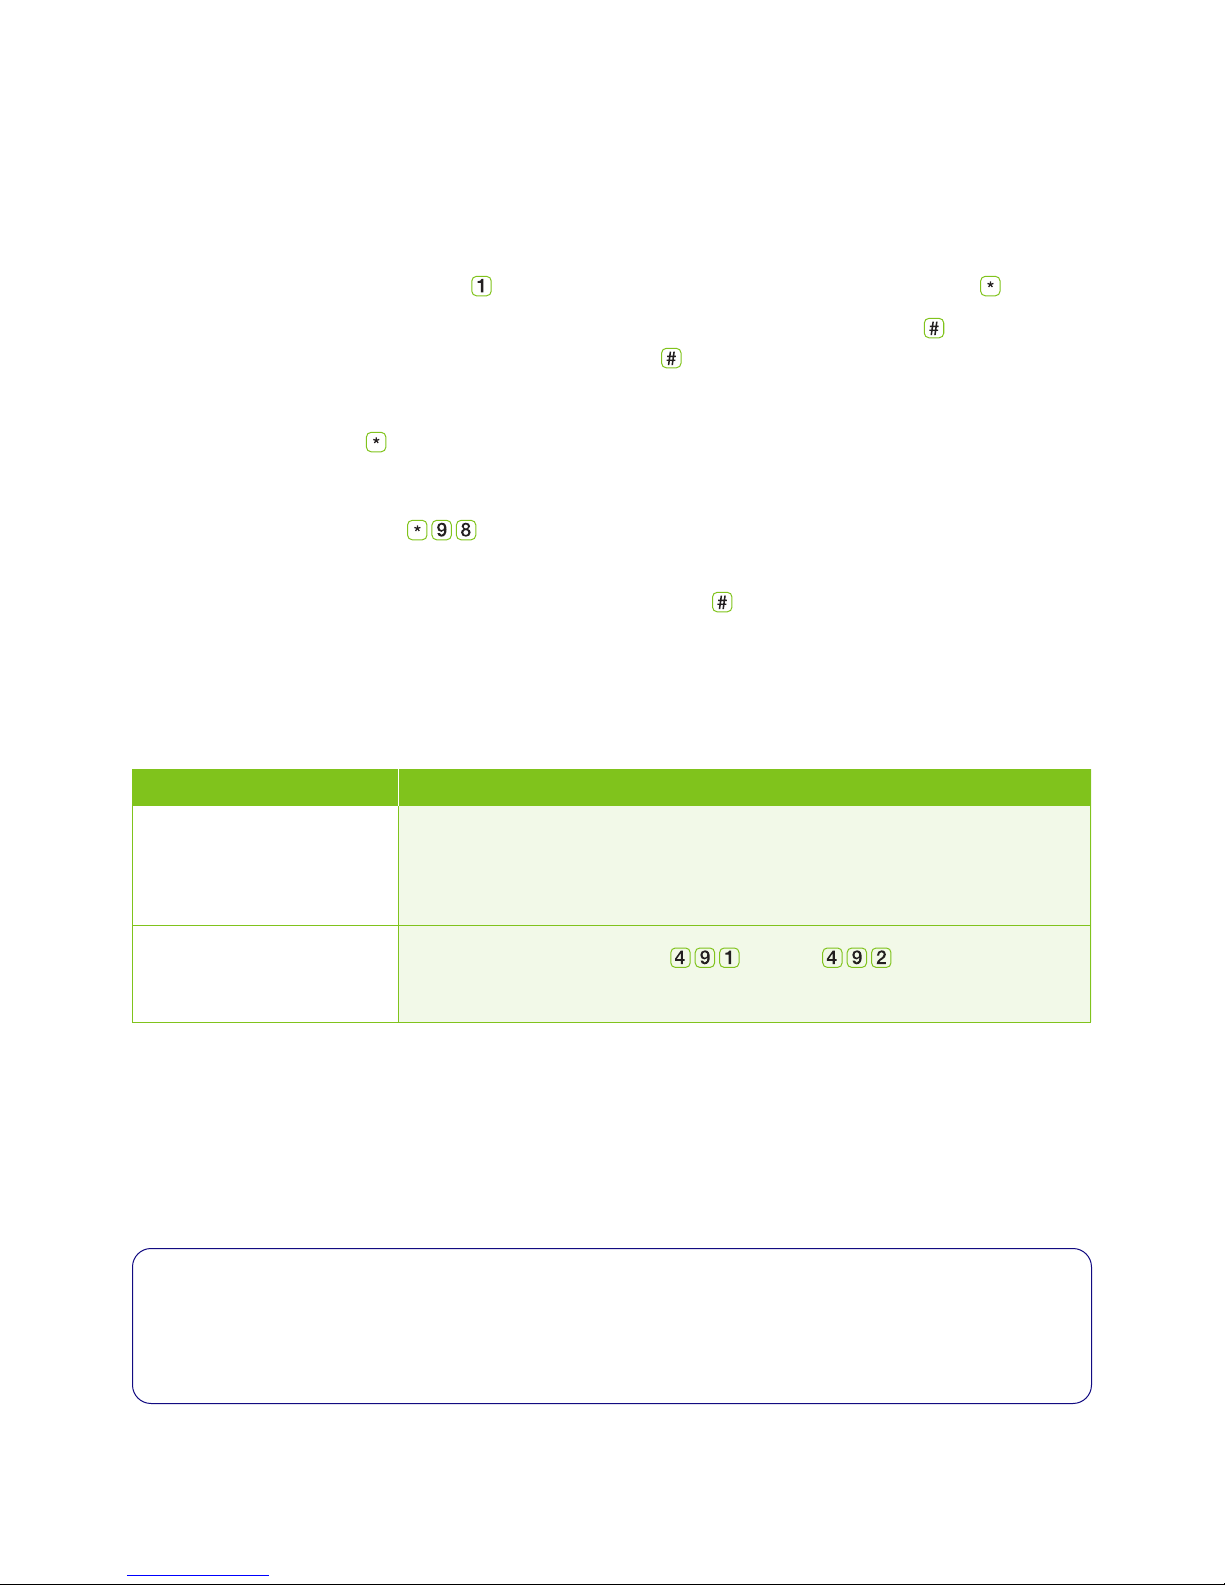
4 The TELUS tutorial will prompt you to set up your primary mailbox. To set your extension mailbox, you will be required
to return to the Main Menu by pressing , then enter the Personal Options section of your mailbox by pressing .
5 The Zero-out password cannot be the same as your log-in password and must be between 6 – 15 digits..
6 Whenever you exit your mailbox, press until the system says “Good-bye.”
Other types of TELUS VMO services
TELUS – changing the way business communicates 9
TELUS VMO – Premium Mailbox |User Guide Version 1.0