Teral CTFII User manual

Instruction Manual
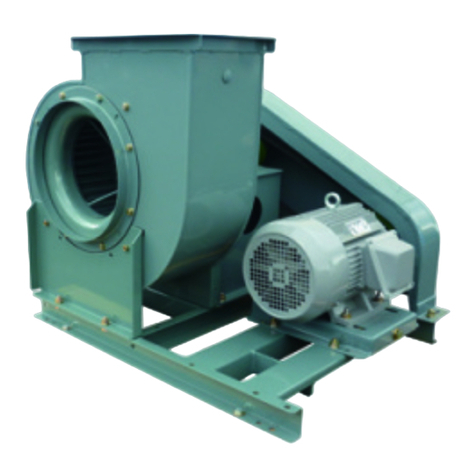
Centrifugal Fan
Turbofan Type CTFII / CTF3
CTF-B / CTF-BII
CTF-A / CTF-HA
Plate fan Type CPF / CPFII
CPF-B / CPF-BII
Warning
Do not carry out operation, inspection or maintenance of the fan until you read this manual and
understand the contents.
Keep this manual carefully at hand so that it can be consulted anytime when operating, inspecting
or maintaining the fan.
For contractors who carry out equipment work:
Please be sure to deliver this manual to user(s) who will carry out operation, inspection and
maintenance of the fan.
Teral Inc.

I
Limited warranties
1. In the event of failure or breakage under proper use of the unit during the warranty period, equipment
supplied by Teral Inc. will be repaired or replaced free of charge to the extent of the relevant part,
provided that such failure or breakage is attributable to inadequacy of the design or workmanship of
the equipment.
2. The warranty mentioned in the above clause shall be limited to the mechanical warranty of the
defective part, and shall not cover any consequential expenses or other damages arising from such
failure or breakage.
3. In the event of the following failures and breakage, the costs of the repairs shall be for the account of
the user.
(1) Failures and breakage attributable to equipment that was not delivered by Teral Inc.
(2) Failures and breakage after the expiration of the warranty period
(3) Failures and breakage caused by disasters or force majeure, such as fire, acts of God or
earthquakes
(4) Failures and breakage resulting from repairs or modifications made without the consent of Teral
Inc.
(5) Failures and breakage when parts other than those designated by Teral Inc. are used
4. Teral Inc. shall not be liable for any damage caused by incorrect or reckless use of the fan. In such a
case, any and all costs and expenses incurred for sending engineer(s) shall be borne by the user.
5. If the cause of the failure is unclear, necessary actions shall be determined through mutual
consultation.

II
Purpose of this manual
The purpose of this manual is to provide the user with detailed information necessary to properly
operate, maintain and inspect the fan.
This manual contains the following information and is intended for persons experienced in the
operation of fans, or for those who have been trained by such experienced persons. Only qualified
personnel such as electrical engineers are allowed to carry out the electrical wiring work.
Contents
1. Safety precautions·························································································································· 1-1
1.1 Types and meanings of warning terms ··················································································· 1-1
1.2 Safety precautions ·················································································································· 1-1
1.2.1. Precautions for placement and installation ······································································ 1-1
1.2.2. Precautions for operation································································································· 1-1
1.2.3. Precautions for maintenance and inspection ··································································· 1-2
1.3 Location of the warning labels································································································· 1-2
2. Configuration and overview of the fan ···························································································· 2-1
2.1 Construction and name of each part by transmission method ················································ 2-1
2.2 Specifications and accessories of the fan ··············································································· 2-2
3. Placement and installation ············································································································· 3-1
3.1 Before using the fan ················································································································ 3-1
3.2 Precautions during transportation and storage ······································································· 3-1
3.2.1. Precautions for transportation ·························································································· 3-1
3.2.2. Precautions for storage···································································································· 3-2
3.3 Precautions for the location of installation··············································································· 3-2
3.4 Foundation ······························································································································ 3-3
3.5 Installation······························································································································· 3-3
3.5.1. Floor-mount type·············································································································· 3-3
3.6 Alignment ································································································································ 3-5
3.6.1. Alignment of belt drive type······························································································ 3-5
3.6.2. Alignment of direct type shaft coupling ············································································ 3-6
3.7 Precautions for connecting the ducts ······················································································ 3-6
3.8 Precautions for wiring work ·····································································································3-8
4. Preparation for operation················································································································ 4-1
4.1 Points to be checked before test running ················································································ 4-1
4.1.1. Checking the electrical system························································································· 4-1
4.1.2. Checking the fan system·································································································· 4-1
5. Operation ······································································································································· 5-1
5.1 Precautions in test run ············································································································ 5-1
5.2 Precautions in normal operation······························································································ 5-2
5.3 Precautions when stopping the operation ··············································································· 5-2
5.4 Precautions when stopping the use ························································································ 5-2
6. Maintenance and inspection··········································································································· 6-1
6.1 Daily inspection······················································································································· 6-1
6.2 Periodic inspection ·················································································································· 6-2
6.3 Refill and change of grease (oil)······························································································6-3
6.3.1. Rolling bearing ·················································································································6-3
6.3.2. Oil bath type bearing········································································································ 6-4
6.3.3. Refill of grease in spring coupling ···················································································· 6-4
6.3.4. Consumables ··················································································································· 6-4
7. Troubleshooting ····························································································································· 7-1
7.1 Troubleshooting ······················································································································ 7-1
8. Special accessories························································································································ 8-1

III
8.1 Dampers ································································································································· 8-1
8.2 Expansion joints······················································································································ 8-1
8.3 Filter ········································································································································ 8-1

1-1
1. Safety precautions
1.1 Types and meanings of warning terms
This instruction manual divides precautions into the following four categories according to the
level of hazards (or the severity of the accident).
Be sure to understand the meanings of the following terms and comply with the content
(instructions) of the instruction manual.
Warning Term Meaning
Danger
Indicates an imminently hazardous situation. Failure to observe the
procedures or instructions will result in death or serious injury.
Warning
Indicates a potentially hazardous situation. Failure to observe the
procedures or instructions may result in death or serious injury.
Caution
Indicates a potentially hazardous situation. Failure to observe the
procedures or instructions will result in minor or moderate injury or cause
damage to equipment or devices.
Note Indicates information that is in particular to be noted or emphasized.
1.2 Safety precautions
1.2.1. Precautions for placement and installation
(1) Move and place the fan considering the center of gravity and weight.
(2) Ensure the installment work according to the instruction manual.
(3) Do not install it in any places where is exposed to direct flame or high temperature.
(4) Do not install it in any places with high humidity such as bath room.
(5) Do not install it in any places where toxic gases are produced from acids, alkalis, organic solvent,
paint or other substances or where corrosive gases are produced, for example in machine room
or chemical plant.
(6) Install the outdoor air intake in a position far away from the exhaust vents of combustion gas, etc.
(7) Be sure to install a ground fault interrupter to the main power.
(8) Only qualified personnel such as electrical engineers are allowed to carry out the electrical wiring
work. Before working, be sure to turn off the main power.
(9) Do not expose the motor to water.
If it gets wet, the resulting short circuit and/or insulation degradation of the electric circuit may
damage the fan.
(10) Do not place any combustibles or obstacles that may hinder ventilation around the motor.
(11) Arrange parts with a drain outlet such that proper drainage is ensured.
(12) Install a protective wire mesh etc. to the open air intake.
1.2.2. Precautions for operation
(1) Before starting the fan, ensure that all the relevant workers are informed of the operation and that
there are no workers in the dangerous zone.
(2) Only those who are authorized by the site manager are allowed to operate the fan.
(3) Before turning on the power, be sure to attach the cover to the terminal box of the motor.
(4) Ensure to apply the rated voltage to the fan.
(5) When the fan is running, never touch any parts of the unit unless it is absolutely necessary.
(6) Do not insert your finger or a rod-like object into the air intake or outlet.
(7) Do not insert your fingers or other objects into the opening of the motor. Failure to observe this
may cause an electric shock, injury, or fire.

1-2
(8) Do not place any objects around the air intake or exhaust vents of the fan.
(9) Ensure to install a belt guard or shaft coupling guard before operating the fan.
(10) Remove any tools and other objects from the top of the fan before operation.
(11) Do not operate the fan if there are any defects or faulty parts.
(12) If the gas for which the fan is used is hot, do not touch the fan body as it can also be hot.
1.2.3. Precautions for maintenance and inspection
(1) Maintenance and inspection work must be carried out only by personnel who have been trained
to handle the fan.
(2) Before starting maintenance or inspection work, ensure to inform the relevant personnel of the
work.
(3) Before starting the maintenance or inspection work, ensure to stop the fan and turn off the main
power on the operation panel.
If you carry out the maintenance or inspection work with the power on, you may suffer an electric
shock and unexpected activation of the fan may pose a danger of injury.
(4) Consult Teral, Inc., or a service company before moving, repairing, or modifying the fan.
1.3 Location of the warning labels
The figure below shows the locations to which each warning label should be affixed. If these labels
become dirty and hard to read or if they are peeled off, replace with new ones.
Warning
Follow all warnings on the labels affixed to the fan and those in the
instruction manual.
Warning
Keep your hand away
from here, or you may
get injured.
Warning label d
Nameplate Caution
Warning label c
Rotating
parts
◦Ask vendo
r
s specialized in installation,
electrical work, and repairs.
◦Only personnel authorized by the
person in charge of machine
management are allowed to carry out
the operation and inspection work.
◦Read the instruction manual thoroughly,
and follow the instructions.

2-1
2. Configuration and overview of the fan
2.1 Construction and name of each part by transmission method
(1) OB Type
(2) MOB Type
No. Part name
cFan casing
dImpeller
eAir intake
fMain shaft
gBearing
hV-belt pulley
iBelt guard
jCommon base
kSuction flange
lDischarge flange
{
11 Vibration insulating liner
{
12 Vibration insulating base
{
13 Shaft coupling
{
14 Shaft coupling guard
{
15 Motor
(3) HOH Type
(4) VOH Type

2-2
2.2 Specifications and accessories of the fan
If you purchased a standard unit, refer to the standard specifications in the following table. For
custom-made units according to special specifications, refer to such specifications including the
external dimensions drawing.
Caution
Do not use this unit under any conditions other than those provided
in the specifications. Failure to observe this may cause an electric
shock, fire, and/or product failure.
(1) Standard specifications and special specifications
Clean air
Air 0°C to 80°C
Installation location Indoor (ambient temperature: 0°C to 40°C)
Installation method Floor mount
Totally closed type (0.4 kW or lower)
Type Drip proof type (0.75 kW or higher)
50Hz, 3 phases, 200V
Motor
Phase, voltage 60Hz, 3 phases, 200/220V
Prime and inside coating: Anti-corrosive coating
Standard specifications
Painting Finish coating: Acrylic alkyd resin paint
(Munsell 7.5BG5/1.5)
Belt guard, with rotation measuring hole (Standard for CTF3)
Belt guard for outdoor use (Standard for CTF3)
Belt guard, with rear cover (Standard for CTF3)
Special orientation of discharge flange
Casing, upper and lower split
Structure
modifications
Hot gas type
Totally closed fan-cooled type
Motor modifications Different voltage
Painting with polyvinyl chloride resin
Painting with epoxy resin
Special specifications
Paint changes
Paint color specified
(2) Standard and special accessories
Standard accessories Special accessories
Companion flange Intake mesh
Common base (excluding VOH type) Intake damper
Vibration insulation base (vibration-proof type
only) Discharge damper
Vibration insulation liner (vibration-proof type
only) Foundation bolt
V-belt pulley on the fan side (only for OB type) Shaft seal (only for OB and MOB types)
V-belt pulley on the motor side (only for OB
type) Intake filter
V-belt and belt guard (only for OB type) Connecting pipe
Shaft coupling (only for MOB type) Expansion joint
Shaft coupling guard (only for MOB type)
Bearing guard (only for OB and MOB types)

3-1
3. Placement and installation
3.1 Before using the fan
When you receive the delivery of the fan, check the following points first.
If there are any problems, contact the sales agent you purchased the product from.
Handle the motor according to the instruction manual of the motor.
Incorrect handling may result in an accident or failure.
(1) Check the nameplate to verify that the product is the one you ordered.
(2) Check that the discharge direction, rotation direction, and power transmission methods are as
ordered.
(3) No parts of the product are damaged during transportation.
(4) All fastening parts including bolts and nuts are securely tightened.
(5) All the accessories that you ordered have been delivered.
3.2 Precautions during transportation and storage
3.2.1. Precautions for transportation
Warning
• Do not step under the suspended fan. The fan may fall onto you.
• For transportation of the unit, ask a specialist company who should
move and place it in consideration of the center of gravity and
weight.
• Before hoisting the unit, refer to the catalogue or external
dimensions drawing etc. to confirm that the weight of the fan does
not exceed the rated load limit of the hoisting equipment.
• Do not lift the whole unit using the main shaft of the fan, lifting eyes
of the motor, or other parts.
Caution
• Care should be taken to nails especially when opening a wooden
box that contains the unit, or you may get injured.
(1) To lift the fan, use the specified lifting eyes on the casing.
(A fan of #61/2 or larger has labels on it to indicate the lifting point.)
(2) If the fan is small-sized and has no lifting eyes, lift the fan by running a rope or wire under the
common base.
(3) When lifting a split casing or impeller, ensure that the points which a rope or wire would contact
are covered with blankets, etc. so that any distortion is
prevented.
(4) Use as long ropes and wires as possible so that the fan can be
lifted at an angle of 90° or less, which prevents the fan from
being deformed/damaged by the lifting load.
(5) When the casing surface is covered with lagging (for heat
insulation), even a very small load will cause deformation, so
ensure that the rope should not contact the lagging surface.
Lifting eye

3-2
3.2.2. Precautions for storage
(1) Take protective measures for the unit against rust during storage until it is installed and
assembled. In particular, take measures to prevent the bearings from rain water and dust,
such as covering them with a vinyl sheet.
(2) Store indoor-type motors and other electrical devices indoors.
For equipment for outdoor use, also protect its wiring and cable openings against moisture.
3.3 Precautions for the location of installation
Install the fan in a place where the following conditions are satisfied:
(1) This fan is intended for indoor use. If you use it outdoors, either install it in a location not
exposed to the wind or rain, or protect the motor, bearing, and other critical parts with covers.
Furthermore, install the fan in a location where it will not suck in rain water.
(2) A well-ventilated place with minimum exposure to dust or moisture
If you install the unit in a fully closed room, such as machine room, install a ventilator so that
the room temperature does not increase due to the heat generated by the motor.
(3) A place at an ambient temperature of 0°C to 40°C
(4) A place where no unauthorized persons are able to enter or operate the product.
Take measures to prevent unauthorized persons from having access to the fan, for example,
by installing a barrier.
(5) A place where the fan can be easily and safely
inspected and repaired.
Secure a space wide enough to replace pulleys and
align the centers.
In the case of the split type casing, secure a space
wide enough to place the upper casing, the impeller
etc. and perform assembly, disassembly, and repair
work.
(6) If you install the fan indoors, ensure that the room
has a doorway that is wide enough to allow the fan
to pass through.
(7) If it is frequently necessary to replace or repair
large-sized fans or impellers due to corrosion or
wear, consider using minimal hoisting equipment.
Caution
Do not place any combustibles or objects that may obstruct
ventilation around the motor.
The cooling system may be prevented from working, which may
result in overheating or fire.
Fan
V-belt
pulley
Motor
Installation of the fan
Min. 600 mm
Min. 450 mm

3-3
3.4 Foundation
(1) The foundation must be strong enough to support the weight and the load and vibration
produced by the fan during operation.
(2) The foundation concrete should be constructed such that it keeps its levelness and is not
affected by ground subsidence. Reinforce the ground by piling if it is soft or weak.
(3) The weight of the foundation must be two to four times the total weight of the fan including
the motor.
(4) The unit’s foundation should be isolated from vibrations of the structure’s pillars or floor.
(5) When constructing foundations for two or more units, isolate one unit from another so as to
prevent the transmission of vibration.
(6) Foundation bolt should be secured using the installation method of a fan, in which, as a
standard, box voids are placed in the concrete foundation. Refer to the external dimensions
drawing for the positions for the foundation bolt holes.
When setting the foundation bolts before installing the fan, use a template to ensure that the
positions are correct.
(7) If the foundation is constructed on the second floor or higher, level the foundation with a
beam and keep it as close as possible to the walls.
3.5 Installation
3.5.1. Floor-mount type
The followings are the procedure for installing the foundation bolts (box void method).
(When foundation bolts are installed in advance, follow only the applicable instructions below.)
(1) Clean the foundation concrete surface and check the levelness. According to the site conditions,
chipping may be necessary.
(2) Clean the foundation bolt holes and remove any debris.
Although the foundation bolt holes must be wet, there must be no water in the holes. Remove
water.
(3) Set one flat liner and two tapered liners
on both sides of the fan foundation bolt
holes as shown in the figure.
If necessary, use auxiliary liners (at least
3 mm thick).
If there is a distance of more than one
meter between foundation bolts, also set
liners in that space.
(4) Place the fan base on the liners, and
insert the foundation bolts through
foundation bolt holes of the fan base into
the box voids.
To ensure resistance to earthquake, weld
the foundation bolts to the reinforcing iron bars of foundation concrete.
(5) Use the tapered liners to adjust the fan position and height.
As a guide, the levelness of the shaft should be within 0.1 mm per meter.
Fan base
Mortar finish
A
uxiliary
liner
Tapered
liner
Flat liner
Foundation concrete

3-4
(6) If the casing is separated from the bearing and the
base, set the height and the position in consideration
of the clearance between the rotating body and the
casing.
Adjust the clearance between the impeller and the air
intake and the clearance between the main shaft and
the casing (shaft seal) so that they are as even as
possible in terms of circumference.
However, if the fan handles a gas at a temperature
exceeding 200°C, adjust the height in consideration
of thermal expansion of the casing center. Calculate
the expansion of the center height by assuming that it
expands about 1 mm per meter when temperature
increases by 100°C.
(7) After sufficiently roughing the inner surface of foundation bolt holes, fill them with non-shrink
mortar. Set the foundation bolts such that they are vertical in the center of the holes.
(8) After the mortar has fully cured, firmly tighten the nuts of the foundation bolts.
Tighten the bolts uniformly.
Weld the liners so that they will not move during the operation of the unit.
(9) Fill the clearance between the fan base and the foundation concrete with mortar to integrate them
into a concrete structure.
(10) Check that the mortar has not contracted or cracked.
If the drain piping and/or cooling water for the bearing are required, consider the installation of a
sump pit.
(11) When a vibration isolator is equipped, fix the vibration isolation base (lower base) in place with the
foundation bolt.
If vibration isolation springs are used in building equipment, install the vibration isolation materials
at equal intervals around the center of gravity of the fan assembly.
(12) When the fan is installed and the ducts are connected, carry out the alignment work described in
the section 3.6.
Ensure to tighten the foundation bolts before measuring the alignment results.
Casing
Impeller
Clearance
Clearance
A
ir intake

3-5
3.6 Alignment
The fan is aligned at the factory before shipping, but should be realigned after installation.
Warning
Alignment work should be carried out without the belt guard and the
shaft coupling guard. So they must be re-installed before starting the
operation.
If the fan is operated without the belt guard and/or the shaft coupling,
you may be caught by the belt/shaft and injured.
Caution
Incorrect alignment may damage the equipment, or cause vibrations
and noise. Align the fan correctly.
3.6.1. Alignment of belt drive type
(1) Place a ruler or a piano wire onto the outer surfaces of the
V-belt pulleys on both the fan and motor sides, and check
and adjust it such that the surfaces of the pulleys are on a
straight line.
(2) If you can depress the middle of the V-belt with your finger
up to about the same depth as the thickness of the V-belt,
the tension of general V-belts should be appropriate.
Use the slide base of the motor to adjust the tension of the
V-belt.
(3) Stretch the high tension V-belts slightly tighter than general
V-belts. Too loose tension may cause the belt to slip during
startup, and excessive tension may apply a large load to
the shaft and bearing, thus resulting in failure.
(4) Since V-belts tend to loosen at the early stages of its use,
ensure to readjust it in several days of use.
[Procedure]
Obtain the deflection δ: 0.016ℓ. (ℓ: Distance between pulleys)
Then use a tension meter to produce the standard deflection (δmm) in the middle of the V-belt.
Re-tension the belt (or adjust the tension) such that the deflection load at that time corresponds to
the value given in the following table.
Deflection load Td for each V-belt type and small pulley OD
V-belt
type
Range of small pulley
outside diameter
(mm)
Deflection load of new
belt
N/belt (kgf/belt)
Deflection load after
re-tension
N/belt (kgf/belt)
65 - 80
81 - 90
91 - 105
A
106 -
9.8 (1.0)
11.8 (1.2)
13.7 (1.4)
15.7 (1.6)
7.8 (0.8)
8.8 (0.9)
10.8 (1.1)
11.8 (1.2)
115 - 135
136 - 160
B
161 -
17.7 (1.8)
22.6 (2.3)
24.5 (2.5)
13.7 (1.4)
17.7 (1.8)
18.6 (1.9)
175 - 205
206 - 255
C
256 -
35.3 (3.6)
42.2 (4.3)
50.0 (5.1)
27.5 (2.8)
32.4 (3.3)
38.2 (3.9)
67 - 90
91 - 115
116 - 150
3V
151 - 300
21.6 (2.2)
25.5 (2.6)
29.4 (3.0)
33.3 (3.4)
17.7 (1.8)
19.6 (2.0)
22.6 (2.3)
25.5 (2.6)
180 - 230
231 - 310
5V
311 - 400
74.5 (7.6)
90.2 (9.2)
105.9 (10.8)
57.9 (5.9)
69.6 (7.1)
82.4 (8.4)
The values in ( ) are expressed in the traditional unit system and
shown for reference.
Tension meter
Ruler or piano wire
Make them parallel
V-belt
pulley
Motor Fan

3-6
3.6.2. Alignment of direct type shaft coupling
The following is an example of the case a flange type flexible shaft coupling is used.
(1) Put a parallel ruler at four places on the circumference of the shaft coupling and check the
gap between levels of the circumferences.
(2) Measure the clearance between the mating surfaces of the shaft coupling using a taper
gauge or a feeler gauge.
The tolerances are within 0.05 mm for the gap between the levels and within 0.1 mm for the
unevenness of the clearance.
Correct the alignment by inserting a shim under the motor.
Use a dial gage for the adjustment of a spring coupling or the like which requires preciseness.
3.7 Precautions for connecting the ducts
Caution
Ensure that the ducts do not apply any load to the fan.
Otherwise, malfunctions, damage or vibration may occur.
(1) Connect the fan’s flanges and ducts using expansion joints to avoid the transmission of
vibrations or noise to the exterior.
In particular, when handling a high temperature gas, be sure to install expansion joints so
that the reaction force from the duct due to thermal expansion will not be applied to the fan.
(2) Before connecting the ducts, check the inside of the ducts and fan, and remove any foreign
matters, such as waste cloth and tools.
(3) Please note that, in general, the use of ducts of which diameter is much smaller than the port
diameter of the fan, ducts with bends in series, or ducts with bends just before or after the
connection to the fan may cause an unexpected increase in pressure loss.
Parallel ruler
Within 0.05mm
Taper gauge
“a-b” should be within 0.1 mm

3-7
(4) If necessary, install a damper to control air volume.
When θexceeds 7°
(Wrong)
Install straight air duct
(Correct)
When bend section is near the
discharge port
(Wrong)
Attach vanes at bend or
rectangular bend section
(Correct)
When local resistance
becomes excessive
(Wrong)
Install a bell mouth or the
like to reduce the local
resistance.
(Correct)
When rectangular bend
section is near the suction
port.
(Wrong)
Attach vanes at rectangular
bend section
(Correct)
When a vend is created in
the direction opposite to
impeller’s rotation near the
discharge port
(Wrong)
When a bend is created in the
direction same as impeller’s
rotation near the discharge port
(Correct)
When the suction air makes a
whirl in a direction opposite to
impeller’s rotation
(Wrong)
Attach vanes to prevent
suction air from whirling
(Correct)
(Wrong) (Correct)
Warning
Be sure to install a protective wire mesh on any open air intakes for
the fan.
(5) On the duct inlet or the air intake through which air is directly sucked, install a protective wire
mesh to prevent entry of any foreign matters.
(6) In the case of a turbo fan, if it is expected that dust or water droplets enter the fan, be sure to
install a filter to prevent them from entering the fan.
Note
If there is a wall in front of the fan, ensure that the gap between the intake
and the wall is larger than the diameter of the air intake of the fan.
Min. 1.5D
(D: Impeller Dia.)

3-8
3.8 Precautions for wiring work
Warning
Use high-quality wiring equipment and devices, and carry out wiring
work safely and securely according to the technical standards for
electrical facilities and the indoor wiring regulations.
Only qualified personnel such as licensed electrical engineers are
allowed to carry out electrical wiring work.
Incomplete wiring work by an unqualified person is prohibited by law
and very dangerous.
(1) Be sure to install a ground fault interrupter and an overload protection device on the primary
power side of the fan.
(2) If a standard thermal relay is used for the following models as an overload protection device,
it may trip at the startup. Use a time delay thermal relay instead.
Frequency Model number Motor output RPM
CTFII - No.3½ 3.7 kW 1880 min-1
CTFII - No.4 3.7 kW 1460 min-1
CTFII - No.4½ 5.5 kW 1340 min-1
50 Hz
CTFII - No.5 5.5 kW 1190 min-1
CTFII - No.3½ 3.7 kW 1870 min-1
CTFII - No.4 3.7 kW 1510 min-1
CTFII - No.4½ 5.5 kW 1390 min-1
60 Hz
CTFII - No.5 5.5 kW 1200 min-1
(3) Be sure to install a ground wire to prevent an electric shock.
• Connect the ground wire to the ground terminal in the terminal box of the motor.
• Do not connect the ground wire to gas pipes, water pipes, lightening arresters, or ground
wires for telephone.
Warning
Incomplete wiring work is prohibited by law and very dangerous.
(4) Control fluctuations of the voltage within ±10% of the rated voltage, and the frequency within
±5% of the rated frequency. Note that, if the unit is used beyond the ranges, it may cause a
failure.
(5) Before running the fan, check the following points again:
cAn appropriate fuse (ground fault interrupter) is installed.
dWiring is correct.
eThe unit is securely connected to a ground.
fNone of the three terminals of the motor is loosened or disconnected.
Caution
Do not operate the unit with only two terminals connected.
Failure to observe this may cause the motor to burn out.

4-1
4. Preparation for operation
4.1 Points to be checked before test running
4.1.1. Checking the electrical system
(1) Check that the fan is correctly wired.
(2) Check that the terminals are securely connected.
(3) Check that the equipment is securely grounded.
(4) Check that the settings of the overload protection device meet the rated current value of the
motor being used. The rated current value is indicated on the motor nameplate.
4.1.2. Checking the fan system
(1) Check that water has not accumulated in the fan and that no foreign matters or materials
such as tools have been left inside.
(2) Check that all the connections of foundation bolts, the fan, accessories and pipe joints are
securely tightened.
(3) Check that the dampers and valves can fully open and close, and that they operate properly.
(4) Check that a specified amount of lubricant is filled (to the specified level in the oil gauge)
when the bearing is lubricated in an oil bath.
(5) Check the cooling water when the bearing is cooled in an oil bath or by a water-cooling
system.
Supply about 10 to 14 ℓ/min of clean water at a temperature of 25 °C or lower and a water
pressure of 0.3 MPa or less.
(6) When using a spring coupling, fill grease into the clearance between the tooth flanks before
combining them.
Make sure that an appropriate amount of grease is filled.
(7) Check the alignment of the tension of V-belt.
Warning
Be sure to turn OFF the main power before checking the fan by
rotating it by hand.
(8) Rotate the fan by hand or by inching a motor to check that it can rotate smoothly without any
internal obstructions.
(9) Put an operator in place in advance so that the fan can be turned OFF at any time
immediately after the instructions of the person in charge of the operation.
Warning
Do not operate the fan if you find any problem such as noise. Be sure
to contact a specialist company or a service center of the
manufacturer.

5-1
5. Operation
5.1 Precautions in test run
Warning
Be sure to install a belt guard and a shaft coupling guard before
operation if the unit is equipped with them.
(1) Close the damper and turn the unit ON and OFF once or twice to confirm that the unit is operating
properly without any unusual noise or vibrations. At that time, check the rotation direction of the
fan. If the fan rotates in the reverse direction, swap two of the three wires of the power supply
cable.
Warning
Be sure to turn off the main power before changing the wiring of the
fan.
(2) Turn on the power, and watch the unit carefully until it reaches full speed.
At that time, carefully check for unusual noise, vibrations, current, or any other abnormal
condition.
(3) Start the continuous operation, and gradually open the damper.
In order to check the condition of each part, keep the fan running at a low flow rate (light load) for
20 to 30 minutes.
At that time, ensure that the fan does not run at a rate where surging may occur.
(4) Gradually open the damper until the fan reaches the full load operation.
Keep it running under this condition for one to three hours, and check the temperature, vibrations
and noise at each section of the fan.
In addition, check that the motor current value is normal.
In particular, note that the (electrical) current value of the models that handle high temperature
gasses increases during the operation at room temperature.
The bearing temperature may become slightly higher than usual for about one to two hours after
the start of operation. If there are no errors in the machine, however, the temperature stabilizes
thereafter.
(5) If the model handles high temperature gasses, misalignment may be caused by thermal
expansion after the start of stable operation. Therefore, stop the operation once to check the
alignment when the temperature has risen sufficiently after the start of operation.
Warning
Do not touch the body of the fan or the duct if the temperature of the
gas is high. Otherwise, it may cause burns.
Do not place any combustibles near the unit.
Note
When the bearing is cooled by air-cooling method, secure a sufficient
space around the air-cooling parts (such as heat fins and heat sinks) so
that their heat radiation is not blocked by lagging or the like.

5-2
5.2 Precautions in normal operation
(1) Frequently starting and stopping the fan may cause damage to it sooner. Use the following values
as a guide for the frequency of starting the fan.
Motor output Startup frequency
7.5kW or less Up to 6 times an hour
11kW to 22kW Up to 4 times an hour
26kW or more Up to 3 times an hour
Warning
In the event of a power failure, be sure to turn off the main power.
Otherwise, when the power is restored, the fan suddenly starts, and it
poses a danger.
5.3 Precautions when stopping the operation
(1) When stopping the fan, close the damper slowly and then turn the power off.
(2) If air exceeding 200°C is used, close the damper, cool down the casing slowly and
completely while keeping the fan running for a certain period and then stop the operation.
Ensure that the fan does not run at a rate where surging may occur.
(3) If cooling water is used for the system, stop the fan and then close the cooling water valve.
(4) Be careful of gas leak at the shaft seal if the fan handles any hazardous gas.
5.4 Precautions when stopping the use
Warning
When you leave the fan unused for a long period of time, be sure to
turn off the main power.
(1) When you leave the fan unused for a long period of time, apply appropriate anti-corrosive
agent to the areas prone to rust.
(2) Fully protect the motor and other electrical devices from moisture.
(3) Remove the V-belt before storing the fan.
(4) Cover the bearing with a vinyl sheet or other material to prevent contact with outside air and
entry of dust.
(5) When you run the fan after a long time of nonuse, inspect each part, and refill the bearing
with grease or replace the grease.
(6) Drain water to prevent water from freezing and cracking the piping during the winter if the
bearing is cooled with water.

6-1
6. Maintenance and inspection
6.1 Daily inspection
(1) Check vibration, noise, bearing temperature, the amount and cleanliness of the oil, cooling
water, amperage, etc.
If there is any unusual condition, it may be a sign of failure; therefore, take the appropriate
measures as soon as possible.
For this purpose, it is recommended to keep an operation log.
Warning
The main shaft, V-belt pulley, and V-belt are rotating during
operation. Care should be taken so that your clothing is not caught in
these parts.
(2) The bearing temperature must be less than [the normal room temperature plus 40°C] or
[70°C], whichever is lower.
(3) If strong vibrations occur, stop the operation
and inspect the V-belt alignment, duct
connections, tightening of the mounting bolts
and foundation bolts, and check for
accumulation of dust on the impeller and
damage to the bearings.
If the vibration is within the range specified as
"Good" in JIS B 8330, it is considered normal
(see the figure on the right).
If a vibration insulating device is installed on
the fan, the vibration of the fan itself becomes
slightly stronger while it is not transmitted to
the foundation. In such a case, a vibration
lower than the broken line is considered
normal.
(4) In addition to vibrations, noise is an important
factor in judging the operating condition.
If you hear a metallic sound possibly made by
contact into the rotor, stop the operation
immediately.
Continuous roaring or hissing noise of air
flowing inside the casing is normal; however,
discontinuous hissing or howling noise is
caused by surging. An appropriate measure is
required in the latter case, for example by
changing the damper opening.
(5) Bearings generate some noise even in normal condition.
It is difficult to identify an abnormal noise because bearings produce complicated noise, so
learn about the noises thoroughly to prevent any accident.
n - Rotation (mim-
1
)
Acceptable vibration range
a - Total amplitude (μm)
With vibration isolator
10mm/s
Acceptable
Excellent
Good
(On the bearing box)
Unacceptable
This manual suits for next models
9
Table of contents
Other Teral Fan manuals
Popular Fan manuals by other brands

Ebmpapst
Ebmpapst R3G450-AQ25-68 operating instructions

Gulf Coast Fans
Gulf Coast Fans 4YU26 owner's manual

HAMPTON BAY
HAMPTON BAY SEAPORT AL634-WH Use and care guide

Ebmpapst
Ebmpapst R3G310-BE90-N1 operating instructions

HAMPTON BAY
HAMPTON BAY CLARET Use and care guide

Ebmpapst
Ebmpapst W2S130-AB25-10 operating instructions

Maxxair
Maxxair ICF72 Installation operation maintenance warranty manual

Ebmpapst
Ebmpapst 3214 JN operating manual

HAMPTON BAY
HAMPTON BAY Everstar owner's manual

Ebmpapst
Ebmpapst W2E250-CB05-51 operating instructions

Gaggenau
Gaggenau AR 401 742 installation instructions

Universal Blue
Universal Blue UVP1002-20 instruction manual