4
General comments:
• Clean the hob regularly to maintain its
working condition and aesthetic
appearance; clean it when it is cold.
• When cleaning the hob, do not use
harsh abrasives, caustic cleaners or
sharp objects.
• All stainless steel parts should be
cleaned with a non-abrasive cleaning
liquid on a soft cloth.
• Clean the hot plates with a damp
sponge and then dry them by turning
them on for a few seconds. To maintain
their appearance apply a commercially
available grease intended for the
maintenance of hot plates.
• The hot plate trim rings can be cleaned
with agents intended for the
maintenance of stainless steel parts.
The rings may become yellowed as a
result of overheating. This is normal.
• If a hotplate is to be out of use for a long
time, apply the special grease
periodically.
• Immediately after use, soak pans and
other utensils in warm water with
washing up liquid. Thoroughly clean
them with a brush or sponge and dry
them carefully.
Care of your hot plates
• Keep the hot plates clean. A dirty plate
does not transfer heat efficiently.
• Avoid placing wet pans on the hot
plates.
• Never sprinkle cold water on an
overheated plate.
• Turn the hot plate off for a few minutes
before the dish is cooked; the plate
accumulates heat and is still hot for a
while after turning off.
• Never use the hot plates for preparing
foods wrapped in aluminium foil or in
plastic pans. Never place any plastic
trays etc. on the hot plates.
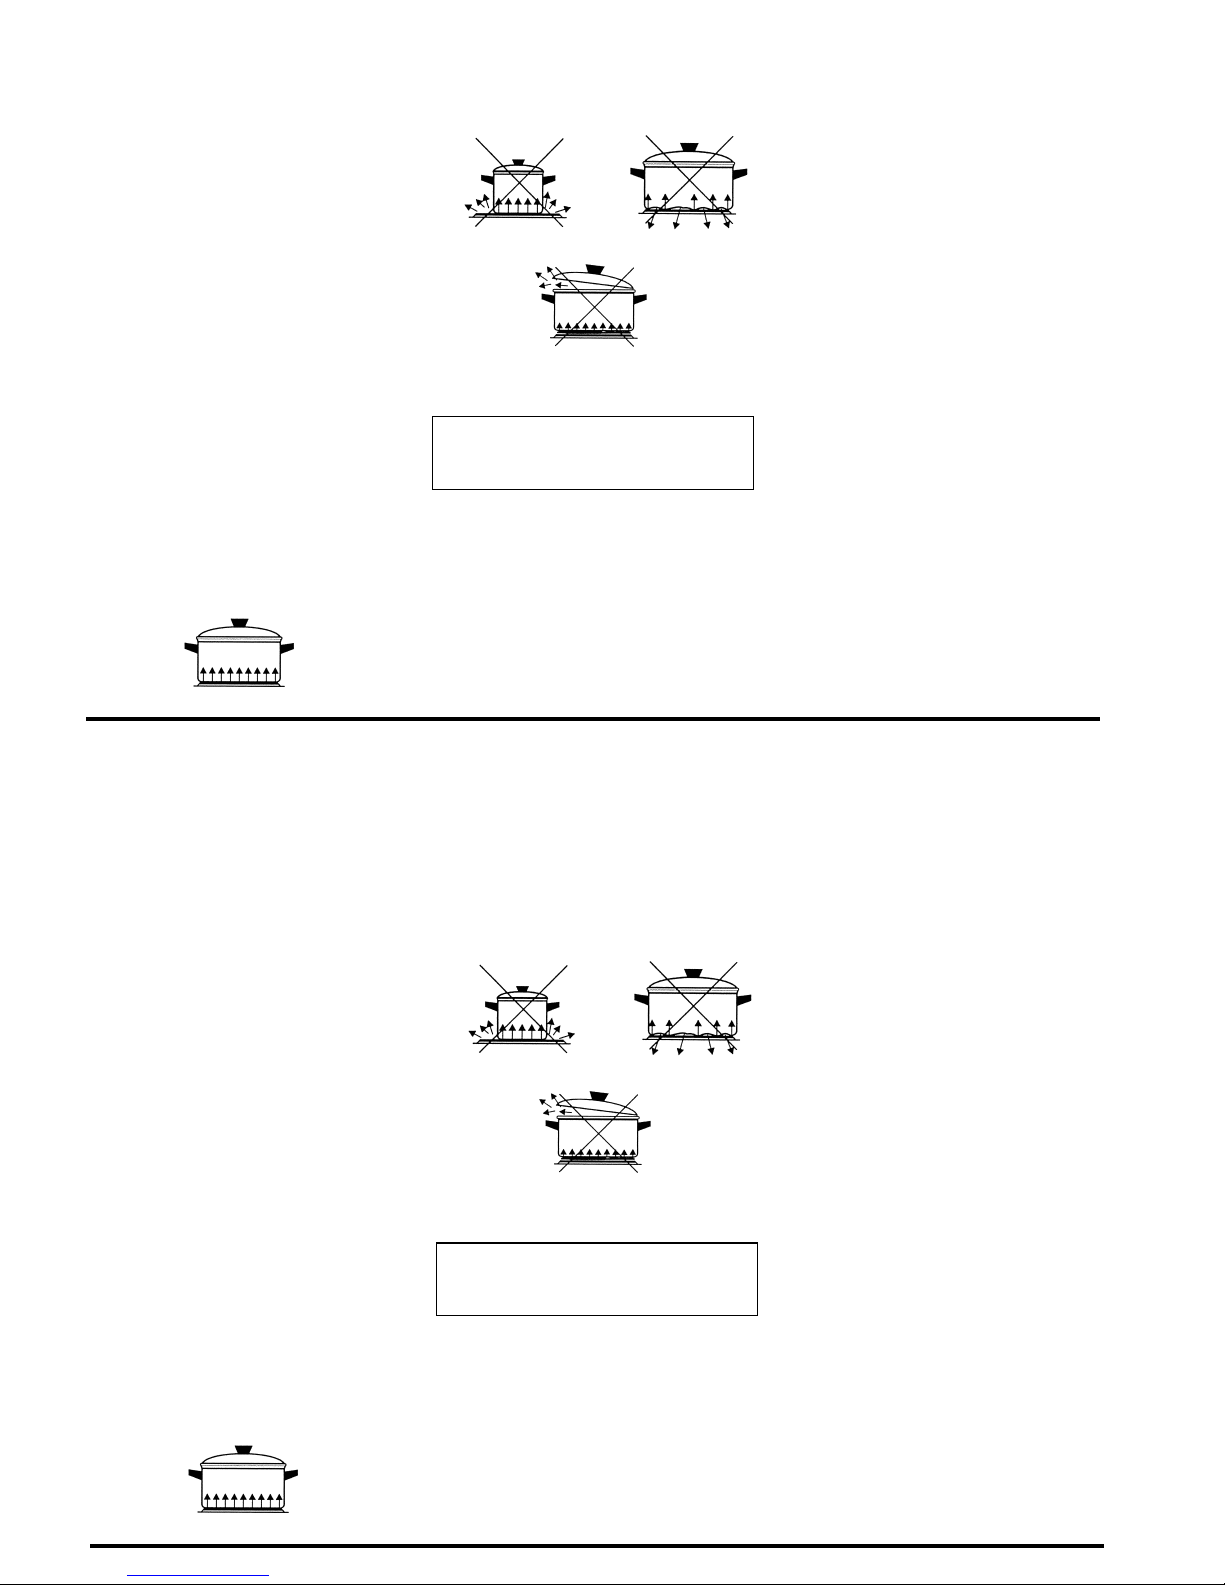
CHOICE OF UTENSILS
• Any cookware should have a thick, flat
and dry base of the same diameter or
slightly bigger than the hot plate. If the
cookware diameter is smaller than the
hot plate heat will be wasted.
• Cookware with uneven bases are very
inefficient, making the cooking time
longer and wasting electricity.
• Cookware made of flameproof glass,
suitable for hot plate cooking, should
match the hot plate size. Pans
projecting beyond the hot plate may be
broken due to temperature stresses.
The heated pan must never be filled up
with cold water or placed on cold metal
or stone surfaces.
• Always use the pan with its lid on. This
prevents the accumulation of odour
and vapour in the kitchen.
Correct
• Low current consumption
• Good heat transfer
even pan base
pan and plate
diameters are equal
pan covered with lid
Pan too small Uneven pan base
Lid not properly positioned
CLEANING THE HOB
NOTE!
Switch off the hob at the mains
electricity switch before cleaning.
Incorrect
• High electricity consumption
• Poor heat transfer
• Longer cooking time
4
General comments:
• Clean the hob regularly to maintain its
working condition and aesthetic
appearance; clean it when it is cold.
• When cleaning the hob, do not use
harsh abrasives, caustic cleaners or
sharp objects.
• All stainless steel parts should be
cleaned with a non-abrasive cleaning
liquid on a soft cloth.
• Clean the hot plates with a damp
sponge and then dry them by turning
them on for a few seconds. To maintain
their appearance apply a commercially
available grease intended for the
maintenance of hot plates.
• The hot plate trim rings can be cleaned
with agents intended for the
maintenance of stainless steel parts.
The rings may become yellowed as a
result of overheating. This is normal.
• If a hotplate is to be out of use for a long
time, apply the special grease
periodically.
• Immediately after use, soak pans and
other utensils in warm water with
washing up liquid. Thoroughly clean
them with a brush or sponge and dry
them carefully.
Care of your hot plates
• Keep the hot plates clean. A dirty plate
does not transfer heat efficiently.
• Avoid placing wet pans on the hot
plates.
• Never sprinkle cold water on an
overheated plate.
• Turn the hot plate off for a few minutes
before the dish is cooked; the plate
accumulates heat and is still hot for a
while after turning off.
• Never use the hot plates for preparing
foods wrapped in aluminium foil or in
plastic pans. Never place any plastic
trays etc. on the hot plates.
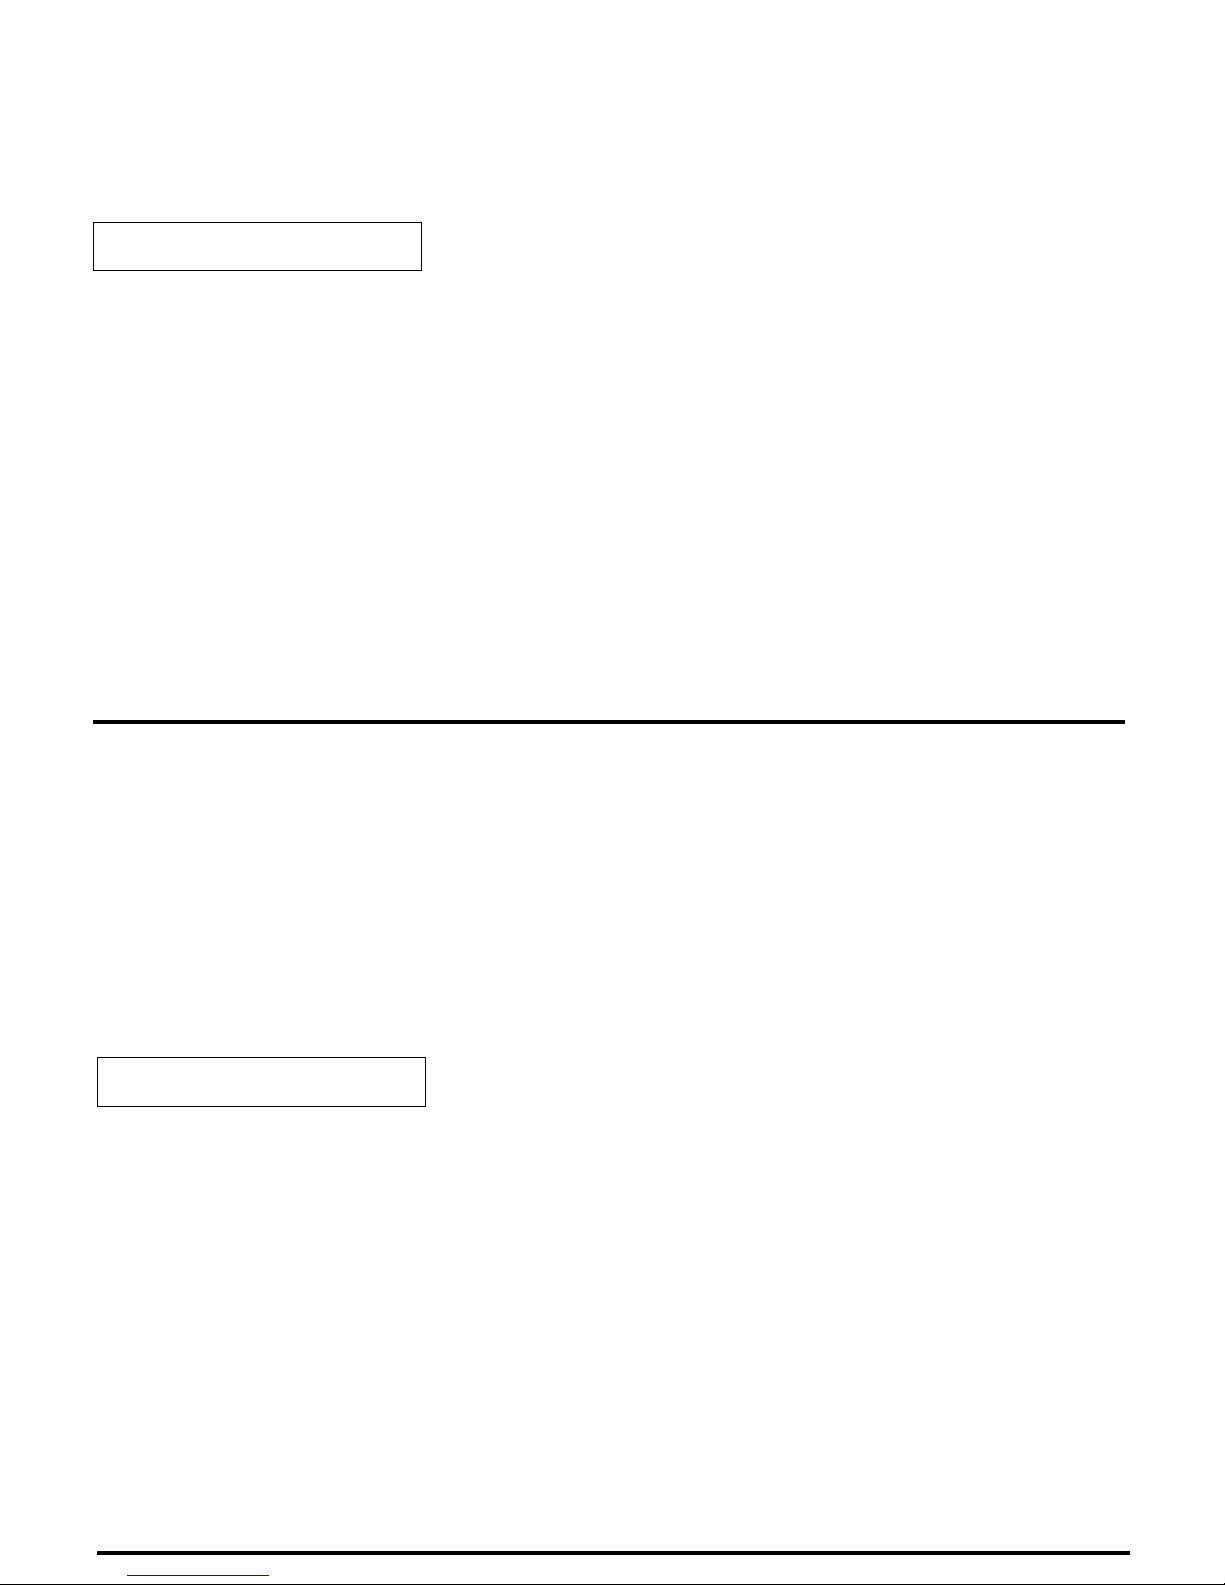
CHOICE OF UTENSILS
• Any cookware should have a thick, flat
and dry base of the same diameter or
slightly bigger than the hot plate. If the
cookware diameter is smaller than the
hot plate heat will be wasted.
• Cookware with uneven bases are very
inefficient, making the cooking time
longer and wasting electricity.
• Cookware made of flameproof glass,
suitable for hot plate cooking, should
match the hot plate size. Pans
projecting beyond the hot plate may be
broken due to temperature stresses.
The heated pan must never be filled up
with cold water or placed on cold metal
or stone surfaces.
• Always use the pan with its lid on. This
prevents the accumulation of odour
and vapour in the kitchen.
Correct
• Low current consumption
• Good heat transfer
even pan base
pan and plate
diameters are equal
pan covered with lid
Pan too small Uneven pan base
Lid not properly positioned
CLEANING THE HOB
NOTE!
Switch off the hob at the mains
electricity switch before cleaning.
Incorrect
• High electricity consumption
• Poor heat transfer
• Longer cooking time