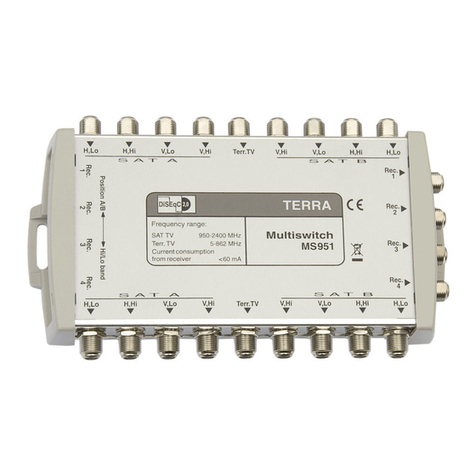
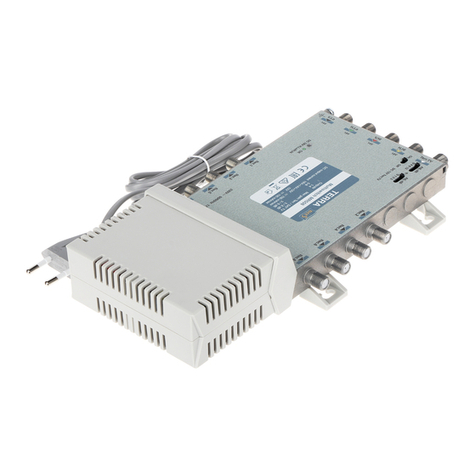
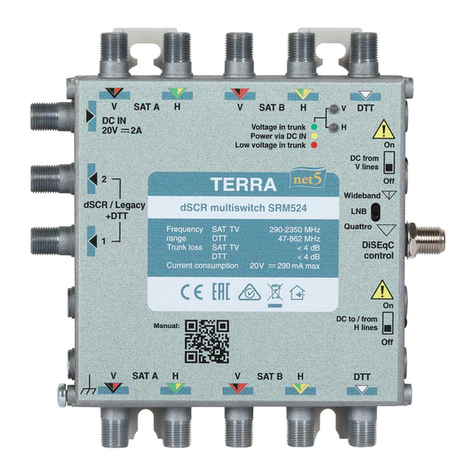
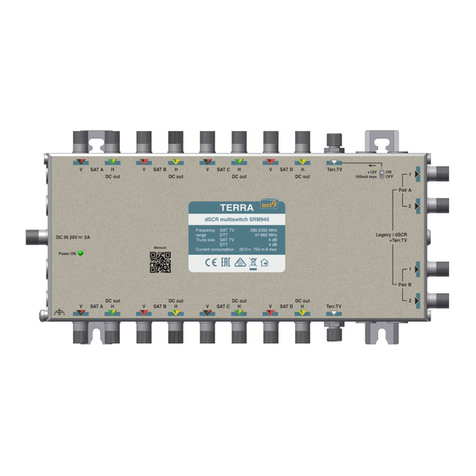
Terra SRM564 User manual

dSCR (Digital satellite cable router) multiswitches SRM564, SRM584, SRM564T, SRM584T
Vers. 1.01
1
Product description
Cascadable single cable wideband multiswitches SRM564, SRM584 and SRM564T, SRM584T are intended for the
distribution of satellite and terrestrial signals for up to 32 satellite tuners or receivers on each outputs pair.
The multiswitches have 4 passive Wideband SAT IF (for connecting 2 Wideband LNBs) and 1 passive Digital Terrestrial
TV (DTT) trunk lines.
The multiswitches have 2 DC input ports for expanded SAT IF distribution system feeding options and dedicated control/
conguration port (see Figure 1 and chapter „Installation instructions”).
The multiswitches may be simply switched to Quattro SAT IF range input mode by dedicated switch.
SRM564, SRM564T is are cascadable single cable multiswitches with 3 pairs subscribers outputs (6 outputs total).
SRM584, SRM584T is are cascadable single cable multiswitches with 4 pairs subscribers outputs (8 outputs total).
SRM564 and SRM584 have active Automatic gain control (AGC) Digital terrestrial television (DTT) path to subscribers
outputs (see Table „Technical characteristics”).
SRM564T and SRM584T have passive DTT path to subscribers outputs (see Table „Technical characteristics”).
The multiswitches are intended for the distribution of satellite and DTT signals for up to 32 satellite tuners or receivers on
each outputs pair and have 7 x DC power modes for convenient DC powering options (see chapter „Installation instructions”).
The devices ensures an independent access for every subscriber to any SAT IF and DTT trunk line.
These multiswitches automatically detect Legacy/SCR/dSCR commands from the receiver. The dSCR switches also
feature fully automatic level control for SAT IF and DTT (SRM564, SRM584) signals, negating the need for any gain or level
adjustments in most installations.
Multiswitch is built into a zinc alloy die cast housing for extreme interference immunity. The housing of multiswitches meets
more stringent screening requirements according to EN50083-2, class A.
Control according to EN50494/EN50607 (SCR/dSCR) commands as well as Legacy (+13 V/+18 V/22 kHz) commands.
According to the standard ETSI EN 303 354 V.1.1.1, TERR TV band amplier of multiswitch type is Launch, selectivity
clasication 0.
Safety instructions
Installation of the multiswitches must be done according IEC60728-11 and national safety standards.
The multiswitches are powered from the stabilized power supply +20 V. This voltage is not dangerous to life.
External power supply must have a short circuit protection.
Any repairs must be made by skilled personnel.
To avoid damaging of the multiswitches do not connect the supply voltage until all cables have been connected correctly.
The device shall be mounted in vertical position with RF input connectors on the top side on a wall or other nonamable
surface.
The multiswitches must be xed with steel screws Ø 4-4.5 mm. The screws are not included in a package.
Do not expose multiswitches to moisture or splashing water and make sure no objects lled with liquids, such as vases,
are placed near or on the unit.
Avoid placing the multiswitches next to central heating components or direct sunlight and in areas of high humidity.
No naked ame sources, such as lighted candles, should be placed on multiswitch.
If the multiswitches have been kept in cold conditions for a long time, keep it in warm room no less than 2 hours before
powering.
The ventilation should not be impeded by covering the multiswitches with items, such as newspapers, table-cloths, curtains.
The mains socket of external power supply must be easily accessible.
Manual in .pdf

IMPORTANT WARNINGS!
Before connecting any products to a system, it is essential to make sure the system power supply is switched o. Avoid
short-circuit or overload of any power supply. Never “HOT-SWAP” any system components as this may result in damage to
the newly introduced or existing components.
The SRM564, SRM584 and SRM564T, SRM584T multiswitches are intended only for indoor installation or installation
in a suitable weatherproof outdoor cabinet. These multiswitches must not come into contact with moisture or be installed in
areas of high humidity or heat.
Multiswitches are suitable for moderate and tropical climates.
Always mount the multiswitches securely to a wall or bulkhead panel so it cannot hang or swing on its coaxial cables as
this may strain the internal circuit board and components.
Always connect all of the coaxial cables to the multiswitches before connecting the power. These units are not designed
to be “HOT-SWAPPED” or connected to a live system.
Always be sure that connecting cables shield and multiswitches functional grounding clamp have common potential
before powering the system. Floating voltages can be created in an un-earthed system which may cause damage and can
be dangerous.
Momentary short-circuit of any cables may be enough to damage the sensitive electronics within the multiswitch or the
connected system.
Always allow plenty of ventilation around the multiswitch and do not allow it to be covered with materials such as loft
insulation.
We recommend at least 5 cm of airspace around the multiswitch. Digital products can get hot to the touch and require a
ow of air to avoid overheating.
LNBs and other system equipment connected to the multiswitch SAT trunks inputs/outputs can be powered from the
same power supply as the multiswitch (see chapter „Installation instructions”).
To avoid damage not covered by warranty DO NOT EXCEED MAX. CURRENTS. See “Technical
characteristics” for max. current for external equipment.
DO NOT OPERATE THE DC POWER TO H or V TRUNK LINES SWITCHES (see Figure 1, pos. 21, 23)
unless you totally understand the power demands of the system and conrmed they are 3.2 A total or less
per H or V lines. ALWAYS LEAVE THE DC POWER TO H or V TRUNK LINES SWITCHES IN THE “OFF”
POSITION when inserting the SRM564, SRM584 and SRM564T, SRM584T into an existing multiswitches
installation.
Damage caused by current overload is not covered by the manufacturer’s warranty.
2

3
Figure 1. External view of the multiswitch SRM564
Figure 2. External view of the multiswitch SRM584
External view
SRM564
SRM584
1 2 3 4 51 2 3 4 5
6 7 8 9 1020
11
12
15
16
17
18
21
DC IN(H) DC IN(V)
20V 2A
HH
V
20V 2A
VDTT
DTT
Frequency SAT TV
range DTT
Trunk loss SAT TV
DTT
Current consumption 2 0 V 720 mA max
290-2350 MHz
47-862 MHz
4 dB
4 dB
dSCR multiswitch SRM564
On
Off
1
2
Legacy / dSCR
+DTT
Pair D
2
1
2
1
Pair A
Pair B
HHV V
SAT A SAT B
SAT A SAT B
On
Off
LNB
Wideband
Quattro
V
H
Voltage in trunk
Power via DC IN
Legacy / dSCR
+DTT
DiSEqC
control
DC to / from
H lines
DC to / from
V lines
Low voltage in trunk
27
2223
19
24 25
26
Manual:
13
14
12 3 4 51 2 3 4 5
6 7 8 9 1020
11
12
15
16
17
18
21
DC IN(H) DC IN(V)
20V 2A
HH
V
20V 2A
VDTT
DTT
Frequency SAT TV
range DTT
Trunk loss SAT TV
DTT
Current consumption 20 V 950 mA max
290-2350 MHz
47-862 MHz
4 dB
4 dB
dSCR multiswitch SRM584
On
Off
1
2
1
2
Legacy / dSCR
+DTT
Pair D
Pair C
2
1
2
1
Legacy / dSCR
+DTT
Pair A
Pair B
DC to / from HHV V
SAT A SAT B
SAT A SAT B
On
Off
LNB
Wideband
Quattro
V
H
Voltage in trunk
Power via DC IN
H lines
DC to / from
V lines
DiSEqC
control
Low voltage in trunk
26
19
24 25
2223
27
Manual:

4
1- SAT A V trunk input (SAT A VLo trunk input in Quattro LNB IF range input mode)
2- SAT A H trunk input (SAT A HLo trunk input in Quattro LNB IF range input mode)
3- SAT B V trunk input (SAT A VHi trunk input in Quattro LNB IF range input mode)
4- SAT B H trunk input (SAT A HHi trunk input in Quattro LNB IF range input mode)
5- DTT trunk input
6- SAT A V trunk output (SAT A VLo trunk output in Quattro LNB IF range input mode)
7- SAT A H trunk output (SAT A HLo trunk output in Quattro LNB IF range input mode)
8- SAT B V trunk output (SAT A VHi trunk output in Quattro LNB IF range input mode)
9- SAT B H trunk output (SAT A HHi trunk output in Quattro LNB IF range input mode)
10 - DTT trunk output
11 - dSCR output2 pair D (UB+DTT)
12 - dSCR output1 pair D (UB+DTT)
13 - dSCR output2 pair C (UB+DTT, SRM584, SRM584T only)
14 - dSCR output1 pair C (UB+DTT, SRM584, SRM584T only)
15 - dSCR output1 pair A (UB+DTT)
16 - dSCR output2 pair A (UB+DTT)
17 - dSCR output1 pair B (UB+DTT)
18 - dSCR output2 pair B (UB+DTT)
19 - Wideband / Quattro switch
20 - DC IN(H) 20 V power input, switchable to H lines by switch pos. 21 (see „Installation instructions”)
21 - DC power to/from H trunk lines switch (see „Installation instructions”)
22 - DC IN(V) 20 V power input, switchable to V lines by switch pos. 23 (see „Installation instructions”)
23 - DC power to/from V trunk lines switch (see „Installation instructions”)
24 - DC IN(H) and DC in V trunk lines LED indicator (see „Installation instructions”)
25 - DC IN(V) and DC in H trunk lines LED indicator (see „Installation instructions”)
26 - DiSEqC control/conguration port
27 - Functional grounding clamp
All sockets are “F” type.
Installation instructions
Read the safety instruction rst.
Fit multiswich on mounting place and connect it (pay attention to the multiswitch inputs and Wideband or Quattro LNB
outputs marking, connect the isolated 75 Ω loads to the unused RF output F sockets), power on multiswich using one of 7
powering modes (see Table 1).

Diagram of DC paths
Figure 3. Diagram of DC paths
5
DC IN(H) DC IN(V)
20V 2A
20V 2A
DTT
HHV
SAT A SAT B
On
Off
On
Off
V
DC to / from
H lines
DC to / from
V lines
DiSEqC
control
DC-DC
converter

Table 1
Powering mode
”DC to / from
H trunk lines”
switch position
(see Figure 1,
pos.21)
”DC to / from
V trunk lines”
switch position
(see Figure 1,
pos.23)
Warnings and notes*
1. Multiswich powered from local
PSU (20 V) via DC IN(H) input
(see Figure 1, pos. 20) .
(Recommended for use is PS202F
PSU).
H trunk lines are DC isolated from it.
OFF OFF
Recommended as rst choice.
WARNING: BEFORE CONNECTION
ALWAYS CHECK DC TO / FROM H / V
TRUNK LINES SWITCHES (see Figure 1,
pos. 21, 23). ITs MUST BE IN POSITION
"OFF"!
Note: All trunk lines preserve DC
bypassing. See “Diagram of DC paths".
2.Multiswich is powered from local
PSU (20 V) via DC IN(H) input and
with DC passing to H trunk lines.
In this mode H trunk lines can power
in cascade other multiswiches
(without PSU, with “DC to / from
H lines” switch ON) and other
equipment connected to H trunk
lines.
ON OFF
WARNING: Don’t overload PSU via H
trunk lines and don’t exceed the current
capability of H trunk lines – check total
system power consumption of multiswich
and from H trunk lines (including all other
equipment connected). See “Technical
characteristics”.
Check all other system equipment
connected to H lines if it can accept 20 V.
SERIOUS DAMAGE OF IT CAN OCCUR!
3. Multiswich is powered from H
trunk lines:
- building new SCR/dSCR system
(18 V - 20 V)
- upgrading systems (15 V - 18 V)
ON OFF
WARNING: Don’t exceed the current
capability of system power supply
and H trunk lines. See “Technical
characteristics”.
SERIOUS DAMAGE CAN OCCUR IF
OVERLOADED!
4. Multiswich is powered from lo-
cal PSU (20 V) via DC IN(V) input
(see Figure 1, pos.23).
(Recommended for use is PS202F
PSU).
V trunk lines are DC isolated from it.
OFF OFF
WARNING: BEFORE CONNECTION
ALWAYS CHECK DC TO / FROM H / V
TRUNK LINES SWITCHES (see Figure 1,
pos. 21, 23). ITs MUST BE IN POSITION
“OFF”!
Note: All trunk lines preserve DC
bypassing. See “Diagram of DC paths“.
5. and 6. OFF ON Similar to Powering modes 2 and 3, but in
relation to V trunk lines.
7. Multiswiches in large systems
are powered from one mains point.
In this mode V and H trunk lines
can power in cascade other
multiswitches.
ON / OFF ON / OFF
WARNING: Before power “ON”, select
the optimal combination of DC to / from
H / V line switches (see Figure 1, pos. 21,
23).
Note: All trunk lines preserve DC bypassing.
See “Diagram of DC paths“.
* Current consumption from DC IN(V) and V lines is slightly higher compared to power from DC IN(H) or H lines (see “Diagram
of DC paths“and “Technical characteristics”).
Then switch on receiver(s). The multiswitch will begin the process of auto-detecting which type(s) of receiver connected.
All subscriber outputs are congured to connect legacy STB (supports +13V/+18V/22 kHz signals), but it switches to
dynamic mode SCR/dSCR if receives a DiSEqC command according EN50494/EN50607.
Disconnect RF cable or STB from necessary output to reset to Legacy / Start mode.
6

DC voltages diagnostic LEDs meanings described in Table 2.
Table 2.
LED “V” LED “H” Voltage at
DC IN(V)
Voltage at
DC IN(H)
DC to /
from V lines
switch
DC to /
from H lines
switch
Voltage
in V line
Voltage
in H line
Warnings
and notes
blank Yellow 0 V 15…20 V OFF OFF 0 V 0 V Normal operation.
Multiswitch powered from
DC IN(H) port.
blank Green 0 V 0 V OFF ON 0 V 15…20 V Normal operation.
Multiswitch powered from
H line.
blank Blinking
Yellow /
Green
0 V
0 V
1. 15…20 V
2. 15…20 V
OFF
OFF
ON
OFF
0 V
0 V
15…20 V
15…20 V
Normal operation.
Multiswitch powered from
DC IN(H) port and power
pass from DC IN(H) to
H lines
Normal operation.
Multiswitch powered from
DC IN(H) port. Voltage
in H line from another
system power point.
blank Red 0 V
0 V
1. < 14 V
2. 0 V
OFF
OFF
OFF
ON
0 V
0 V
0 V
< 14 V
Low voltage at DC
IN(H).
Multiswitch powered from
DC IN(H) port.
Attention! increased
current consumption.
Low voltage in H line.
Multiswitch powered
from H line. Voltage in H
line from another system
power point.
Attention! increased
current consumption.
Yellow blank 15…20 V 0 V OFF OFF 0 V 0 V Normal operation.
Multiswitch powered from
DC IN(V) port.
Green blank 0 V 0 V ON OFF 15…20 V 0 V Normal operation.
Multiswitch powered from
V line.
Blinking
Yellow /
Green
blank 1. 15…20 V
2. 15…20 V
0 V
0 V
ON
OFF
OFF
OFF
15…20 V
15…20 V
0 V
0 V
Normal operation.
Multiswitch powered from
DC IN(V) port and power
pass from DC IN(V) to V
lines.
Normal operation.
Multiswitch powered from
DC IN(V) port. Voltage
in V line from another
system power point
Red blank 1. < 14 V
2. 0 V
0 V
0 V
OFF
ON
OFF
OFF
0 V
< 14 V
0 V
0 V
Low voltage at DC
IN(V).
Multiswitch powered from
DC IN(V) port.
Attention! increased
current consumption
Low voltage in V line.
Multiswitch powered
from V line. Voltage in V
line from another system
power point.
Attention! increased
current consumption.
7Continued ↓

LED “V” LED “H” Voltage at
DC IN(V)
Voltage at
DC IN(H)
DC to /
from V lines
switch
DC to /
from H lines
switch
Voltage
in V line
Voltage
in H line
Warnings
and notes
Yellow Yellow 15…20 V 15…20 V OFF OFF 0 V 0 V Normal operation.
Multiswitch powered
from DC IN(H) port
and additional PSU
connected to DC IN(V)
port.
Blinking
Yellow /
Green
Yellow 15…20 V 15…20 V ON OFF 15...20 V 0 V Normal operation.
Multiswitch powered
from DC IN(H) port.
Additional PSU
connected to DC IN(V)
port feeding DC to V
trunk lines.
Green Green 0 V 0 V One of switches is ON 15...20 V 15...20 V Normal operation.
Multiswitch powered
from V or H line (de-
pending on which switch
is ON).
Continued of Table 2.
8
PIN code
All User Bands (UB) are protected by PIN Code to prevent the set of UB from being used/disturbed by another user
(see Table 3).
Default settings
1. SAT IF inputs are congured to use 2 Ku-band Wideband LNBs (SAT A/B LNB LO=10400 / 10410 MHz, see label on
multiswitch rear side and package).
2. All outputs are congured to connect legacy STB (supports +13V/+18V/22 kHz signals), but it switches to dynamic mode
SCR/dSCR if receives a DiSEqC command according EN50494/EN50607. Output User Bands (UB) are the same in all
subscriber outputs (see Table 3).
3. PIN Codes (see Table 3 and see chapter “Conguration”).
4. Only one UB plan is set depended of delivery region, if you need another plan see chapter “Conguration” or contact
TERRA UAB.
5. DC power to H / V trunk lines switches set (see Figure 1, pos. 21, 23) in position “OFF”.
Table 3
Marking: v.0 Marking: v.1 Marking: v.2
User
Band
(UB)
PIN
Code
Bandwidth,
MHz
Central frequency,
MHz
Bandwidth,
MHz
Central frequency,
MHz
Bandwidth,
MHz
Central frequency,
MHz
EN50494 EN50607 EN50494 EN50607 EN50494 EN50607
UB0 46 1210 1210
UB1 1 40 1210 1210 40 1210 1210 46 1420 1420
UB2 2 40 1420 1420 40 1420 1420 46 1680 1680
UB3 3 40 1680 1680 40 1680 1680 46 2040 2040
UB4 4 40 2040 2040 40 2040 2040 46 1006 1006
UB5 5 40 1284 1284 40 no 985 46 1057 1057
UB6 6 40 1516 1516 40 no 1050 46 1108 1108
UB7 7 40 1632 1632 40 no 1115 46 1159 1159
UB8 8 40 1748 1748 40 no 1275 46 no 1261
UB9 9 40 no 970 40 no 1340 46 no 1312
UB10 10 40 no 1010 40 no 1485 46 no 1363
UB11 11 40 no 1050 40 no 1550 46 no 1471
UB12 12 40 no 1090 40 no 1615 46 no 1522
UB13 13 40 no 1130 40 no 1745 46 no 1573
UB14 14 40 no 1170 40 no 1810 46 no 1624
UB15 15 40 no 1330 40 no 1875 46 no 1731
UB16 16 40 no 1370 40 no 1940

9
Recommended accessories
1. Power supply PS202F
2. Power inserter PI012
3. Multiswitch programmer PC102W
This product complies with the relevant clauses of the European Directive 2002/96/EC. The unit must be recycled or discarded according to applicable local
and national regulations.
Equipment intended for indoor usage only.
Functional grounding. Connect to the main potential equalization.
This product is in accordance to following norms of EU: EMC norm EN50083-2, safety norm EN62368-1, RoHS norm EN50581.
This product is in accordance with Custom Union Technical Regulations: “Electromagnetic compatibility of technical equipment“ CU TR 020/2011,
“On safety of low-voltage equipment“ CU TR 004/2011.
This product is in accordance with safety standard AS/NZS 60065 and EMC standards of Australia.
Conguration
The default setting of the device can be changed using dedicated programmer and software.
These multiswitches can be congured:
1. Up to 32 User Bands (UB) per pair outputs (SRM564 and SRM564T- total 96 UB, SRM584, SRM584T- total 128 UB)
for use with STBs supporting DiSEqC commands according to standard EN50607 (dSCR).
2. Default settings Dynamic mode can be changed to Static mode.
3. Default setting Satellite A/B can be changed to C/D (see Application diagrams for installation 4 wideband LNBs
(SAT B/C/D in the case Quattro LNB IF range input mode). PC Windows software can be free downloaded from
www.terraelectronics.com.
Output conguration must be the same per pair of outputs, but can be dierent in others pairs. Each pair of outputs are
congured separately. Pay attention to the numbering of outputs.
Some possible outputs pair congurations shown in Table 4.
Table 4
Input mode Output 1 Output 2
Wideband LNB SAT A: LO=10410 MHz. SAT B: LO=10400 MHz.
Other settings default.
SAT A: LO=10410 MHz. SAT B: LO=10400 MHz.
Other settings default.
Wideband LNB 8 SCR/dSCR UB + up to 24 dSCR UB Up to 24 dSCR UB
Quattro LNB 8 SCR/dSCR UB + 24 dSCR UB, PIN protected Legacy
Wideband LNB Static mode (up to 32 converted transponders) Static mode (up to 32 converted transponders
Wideband LNB 8 SCR/dSCR UB + Static mode
(up to 24 converted transponders) Up to 24 dSCR UB
See programmer user manual for more information.

Draugystes str. 22, LT-51256 Kaunas, Lithuania, tel.: +370 37
-
31 34 44, fax: +370 37
-
31 35 55
Technical characteristics
* see label on multiswitch rear side and package
** without external DC feeding
Type SRM564 SRM584 SRM564T SRM584T
Frequency range SAT IF wideband LNB 300-2350 MHz
input LO=10400 MHz*
wideband LNB 290-2340 MHz
LO=10410 MHz*
Quattro LNB
LOlow=9750 MHz / 950-2150 MHz
LOhigh=10600 MHz
SAT IF output 950-2150 MHz
DTT 47-862 MHz 5-862 MHz
Number of trunk inputs SAT IF 4
& outputs DTT 1
Number of tap outputs 6 (3 pairs) 8 (4 pairs) 6 (3 pairs) 8 (4 pairs)
Trunk output loss SAT IF < 4 dB
DTT < 4 dB
Return loss / impedance > 10 dB / 75 Ω
Input level per channel SAT IF 65-105 dBµV
DTT 55-85 dBµV (8 DTT channels) -
Terr.TV noise gure < 8 dB -
Tap output user bands (dSCR mode) 32 max. per pair outputs, congurable
with combined DTT user band bandwidth 20-60 MHz, adjustable
(dSCR mode)
dSCR mode output level, 84 dBµV adjustable
AGC controlled
legacy mode output level 78 dBµV
AGC controlled, typical
DTT output level, 82 dBµV max. (8 DTT channels), -
AGC controlled adjustable
DTT loss - 18 dB
Decoupling SAT IF inputs/SAT IF inputs > 30 dB
SAT IF inputs/tap outputs > 30 dB
SAT IF/ Terr. TV > 25 dB
DC pass through SAT IF 3.2 A max., 1.6 A max. through one line
trunk lines DTT 200 mA max.
Current from DC IN(H) input (Uin=20 V)** 720 mA max. 950 mA max. 680 mA max. 910 mA max.
consumption from DC IN(V) input (Uin=20 V)** 740 mA max. 970 mA max. 700 mA max. 930 mA max.
from H / V 20V on the line 680 mA max. 910 mA 640 mA max. 870 mA max.
trunk lines 18V on the line 770 mA max. 1 A 730 mA max. 960 mA max.
15V on the line 990 mA max. 1.22 A 950 mA max. 1.18 A max.
from STB 18 V 20 mA max.
Current pass from DC IN(H) input to H trunk lines 1.28 A max. 1.05 A max. 1.32 A max. 1.09 A max.
(Uin=20 V), switchable
Current pass from DC IN(V) input to V trunk lines 1.26 A max. 1.03 A max. 1.3 A max. 1.07 A max.
(Uin=20 V), switchable
Operating temperature range -20o÷ + 50oC
Dimensions/Weight (packed) 226.6x133.6x30 mm/0.80 kg
This manual suits for next models
3
Table of contents
Other Terra Switch manuals
Popular Switch manuals by other brands
Dwyer Instruments
Dwyer Instruments Proximity PLS2 Specifications-installation and operating instructions
Panasonic
Panasonic CF-VEBU07W operating instructions
pumpa
pumpa H07RNF Translation of the original instruction manual
Vertiv
Vertiv Avocent MergePoint Unity Installer/user guide
Tektronix
Tektronix Grass Valley 3000 Installation and service
HMS Networks
HMS Networks Anybus SP2555 Startup guide
