TeVii D720 HD60 User manual
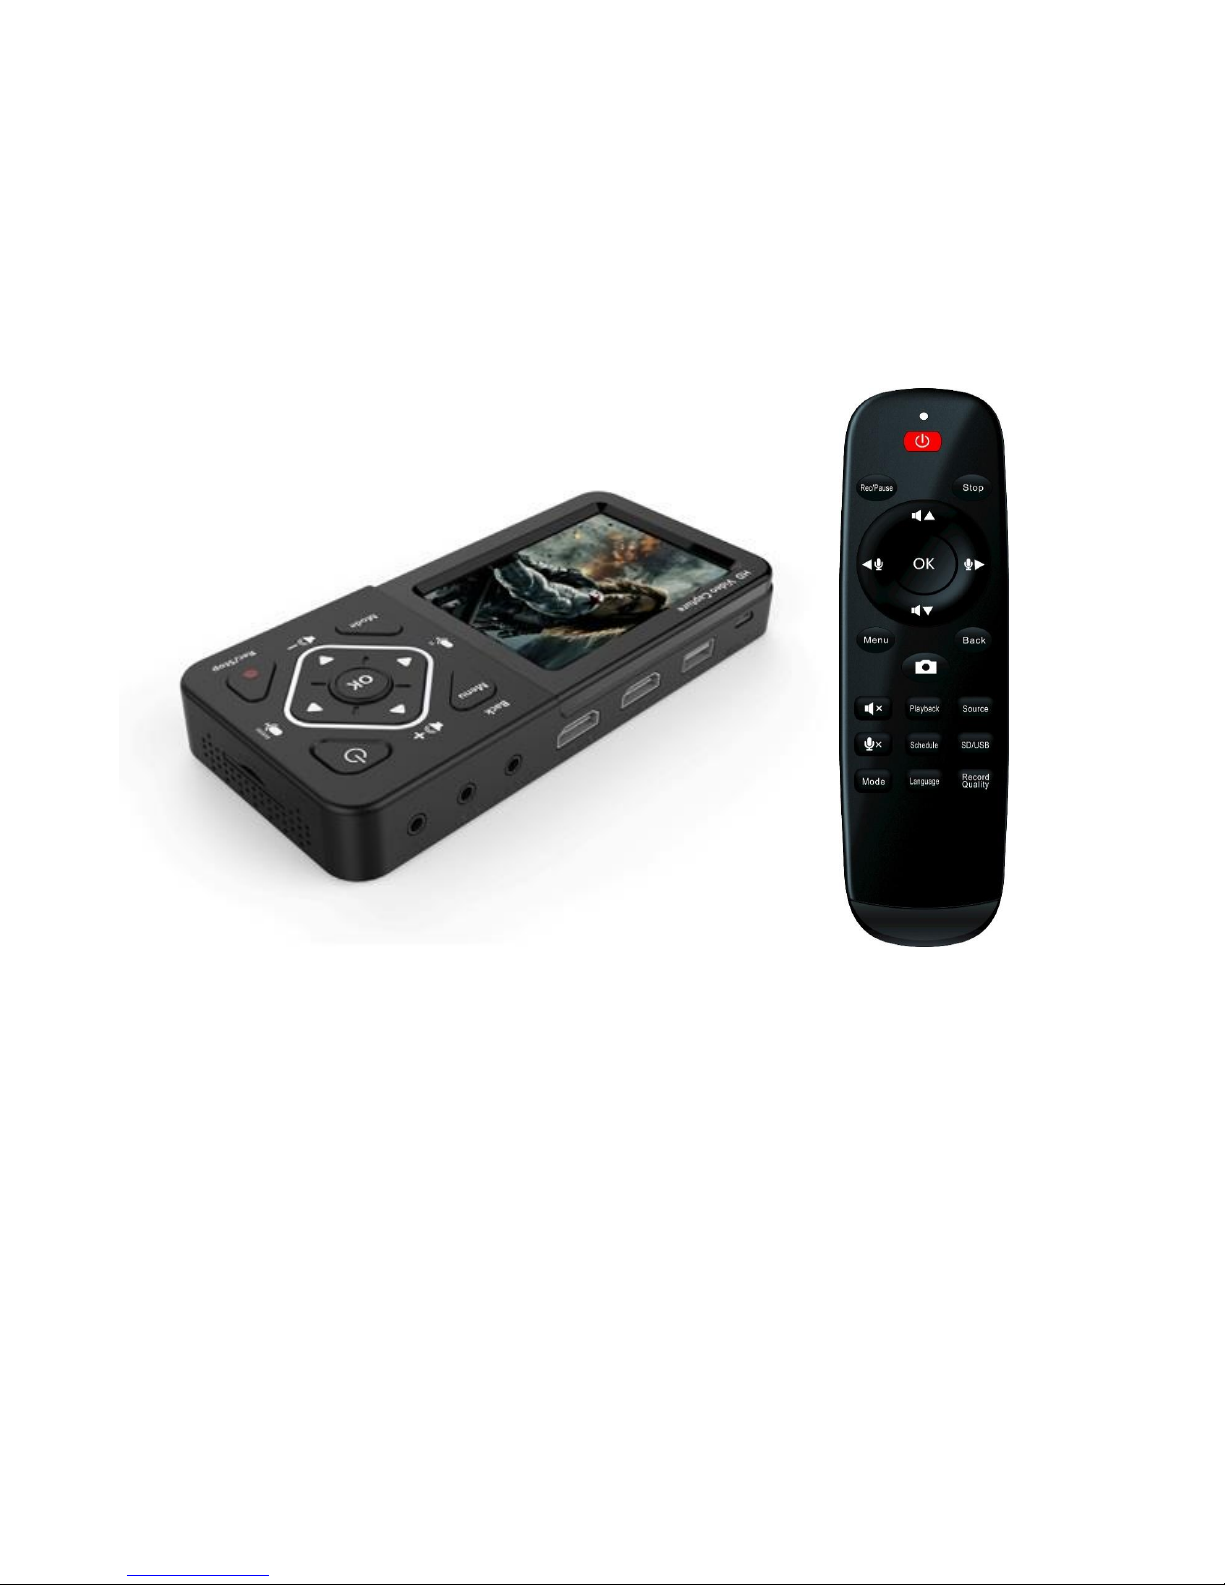
HD60 Video Recorder
Record Full HD Videos & Playback instantly
V2.0

1
Important Safety Instruction
Before using HD60 Video Recorder, please ensure that you read and understand the safety
precautions below:
1. Do not attempt to open the case of HD60 Video Recorder or modify it in any way as this
will void the warranty.
2. Keep HD60 Video Recorder away from water and other liquids as this may cause the unit
to malfunction.
3. HD60 Video Recorder may become warm during use. This does not indicate malfunction.
4. Do not place heavy objects on HD60 Video Recorder as this may cause the unit to
overheat and malfunction.
5. If the exterior of HD60 Video Recorder requires cleaning, wipe it with a soft dry cloth.
6. Do not dispose of the unit via conventional domestic waste.
Glossary
HDMI: High Definition Multimedia Interface.
AV: Audio and Video.
OSD: On Screen Display.
OBS: Open Broadcaster Software is a free and open source software for video recording and
live streaming.
XSplit: A simple yet powerful live streaming and recording software.

2
Table of Contents
Important Safety Instruction ................................................................ ………… 1
Table of Contents ................................................................................................ 2
What’s included .................................................................................................. 3
Remote Control ................................................................................................... 4
Product Components ........................................................................................... 5
Connection instruction and installations (Standalone Mode)
1. Installation .............................................................................................. 6
2. Set up Menu ........................................................................................... 6-7
3. Record/Capture to USB or SD card .......................................................... 7-8
4. Playback .................................................................................................... 9
5. Pause Recording ........................................................................................ 9
PC Mode
1. Installation/Capture and record to PC ..................................................... 10
2. Live Streaming via XSplit ..................................................................... 11-15
3. Live Streaming via OBS ....................................................................... 16-18
4. Schedule recording ................................................................................ 19
5. Firmware upgrade ................................................................................. 20
Product specification ....................................................................................... 20
Trouble shooting ........................................................................................ 21-22
3
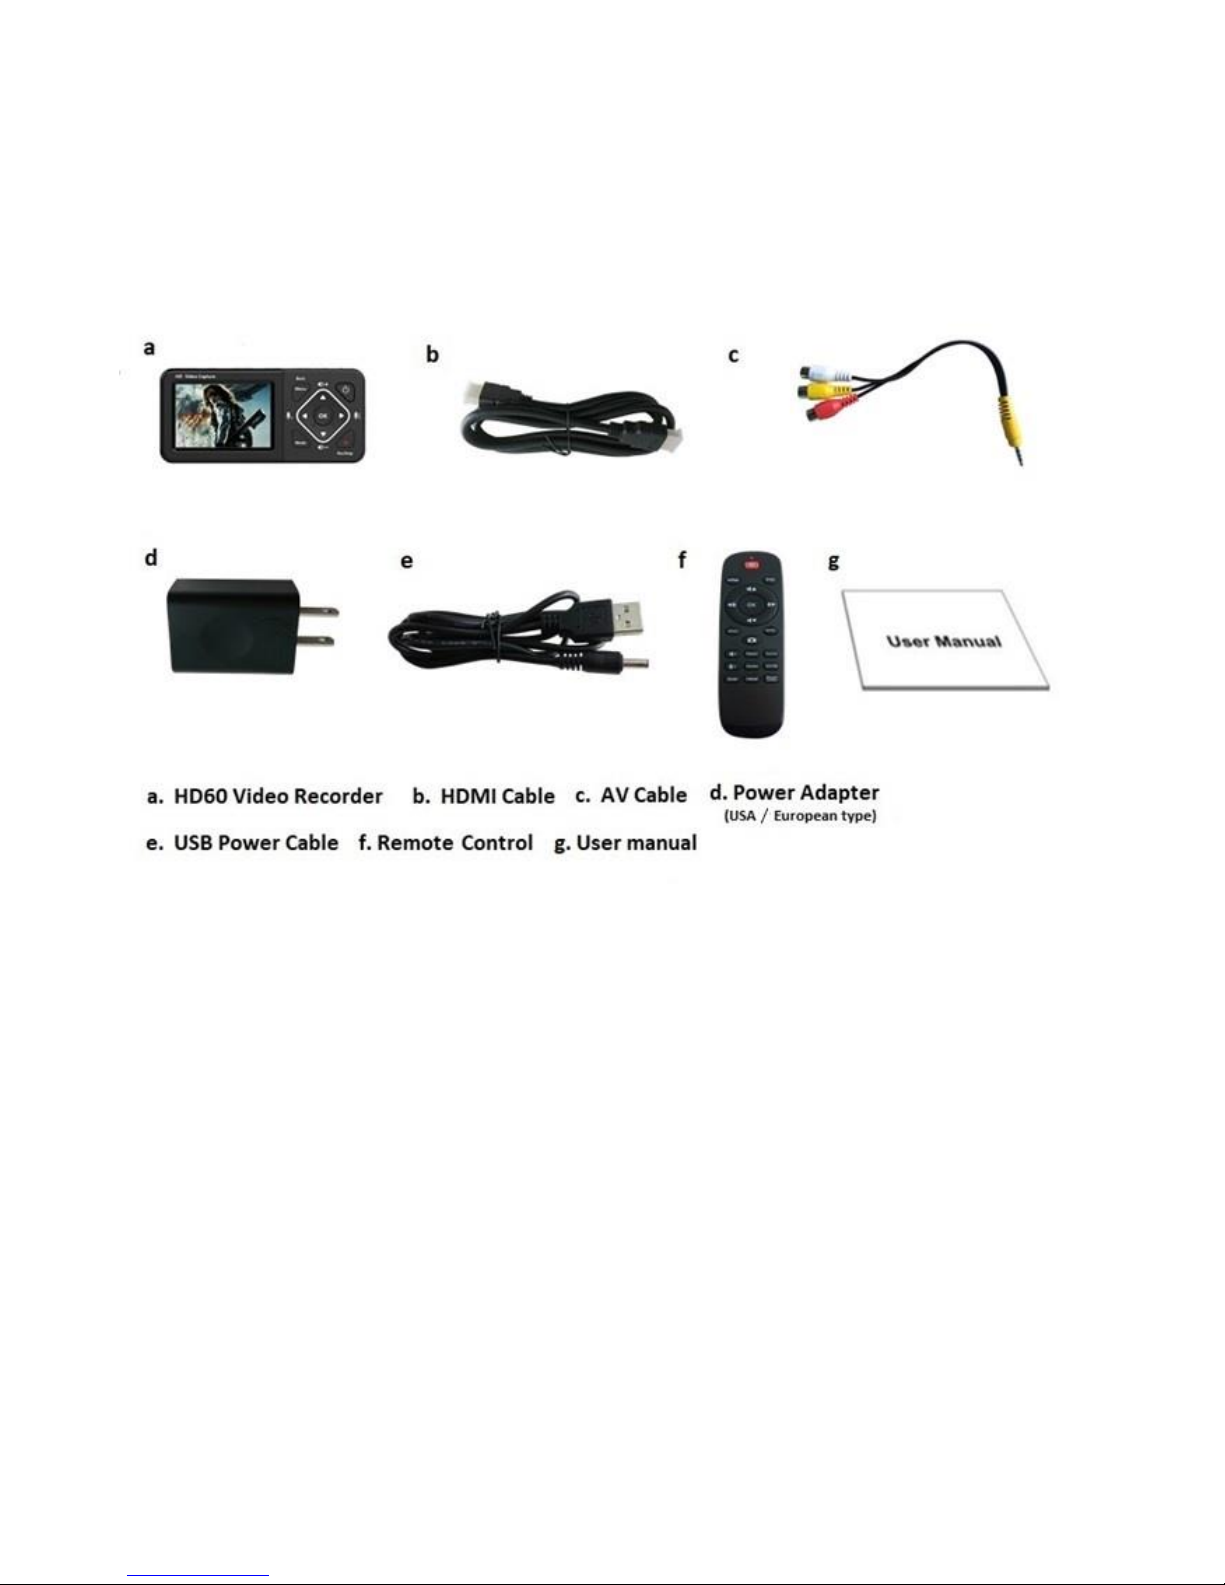
What's included
4
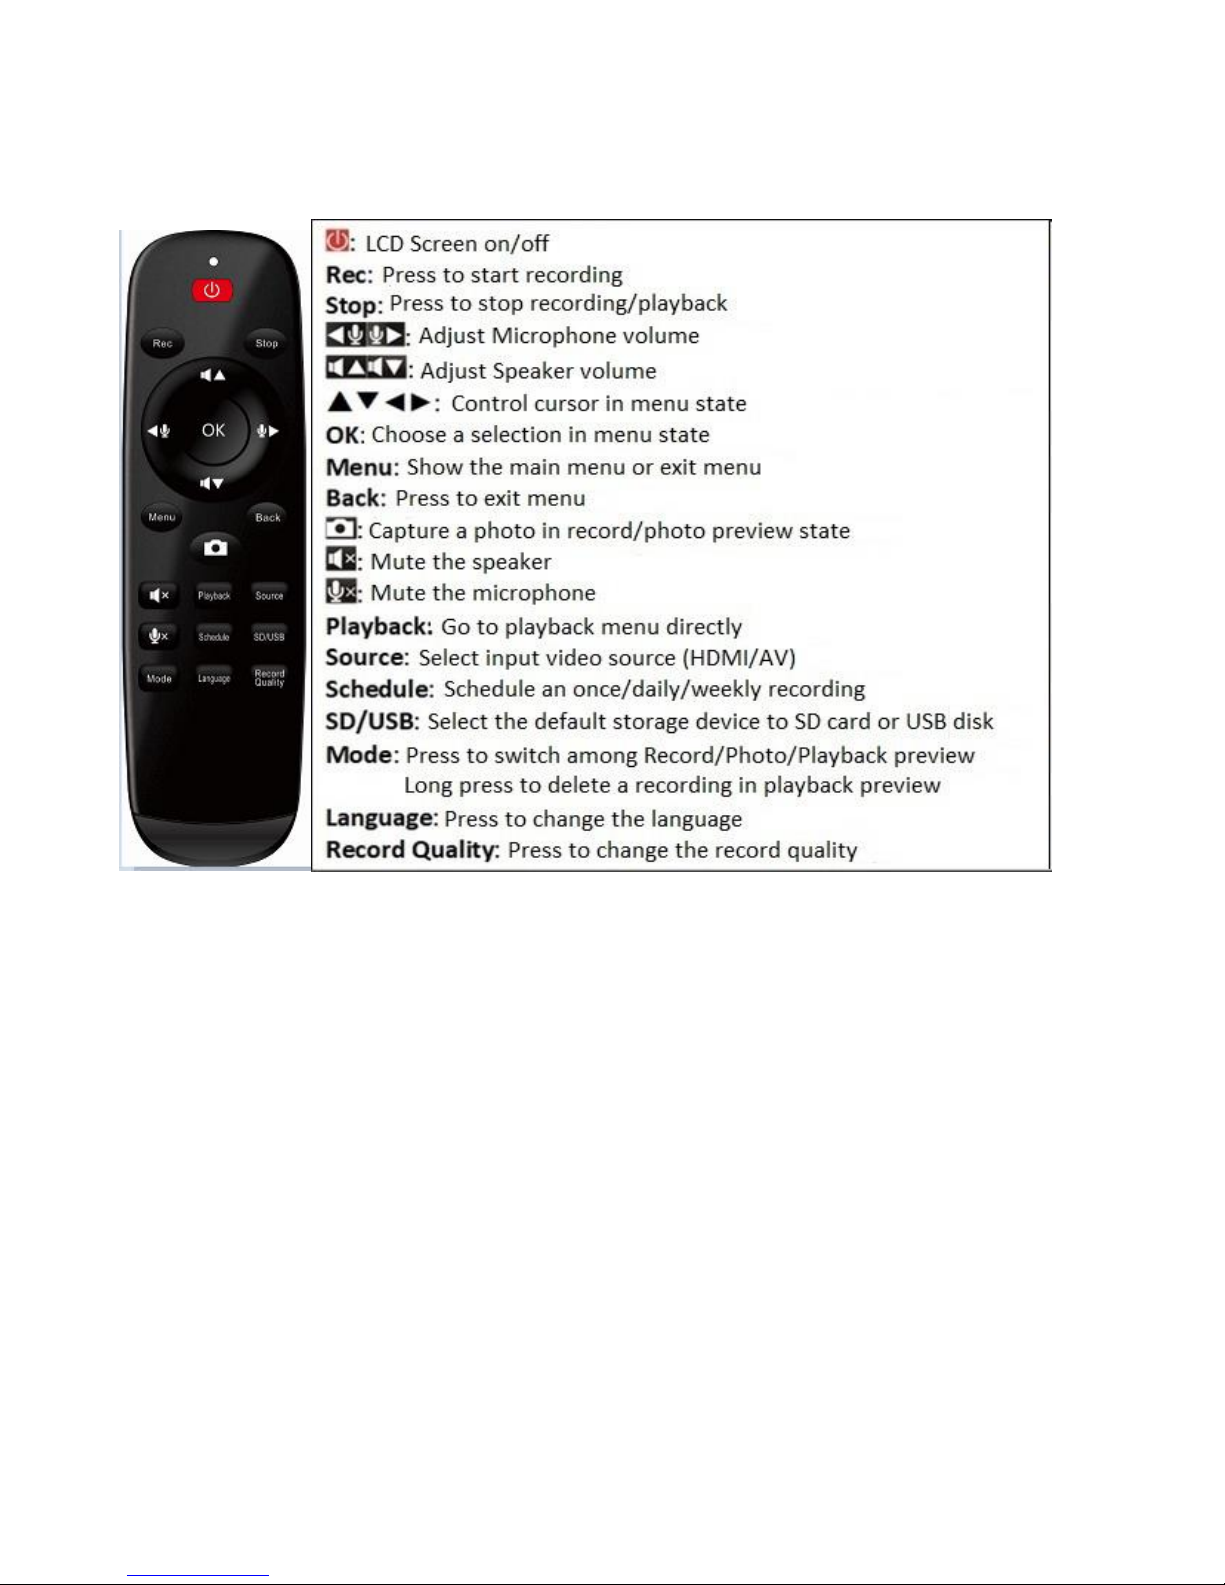
Remote Control

5
Product Components
1. IR Receiver: Receives Infra-Red signals from Remote Control
2. LED indicators: The HD60 Video Recorder is power on when Blue light is on;
Blue blinking means running low of memory. Red blinking means running low of
battery& it needs charging immediately. The Red light is on when the Recorder is
power off & charging.
3. Panel Buttons:
Power: During power on state, press shorter than 2 seconds to turn on/off LCD
screen, press longer than 2 seconds but shorter than 10 seconds to show
shutdown dialog, press longer than 10 seconds to force shutdown. During power
off state, press longer than 2 seconds to turn on.
Menu/Back: Press this button to enter or exit menus.
Vol+/-,Mic+/-: Press these buttons to control Speaker/Microphone volumes.
Mode: Press this button to switch among Record/Photo/Playback preview. Long
press to delete a recording in playback preview.
Rec/Stop: Short press to start/stop recording in record preview state. Long press
to capture a photo in photo preview state.
4. SD card slot: Insert SD card for record or playback.
5. DC input 5V/2A: DC jack for USB power adaptor
6. Earphone: Earphone output with Microphone input interface.
7. AV IN: earphone jack for CVBS video + L/R Audio input.
8. HDMI IN: HDMI input
9. HDMI OUT: HDMI output.
10. USB: for plug into an external USB storage device.
11. USB TO PC: micro USB for connecting to PC. HD60 Video Recorder works as an USB
6
storage of PC or streams video to PC.
12. LCD Screen: LCD screen for preview/playback.
Connection Instruction and installation (Standalone Mode)
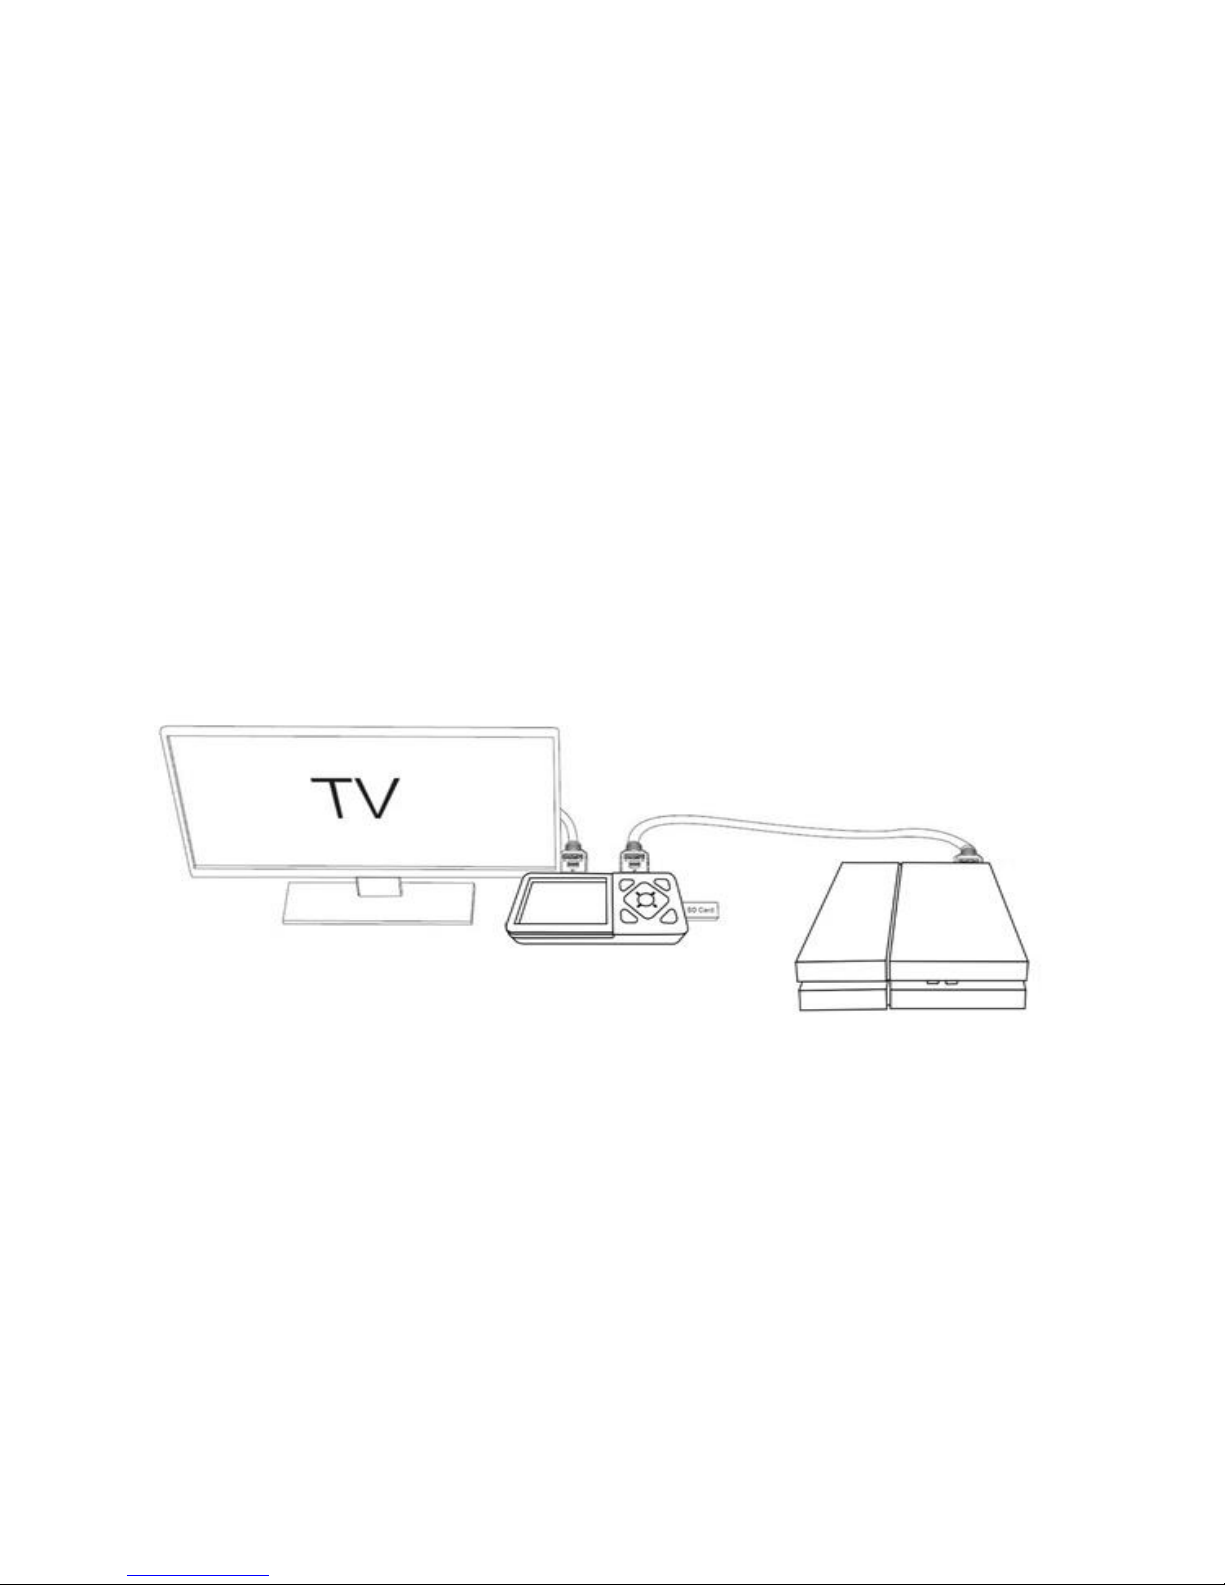
1. Installation
(1) Connect power adapter to DC jack ○
5of HD60 Video Recorder
(2) Connect video source (PS, XBox, Blu-ray player,etc ) to HD60 Video Recorder by
HDMI in ○
8or AV in ○
7
(3) Connect HD60 Video Recorder from HDMI OUT ○
9to TV with HDMI cable.
(4) Plug the USB storage device into the USB ○
10 or insert SD card to ○
4
of HD60 Video Recorder
2. Set up Menu
Press Menu button to browse the menu setting as below.

7
Language: Set the OSD language to be displayed on the menu. English, French,
Germany, Italy, Japanese, Russian, Poland, Simplified Chinese and Traditional
Chinese are available.
System Date/Time Setting: Set the time by year, month, day, hour and minute.
Time Watermark: Set the time watermark on screen and recording.
Video Quality: Set the video record quality: 1080p60 High/Middle/Low, 720p60,
480p60 are available. The corresponding video bitrate are 30/22/18/12/4Mbps.
Video Source: Select the source input to HDMI or AV.
USB Mode: Select the USB Host mode (USB Storage Mode, record/playback the
USB pen drive or USB HDD) or USB Device Mode (PC Storage Mode, PC Steaming
Mode, see PC Mode for details).
Default Storage device: Select the default storage device to SD card or USB disk. It
will set to the other one if this default storage is not available.
Schedule Recording: Available setup 3 different schedules: Daily, Once, Weekly
recording.
Restore factory settings: Restore the factory settings.
Formatting: Format the inserted SD card or USB pen drive.
Firmware Upgrade: Support to upgrade the recorder.
Firmware version: Shows the current version info.
3. Record/Capture to USB or SD card
(1) After finishing the setup, press the Menu button to return to the preview mode.
Connect the Recorder to video source via HDMI or AV cable.
(2) Insert the SD card or connect USB storage to the Recorder
(3) Press Rec/Stop button or press Rec button on the remote control to start
recording
(4) Press the Rec/Stop button again on HD60 Video Recorder or press he Stop button
on the remote control to stop recording.
(5) For schedule recording, please keep the Recorder power on & connected to DC
power always.

8
NOTE:
⚫It will automatically generate the file name when recording starts, the name
rule is date + index.mp4.
⚫The HD60 Video Recorder supports FAT32, NTFS & exFAT formats. The HD60
Video Recorder automatically generates a new recording file when previous
one reaches the maximum 4GB capacity.
⚫When HDD or USB storage is full, HD60 Video Recorder will stop recording automatically.
⚫HD60 Video Recorder saves files in MPEG4 format. The capture resolution can
be set at either 480p,720p or 1080p. Please note that not all games/video files
are produced at 1080p.
9
4. Playback
(1) After all devices are connected properly, press the Playback button on
the remote control to enter the playback preview menu.
(2) You will see the status bar showing the file list with current/total
index. Select your desired file and press OK to start playback.
(3) You will see the progress bar on the bottom, and you can press ▲▼ to
adjust the output volume, or ◄► to Fast forward/rewind.
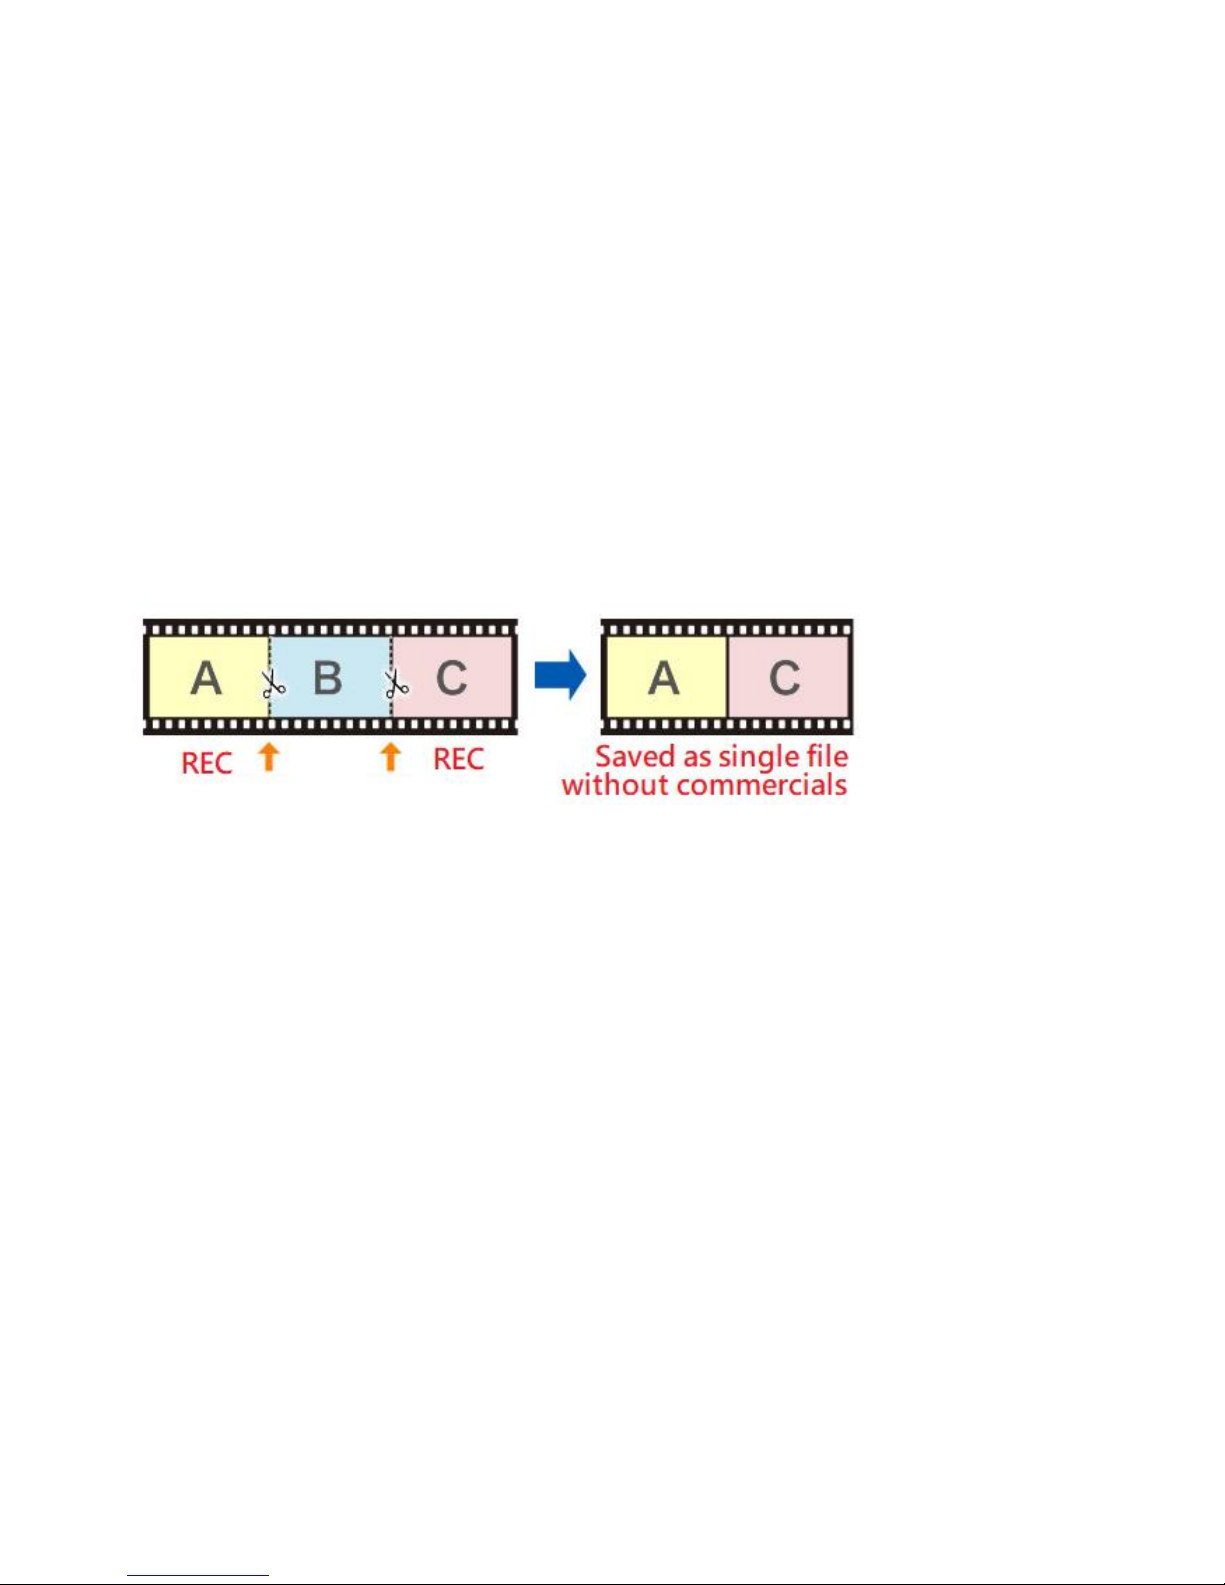
5. Pause Recording
Press “OK” button during recording to PAUSE, recording time on the top
of left corner is flashing, press “OK” button again to continue recording.
PAUSE recording can save you from recording unimportant sections &
save memory space.

10
PC Mode
1. Installation
Connect the micro USB cable between the USB TO PC port of HD60 Video
Recorder and the USB port of PC, the menu below will pop up. Or you can
manually open it after USB cable connected.
(1) USB Storage Mode: record/playback video on USB Flash Drive / USB HDD.
(2) PC Storage Mode: PC can detect SD card in HD60 Video Recorder & access
files on SD card.
(3) PC Steaming Mode: HD60 Video Recorder can stream video from input source
to PC instantly. With live-streaming software like OBS/XSplit, PC can live stream
to twitch/YouTube/facebook..etc.
Note:
The PC Mode requires high performance computer used in this case,
otherwise you may see“WARNING: High encoding CPU usage! Consider
turning down settings.”
11
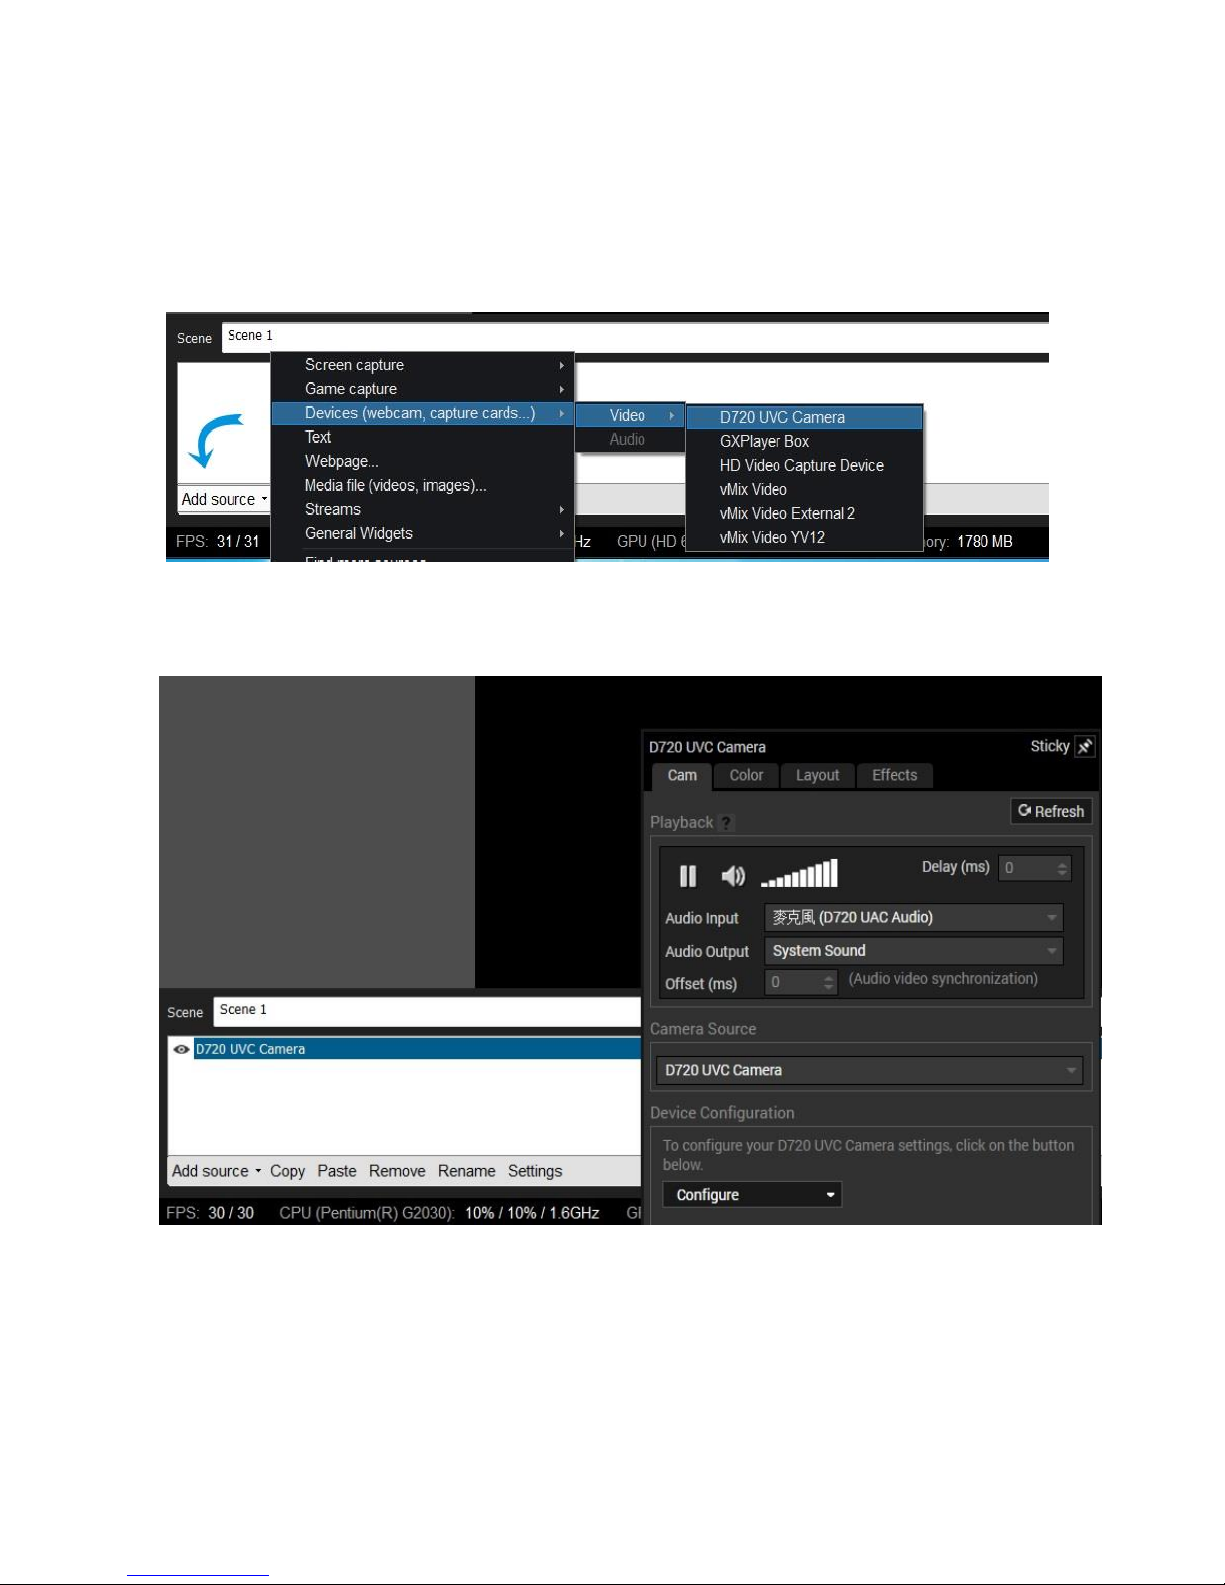
2. Live Streaming via XSplit
(1) Download & install & run the XSplit on your PC.
(2) Sources (or Add) →Webcam, capture card, video devices →D720 UVC
Camera.
(3) Select D720 UVC Camera → Settings→ Audio Input → D720 UAC Audio.

12
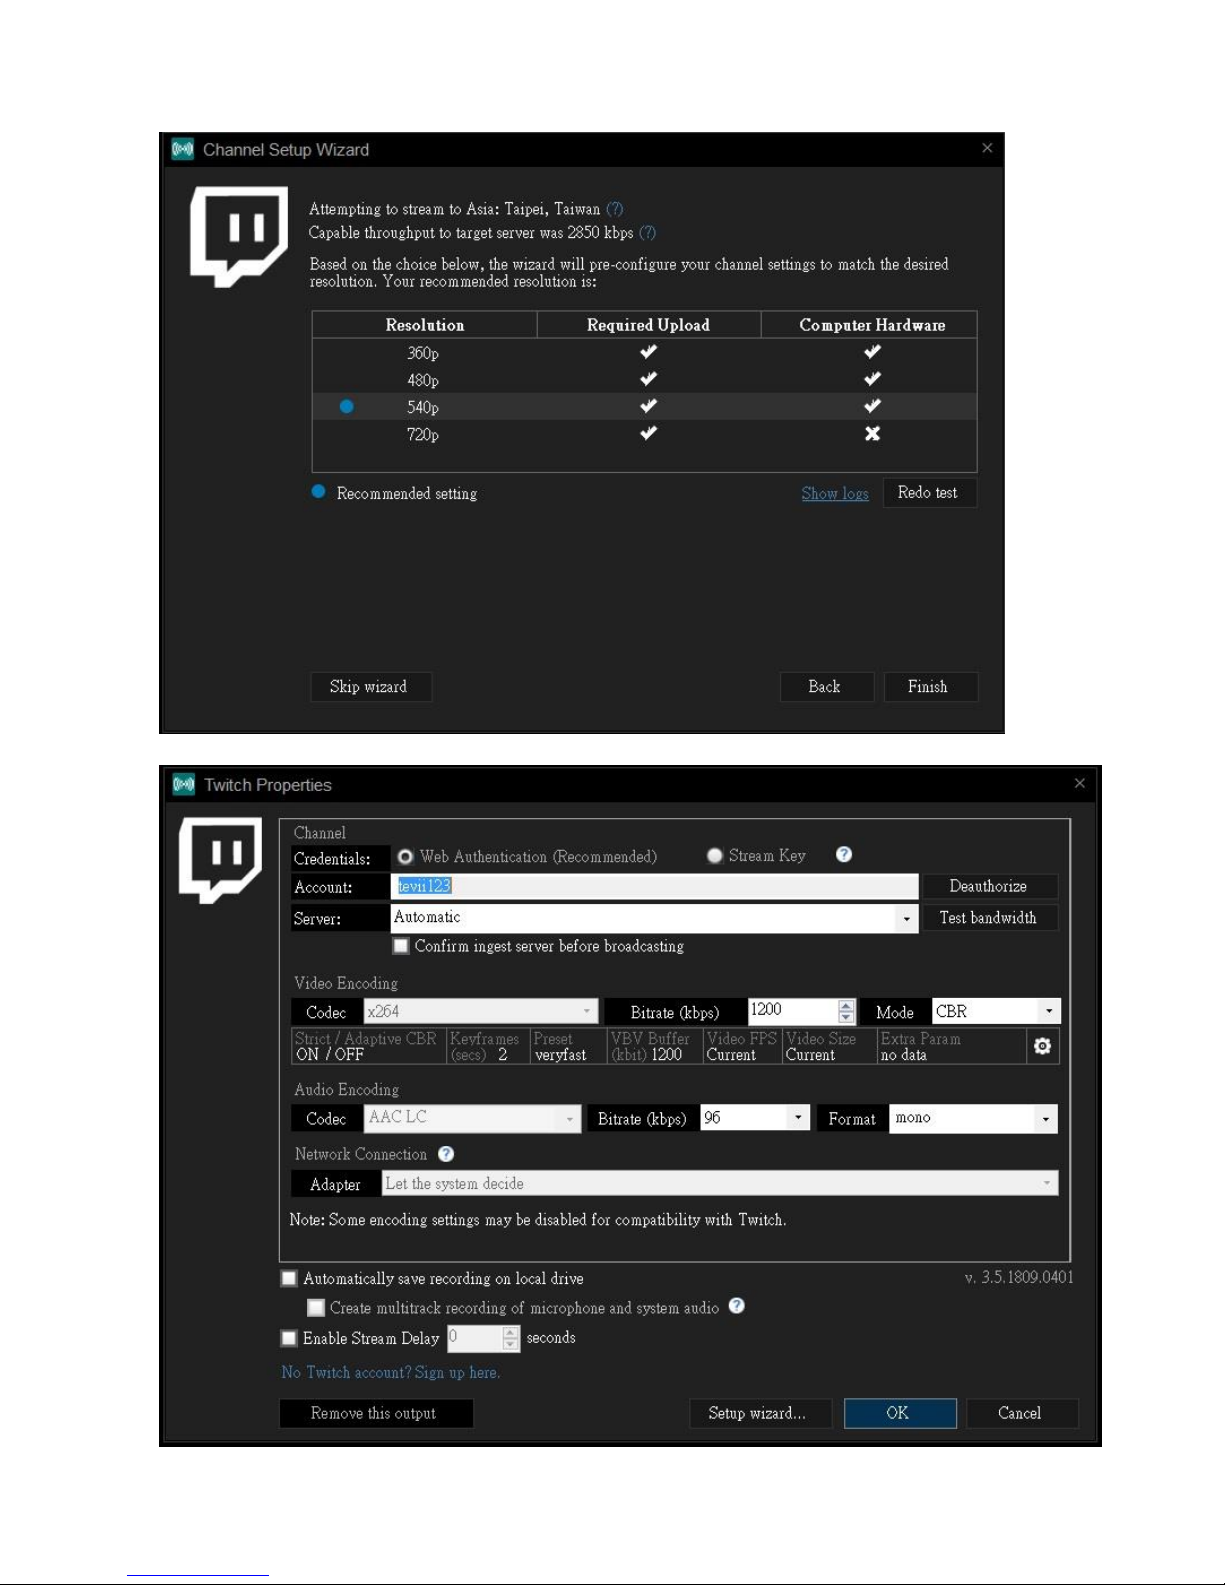
Setting up for Live Streaming
(1) Select Broadcast → Set up a new output → Select Streaming platform
(2) We select Twitch for an example and click Authorize to connect Twitch

13
(3) Input Twitch’s Username and Password, the account will show up→
click next → searching neighbor server automatically.
14
(4) Select Resolution you need → click Finish→Press OK to complete setting.
15
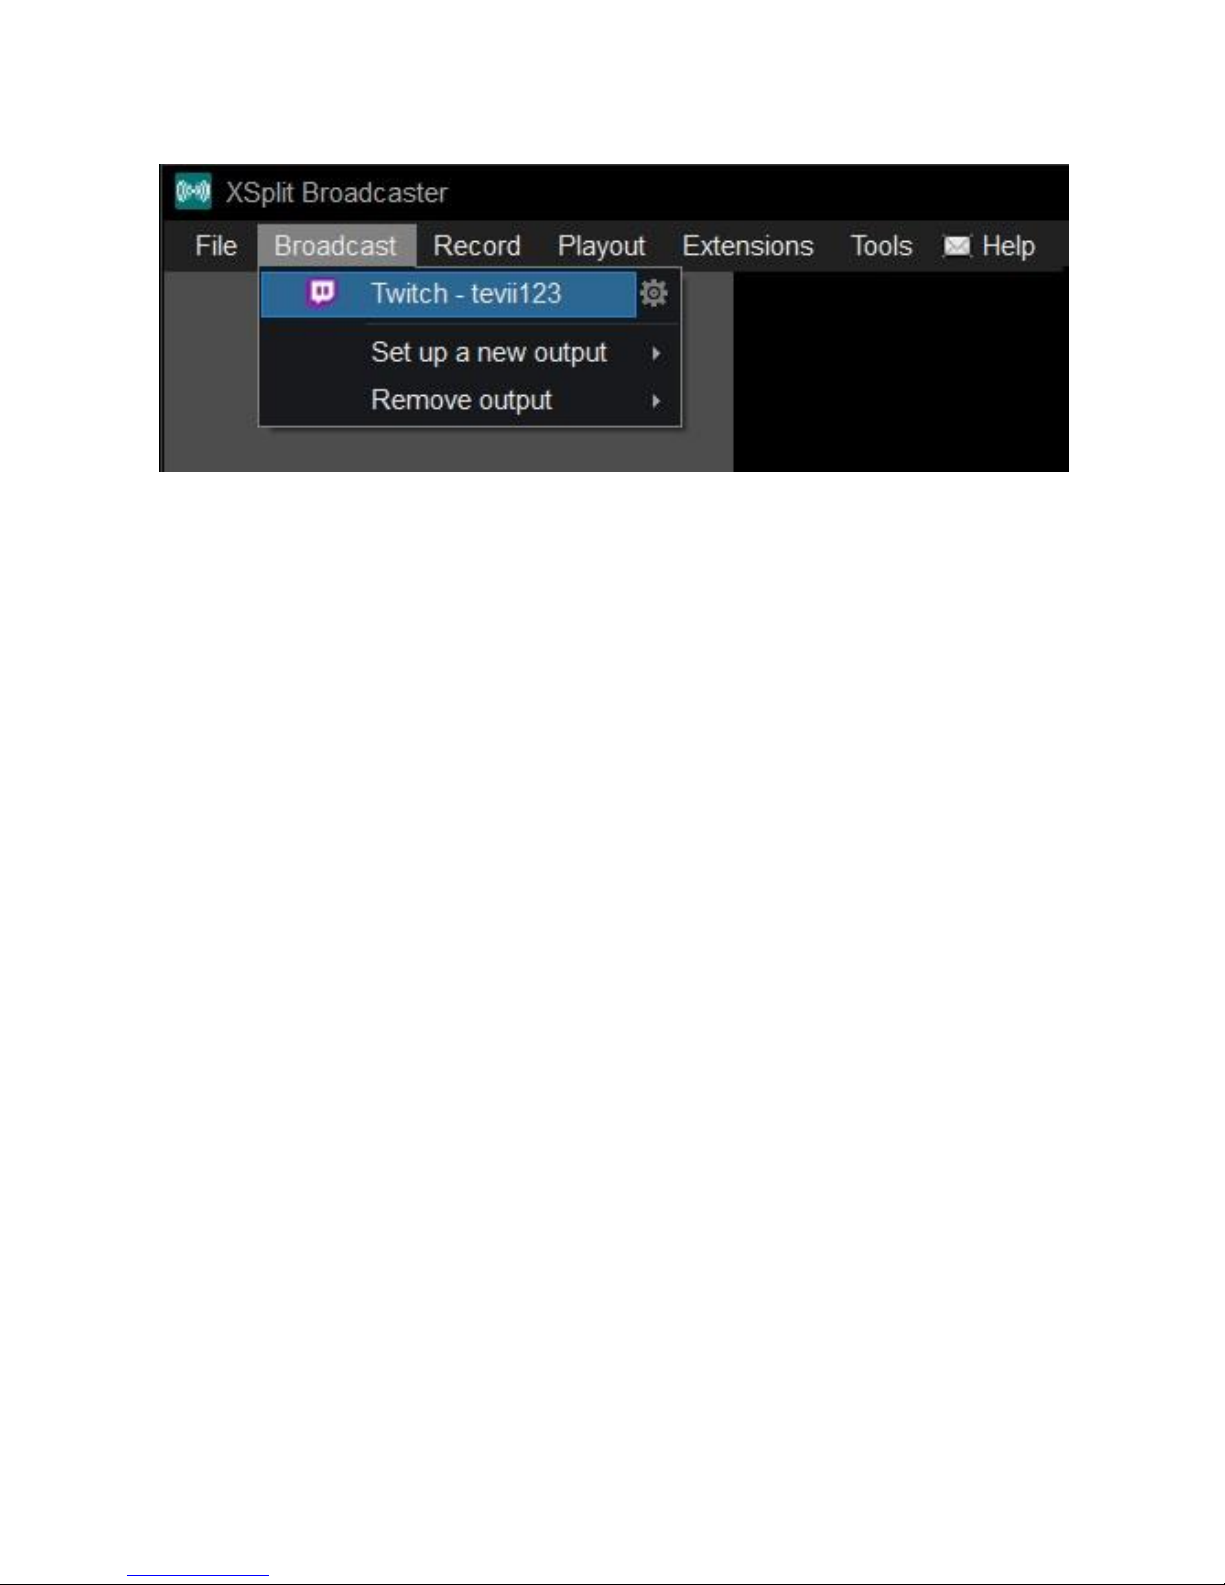
(5) Broadcast → Select completed setting platform then start streaming
( Twitch for an example)
16
3. Live Streaming via OBS
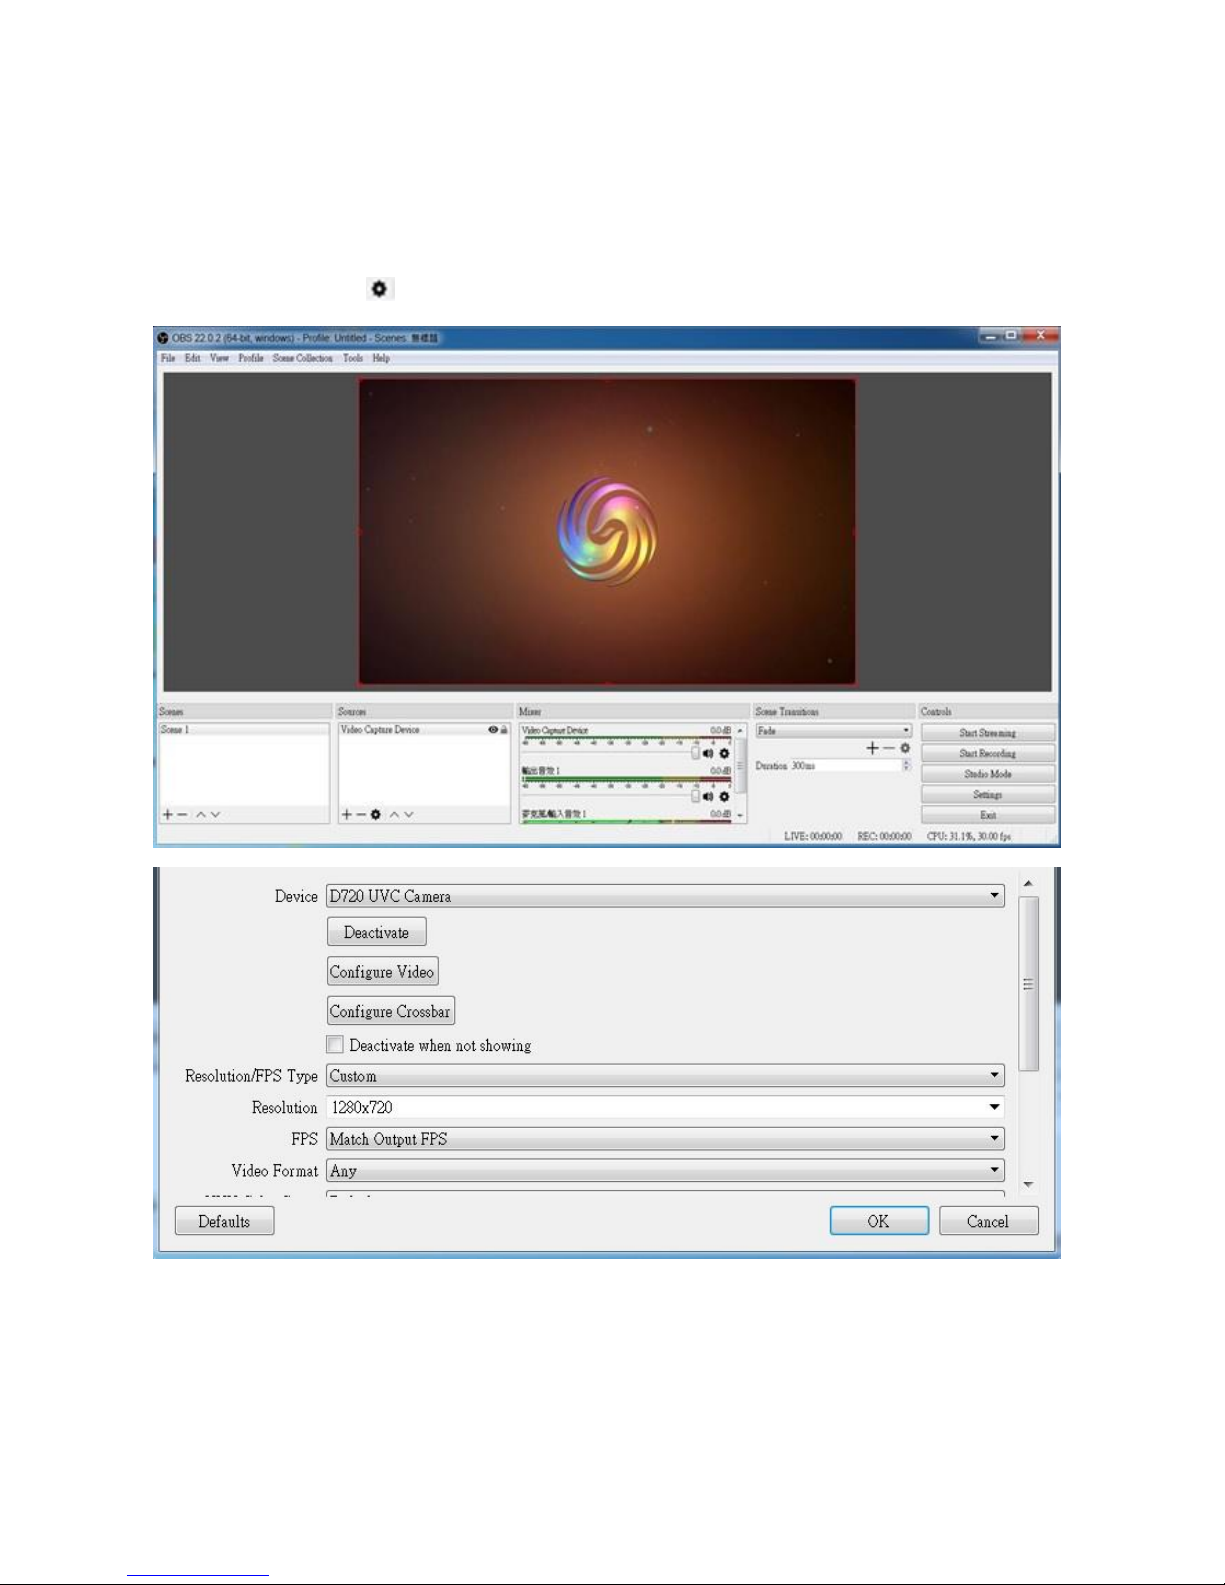
(1) Download & install & run the OBS on your PC.
(2) Select Scenes 1→ Click Source (+) then select Video Capture Device→
click setting mark →Device→Select D720 UVC Camera
17
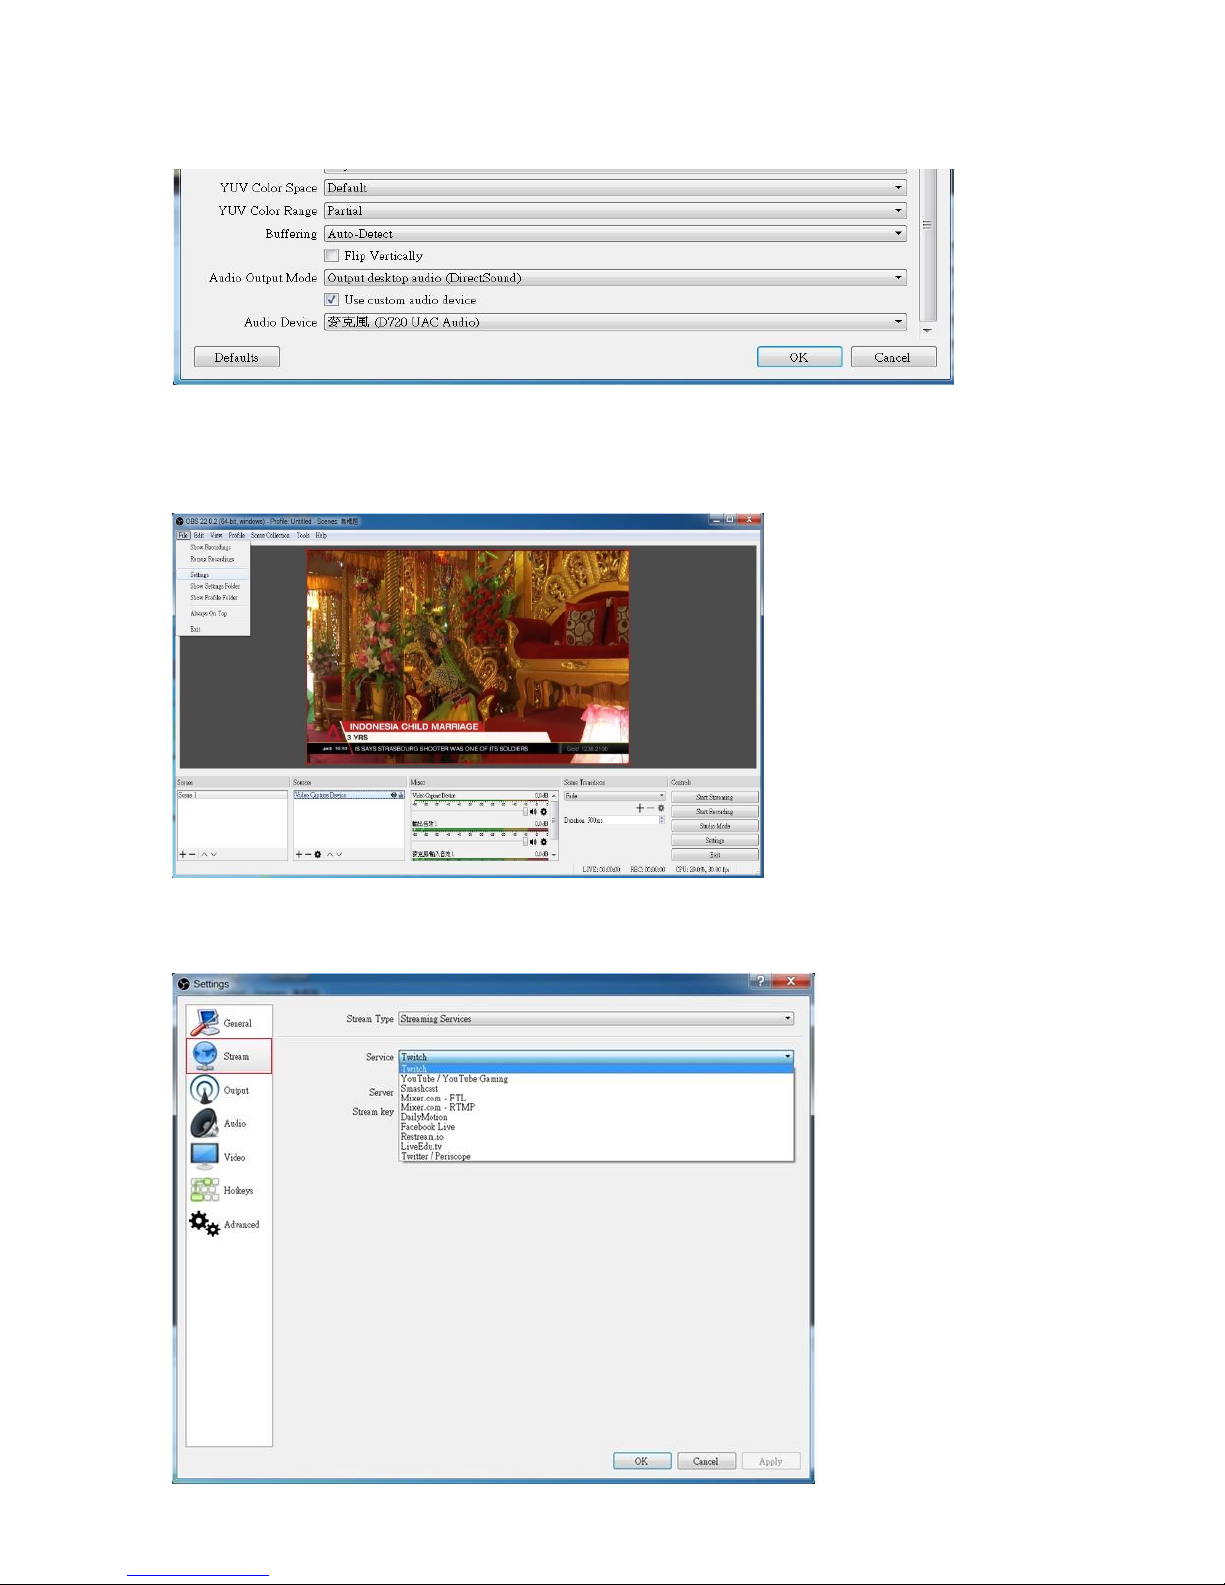
(3) Settings Audio output Mode→Output desktop audio (DirectSound)
→Select Use custom audio device→Audio Device Microphone (D720 UAC Audio)
Setting up for Live Streaming
(1) Press File list’s Setting
(2) Select Stream (refer to below photo)→ Service (select a stream platform for example
Twitch)→ Select a proper server→Stream key (input a stream code)→Press OK to
complete setting.

18
(3) Press Start Streaming
19
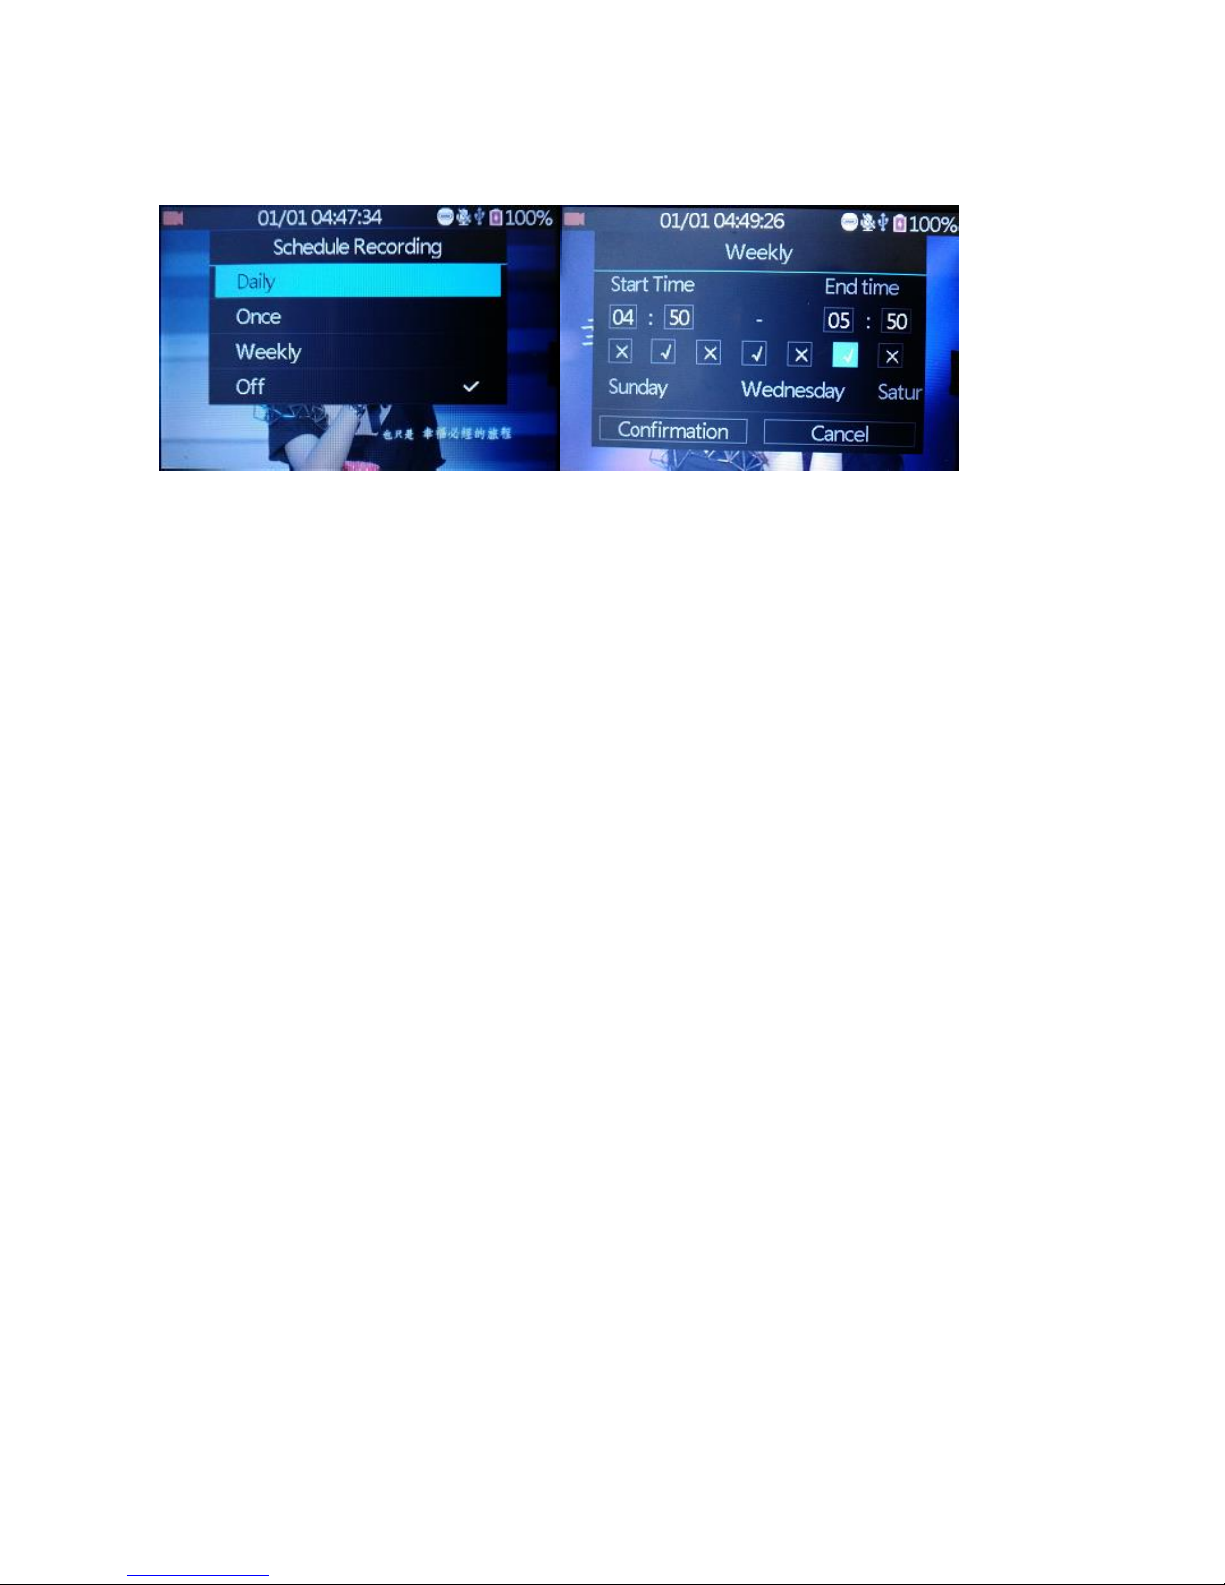
4. Schedule Recording
The user can schedule a recording by press Schedule on remote or choose
from menu Schedule Recording.
On above menus, HD60 Video Recorder allows you to setup 3 different types of
schedules:
Daily, Once, Weekly recording.
Start Time/End Time:set the desired time of start/stop recording.
Week checkmarks: set the desired week days of schedule.
Confirmation: Click to save the schedule settings.
Cancel: Click to exit without saving the schedule settings.
Note:
⚫If the schedule saved successfully, a reminder icon will show on the
status bar.
⚫The schedule recording works only on preview screen with power on.
⚫When reached the scheduled time, HD60 Video Recorder will start to record
videos automatically.
⚫The recording will be saved to current available storage device.
Table of contents
Other TeVii DVR manuals


