Helpline No. UK/Northern Ireland 01270 508538 Rep.Ireland 1800 995 036
Web Support www.quesh.co.uk
Model No: 44159 10
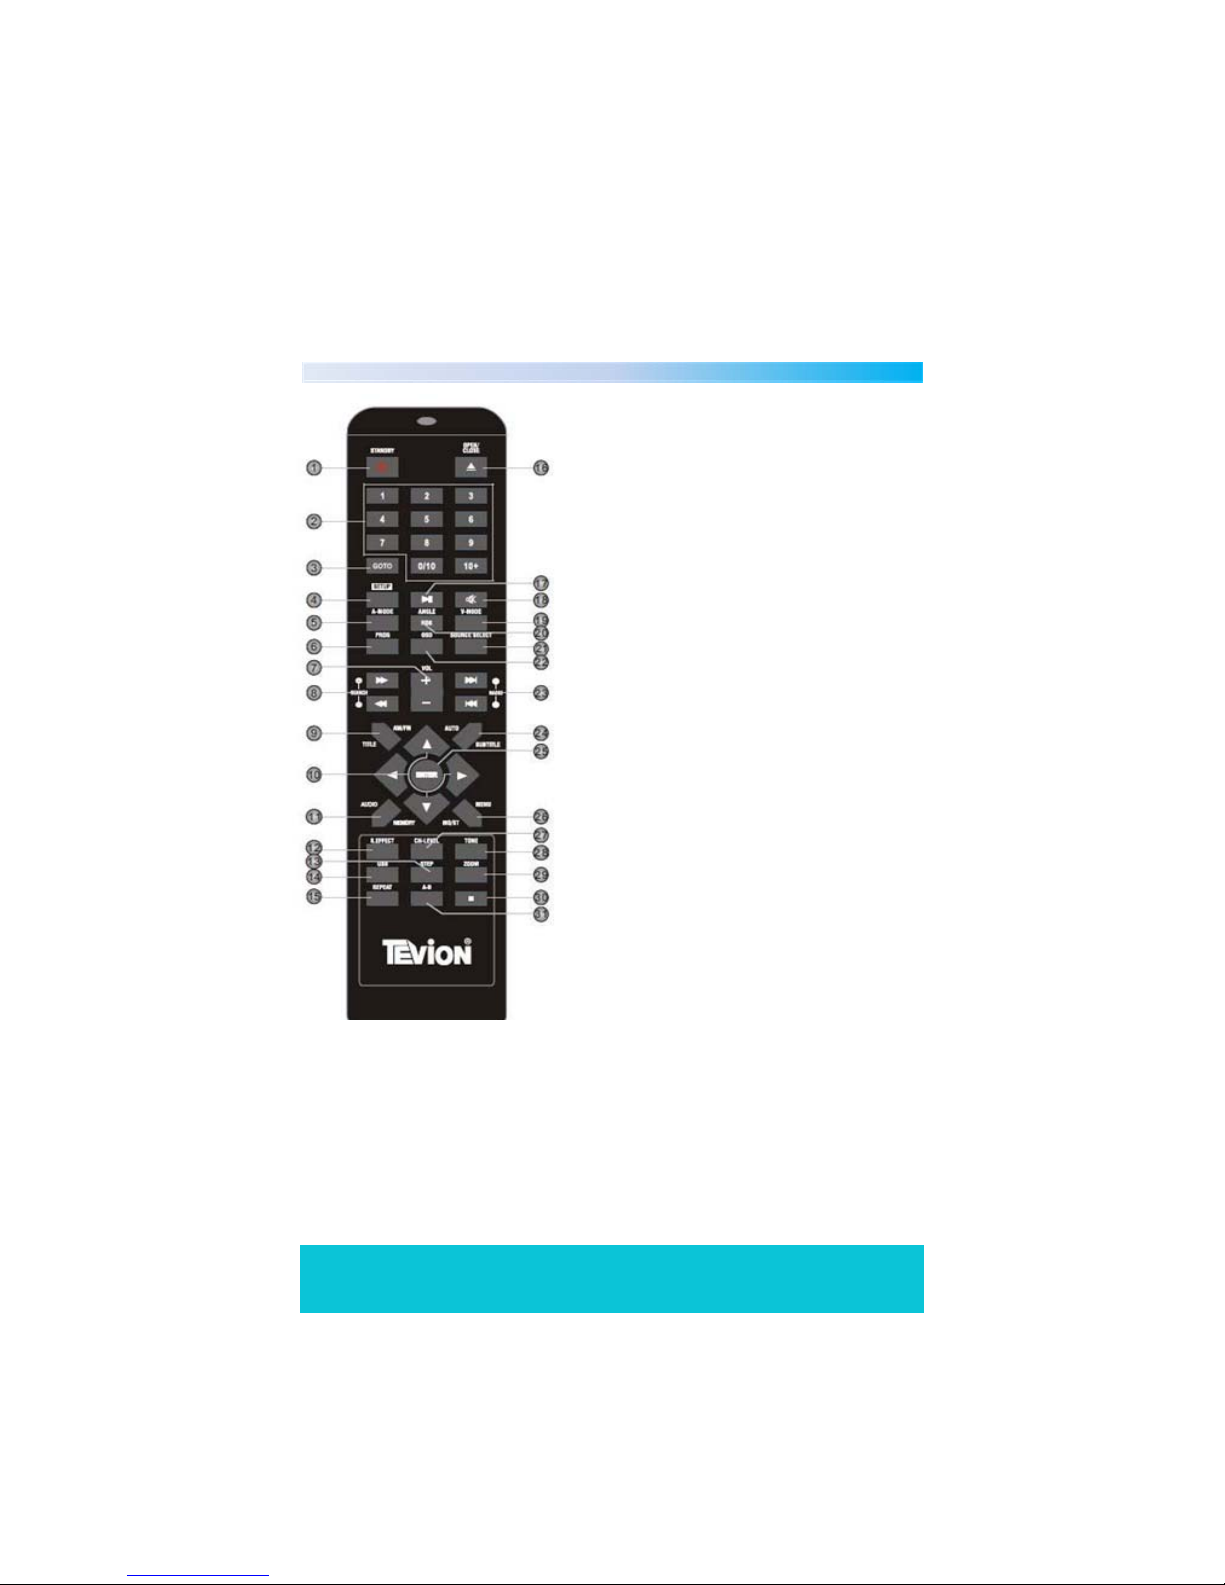
Repeat
Press repeatedly to switch the repeat modes.
Note: For VCD2.0, SVCD, etc, this function is invalid when PBC (Playback
control) function is activated.
Repeat A-B
You can repeat a specific section of a disc with this button. During play back,
press this button to mark down the starting point (A) and press it again to mark
down the ending point (B). Then, the unit will playback this section (from A to
B) over and over again. Press it for a third time to cancel A-B repeat and resume
the normal playback. Note: Points A and B must be in the same title/ track.
Mute
Press to temporarily switch off the sound. Press it again to restore the sound.
Vol Increase/Decrease
Press the “VOL+/VOL-” to turn up/down the volume.
Sound Effect
Press repeatedly to select the sound effect of the audio output from
Normal/Concert/Living Room/Hall/Bathroom/Cave/Arena/Church.
Title
Press to enter the title menu of the playing DVD disc.
Menu
Press to enter into the main menu of the disc. Press to activate/ disable the PBC
(Play Back Control) function. When playing a disc encoded with PBC function,
press to display the PBC menu, press it again to disable the PBC function. (Note:
VCD 2.0, SVCD, etc. have PBC function. DVD, VCD1.1, CD-DA and MP3 disc have
no PBC function.)
Subtitle
Press repeatedly to switch the subtitles on or off.
Note: This function only works with those discs encoded with subtitles.