Text Alert Wireless Alert User manual

Manual
a
product
Document Version: V4.8
Apologies to Apple Mac users – TextAlert drivers and software only currently available for Windows/PC
Applicable to firmware package versions 4.8 and up
Before attempting to connect or operate TextAlert, please read these instructions thoroughly.
Pay close attention to the guarantee conditions.

**** ****
**** ****
- Installer Manual -
2
Table of Contents
Introduction ...................................................................................................................................................................4
Detection/Sensors .................................................................................................................................................4
This package includes: ..........................................................................................................................................5
LED Lights and Audible Notifications ....................................................................................................................5
Audible Signals:.....................................................................................................................................................5
LEDs: .....................................................................................................................................................................5
Installation .................................................................................................................................................................6
Admin Tab ...............................................................................................................................................................16
Eliminating False Alarms.........................................................................................................................................18
Setting up zones......................................................................................................................................................22
Setting up remote control functions:........................................................................................................................28
What can the remote do? ....................................................................................................................................29
“Advanced Options..................................................................................................................................................32
Managing “Outputs”.............................................................................................................................................33
Managing “Inputs”; (under the “Advanced Options” tab).........................................................................................34
Guarantee ...............................................................................................................................................................36
Copyright Notice......................................................................................................................................................36
Contact details.........................................................................................................................................................36
Troubleshooting ..........................................................................................................................................................37
Text setup software reports “Hardware not detected”.............................................................................................37
TextAlert does not seem to send any SMS messages. ..........................................................................................38

**** ****
**** ****
- Installer Manual -
3
SPECIFICATIONS
General
oDimensions: 112mm x 75mm x 30mm (excluding antennas)
oOperating temperature: 0-50°C (32 F – 122 F)
oWaterproof specification: None
oMounting method: Self-adhesive backing
Electrical
oPower consumption: 200mW
oBattery type & capacity: Lithium-Ion 1050mAH
oBattery backup time: Approximately 24 hours
oCharger input: 8-24V DC
Connectors
oUSB Connector: mini-B
oCharger input: 5mm DC Jack (Center positive)
oAntenna connectors: SMA female
RF Specifications
oGSM engine: Quad-band
oISM Receiver frequency: 433MHz
oISM Receiver sensitivity: -110dBm

**** ****
**** ****
- Installer Manual -
4
TextAlert receives wireless
radio signals from Voice Alert
PIR sensors or transmitters
and reports the specific zone
violation by sending SMS text
notifications and making
phone calls to selected cell
numbers.
This means that any number
of detection devices can be
integrated into the system and
simultaneously trigger a
variety of reporting devices.
(See www.voicealert.com)
TextAlert offers two options of
detection.
a) Standard VoiceAlert® PIR motion sensors (model VA6000T) have an integrated RF/433
MHz radio transmitter.
or
b) Any standard infrared PIR, photo beam, pressure mats, vibration switches, trip wires and
any other commercially available detection method: that is connected to a Voice Alert
transmitter (TXPCBB), which is also an RF/433 MHz radio transmitter.
The word “sensor” will mean any detection device connected to a Voice Alert transmitter.
*IMPORTANT: As with any mobile/cell phone text message: Though TextAlert
always immediately transmits a warning text (and may place a ‘dropped call’
phone call to recipient 16), the time it takes for that message to reach your
cellular/mobile telephone will depend on your service provider’s network
capacity at that time. It is important that you read the “Disclaimer” caution that
must be agreed to each time you work with TextAlert’s software.

**** ****
**** ****
- Installer Manual -
5
1. TextAlert base unit – with a detachable 433 MHz antenna and a GSM cell phone
antenna;
TextAlert contains an internal cell phone battery which should provide you with up to 24
hours of battery backup in case of power failure.
2. A configuration software CD
3. A USB cable to connect TextAlert to your PC
4. Power Supply/Charger
TextAlert has various LED lights and audible pulses that communicate its current state at any
particular time:
•When arming, disarming or triggering a panic message via remote, the TextAlert will
respond with a unique signature pulse of sound that identifies the action.
•Rather than try to describe the sounds, once setup is complete, familiarize yourself with
these ‘signatures’ by arming, disarming and triggering panic messages.
1. When first turned on, the right hand column of three lights (SIM Card Error, Sensor
Receive, & Battery Low) will rapidly ‘cycle’ as TextAlert makes contact with the SIM
card service provider.
2. When TextAlert has established contact with the cellular provider, it has two states:
a. If ANY zone is armed, all LED’s will simultaneously flash more than once per
second:
At a glance you will now know that at least one zone is armed.
b. When ALL zones are disarmed, only the “Cell Status” LED will flash once every
4 or so seconds:
AT a glance you will now know that all zones are disabled.
If you encounter problems
a. Verify that the SIM Card does not have a PIN enabled.
b. Verify that the SIM card is inserted in all the way. When installed correctly, it will
make a “click” sound.
c. If the problem is not solved by the above two steps, remove all power from the
TextAlert, wait 2 seconds, and try again. If the problem persists, contact our
Technical Support line 760-633-3737.
Each of the LEDs is marked clearly;
oCell Airtime Low – If this flashes, airtime is low. You will need to buy some airtime for
the SIM card.

**** ****
**** ****
- Installer Manual -
6
oCell Low Signal – This means you have low cellular signal strength. If your TextAlert is
linked to your computer via a USB cable, you can review the actual signal strength in
the “Status” tab/window – the example below shows a low signal strength warning. We
offer a high-gain antenna to rectify the problem:
oCell Status – A 3-second interval flash is ideal.
oSIM-Card Error – The contacts may need cleaning or the SIM is faulty, or a pin number
is still active on the SIM. If the PIN is still active put the SIM into a cell phone and
remove the PIN through options in your cell phone menu.
oBattery Low – When this LED glows, the internal battery is running low. Plug unit into
the external power supply.
All you need now is:
•A cell phone SIM card (contract or prepaid) from any cell service provider.
•Sensors (supplied separately) Voice Alert VA6000T or other Voice Alert
sensor/transmitters.
•Install the GSM antenna. The TextAlert is supplied with a basic GSM antenna that is
suitable for all networks in the United States. If you are not in the United States contact
a local supplier of GSM/cellular products to acquire a local antenna. Screw the
antenna to the connector on the unit marked “GSM” (only finger-tight). If you have
problems getting signal for your TextAlert, place the SIM card in your cell phone and
check on the screen of your cell that there is sufficient strength. On a phone with a 4 or
5-bar signal strength indicator, you should have at least 1-2 bars of signal. If the signal
is too weak, the TextAlert may have trouble sending or receiving SMS messages. In
these cases, try and find a better location for TextAlert. Because the antennas are

**** ****
**** ****
- Installer Manual -
7
detachable it allows you to place them at the end of an extension cable to achieve
better sensor range and mobile phone signal.
•Install the 433 MHz antenna. The 433 MHz antenna has a white band labelled 433
MHz. It is IMPORTANT that this antenna be attached to the 433 MHz connection on
the TextAlert only or the unit will not work.
•*VERY IMPORTANT* Before you install your SIM Card install the SIM Card into any
normal cellular phone. WARNING: DO NOT Insert or remove the SIM card while the
TextAlert is powered!!
The phone must NOT ask for a PIN when switched on with this SIM card inside. If the
phone does request a PIN, you need to enter the correct pin so that the phone can
start, and then disable the SIM Card PIN. See your cell/mobile phone documentation
on how this can be done.
Verify that you are able to send a Text/Sms message. The SIM card will now work
with the TextAlert. If the SIM Card is a prepaid (non contract), ensure that the card is
loaded with sufficient airtime for your needs.
NOTE: If you are using a prepaid SIM card and the card has not produced a billable event on the
network for a period of time (typically 3 months), the card will be de-activated by the network, and
the SIM card will then be useless and TextAlert will cease to function until you replace the SIM.
The SIM card is fitted into the side of the TextAlert unit, as indicated by the graphic on
the unit. The SIM card is slid in until it “clicks” into place. To remove the SIM press it
in and it will “un-click” and pop out. TextAlert can automatically detect if the airtime is
running low. It is user's responsibility to make sure than the airtime is topped up.
•
Plug TextAlert in to the power source and turn it on with the white switches in blue
housing. These switches only activate or de-activate power from the internal battery. If
TextAlert is plugged into a power source, it will operate and trickle charge the battery
whether the switches are on “ON” or “OFF”. If power is lost, TextAlert will only switch to
battery mode if the switches are turned “On”. If the switches are turned “Off”, TextAlert
will not operate.
Make sure your TextAlert is NOT connected to the PC.
•Put the CD into the computer to install the software and the following screen will
appear. Follow the instructions.

**** ****
**** ****
- Installer Manual -
8
Click “Run”
Click “Next”

**** ****
**** ****
- Installer Manual -
9
Click “Next”

**** ****
**** ****
- Installer Manual -
10
Click “Next”
Click “Exit”

**** ****
**** ****
- Installer Manual -
11
Click “Install”
The system will now auto-scan itself to identify the TextAlert – go make a cup of coffee –
this can take several minutes.
Microsoft now wants to have their say… ignore it and click “Continue Anyway” – This
message may appear more than once; that’s okay… keep selecting “Continue Anyway”

**** ****
**** ****
- Installer Manual -
12
Click “Yes”
After the PC has restarted, you can connect your TextAlert to the PC using the USB cable and
also connect the power supply.
You will probably see an icon pop up on your taskbar that says:
Select “No, not this time”, and click Next”

**** ****
**** ****
- Installer Manual -
13
Select “Install software automatically”, and click Next”
You may now have another of the following screens – simply click “Continue Anyway”

**** ****
**** ****
- Installer Manual -
14
Completion; After this step, the screens above will appear to repeat. Treat them exactly the
same as you did before.
CONGRATULATIONS: Your TextAlert Software should now be installed and ready to use!
You can access the software on your PC by going:
Start > Programs > TextAlert > Configure TextAlert
When you click “Start” – usually at bottom left of your screen – it will look something like this:

**** ****
**** ****
- Installer Manual -
15
•The first screen to open is a disclaimer stating that the system and its performance or
timely delivery of messages is subject to the performance of the mobile phone service
provider of your choice. You need to click “YES, I AGREE” in order to proceed:
•Once you agree, the Admin screen will appear.
When you open the dialogue screen, it will show a pop-up message that allows you to
connect* from the PC software to the TextAlert plugged in via USB.
•If you choose “No”, you can configure the software and save it to your computer and
then at a later time when you plug the TextAlert into the USB, you can save to the
TextAlert.

**** ****
**** ****
- Installer Manual -
16
On the Admin tab there are 15 recipients of Sms/Text messages (plus the administrator
makes 16 recipients). This list of recipients requires you to input the phone number of each
and their name.
IMPORTANT: WHEN ENTERING A PHONE NUMBER YOU MUST INCLUDE +1 BEFORE
EACH PHONE NUMBER. That is the “+” sign and the number “1”.
•Just below the header is a list of tabs that give you access to the main admin screen,
the 16 zones, and the 8 remote control setting options.
Starting with the “Admin” Tab look at the components that make up the various tabs.
•Put the details of the main administrator/owner of TextAlert into the yellow highlighted
area: The administrator will be able to use his or her cell phone to remotely execute the
majority of configuration and management that the software can achieve.
Note; There is a checkbox for “Pwr Msg?” – when this box is checked, the administrator
will receive a warning SMS message if power is lost to TextAlert (by being unplugged
or due to power failure).
“Confirm Arm/Disarm?” – When checked, this box causes TextAlert to send the
Administrator a warning message each time TextAlert or any of its zones are either
armed or disarmed (by mobile phone – a separate checkbox under the remote control
setup tab controls who receives arm/disarm messages if a remote is used to execute
that function.
•Along the top ‘header’ of the software’s screen are options to read-from or write-to the
TextAlert when it is plugged into the computer with the USB cable.
IMPORTANT: You must click “Save to TextAlert” or the unit will not be activated with any
of the information you enter in this software.
•The header allows you to save your configuration to a folder on your computer and
then read from that folder at a later time.

**** ****
**** ****
- Installer Manual -
17
We strongly suggest that you always make and maintain a folder on your computer and “Save
Setup to File” in that file. For example:
You will be able to store and manage an infinite number of TextAlert units each with their
separate file.
You will be able to “Open Setup From File” at any time in the future to access and change
information and settings.
Here’s what it looks like when you’re ready to open a pre-saved setting from file:
In the same way - you can:
You can also:
IMPORTANT: “Save Setup to TextAlert” is CRITICAL. If you fail to take this step
*TextAlert will not be programmed to do anything….. IT WON’T WORK!

**** ****
**** ****
- Installer Manual -
18
To ensure you have been successful in "saving to", click the "Open Setup from TextAlert" and
if your information is there then you have been successful.
•The software provides you with simple screen-by-screen instructions to configure all
zones and remotes by selecting options, checking boxes, or filling in desired
information.
Zone Tabs
When you open a zone tab, “Zone Not in use” will show and no functions will be displayed:
To prevent false alarms TextAlert can be set to require multiple signals before an SMS is sent.
In order to offset this possibility of false triggering, any zone that TextAlert monitors can easily
be given one of three functions – two of them with ‘double-trigger’ or ‘dual-sensor’ features:
•One Sensor – Triggered Once: The simplest and most sensitive deployment is a single
sensor that will cause a message to be sent. There are times that one wants this level
of ‘sensitivity’ to never miss a potential threat.
•One Sensor – Multi-Triggered: You can define the number of triggers and period in
which they must occur to suite the area you are monitoring.
•Two Sensors – Both Triggered: In this setting, both sensors must be triggered within a
defined period of time before the SMS is sent.

**** ****
**** ****
- Installer Manual -
19
•If you select “Single Sensor” or “Dual Sensor” or “Single Sensor Multi Trigger”, the
zone tab will be populated with options appropriate to that selection:
oSingle
Zone (Simple)
Dual Zone
oSingle
Zone (Multi Trigger)

**** ****
**** ****
- Installer Manual -
20
5. As you fill in the names under each zone tab, you will notice that those names
automatically appear as potential recipients of every message .
Below are two screens that show this.
oAdmin Page Entry (Sms recipients)
o
As listed in each zone
o
Deliver Message to: Controls who gets the message when a particular zone is
triggered.
Allow Arm/Disarm: Allows that person using their cell phone number, to activate or
deactivate that specific zone.
Place Call to:Activates that specific zone to call the recipient. For each zone you can
only select up to 5 recipients of an actual message.
Telephone Ring: People sometimes don’t hear incoming Sms/Text messages or
Sms/Text messages might be ‘held up’ in delivery. The telephone ring feature will call
people who are selected to receive the phone call. This accelerates delivery of the
message that “something is wrong” at the TextAlert location. The Sms/Text that follows
will detail which zone has been violated.
Table of contents
Popular Receiver manuals by other brands
Wegener
Wegener UNITY 550 user manual
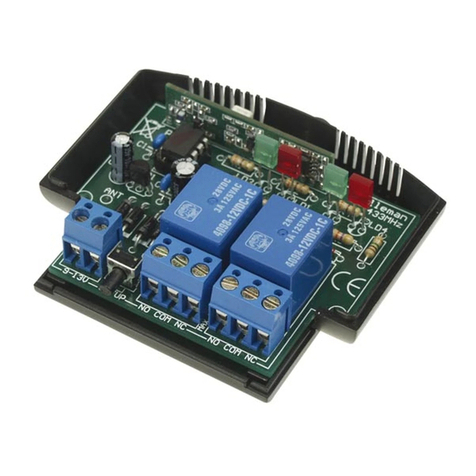
Velleman
Velleman K8070 Assembly manual

Sony
Sony SAT-HD300 - High Definition Satellite... operating instructions

Audio Pro
Audio Pro AVD-303 datasheet
DMP Electronics
DMP Electronics XR150 series Installation and programming guide
Sokkia
Sokkia GSR2700 IS Operation manuals

