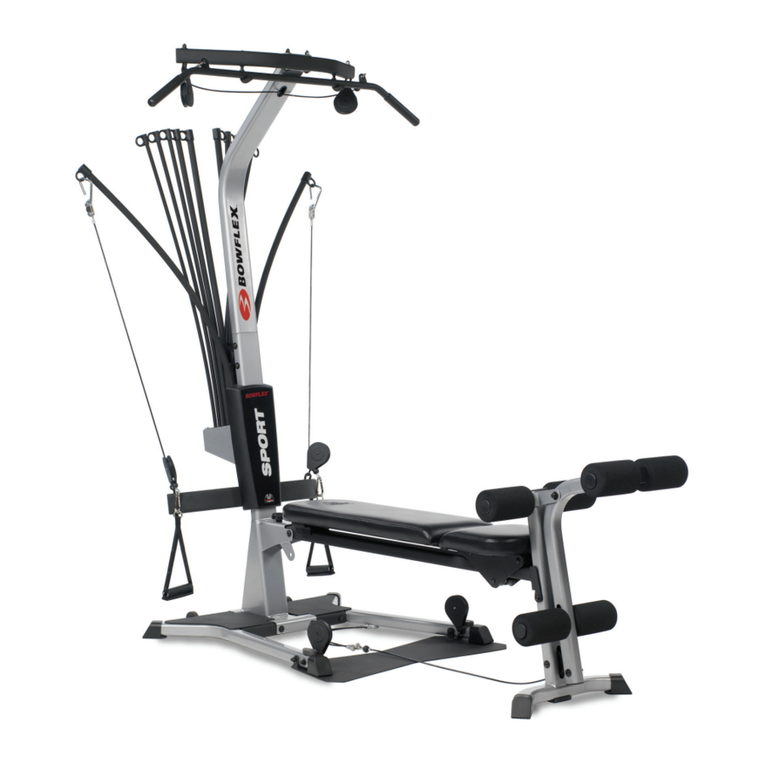
Thane Fitness Power Gym User manual

INSTRUCTION
MANUAL
TOTAL
BODY
EXERCISE
&
WORKOUT
Includes 30 exercises using the Power Gym
A Quality Thane Fitness Product
Thane Fitness is a subsidiary of
Thane International, Inc.
La Quinta, Ca 92253
www.thane.com

Table of Contents
The Power Gym Cross Training System......................................................................................3
Balance Fitness Concept ..............................................................................................................3
Components of Balance Fitness....................................................................................................3
How to Establish Your Training Duration and
Intensity on the Power Gym ........................................................................................................4
The Power Gym Fat Burning Zone..............................................................................................4
Predicted Target Heart Rate Zone for Different Ages ..........................................................5
Fitness Exercise Guidelines....................................................................................................5
Body Fat & Weight Loss Concept ................................................................................................6
Workout Tips...... 6
A. Warm-up ............................................................................................................................6
B. Aerobic, Resistance and Flexibility Exercises ..................................................................7
C. Cool-down ..........................................................................................................................7
Low Intensity Workout..................................................................................................................8
Intermediate Workout ................................................................................................................10
Advanced Workout ......................................................................................................................13
The Power Gym Exercises ..........................................................................................................16
CARDIOVASCULAR..............................................................................................................16
Adjustable Dial Hydraulic Exersiser - Attachment........................................................16
ARMS ..... 16
Standing Bicep Curls ......................................................................................................16
Seated Curls ....................................................................................................................16
Concentration Curls........................................................................................................17
Seated Tricep Press..........................................................................................................17
Kick Back Tricep Extensions ..........................................................................................17
BACK ..... 18
Lateral Pulls ....................................................................................................................18
Seated Rows ....................................................................................................................18
One Arm Rows ................................................................................................................18
CHEST ... 19
Flat Chest Press ..............................................................................................................19
Incline Chest Press..........................................................................................................19
Flat Chest Flies................................................................................................................19
Incline Chest Flies ..........................................................................................................20
SHOULDERS ........................................................................................................................20
Shoulder Press ................................................................................................................20

3
The Power Gym Cross Training System
Congratulations on your purchase of The Power Gym. You are about to discover that
this is the best total home gym you can buy. The main reason for The Power Gym’s popularity
is its convenience. No where else, except in a gym, can you get a total body workout in one
compact piece of equipment. For many people who have little time to spend at a gym,
The Power Gym delivers an easy and quick upper and lower body workout that balances the
three essential components of exercise while incorporating a full range of movement:
• Stretching for flexibility
• Muscle toning for strength
• Aerobic conditioning for stamina and endurance
Keep in mind that for any fitness program to be successful, it must be done on a regular,
sustained basis and must involve endurance, strength, and flexibility training. Clearly, when
these fitness components are addressed, the quality - if not the length - of one’s life can
be increased.
The Power Gym Balance Fitness Concept
Balance fitness can do more to ensure a longer, healthier life than just about anything else
known to the medical community today.
It is never too late to start a fitness program. But, if you have been inactive for several years
or you are new to an exercise program, be sure to consult with your family physician, especially
if you are over 35, have health problems, have a history of heart disease in your family or if you
are overweight.
The Power Gym Components of Balance Fitness
The American College of Sports Medicine’s (ACSM) new guidelines now recommend that
you add resistance training, aerobic activity, and flexibility to your exercise program to achieve
ultimate fitness. The Power Gym is the only piece of equipment suited to comply with all of
these recommendations.
• Resistance training promotes an increase in lean body mass and a decrease in your body fat
level, burning more calories 24 hours a day even when sleeping.
•Aerobic training increases the functional capacity of the heart and lungs. It also gives you
more energy, reduces the risk for cardiovascular disease, and increases muscle endurance.
• Flexibility training is important to the total balance of your body. In addition to stretching
Lateral Seated Raises ......................................................................................................20
Lateral Standing Raises ..................................................................................................21
Upright Rows....................................................................................................................21
Shrugs ..............................................................................................................................22
Forward Raises ................................................................................................................22
LEGS........... 23
Leg Extensions ................................................................................................................23
Leg Curls..........................................................................................................................23
Leg Press ..........................................................................................................................23
THIGHS ................................................................................................................................24
Adductions........................................................................................................................24
Abductions........................................................................................................................24
HIPS ....... 24
Hip Extensions ................................................................................................................24
ABS............ 25
Abdominal Crunch ..........................................................................................................25
Abdominal Obliques ........................................................................................................25
BACK ..... 26
Back Extension ................................................................................................................26
Back Lateral Flexion........................................................................................................26
Back Massage ..................................................................................................................26
Accelerated Weight Loss Plan............................................................................................................27
Why Is There Fat?........................................................................................................................28
What Happens When You Diet....................................................................................................28
Food and How to Control It........................................................................................................29
Don’ts ..... 29
DOs ......... 30
Food Preparation ........................................................................................................................31
Food Timing ................................................................................................................................31
When to Eat, When to Stop ........................................................................................................31
Restaurant Eating........................................................................................................................32
Cheating (Indulging) ..................................................................................................................33
How to Prevent and Stop Cravings ............................................................................................33
Nutritional Supplementation......................................................................................................35
Good Judgement..........................................................................................................................35

54
How to Establish Your Training Duration and
Intensity on The Power Gym
The length of your workout depends on the intensity of the activity. Those who like to
work at a lower intensity should work out for a longer duration. Low-to-Moderate intensity
cross-training workouts are best for most adults since higher intensity workouts can lead to
increased risk of injury. Plus youare more likelyto stick to an exercise routine that leaves you with
a sense of accomplishment
Beginners can achieve a significant training effect from lower-intensity workouts. If you’re
already fit and want to improve, gradually increase your intensity.
After several weeks of aerobic conditioning, certain changes become apparent. What was once
a fairly attainable level of exercise now become quite easy.
See Exercise Guidelines Chart. (page 5)
The Power Gym Fat-Burning Zone
The following chart will help you establish your “Target Heart Zone”. The primary Power Gym
heart rate training zone is referred to as the “Fat-burning Zone” because the intensity is sufficient
to require your body to use fat as the primary fuel source for the exercises. You should exercise at
70 to 80 percent of your maximum heart rate to achieve this level of intensity. To achieve weight
loss, concentrate in maintaining your heart rate in this fat-burning zone for 20-30 minutes
per day, 3 to 5 days per week.
Regardless of your maximum average heart rate or your target heart rate, consult with your
physician or with a sports medicine expert to establish the rates that are right for you. This is
especially important if you are over 35, have been sedentary for several years, are overweight, or
have a history of heart disease in your family.
Predicted Target Heart Rate Zone for Different Ages
Maximum Predicted Aerobic Target Zone
Age Heart Rate Per Minute 70%-80%
20 200 140-160
25 195 137-156
30 190 133-152
35 185 130-148
40 180 126-144
45 175 123-140
50 170 119-136
55 165 116-132
60 160 112-128
To accurately determine your own heart rate, simply record your heart rate several times while
working on The Power Gym at maximum effort such as when you are doing the stepper on your
highest possible setting.
Caution: Only attempt this if you are healthy and have not experienced undue discomfort or
lightheadedness while exercising.
Note: You can take your pulse for 15 seconds and multiply by 4 to obtain your heart rate
per minute.
The Power Gym Fitness Exercise Guidelines
Frequency: 3 to 5 sessions/week
Intensity: 8-12 repetitions or until fatigued at 60-70 percent
maximum heart rate
Time: 20-60 minutes/session
Type: 8-10 resistance exercises combined with cardiovascular workout
Level: Adjust the dial on the hydraulic cylinders and resistance bands to
be suitable with your fitness level and then increase accordingly.
your muscles these exercises improve mobility and performance, while decreasing the risk
of muscular or skeletal injury - especially good for preventing lower back pain.
The recommended amount of time to spend in your exercise routine is 20 to 60 minutes
per day, 3 to 5 days per week. Of course the key to a successful routine is to relax and listen
to your body.

76
The Power Gym Body Fat & Weight Loss Concept
The Power Gym offers the best way to accomplish weight loss, especially areductionin bodyfat,
by combining resistance training with cardiovascular exercise because metabolic rate is sustained
for longer periods of time and energy.
Body composition is an important component of health-related fitness. Good body composition
results from aerobic activity, strength training, and proper diet. Your every day calorie balance will
determine whether you will gain or lose weight from day to day.
Calorie balance refers to the difference between the calories you take in from food and your
calorie expenditure, or the amount of energy you put out in daily activities, work or exercise.
It is important to begin a weight loss program that incorporates diet and exercise. Body weight
is lost when calorie expenditure exceeds intake from food or when calorie intake is less than
calorie expenditure during work or exercise. It is a known physiological fact that one pound of fat
is equal to 3,500 calories of energy. Although a shift in calorie balance will be accompanied by
changes in bodyweight,how yourbody loses weight varies dependingon the type ofweight loss pro-
gram you undertake.
For example, low calorie diets without proper exercise can cause a substantial loss of water and
lean body tissue such as muscle. In contrast, a Power Gym exercise routine, including a balanced
diet, results in a weight loss of the fat stores you would like to get rid of. Resistance training, helps
you add muscle mass, and since muscle cells are more active than fat cells you burn more calories
per day even when you are sleeping. The cross-training Power Gym workout sustains aerobic activ-
ities that use large muscle groups and will cause the greatest energy expenditure to maximize
weight loss.
The Power Gym Workout Tips
The ABC’s of a Balanced Workout
To achieve balance, all of your home workouts should include these phases:
A. Warm-up
B. Aerobic, resistance, and flexibility routine
C. Cool-down
The secret is to know when you are pushing too much or too little. Monitoring your heart rate
tells you how much to exercise and when to rest.
A. Warm-up
A good warm-up will help you perform better and will decrease the aches and pains most
people experience. The warm-up prepares your muscles for exercise and allows your
oxygen to ready itself for what is to come. This usually takes about 5 to 10 minutes, or until
your heart rate reaches about 50 to 60 percent of maximum. You can accomplish
this by using The Power Gym in the stepping mode with the dual resistance cylinder
adjusted to a lower number setting.
B. Aerobic, Resistance and Flexibility Exercise
Vigorous aerobic exercise is the core of your workout program. Exercise must be intense
enough to raise your heart rate into your target zone, usually between 70 and 80 percent of
maximum. You should be periodically checking your heart rate to guarantee maximum
results. Exercising with a heart rate monitor provides constant visible feedback as to your
heart rate while exercising and allows you to stay within your selected target heart
rate zone. To reach your target heart rate raise your adjustable dial to a higher number
while stepping.
In addition to aerobic exercise, perform a minimum of 8 to 10 resistance exercises with the
resistance bands. Be sure to vary your exercise selection so that all the main muscle groups
are worked. At least 8 to 12 repetitions should be completed during each session. You can
choose from a variety of over 30 different Power Gym exercises that can be done as
cross-training aerobic and resistance workout.
Flexibility is the process of loosening up muscles, tendons, and ligaments. Done properly,
stretching can dramatically reduce your risk of injury, as your body structures become
loose, mobile, and flexible. Be sure to hold each stretch for at least 30-60 seconds - it’s the
holding that accomplishes the stretching and loosening of the muscles and joints thereby
increasing your range of motion.
C. Cool-down
The cool-down enables your body’s cardiovascular system to gradually return to normal,
preferably over a 5 to 10 minute period. During each cool down period don’t perform any
resistance exercises and lower the setting on the stepping routine.
Bringing your workout to an abrupt halt can cause lightheadedness because blood will pool
in your legs if you stop working abruptly. When your heart rate has returned to below 60
percent of maximum, you can stop exercising.
Always keep in mind that warm-up, cool-down, and flexibility are as important as the
activity phase. All can prevent common injuries.

98
LOW INTENSITY WORKOUT
POWER GYM ADJUSTMENT
• Back cushion upright position.
• One resistance band.
• Adjustable dial hydraulic exercise levels (1-4).
STRETCHING
•While seated on the Power Gym stretch all body parts to be worked out to full
extended position.
WARM-UP
•5 minutes easy stepping levels (1-4).
BEGIN WORK-OUT
•Increase stepping pace to desired heart rate (see chart on page 5).
• Begin arms warm up.
•Extend arms outward, small circles clockwise and counterclockwise -
10 reps each direction.
•Cross arms front and back -10 reps each direction.
•Stretch arms over head - 10 reps each arm, alternating.
•Repeat sequence 3 times with 1 minute rest between each sequence.
SPRINT
•10 second sprints and 30 seconds regular pace.
(3 sets - return to regular stepping.)
UPPER BODY EXERCISES
(To be performed while continuing to step.)
CHEST
•Chest flies in the upright position (Photo 13).
•3 sets of 15 reps.
•1 minute active rest between sets
Note: Active rest constitutes continuing to step while resting
the fatigued body part.
SHOULDERS
•Shoulder press 3 sets of 15 reps (Photo 14).
•1 minute active rest between sets.
BICEPS
•Seated arm curl 3 sets of 15 reps (Photo 3).
•1 minute active rest between sets.
TRICEPS
•Seated triceps extension 3 sets of 15 reps (Photo 5).
•1 minute active rest between sets.
LOWER BODY EXERCISES
QUADS - HAMS - GLUTES
•Leg press 3 sets of 15 reps (Photo 22).
•1 minute active rest between sets.
•Crank up resistance for this movement.
SPRINT SEQUENCE
•10 seconds sprint - 30 seconds regular pace.
(3 sets - return to regular stepping.)
COOL DOWN
•5 minutes cool down. Slow motion stepping low intensity.
ABDOMINAL
•Abdominal crunch (Photo 26) 3 sets of 15 reps.
• 30 seconds between sets.
STRETCHING
•While seated on Power Gym stretch all worked out body parts to full
extended position.

1110
INTERMEDIATE WORKOUT
POWER GYM ADJUSTMENT
• Back cushion upright position.
• Two resistance bands.
•Adjustable dial hydraulic exercise levels (3-6).
STRETCHING
•While seated on Power Gym stretch all body parts to be worked out to
full extended position.
WARM-UP
•5 minutes easy stepping levels (3-6).
BEGIN WORK-OUT
•Punching motion boxing style with or without cables in hand. 10 reps left
and right, simultaneously.
•Bent arm flies with or without cables in hand. 10 reps left and right (Photo 13).
• Walking motion with cables in hand. 10 seconds.
•Increase stepping pace to desired heart rate (see chart on page 5).
• Begin arms warm up.
•Extend arms outward, small circles clockwise and counterclockwise -
10 reps each direction.
•Cross arms front and back - 10 reps each direction.
•Stretch arms over head - 10 reps each arm, alternating.
•Repeat sequence 3 times with 1 minute rest between each sequence.
SPRINT
• 20-30 second sprint and 30 seconds regular pace.
(3 sets - return to regular stepping.)
UPPER BODY EXERCISES
(To be performed while continuing to step.)
CHEST
•Chest flies in the upright position (Photo 13).
•3 sets of 15 reps.
•1 minute active rest between sets (active rest, regular pace stepping.)
(Active rest constitutes continuing stepping while resting the fatigued body part.)
SHOULDERS
•Shoulder press 3 sets of 15 reps (Photo 14).
•1 minute active rest between sets.
SPRINT
•20-30 second sprints and 30 seconds regular pace.
(3 sets - return to regular stepping.)
BICEPS
•Seated arm curl 3 sets of 15 reps (Photo 3).
•1 minute active rest between sets.
TRICEPS
•Seated triceps extension 3 sets of 15 reps (Photo 5).
•1 minute active rest between sets.
SPRINT
•20-30 second sprints and 30 seconds regular pace.
(3 sets - return to regular stepping.)
QUADS - HAMS - GLUTES
•Leg press 3 sets of 15 reps (Photo 22).
•1 minute active rest between sets.
•Crank up resistance for this movement.
SPRINT
•20-30 second sprints and 30 seconds regular pace.
(3 sets - return to regular stepping.)
COOL DOWN
•5 minutes cool down. Easy stepping, low intensity.
ABDOMINAL
•Abdominal crunch 3 sets of 20 reps (Photo 26).
• 30 seconds between sets.

1312
EXERCISES PERFORMED AFTER COOL DOWN
Choose from list and rotate every other work-out
Please do 2-3 sets of 15-25 reps with a 30 second rest between sets.
• Standing curl (Photo 2).
• Concentration curl (Photo 4).
• Tricep extensions (Photo 6).
• Lateral pull (Photo 7).
• Seated rows (Photo 8).
•One arm row (Photo 9).
• Standing raises (Photo 16).
• Shrugs (Photo 18).
• Leg extensions (Photo 20).
• Leg curls (Photo 21).
• Inner thighs (Photo 23).
• Outer thighs (Photo 24).
• Hip extensions (Photo 25).
STRETCHING
While seated on Power Gym stretch all worked out body parts to full extended position.
ADVANCED WORKOUT
POWER GYM ADJUSTMENT
• Back cushion upright position.
•One resistance band during the warm-up phase.
•Three resistance bands after the warm-up.
•Adjustable dial hydraulic exercise levels (4-8).
STRETCHING
•While seated on Power Gym stretch all body parts to be worked out to
full extended position.
WARM-UP
•5 minutes easy stepping levels (4-8).
BEGIN WORK-OUT
Use one cable at low resistance and high repetition to warm up each exercise to be performed
during workout. 1 set, 25-50 reps, upper body exercises.
• Chest (Photo 13).
• Shoulders (Photo 14).
• Biceps (Photo 2).
• Triceps (Photo 5).
SPRINT
• 45-60 seconds sprint and 30 seconds regular pace.
(3 sets - return to regular stepping. All upper body exercises to be done
while continuing stepping.)
UPPER BODY EXERCISES
CHEST
•Chest press in the upright position (Photo 11).
•Chest flies in the upright position (Photo 13).
•3 cables 5 sets of 8-15 reps with one set of sprint between each set.

1514
SHOULDERS
• Forward raises (Photo19).
• Seated raises (Photo 15).
• Shoulder press (Photo 14).
•3 cables, 5 sets of 8-15 reps with one set of sprint between each set.
BICEPS
•Seated arm curl (Photo 3).
•3 cables, 5 sets of 8-15 reps with one set of sprint between each set.
TRICEPS
•Seated triceps extension (Photo 5).
•3 cables, 5 sets of 8-15 reps with one set of sprint between each set.
QUADS - HAMS - GLUTES
•Leg press (Photo 22) 5 sets of 25 reps on level 11-12.
SPRINT
•45-60 second sprint - 30 seconds regular pace. (3 sets - return to regular stepping.)
COOL DOWN
•5 minutes cool down. Easy stepping, low intensity.
ABDOMINAL
•Abdominal crunch (Photo 26) 3 sets of 50 reps.
• 30 seconds between sets.
EXERCISES PERFORMED AFTER COOL DOWN
•3 cables, 5 sets of 8-15 reps, 30 seconds rest between sets.
•Standing biceps curls (Photo 2).
• Concentration curls (Photo 4).
•Kick back tricep extension (Photo 6).
• Lateral pulls (Photo 7).
• Seated rows (Photo 8).
•One arm rows (Photo 9).
•Lateral standing raises (Photo 16).
• Shrugs (Photo 18).
• Leg extension (Photo 20).
• Leg curls (Photo 21).
• Adductions (Photo 23).
• Abductions (Photo 24).
• Hip extensions (Photo 25).
• Abdominal obliques (Photo 27).
STRETCHES
Seated position; stretch all body parts to be worked out to full extended position while
seated on the machine.

1716
The Power Gym Exercises
CARDIOVASCULAR
Adjustable Dial Hydraulic Exerciser - Attachment (1)
Starting position: Seated with both feet strapped in the
petals, grab the handle bars on either side of the machine.
Movement #1: Fully extend the right leg while keeping
the left leg in the starting position. Slowly return the
right leg to the starting position while fully extending
the left leg. Repeat.
Movement #2: Fully extend both legs at the same time.
Slowly return them to the starting position. Repeat.
Muscles Emphasized: Quadriceps, hamstrings, 3 Gluteals;
Maximus - Medius - Minimus.
NOTE: The following upper body exercises may be performed
while doing this exercise: Seated Curls, Seated Tricep Press,
ARMS
Standing Biceps Curls (2)
Starting position: Standing behind the Power Gym with toes on the
base and heels on the floor, hold the resistance bands with an
underhand grip.
Movement: Keeping upper arms and elbows close to the body bend
elbows and raise resistance bands to chin level, moving only the
forearm up.
Muscle Emphasized: Bicep muscles.
Seated Curls (3)
Starting position: Seated on the Power Gym with feet in the stepping
position (see photo 1) or with feet locked under the stabilizing bar,
grab the resistance bars with an underhand grip.
Movement: Keeping the elbows close to the body, lift your forearms up
to the shoulder in a repetitive movement.
Muscles Emphasized: Bicep muscles.
Concentration Curls (4)
Starting position: Sit sideways on the Power Gym with legs apart and
feet firmly on the floor. Grab the resistance bar with the hand closest
to the back of the machine using an underhand grip and rest the arm
being worked on the corresponding leg. The resistance bar cable will
be under your leg. Reverse sitting position to work the other arm.
Movement: Starting with the arm straight, bring it up to the shoulder
and lower to starting position. Keep the elbow resting on the inner
thigh for better isolation of the bicep muscles.
Muscles Emphasized: Bicep muscles.
Seated Tricep Press (5)
Starting position: Sit on the Power Gym and grab the resistance bars
with an underhand grip. Lock feet under the stabilizer bar.
Movement: Holding elbows close to the head extend arms straight over
head. Bend arm at elbow and return to extended position. Do not move
arms at the shoulders.
Muscles Emphasized: Triceps muscles; Long head, Lateral head,
Medial head.
Kick Back Tricep Extensions (6)
Starting Position: Holding the resistance band in the left hand,
place right knee on the bench seat and right hand on the seat back.
Bend at the waist, keep the bent left elbow tucked and close to the
thigh with the resistance band pointed towards the floor.
Movement: Slowly extend and straighten the lower arm in a back
and forth motion. Switch sides and repeat.
Muscles Emphasized: Tricep muscles.
photo 1
photo 2
photo 3
photo 4
photo 5
photo 6

1918
BACK
Lateral Pulls (7)
Starting position: Grab resistance bars with underhand
grip. Sit on the floor, facing the Power Gym. Place both
feet on the base, and bend knees slightly. Bend body
forward from the waist. Raise arms parallel to the floor at
shoulder level.
Movement: Keeping arms parallel to floor and palmsfacing
down, pull bands toward shoulders. Body should remain
stationary and only the arms should move. Contract the
leg and abdominal muscles for stabilization. Breath out
when pulling the handles toward your shoulders and
breath in when returning to the starting position.
Muscles Emphasized: Bicep muscles and the large muscles
of the upper back. Seated Rows (8)
Starting position: Grab resistance bars with underhand
grip. Sit on the floor, facing the PowerGym. Place both feet
on the base, and bend knees slightly. Bend body forward
from the waist. Position hands so that palms are facing
each other.
Movement: Pull the resistance bands straight back toward
thewaist area ina smooth motion.Pull only with thearms,
keeping the body rigid.
Muscles Emphasized: Bicep muscles and the large muscles
of the upper back.
One Arm Rows (9)
Starting position: Grab left resistance band with left hand.
Place right hand on bench seat and right toes on base of
machine with heel on floor. Left foot should be flat on floor
with toes turned slightly to the left.
Movement: With left palm turned to the right, pull the
resistance bands toward the chest and return to the starting
position. Reverse position for the right arm.
Muscles Emphasized: Bicep muscles and the large muscles of
the upper back.
CHEST
Flat Chest Press (10)
Starting position: Adjust theseatback to the flat position. Sit on
the
Power Gym
and grab the resistance bars with an underhand
motion.Hook feetunder the stabilizer bar andposition hips and
head flat on the bench. Extend arms straight into theair.
Movement: Slowly lower arms by bringing them down close to
the body.
Muscles Emphasized: Pectoral chest muscles, Deltoid
(shoulders) muscles and Tricep muscles.
Incline Chest Press (11)
Starting position: Adjust the seat back to the incline position.
Sit on the
Power Gym
and grab the resistance bars with an
underhand motion. Hook feet under the stabilizer bar and
position hips and head flat on the bench. Extend arms
straight into the air.
Movement: Slowly lower arms by bringing them down close
to the body.
Muscles Emphasized: Lower pectoral chest muscles, Deltoid
(shoulders) muscles and Tricep muscles.
Note: The difference between Flat Chest Press and Incline Chest Press
is that the bench is slightly elevated in an incline position.
Flat Chest Flies (12)
Starting position: Adjust seat back to the flat position.Sit on the
Power Gym
and grab the resistance bands with an underhand
motion. Hook feet under the stabilizer barandposition hipsand
head flat on bench. Extend arms straight into the air with palms
facing each other.
Movement: Slowly pressing up the resistance band and slowly
returning to the lower position by moving arms on either side
of the body.
Muscles Emphasized: Pectoral major.
photo 7
photo 8
photo 9
photo 10
photo 11
photo 12

2120
Incline Chest Flies (13)
Starting position: Adjust seat backto the inclineposition. Sit on the
Power Gym
with feet resting on the foot pegs and back against the
back pad with hip and head flat on the bench. Arms should be
parallel to the floor. Hold up resistance bands with palms facing up.
Movement: Slowly raise arms above head and slowly return to the
lower position.
Muscles Emphasized: Pectoral minor.
SHOULDERS
Shoulder Press (14)
Starting position: Adjust seat back to full upright position. Sit on
the
Power Gym
with back straight against the pad, and feet hooked
under the stabilizer bar. Extend arms above head with palms
facing forward.
Movement: Slowly lower upper arms against side of body. Keeping
hands at shoulder level. Extend arms above head with palms
facing forward.
Muscles Emphasized: Deltoid (shoulders) muscles, tricep muscles
and back of the arms.
Lateral Seated Raises (15)
Starting position: Adjust seat backto fulluprightposition.Sit on
the
Power Gym
with back straight against the pad, and feet
hooked under the stabilizer bar. Arms lowered against the body
and palms facing inward.
Movement: Slowly raise arms away from the body to shoulder
level. Slowly lower to starting position.
Muscles Emphasized: Deltoids especially the lateral head.
photo 13
photo 14
photo 15
Lateral Standing Raises (16)
Starting position: Stand behind the
Power Gym
facingtowardsthe
stepper with toes resting on the base and heels on the floor, arms
lowered against the body and palms facing inward.
Movement: Slowly raise arms away from the body to shoulder
level. Slowly lower to starting position.
Muscles Emphasized: Deltoids especially the lateral head.
Upright Rows (17)
Starting position: Sit with back straight against the pad, facing the
stepper, feet hooked under the stabilizer bar with resistance bands
under the handle bars, palms facing down.
Movement: Raising both resistance bands simultaneously up
towards the shoulders, keeping the elbows, at all time, parallel to
the ground, and the palms as close to the body as possible
facing down.
Muscles Emphasized: Shoulders, shoulder trapezius and all heads
of the deltoid.
photo 16
photo 17

23
LEGS
Leg Extensions (20)
Starting position: Remove the front stabilizer bar. Sit on the
Power Gym
with lower back resting against back pad. Attach
resistance bands with the foot strap removed from the pedal,
wrap the resistance bands around ankle.
Movement: Extend the leg straight in front of the body and
return to the initial position. Reverse legs and repeat.
Muscles Emphasized: Quadriceps muscles and muscles that
surround the knee.
Leg Curls (21)
Starting position: Stand at the left front side of the
Power Gym
with both hands on the back pad. Rest the heel of the right
foot against the base and toes on the floor. With the foot
strap removed from pedal, wrap the resistance bands around
left ankle.
Movement: Moving only at the knee, bend the knee and bring
the heal as close to the buttocks as possible, in a smooth
controlled matter. Extend the leg as straight as possible
when returning to the starting position, breath out when
curling the leg up and breath in when returning to the starting
position. Reverse legs and repeat.
Muscles Emphasized: Hamstring muscles. These are the
primary muscles involved in propelling the body forward when
walking or running.
Leg Press (22)
Starting position: Sit on the
Power Gym
with feet strapped in
the pedals as if stepping, grab the handle bars on either side of
the machine.
Movement: Pressing out unilaterally both legs together or
separate, breathing out when pushing away from the body,
inhaling when returning to the starting position.
Muscles Emphasized: Quadriceps muscles, hamstring muscles,
gluteus maximus (butt) muscles. This movement greatly
strengthens the lower body.
22
Shrugs (18)
Starting position: Facing the back of the
Power Gym
, stand with legs
on either side of the seat. Position the resistance bands under the
handle bars. Grab the resistance bands with palms facing back.
Movement: Keeping arms straight and out a little from the sides
of the body lift up with the shoulders, hold, and return to a
lower position.
Muscles Emphasized: Trapezius shoulder muscles.
Foward Raises (19)
Starting position: Sit on the
Power Gym
with feet hooked under
the stabilizer bar. Grab the resistance bands with palms facing
down. Arms should be lowered against the side of your body.
Movement: Raise both arms to shoulder level keeping them
straight out in front. Slowly lower to the starting position.
Muscles Emphasized: Shoulder muscles, isolated on the
interior deltoids.
photo 18
photo 19
photo 20
photo 21
photo 22

2524
THIGHS
Adductions (23)
Starting position: Sit with feet hooked under the stabilizer bar
with knees on the outside of the thigh bar resistance bands
positioned to the back undermount.
Movement: Squeeze the knees together and slowly return to
the starting position.
Muscles Emphasized: Inner thighs.
Abductions (24)
Starting position: Sit with feet hooked under the stabilizer bar
with knees on the outside of the thigh bar resistance bands
positioned to the back undermount.
Movement: Press the knees out and away fromthe Power Gym,
breathing out while pushing and breathing in while slowly
returning to the starting position.
Muscles Emphasized: Outer thighs.
HIPS
Hip Extensions (25)
Starting position: Adjust the seat back to the incline position.
Place the right foot flat on the floor to the right of the Power
Gym. Grab the top of the back pad with both hands. Rest the left
foot on the stepper.
Movement: Extend the left leg away from the body in a straight
position and return to the starting position. Reverse legs
and repeat.
Muscles Emphasized: Gluteus maximus muscles which is also
referredas the butt, hamstring muscles, quad muscles, isolating
on the gluteus muscles.
ABS
Abdominal Crunch (26)
Starting position: Remove the back pad and attach the roller
attachment. Sit on the Power Gym and hook feet under the
stabilizer bar. Adjust the height of the handle bars so that you
are seated in the upright position. Use the seatbelt for support,
stability and isolation of the abdominal muscles.
Movement: Grab the handle bars and pull forwardwith the absand
push back to the starting positionwith the back. Breath out while
moving forward and breath in while returning to the starting
position. The back rollers have to be in constant contact with
the back.
Muscles Emphasized: Abdominal muscles and lower back muscles.
Abdominal Obliques (27)
Starting position: Remove the back pad and replace it with the
back roller attachment. Sit on the Power Gym facing diagonally
with feet together on the same side. Use the seatbelt for more
support, stability and isolation of the abdominal muscles.
Movement: Grab the handle bars and pull forward with abs
and push back to the starting position using your back. The
upper body moves towards the stepper at an angle. Breath out
while moving forward and breath in while returning to the
starting position. The back rollers have to be in constant contact
with the back.
Muscles Emphasized: Lateral flexor muscles and the
oblique muscles.
photo 23
photo 24
photo 25
photo 26
photo 27

26
BACK
Back Extension (28)
Performed simultaniously with the abdominal crunch.
Muscles Emphasized: Lower back muscle.
Back Lateral Flexion (29)
Performed simultaniously with the abdominal obliques.
Muscles Emphasized: Lateral flexor muscle and lower
back muscle.
Back Massage (30)
Starting position: Laying flat, facing down, resting on the
back pad with both arms on either side of the body.
Muscles Emphasized: Full body massage.
27
Accelerated
Weight Loss Plan
photo 28
photo 29
photo 30

2928
Why is There Fat?
Believe it or not, fat is important. It is not nature’s mistake, but rather, essential to life.
The ability to store energy in the form of fat is a critical survival mechanism for any living
organism subject to an uncertain and intermittently inadequate food supply. A normal human can
survive up to two months with no food whatsoever - in total starvation, with only water - only
because of the presence of stored energy in the body, mostly as fat. And body fat also provides
shielding from cold.
Today, however, many of the survival advantages nature intended fat to provide are unneeded.
Food is typically not scarce, but abundant and in constant supply. Most people do not require an
“energy reservoir”, as they too often lead quite sedentary lives.
These days, most people’s biggest problem is how to avoid building an “energy reservoir” that is
too large, i.e., how to avoid getting fat! This becomes more and more true as we grow older, since
our rate of calorie burning - also known as the metabolic rate - diminishes with age along with our
activity level, while our food consumption typically goes up, not down.
And so it is that 40% to 50% of the adult population needs to lose weight. But how? Should you
simply “go on a diet”? Will that work permanently? As you will see, the answer to that question is
quite definitely “NO”.
What Happens When You Diet?
Severely restrictive diets, such as the “liquid protein” schemes, or some of the popular “crash”
diet programs — or any diet thatrecommends severe, temporary reduction of caloric intake —will
cause weight loss that is often due in large part to lean body weight loss, which is loss of important
body muscle tissue. This kind of weight loss is the worst possible way to achieve yourgoals because
it leads to weakness, ill health, and a decreased metabolic rate, which in turn makes it ever harder
to lose fat. This sets up the never-ending cycle ofdefeat and futility sofamiliar to the chronic dieter.
Dieting will, in the long run, make you fatter!
You’re reading this because what you want to lose is fat. And you don’t want to suffer too much
in the process. The simple, powerful solution: Follow the system outlined below, and watch what
happens!
Food and How to Control It
Don’ts
1) Avoid going on repeated diets, each of which usually sets you up to regain everything you
lose, and then some, just as soon as you “go off” your diet. Instead, follow the simple
guidelines below.
2) Don’t add any fat or oil to anything you eat... ever! This is by far the most important rule to
remember, and it cannot be overemphasized. The words “added fats and oils” have a very
specific and special meaning here, referring to all thoseunnatural fats and oils that humans
manufacture, process, and add to the food you eat. There are no such things as added fats
and oils in nature. They just don’t exist. NATURE makes corn... HUMANS make corn oil,
margarine and deep-fried food. NATURE creates soybeans and peanuts... HUMANS
manufacture soy oil, mayonnaise, and peanut oil.
It is very important to avoid ALL added fats and oils, not just because they’ll make you fat, but
because they’ll also make you sick, linked as they are to such disorders as breast and colon
cancers, heart disease, and other serious illnesses.
Eliminating added fats and oils means avoiding:
•Margarine,
•Mayonnaise,
•Olive Oil,
•Butter,
•Oily salad dressings,
•Chips of all kinds (unless they’re baked),
•Fried foods,
•French fries,
•Cream cheese,
•Ice cream,
•Lard,
•and any other manufactured fat or oil.
Note that if you don’t like salads without dressing — try lemon juice and seasoning salt.
It’s delicious! Or... try any of the oil-free salad dressings now widely available.
All the above-listed items are horrible for you. But the hydrogenated products such as
margarine, mayonnaise, and all heated fats and oils are the worst, as they are high in trans fats,
substances that form when fat or oil is heated or heavily processed. Trans fats are directly
implicated in the onset and/or exacerbation of obesity, cardiovascular disease and cancer. Avoid
these “foods” at all costs.

31
Food Preparation
This subject could fill a book all by itself. The essential point to remember is, once again,
to avoid added fats and oils! Do not fry with oil. Use non-stick pans and fry with water. A little
experimentation and you’ll see how easy this is. Also remember that any menu that contains oil,
butter or margarine caneasily be made as well or nearly as wellwithoutthose ingredients. You must
experiment to apply this concept to every one of your favorite recipes, but the reward for doing so
is very high. It will mean better and better health as well as greater and greater success.
Food Timing
The best way to arrange your food day is to spread out your daily intake into several meals, as
opposed to eating, say, one large meal per day. Studies have shown that when two comparable
groups of people eat thesame number of calories but on different schedules, the groupthat eats one
large meal per day gains weight and feels worse, while the group that spreads its calories out dur-
ing the day feels better and gains no weight.
Other studies indicate that when food iseaten late inthe day, closer to bedtime, weight is gained
as compared to no weight gain when the same food is eaten earlier in the day.
Therefore, LARGEST MEAL=Lunch, SMALLEST MEAL=Dinner, MODERATE MEAL=Breakfast.
This is the optimal way to arrange your days. The typical large dinner with which most people
are familiar is problematic because the natural daily rhythms of the body are such that evening is
when it is preparing for rest, not a large meal. More importantly, food eaten late in the day is much
more likely to be converted to storedbody fat. So eat a very light meal for dinner — salad, perhaps
soup and a small side dish. Not much more. Remember: food eaten this late will almost certainly be
converted to body fat; and body fat, once accumulated, comes off much slower, and with much
greater difficulty, than it goes on - a fact with which many people are already familiar.
Breakfast can go either way. If you’re hungry in the morning, by all means, eat away. If not, eat
lightly. Follow your body’s signals.
Lunch is the perfect time to eat your largest meal of the day, if you have one. There’s plenty of
time left to burn it off, and the satiety will probably last well into dinnertime, thereby helping to
keep dinner small.
When to Eat, When to Stop
Naturally thin people typically follow both of these two simple patterns:
1) Eat only when hungry; and
2) Stop eating when no longer hungry.
30
3) Try to avoid processed foods high in sugar and white flour. Check your labels and do not eat
anything that has too much of these items in the ingredient list, as they too contribute to
obesity and ill health.
DOs
1) ALWAYS BALANCE YOUR FOOD INTAKE -- so that your intake of carbohydrates (all flour
products such as bread, pasta,etc., and all sweet foods) approximately matches your intake
of protein (e.g., meat, fish, fowl, egg, milk products, soy products). You may do this by
simply eyeballing the foods your are eating. Example: if you have a dish full of pastain front
of you (high carbs) then you need to balance it with what you approximate to be an equal
amount (by volume or better, by weight) of high protein food. The best high protein foods
are those fat-free turkey or chicken breast deli slices found in the deli section of your
supermarket. They are inexpensive, and they are pure protein, with NO fat, NO carbs.
Note that egg whites are also pure protein, and may be eaten in just about any
(reasonable) quantity.
2) DRINK PLENTY OF WATER! Try to drink eight 8 ounce glasses of water each day,or more.
It is usually best to use bottled spring or distilled water, since the water in most areas
today is heavily treated with chlorine and other unhealthful chemicals.
3) The BEST possible foods to eat are green vegetables: eat all you want of them (within
reason, of course). And remember not to ruin things for yourself by adding oily
salad dressings!
There are several vegetables that actually use up more energy getting digested than they bring
to your body. The digestion of any food requires an expenditure of energy by the body. Once the food
is digested, it releases its own stored energy in the form of calories, which are then either used
(“burned”) or stored, mostly as fat. Sometimes, the number of calories in a food is lower than
the number of calories it takes to chew and digest it. The act of eating, for example, celery or
cucumber, can be a weight losing proposition all by itself — without exercise or anything! Now isn’t
that interesting...?
• Alfalfa sprouts
• Beet greens
•Broccoli - (a close call)
•Cabbage
• Cauliflower - (a close call)
•Celery
•Chard, Swiss
•Chives
•Cucumber
• Eggplant - (a close call)
•Endive
•Garlic
•Lettuce
•Mushrooms
• Peppers - (a close call)
•Radishes
• Seaweeds of all kinds
•Spinach
• Tomato - (a close call)
• Turnip greens
• Water chestnuts
• Watercress
Vegetables whose digestion can use more calories than they contain include:

3332
This is how primitive man ate, a good indication that it is the way nature intended. Most of us
have been conditioned to eat when it’s time to eat: lunchtime, dinnertime, breakfast. But the truth
is that it is far more natural to eat when you’re hungry. That means truly hungry, not just craving
food. As much as possible, try to follow this simple but powerful principle of eating.
The second timing principle - to stop eating when you’re no longer hungry - is also very
powerful, but may contradict some childhood training. Remember “Eat! Children are starving in
India/ Somalia/wherever...”?
That may be true,but it is certainlyno reasonto stuff yourself. Childhood lessons arenot always
good ones.The most natural time to stop eating is when you’re full, which is, surprisingly, not what
most of us do. This principle means that you should stop even if 95% of the food is still left on your
plate or if only 5% is left. It doesn’t matter. The amount of food on the plate is of no importance; it
is completely arbitrary and irrelevant to your body’s needs. What is important is only how you feel.
If you’re satisfied... if the hunger is gone... STOP.
If you can master these two basic eating concepts, you will, to a large extent, master your
nutritional and weight situation forever.
Restaurant Eating
This is a particularly troublesome area. Restaurants, for some unknown reason, love oil. Even
simple salads are drowned in truly ridiculous amounts of oil. This abuse of oil is the single biggest
problem with eating in restaurants.
Food freshness is also an area of concern. Fish, poultry and meat, in descending order, are most
likely to be problematic. Be careful. Ask plenty of questions, particularly about freshness. If there
is any reason to believe your food is not fresh, order something else, or leave.
When ordering in a restaurant follow these simple rules:
• Always ask how much oil is in the dish(es) you wish to order.
• Insist that the dish(es) you want be made with no oil, or at worst, a very small amount.
• Refuse any offer of sprinkled cheese to go over your food.
•Order salads withvinegar dressing only, or lemon wedges that you can squeeze ontothe salad.
If you must order dressing from the house, get one that separates, like vinaigrette, so that
you can pour off the oil that floats on top, using only the tasty part below the oil. Or bring
your own, healthful salad dressing.
•Never order anything that is deep fried! Remember to ask about this, because there are many
more foods that are deep fried than is obvious from most menus. For example, Italian
restaurants often deep fry their “eggplant parmigiana”. You must ask, and avoid all foods
that are so prepared.
• Avoid creamy foods. Many dishes that are normally prepared with cream are just as tasty
without it. Ask the kitchen to prepare it the way you want it.
•Order a salad first, the larger the better, and ask that it be brought out immediately. Avoid the
oily/cream dressings, and eat the salad as soon as it comes out. This will help “take the edge
off” your hunger, help you resist the temptation to eat those unhealthful white flour rolls and
butter, and get you started in the right direction.
• Try to resist the temptation to order dessert. If you must do so, get one that is as close to “real
recognizable food” as you can get. A cup of fruit, or a fruit tart may do. In any event, avoid
the creamy cakes and pies.
• In general, do not be afraid to ask for what you want. If they say “no”, say “good-bye”.
There are plenty of restaurants that will be only too happy to accommodate you, so don’t put
up with anything less than what you know is right for your body.
Cheating (Indulging)
OK, we all know you’re going to do it. Nobody’s perfect.
That’s why we use that well-worn euphemism... “indulging”, instead of “cheating”.
The secrets of success are:
(a) Use the tips outlined below to help STOP your cravings, and thereby your cheating!
(b) Don’t “indulge” too often, and
(c) If you do cheat, choose ways that are not so bad for you; i.e., minimize the damage.
There is no quota for “cheating”. We urge you to strive for perfection. If you find yourself
succumbing once in a while, consider it cheating, not your “quota of bad stuff for the week”. You
should always strive to reject your old, bad ways — to renew your dedication to yourself and to the
new body and health you are determined to achieve.
But if you are going to cheat, at least don’t eat all of whatever you’re cheating with. Leave some
to throw out. That way you’ll get in the habit, and someday you may find yourself throwing it out
before you eat it!
How to Prevent and Stop Cravings
1) BREAK THE CYCLE!
• Food quality: This is the most important factor you can change in the area of negative food
cycles. Avoid all junk food. Avoid all foods that trigger cravings. Avoid all added highly
processed foods. Eat real, recognizable food.

3534
•Avoid all added fats: The most important diet principle of all added fats and oils (a) make you
fatter faster than anything else you can do or eat, (b) increase your risk of heart disease and
cancer, and shorten your life, and (c) can cause you to crave sweets, which in turn further
damage your health and increase fat levels.
• Avoid sugar: Refined white sugar (table sugar) is damaging to your health in many ways, and
will (a) directly cause weight gain, and (b) cause cravings for fats that will further cause
weight gain.
• Drink plenty of water: This is an easy, healthful way to help avoid cravings. Often, a perceived
craving for food, particularly fatty food, may be satisfied with a cup or two of water!
Drinking plenty of water also helps to naturally control appetite through a direct effect on
the stomach. Always drink pure, fresh water; avoid tap water laden with chlorine and other
chemicals. Aim for at least 6-8 cups of water per day.
•Try brushing your teeth instead of eating! Often, a craving for a particular food, especially
high-fat, high-sugar food, is caused by something no more complicated than a bad taste in
the mouth. A quick, refreshing tooth brushing or mouthwash rinse will often get rid of
cravings immediately and painlessly.
•Food timing: Do not skip breakfast; this only leads to hypoglycemia and severe cravings
sometime around mid-morning, which may, in turn, cause you to eat cookies or doughnuts
with coffee and sugar, which in turn can set you up for a rollercoaster blood sugar ride for the
rest of the day. Not a good idea.
•Avoid eating anytime within three hours of bedtime. Not eating anything near bedtime can
lower your fat levels and can change your eating patterns so that you are hungrier in the
morning, leading you to indeed eat a small-to-moderate breakfast. This in turn helps control
your mid-morning cravings.
If you need to snack between meals, eat some fresh vegetables, or fat-free turkey deli slices,
or a whole grain (not white flour) product, or some fruit.
•Meal size: A pattern of smaller, more frequent meals throughout the day is much more
conducive to craving control than a pattern of starvation or mild snacking during most of the
day combined with one large (often very large) daily meal. Studies have also shown that
spreading food intake throughout the day helps in the weight loss effort, while concentrating
calories all in one large meal sabotages it.
•Avoid overly salted foods, if they lead to sugar cravings or if you suffer from kidney disease
or high blood pressure.
•Eat slowly: This will help minimize the effect of cravings, because you will find that you are
satisfied sooner than you would be if you were wolfing yourfood down.
•Vary your diet: Useful when food allergies are suspected. Try to avoid eating any single food,
such as milk or milk products, bread or other wheat products, eggs, meat, corn, soy, and any
other potentially allergenic food too often. Rotating your diet, so that you do not consume
any single allergenic food more often than once every three to four days is the easiest way to
accomplish this.
•Try the following trick: Carry with you a small pad of paper on which to write down every
thing you decide to eat beforeyou actually eat it.This will introduce an important time delay
during which you are writing down what you’re about to do. There is a good chance you will
often find yourself changing your mind.
Nutritional Supplementation
It is often thought that a good, balanced diet should contain all the nutrients your body needs.
But in today’s world, with mass food production and soil depletion, it usually doesn’t. And besides,
how many of us really eat a “good, balanced diet”?
For these reasons, and because optimal nutrition is especially important during a period of
active fat metabolism and breakdown, we recommend that a good multi-vitamin-mineral
be taken regularly.
TIPS:
• One-pill-a-day multi-vitamin preparations are usually poor in quality and not very helpful.
Better quality formulas require at least 3 tabs/caps per day. Multi-nutrient formulas should
usually always be taken with at least some food. This helps improve absorption, prevent
abdominal discomfort, and prevent the “niacin flush” that sometimes otherwise occurs.
• Look for a formula that contains a full range of B vitamins, vitamins A, C, E and D, and a full
complement of minerals. Vitamin B6, magnesium and chromium are particularly
important, yet often deficient in typical diets.
• Many people benefit additionally from taking extra Essential Fatty Acids, vitamin C, and
sometimes, a digestive enzyme called bromelain.
• The best place to find high-quality, complete nutritional supplementation isusuallyyour local
health store.
•Finally, don’t forget to drink plenty of clear, pure water to help flush out all those toxins your
body stores along with its fat.
Good Judgement
In general, use your good judgment. Do not overdo anything. Keep all nutritional
supplementation to levels consistent with what nature intended for the human body.
And look at the ingredient list of any packaged item you put in your mouth. Look at the source.
The makerof a food or food supplement shouldbe a reputable company, with qualified experts doing
the formulations.

Notes:
Table of contents
Other Thane Fitness Home Gym manuals

Thane Fitness
Thane Fitness AB-DOer User manual
Thane Fitness
Thane Fitness Rockin' ABS User manual

Thane Fitness
Thane Fitness BODYROW User manual

Thane Fitness
Thane Fitness Total FLEX User manual

Thane Fitness
Thane Fitness Pilates Power Gym User manual
Thane Fitness
Thane Fitness WAVERTONE 180 AB2360 Operating and maintenance manual
