Thane Fitness Rockin' ABS User manual


USER’S GUIDE
TABLE OF CONTENTS
USER’S GUIDE
SAFETY WARNINGS AND USAGE ....................................... 2 - 4
ROCKIN’ ABS® MAIN COMPONENTS .................................. 5
PART LIST ..................................................................................... 6
ASSEMBLING THE ROCKIN’ ABS® ....................................... 7 - 15
ROCKIN’ ABS® EXERCISES .................................................... 16
Understanding Your Rockin’ ABs® Product ................................. 16
Three Handle Positions ................................................................ 16
Getting In and Out of the Rockin’ ABs® Machine ....................... 17 - 19
Putting Your Rockin’ ABs® in Locked, Pilates Assist and
Active Positions ............................................................................ 20
Rockin’ Crunch, Advanced and Enhanced Variations ................... 21 - 22
Rockin’ Double Crunch, Advanced and Enhanced Variations ...... 22 - 24
Rockin’ Oblique Twist, Advanced and Enhanced Variations ......... 24 - 26
Rockin’ Jack Knife, Advanced and Enhanced Variations ............... 27
Rockin’ Up Right Crunch, Advanced and Enhanced Variations .... 28
ROCKIN’ LOWER BODY EXERCISES .................................... 29
Rockin’ Squat and Calf Raise ........................................................ 29
Rockin’ Reverse Lunge ................................................................. 29 - 30
Rockin’ Sideways Single Leg Squat ............................................... 31
Rockin’ Standing Rock and Row ................................................... 32
ROCKIN UPPER BODY AND CORE EXERCISES ................ 33
Rockin’ Push Up ............................................................................ 33
Rockin’ Tricep Dip ........................................................................ 34
Rockin’ Plank ................................................................................ 35
ROCKIN’ PILATES EXERCISES ............................................... 36
Rockin’ Pilates Roll Up .................................................................. 36
Rockin’ Reverse Plank ................................................................... 36 - 37
Rockin’ Bridge .............................................................................. 37
Rockin’ Plies ................................................................................. 38
Rockin’ V Sit .................................................................................. 38- 39
Rockin’ Scissors ............................................................................ 39
Rockin’ Knee Hug ......................................................................... 40
Rockin’ Hundreds ......................................................................... 40 - 41
ROCKIN’ ABS® JUMP START 4-WEEKS PROGRAM ...... 42
42
WEEK 4 WEEK 3 WEEK 2 WEEK 1
REGULAR PROGRAM
Rockin’ ABs®
Upper Body
30 Minute Cardio @
Target HR
Rockin’ ABs®
Core
30 Minute Cardio @
Target HR
Rockin’ ABs®
Lower Body
30 Minute Cardio @
Target HR
Rockin’ ABs®
Pilates
30 Minute Cardio @
Target HR
Rockin’ ABs®
Core
30 Minute Cardio @
Target HR
Rockin’ ABs®
Core
30 Minute Cardio @
Target HR
Rockin’ ABs®
Pilates
30 Minute Cardio @
Target HR Rest
Rockin’ ABs®
Upper Body
30 Minute Cardio @
Target HR
Rockin’ ABs®
Core
30 Minute Cardio @
Target HR
Rockin’ ABs®
Upper Body
30 Minute Cardio @
Target HR
60 Minute Cardio @
Target HR
Rockin’ ABs®
Pilates
30 Minute Cardio @
Target HR Rest
Rockin’ ABs®
Upper Body
30 Minute Cardio @
Target HR
Rockin’ ABs®
Lower Body
30 Minute Cardio @
Target HR
Rockin’ ABs®
Upper Body
30 Minute Cardio @
Target HR
Rockin’ ABs®
Lower Body
30 Minute Cardio @
Target HR
Rockin’ ABs®
Lower Body
30 Minute Cardio @
Target HR Rest
Rockin’ ABs®
Lower Body
30 Minute Cardio @
Target HR
Rockin’ ABs®
Lower Body
30 Minute Cardio @
Target HR
Rockin’ ABs®
Upper Body
30 Minute Cardio @
Target HR
Rockin’ ABs®
Upper Body
30 Minute Cardio @
Target HR Rest
Rockin’ ABs®
Lower Body
30 Minute Cardio @
Target HR
Rockin’ ABs®
Lower Body
30 Minute Cardio @
Target HR
Rockin’ ABs®
Lower Body
30 Minute Cardio @
Target HR
DAY 1 DAY 2 DAY 3 DAY 4 DAY 5 DAY 6 DAY 7
ROCKIN’ ABS® JUMP START 4-WEEK PROGRAM

USER’S GUIDE
SAFETY WARNINGS AND USAGE
Important: Do not start exercising before fully studying this User’s
Guide.
• This User’s Guide provides instruction on assembly of the Rockin’ ABs®, and
proper use, storage and maintenance. Use this manual in conjunction with the
Rockin’ ABs DVDs.
• You must read and follow this User’s Guide completely before using your Rockin’
ABs machine. Keep this guide in a safe place and make sure everyone who uses
the Rockin’ ABs® also reads this guide. Have a safe and enjoyable workout.
• The Rockin’ ABs® machine is intended for individual home use. It is not intended
for institutional, health club or commercial use.
WARNING: Please consult with your doctor before you start using this
equipment. Your doctor should help you ascertain your target heart rate, as
determined by your age and physical fitness. Certain training programs and
types of exercise equipment may not be suitable for everyone.
This is particularly important for those individuals over 35, pregnant women and
individuals with existing health problems or problems with balance. If you take
any medication (especially medication which affects your heart rate), you must
seek medical advice from your doctor before starting your exercise program
with this machine.
1. This product has been tested in accordance with the requirements of EN 957-1,
class H – home use only. THE MAXIMUM WEIGHT CAPACITY of the Rockin’
ABs® machine is 300 LBS (136 kg). Persons whose body weight exceeds this
limit should NOT use this machine.
2. Carefully inspect the equipment prior to EVERY use. Never use the device
if it is not functioning correctly or appears to be damaged.
3. Use this device EXCLUSIVELY for its intended purpose as described in this User’s
Guide. Do not alter the equipment and only use those parts and accessories
referred in this User’s Guide.
4. Rockin’ ABs® exercise involves a rocking/rolling, movement that causes the
machine to move in ALL directions during use. It is important that you expect
your machine movement before beginning any Rockin’ ABs® exercise.
5. While using Rockin’ ABs® you will be unable to see things behind you, around
you and/or in your immediate area. This means you should not use your Rockin’
ABs® machine in an area over which you do not have full control.
2
USER’S GUIDE
41
USER’S GUIDE
Note again that your back, torso, shoulders or head
should not touch the back rest during the exercise.
Now remove your hands from the arm rests and extend
your arms out and away from your body. As you do this,
use your lower abs and core to maintain proper body
form and keep the Rockin’ ABs® machine motionless as
shown in Fig, 73.
Once your arms are fully extended, begin raising and
lowering your arms up and down while maintaining
straight arm and pointed fingers. The up and down
motion should be small and controlled with about 8 to
12 inches in distance. The faster the pace of your arm
motions, the more challenging the exercise. The key is
to make sure your torso and legs remain motionless. If
either move when fluttering your arms, slow the pace of
your arms to the point where your body remains
motionless. For maximum challenge, you can do the
Rockin’ Hundreds exercise with the Rockin’ ABs®
machine locked in Active mode. This is an advanced
variation and the increased range of motion of the
Rockin’ ABs® machine requires advanced balance and
core strength.
Fig. 73

USER’S GUIDE
40
6. Ensure that there is at least 10-13 feet (2-3 meters) of free space surrounding the
entire unit. It is important that small children, pets, furniture and other objects are
kept away from the equipment during its use.
7. Only use your Rockin’ ABs® on a clean and dry floor. A slick, slippery, wet or
similar floor surface adversely affects and materially alters the Rockin’ ABs®
performance.
8. The Rockin’ ABs® machine works best on a low pile carpeted surface.
The thicker the carpeted surface the more the Rockin’ ABs® performance may
be adversely affected.
9. Never use the Rockin’ ABs® machine near stairs, ledges, glass windows,
appliances, fireplaces, candles, open flames, pets, small children, or other
obstructions.
10. THIS EQUIPMENT IS NOT SUITABLE FOR CHILDREN. In order to avoid injuries,
keep this and all other fitness equipment out of the reach of children.
11. Handicapped or disabled persons should not use the Rockin’ ABs® machine
without the presence of a qualified health professional or physician.
12. Wear appropriate clothing during training sessions. Training apparel should be
comfortable and light, allowing freedom of movement. Wear comfortable
training shoes with good support and have non-slip soles, such as running shoes
or trainers.
13. Always warm up and stretch before each training session.
14. If you feel faint or experience dizziness, nausea, shortness of breath, chest
pain, irregular heartbeat, or any other abnormal symptoms, STOP the workout
at once and CONSULT A PHYSICIAN IMMEDIATELY.
15. Check all screws and bolts before each use the Rockin’ ABs® machine and tighten
if loose.
16. Always choose the proper intensity level that best suits your physical strength
and flexibility levels. Know your limits and train within them. Always use
common sense when exercising.
17. Begin slowly and get used to the unique movement of the Rockin’ ABs® prior
to starting your routine.
18. To avoid serious injury, never place any part of your body, especially your hands
or feet, between or near any moving parts.
19. Rockin’ ABs® exercise involves a rocking/rolling motion that may not be suitable
for all users and especially those subject to motion sickness, balance disorders,
light headedness, vertigo and/or other medical conditions.
20. DO NOT use any accessories not recommended by the manufacturer.
Understand correct use of this machine.
3
USER’S GUIDE
USER’S GUIDE
Rockin’ Knee Hug - With your Rockin’ ABs® handle fully
engaged in the Pilates Assist position, arrange your
body in the starting Rockin’ V Sit position. Once you are
properly balanced and the Rockin’ ABs® machine is
motionless, bend one of your knees so your legs are
positioned in a “knee hug” form as shown in Fig. 69.
From this position and with a controlled pace,
simultaneously begin alternating knee hugs maintaining
a controlled and steady pace.
As you do this, use your core to keep the Rockin’ ABs®
machine as motionless as possible and your back, torso,
shoulders and head off the back rest. Keep knee
hugging for 30 seconds. Speed is not your intent.
You should complete only 20 to 23 knee hug movements
during each 30 second sequence. Proper form is shown
in Fig. 70.
After 30 seconds, return to the rest position.
Rockin’ Hundreds - With your Rockin’ ABs® handle
fully engaged in the Pilates Assist position, arrange your
body in the starting position shown in Fig. 71.
Note the back rest should be at an approximate 60
degree angle, your feet on the ground, your back should
NOT be contacting the back rest, your butt should be on
the rear part of the seat, each hand should be on an arm
rest and the Rockin’ ABs® machine should be motion-
less.
In one motion, use your core and lower abs to raise your
legs off the ground while maintaining the same position
with your upper body, head, and arms. At this point,
the Rockin’ ABs® machine may rock slightly forward, but
the goal is to keep the machine motionless by maintaining
the proper Rockin’ Hundreds form as shown in Fig. 72.
Fig. 69
Fig. 70
Fig. 72
Fig. 71

USER’S GUIDE
39 4
USER’S GUIDE
21. Carefully read all of the assembly instructions included to make certain your unit
is properly assembled.
22. If you have long hair, tie it up to avoid getting caught in moving parts of the
equipment.
23. Do not place the unit in direct sunlight, as heat can degrade the non-steel
materials.
24. Never use your Rockin’ ABs® machine on fine, delicate or expensive floor
surfaces because they may be scratched, marred, stained, and/or damaged by
the Rockin’ ABs® rolling action.
25. Always use your Rockin’ ABs® machine on a flat and level surface.
SAVE THESE INSTRUCTIONS
USER’S GUIDEUSER’S GUIDE
Next, use your core and lower abs to raise your legs off
the ground while maintaining the same position with
your upper body, head, and arms. At this point, the
Rockin’ ABs® machine may rock slightly forward but the
goal is to keep the machine motionless by maintaining
the proper Rockin’ V Sit form shown in Fig. 66.
Note again that your back, torso, shoulders and head
should not touch the back rest during the V Sit exercise.
Hold this position for 30 seconds. Return to the starting
V Sit position by simultaneously lowering both legs to
the floor slowly to complete the exercise. To add more
challenge to the Rockin‘ V Sit, remove your hands from
the arm rests when your legs are off the ground. Also
raising your legs higher off the ground adds further
challenge, but do not raise your feet above your shoulders.
Rockin’ Scissors - With your Rockin’ ABs® handle fully
engaged in the Pilates Assist position, arrange your
body in the starting Rockin’ V Sit position shown above
in Fig. 66 and begin to perform the Rockin’ V Sit exercise.
Once you are properly balanced and the Rockin’ ABs®
machine is motionless, raise one leg approximately one
foot higher than the other while maintaining both legs in
a straight form with toes pointed as shown in Fig. 67.
From this position and with a controlled pace,
simultaneously lower the raised leg and raise the lower
leg in a “scissoring” fashion. As you do this, use your
core to keep the Rockin’ ABs® machine as motionless
as possible and your back, torso, shoulders and head
off the back rest. Keep raising and lowering each leg in
unison for 30 seconds. Speed is not your intent.
You should complete only 15 to 17 scissor movements
during each 30 second sequence. Proper form is shown
in Fig. 68.
After 30 seconds return to the rest position. As with
the V Sit exercise, you can add more challenge to the
Rockin‘ Scissors exercise by removing your hands from
the arm rests when your legs are off the ground, and/
or reaching forward the knee or calf with both hands on
each Scissor movement.
Fig. 66
Fig. 67
Fig. 68

USER’S GUIDE
5
USER’S GUIDE
38
USER’S GUIDEUSER’S GUIDE
Rockin’ Plies - Standing behind and facing the Rockin’
ABs® machine with the handle engaged in the Active
Mode, grab the foam covered portion of the back rest
frame with both hands. At no time during this exercise
should you use the Rockin’ ABs® machine to support
your weight or control your balance. The Rockin’ ABs®
machine serves as a focus bar for keeping you in proper
form and rhythm. Next spread your legs wide apart with
your toes pointing away from you. Proper form is shown
in Fig. 62.
In one motion, bend your knees to squat down as you
extend both arms away from you, rocking the upper
portion of the Rockin’ ABs® machine forward. Your
ending body position should mirror the image shown in
Fig. 63.
From this position, use your legs to “pulse” your torso
up and down for three to five reps as you maintain your
arms in an extended position, keeping the Rockin’ ABs®
machine as motionless as possible. After your pulses,
return to an upright position.
Treturn to an upright position. To add a bit of challenge
as you return to the upright position, you can rise
slightly to the balls of your feet to more fully engage
your lower leg and calf muscles as shown in Fig. 64
Repeat the exercise at the same pace, keeping proper
balance and form.
Rockin’ V sit - With your Rockin’ ABs® handle fully
engaged in the Pilates Assist stance, place your body in
the starting position shown in Fig. 65.
NOTE: The back rest should be at an approximate 60
degree angle, your legs should be fully extended, your
feet on the ground, your back should NOT be
contacting the back rest, your butt should be on the
middle/front part of the seat, each hand should be on
an arm rest and the Rockin’ ABs® machine should be
motionless.
Fig. 62
Fig. 65
Fig. 63
Fig. 64
ROCKIN’ ABS® MAIN COMPONENTS

USER’S GUIDE
USER’S GUIDE
37
USER’S GUIDE
6
USER’S GUIDE
Maintain this plank position for 30 seconds. To add
challenge, you can lift one leg at a time up off the floor
in a slow controlled movement, being careful to main-
tain balance and control. When lifting your leg, do not
bend your knee, and keep your toes pointed away from
you. The higher you raise your leg, the more challenging
the exercise can be. Prooer form is shown in Fig. 60.
To complete the Rockin’ Reverse Plank, slowly use your
core muscles to lower your butt and torso back into the
Rockin’ ABs® machine. As you lower your torso, you
may bring one leg back, by bending at the knee for
added balance.
Rockin’ Bridge - With the Rockin’ ABs® machine in
Locked Mode, get in a seated position on the floor in
front of and facing the Rockin’ ABs® machine. Extend
both legs forward, placing your feet on the top center
portion of the Rockin’ ABs® seat. Using your hands to
support your descent, lay your back and torso on the
ground in a straight line. Once your upper body and
head are flat on the ground, extend your arms to the
side with your hands palm side down on the floor.
Using your core and upper body, lift your lower torso,
butt and legs up off the floor creating a “bridge”. Your
upper torso and shoulders should remain firmly on the
floor so as not to create stress on your head or neck.
Your proper position should mirror the form shown
in Fig. 61.
Maintain this motionless and rigid position for 30
seconds or until you tire. Use your core to slowly lower
your lower torso, butt and legs to complete the
exercise. Add challenge to this exercise by lifting
one foot off the Rockin’ ABs® seat slightly. Alternate
to work each leg. Further challenge can be added by
lifting your hands and arms off the ground during the
exercise.
Fig. 60
Fig. 61
PART LIST
Part# Description Spec. Q’ty (pcs)
1
2
3
4
5
6
7
8
9
10
11
12
13
14
15
16
17
18
19
20
21
22
23
Plastic Bushing Caps
Accordion Sleeve
Support Tube
Hand Rest
Left Arc Frame
Right Arc Frame
Back Rest Support Tube
Rear Upper Cross Bar
Button Head Screws
Left Front Cross Bar
Right Front Cross Bar
Handle Assembly
Phillips Head Screw
Reinforced Seat Fabric
Back Rest Fabric
Button Head Screws
Hex Nut
Head Cap Screws
Button Head Screws
Hexagon socket button head screws
Hex Key Wrench/Phillips Screwdriver
Hex Nut Wrench
Hex Key Wrench
Challenge Strap
Fitness Computer
Mesh Seat Fabric
31.8*1.5
M10*50
20
M5*8
M10*60
M24
M10*20
M10*20
M8*12
6#
3
8#
2
1
1
2
1
1
1
1
2
1
1
1
1
1
1
2
1
4
8
2
1
1
1
2
1
1
OPTIONAL ACCESSORIES
NOTE: Each Optional Accessory comes with its own assembly instructions.

USER’S GUIDE
USER’S GUIDE
36
USER’S GUIDE
7
USER’S GUIDE
ROCKIN’ PILATES EXERCISES
Rockin’ Pilates Roll Up - With your Rockin’ ABs® handle
fully engaged in the Active position, descend back to
the starting position as shown in Fig. 56. Note that your
feet should be elevated off the ground with your knees
bent to 90 degrees. Your lower back should be nestled
deep into the lower portion of the back rest, and your
butt should be nestled deep into the seat’s rear part.
Next, bring your hands to a position where each palm
is about two inches from each ear palms facing inwards.
Your feet should still be up off the ground and the
Rockin’ ABs® machine motionless.
In one motion, use your abdominal muscles to curl
forward, lifting your shoulders off the backrest as the
Rockin’ ABs® machine rocks forward. Following the
progress of your abs, simultaneously straighten your
legs and reach forward with your arms. At the upper
most portion of your rep, your body should be in the
position shown in Fig. 57. Contract your abs to hold the
Rockin’ ABs® motionless for a short beat.
In a controlled motion, descend backwards to the start
position, slowly lowering your legs and bending your
knees to 90 degrees while simultaneously bringing your
arms back to the starting position as shown in Fig. 56.
Pause for a beat, allowing the Rockin’ ABs® machine to
become motionless. Repeat the exercise maintaining an
even rhythm.
Rockin’ Reverse Plank - With the Rockin’ ABs®
machine in Locked Mode, get in a seated position with
each hand grabbing the front part of the foam covering
the arm rests. Your butt should be in the front part of
the seat, your back straight, knees bent and both feet
together and flat on the floor as shown in Fig. 58.
Maintaining a firm grasp on the arm rests, slide your legs
out in from of you and use your core muscles to lift your
hips and torso out of the Rockin’ ABs® machine. Your
arms should be straight and your body should be in a
straight line as shown in Fig. 59.
Fig. 56
Fig. 57
Fig. 58
Fig. 59
Demonstrated in the image below are all the parts out of the box, after their
protective packaging is removed.
Left Arc Frame
(Part# 6)
Right Arc Frame
(Part# 5)
Back Rest Support
Tube (Part# 7)
Left Front Cross
Bar (Part# 10)
Right Front Cross
Bar (Part# 11)
Handle Assembly
(Part# 12)
Support Tube
(Part# 3)
Rear Upper Cross
Bar (Part# 8)
Left Hand Rest
(Part# 4)
Tools & Screws
ASSEMBLING THE ROCKIN’ ABS®

USER’S GUIDE
USER’S GUIDE
35
USER’S GUIDE
8
USER’S GUIDE
Rockin’ Plank - With the Rockin’ ABs® machine in
Locked Mode, get in a kneeling position in front of
and facing the Rockin’ ABs® machine. Lean forward
and bring your forearms to rest on the Rockin’ ABs®
seat. Note that your elbows should be close to the
front of the Rockin’ ABs® seat but not extending be-
yond the seat’s raised front seam, your elbows should
be bent at a 90 degree angle and your head should be
positioned above but slightly behind your hands.
Grasp your hands together and interlock your fingers.
Your proper position should mirror the form shown in
Fig. 54.
Next, extend your legs backwards in a straight
position, with your knees off the ground and keeping
your feet approximately shoulder width apart to
provide an easy and stable balance. The closer your
feet are together, the more challenging the exercise.
Your head and upper body should remain in the same
position shown in Fig. 55.
Maintain this plank position for 30 seconds. If you
want more challenge, lift one foot off the ground using
your core muscles to stabilize and control your balance.
Return to the start position by lowering your knees.
Note that at no time during the exercise should your
head contact the mesh back rest fabric and/or any
other part of the Rockin’ ABs® machine. The Rockin’
ABs® machine should also remain firm and solid on
the floor.
Repeat the exercise at the same pace, keeping proper
balance and form making certain not to over tire.
After your final rep, return to the start position. Bring
your knees down to contact the floor and then raise
your upper body to a kneeling position releasing your
grip once you are balanced on your knees.
Fig. 54
Fig. 55
STEP 1
Attaching the Back Rest Support
Tube to the Right and Left Arc Frames
Locate the Left Arc Frame (Part# 5), the
Right Arc Frame (Part# 6), two M10/60
Button Head Screws (Part# 16) and two
M10/20 Button Head Screws (Part# 19).
Once out of the package carefully
untwist the Left Arc (Part# 5)
and Right Arc Frame (Part# 6)
and place it on a flat surface in
a position as shown in Fig. 1.
NOTE: The fabric seat comes
pre assembled. Make sure the
seat fabric is smooth and not
twisted before proceeding.
Next step is to take the Back Rest Support
Tube (Part# 7), align and insert the exposed
end at the right bottom side into the tube
welded in the middle of the Right Arc Frame
(Part# 6) as shown in Fig. 2. Align the top
Back Rest Support Tube hole with the welded
tube with Plastic Bushing Cap, take
one M10/60 Button Head Screw (Part# 16)
and insert the screw and tighten
with the Hex Key Wrench/Phillips
Screwdriver (Part# 21) provided,
as shown in Fig. 3.
Fig. 1
Fig. 3
Fig. 2
16

USER’S GUIDE
USER’S GUIDE
9
USER’S GUIDE
34
USER’S GUIDE
Rockin’ Tricep Dip - With the Rockin’ ABs® machine in
Pilates Assist Mode, sit in the front portion of the seat
with your back away from the Rockin’ ABs® back rest
and both feet close together in front of you and firmly
on the floor. With each hand, grasp one of the Rockin’
ABs® arm rests as shown in Fig. 51.
Note the proper position of your hands on the middle
portions of the black foam arm rests.
Using your arms, upper body and core, lift your torso
up out of the Rockin’ ABs® machine so your arms are
fully extended and your shoulders and head are directly
over your hands. Your feet should be firmly planted on
the floor with your knees bent at a 90 degree angle as
shown in Fig. 52.
Using your arms, upper body and core bend at the
elbows to lower your upper body while bending at the
knees. Your butt and torso should shift forward during
your descent so they avoid contacting the front of the
Rockin’ ABs® seat frame and any other part of the
machine or the floor. The further you descend the more
challenging the exercise. At no time during your descent
should your elbows be bent more than 90 degrees.
Always maintain a sure grip on the Rockin’ ABs® arm
rests during the entire exercise. Your Rockin’ ABs®
machine should rock forward slightly during the exercise
but the rocking motion is slight and limited in scope.
Proper body position is shown in Fig. 53.
In one controlled and continuous movement reverse the
motion, to return to the starting position shown above
in Fig. 52.
Repeat the exercise at the same pace keeping proper
balance and form making certain not to over tire.
After your final rep use your arms, upper body and core
to lower yourself back into the Rockin’ ABs® seat as
shown in Fig. 51.
Fig. 51
Fig. 52
Fig. 53
When the upper screw (Part# 16) is fully tightened, place the Right Arc Frame
(Part# 6) in an upright position as shown in Fig. 4a and 4b. Locate the M10/20 Button
Head Screw (Part# 19) and make sure that the hole on the tube welded in the
middle of the Right Arc Frame (Part# 6) is aligned with the hole on the exposed
end of the Back Rest Support Tube (Part# 7) and insert the M10/20 Button Head
Screw as shown in Fig. 4b. Tighten the screw with the Hex Key Wrench/Phillips
Screwdriver (Part# 21) provided.
When the right side of the Back Rest Support Tube and Right Arc Frame (Part# 6)
are connected properly, take the Left Arc Frame (Part# 5) and place it in a parallel
position as shown in Fig. 5a and 5b.
Fig. 5a Fig. 5b
Fig. 4b
19
Fig. 4a

USER’S GUIDE
USER’S GUIDE
33
USER’S GUIDE
10
USER’S GUIDE
Rockin’ Push Up - With the Rockin’ ABs® machine
in Locked Mode, get in a kneeling position in front of
and facing the Rockin’ ABs® machine. With each hand,
grasp one of the Rockin’ ABs® arm rests as shown in
Fig. 47. Note the proper position of your hands on the
front portions of the black foam arm rests.
Next, extend your legs backwards in a straight position
with your knees off the ground and keeping your feet
apart to provide stability. Your head should be over the
top of your hands in this starting position as shown in Fig.
48. If the extended leg position is too challenging, you
can do the Rockin’ Push Up from a kneeling position as
shown in Fig. 50.
While maintaining a solid and secure grip, bend at the
elbows lowering your chest to a comfortable level just
above the Rockin’ Abs arm rests (as shown in Fig. 49).
Return to the start position by pushing up and
straightening your arms (as shown in Fig. 48). Note that
at no time during the downward or upward motion should
your head contact the mesh back rest fabric and/or any
other part of the Rockin’ ABs® machine. The Rockin’ ABs®
machine should also remain firm and solid on the floor.
Repeat the exercise at the same pace, keeping proper
balance and form making certain not to over tire. After your
final rep, return to the start position. Bring your knees down
to contact the floor and then raise your upper body to a
kneeling position, releasing your grip on the Rockin’ ABs®
machine once you are balanced on your knees as shown in
Fig. 47.
Fig. 47
Fig. 48
Fig. 50
ROCKIN UPPER BODY AND CORE EXERCISES
Fig. 49
Once the unit is in this position, it is time to assemble the left side of the Back
Rest Support Tube (Part# 7) with the Left Arc Frame (Part# 5).
Insert the left exposed end of the Back Rest Support Tube (Part# 7) into the tube
welded in the middle of the Left Arc Frame (Part# 5) as shown in Fig. 6. Take one
M10/20 Button Head Screw (Part# 19) and insert it into the hole on the side
portion of the tube and hand tighten only, as shown in Fig. 7.
Locate a M10/60 Button Head Screw (Part# 16) and take the upper portion of the
Back Rest Support Tube (Part# 7) and place it over the upper welded tube with a
Plastic Bushing Cap, when the holes align insert the screw and hand tighten only,
as shown in Fig. 7.
NOTE: Make sure the mesh on the back support tube is fully tightened before
proceeding to Step 2.
Fig. 6 Fig. 7
16
19

USER’S GUIDE
USER’S GUIDE
11
USER’S GUIDE
32
USER’S GUIDE
Rockin’ Standing Rock and Row - With the Rockin’
ABs® machine in Active Mode, get in a standing posi-
tion in front of and facing the Rockin’ ABs® machine.
With your right hand, grasp the foam covered top of the
Rockin’ ABs® back rest and rock the upper portion of
the Rockin’ ABs® machine forward towards you. Lift
your left foot off the floor by bending your left knee.
You should be standing upright and balanced on your
right leg as shown in Fig. 45.
In one motion, bend at the waist leaning forward and
extending your right arm forward rocking the Rockin’
ABs® machine away from you as you extend your left
leg straight out behind you, not allowing your left foot
to contact the floor. Note this position shown in Fig.
46 and the almost straight line of the body from the left
foot all the way up through the extended leg, torso,
shoulders and head.
Once fully extended, simultaneously reverse the motion
to return to your original starting position shown in
Fig. 45. Repeat the same exercise on the opposite leg,
keeping the same proper balance and form.
Fig. 46
Fig. 45
19
19
Fig. 9
STEP 2
Attaching the Left Hand Rest
Locate the Left Hand Rest (Part #4), and two
M10/20 Button Head Screws (Part #19).
Insert the Left Hand Rest into the opening
located at the front of the Left Arc Frame
(Part #5). Note that the black foam covered
part of the hand rest should point inwards
towards the Rockin’ ABs® back rest.
Visually align the pre drilled holes of the
hand rest with the pre drilled holes of the
Left Arc Frame. Insert one M10/20 Button
Head Screw into each of the aligned holes.
Tighten each M10/20 Button Head Screw
with the Hex Key Wrench/Phillips Screwdriver
(Part #21) provided.
STEP 3
Attaching the Rear Upper Cross Bar
Locate the Rear Upper Cross Bar (Part #8)
and two M10/20 Button Head Screws (Part #19).
Insert the Rear Upper Cross Bar between
the upper parts of the Left and Right Arc
Frame (Parts #5 and #6) as shown in Fig. 9.
NOTE: The bend in the Rear Upper Cross Bar
points inwards towards the backside of the Back
Rest Fabric.
Step 3 continued on the next page.
Fig. 8
19
19
4

USER’S GUIDE
USER’S GUIDE
31 12
USER’S GUIDE
USER’S GUIDE
Rockin’ Sideways Single Leg squat - Stand behind the
Rockin’ ABs® machine with the machine on your
immediate left. With the handle engaged in the Active
Mode, grab the foam covered portion of the back rest
frame with your LEFT hand as shown in Fig. 42.
At no time during this exercise should you use the
Rockin’ ABs® machine to support your weight or
control your balance. The Rockin’ ABs® machine serves
as a focus bar for keeping you in proper form and
rhythm.
Lift and bend your RIGHT leg, balancing yourself on
your LEFT leg. Once you are properly balanced on
your LEFT leg, bend at the LEFT knee to do a single leg
squat while simultaneously extending your LEFT hand
outwards to your left, rocking the upper portion of the
Rockin’ ABs® machine away from you. Your ending
body position should mirror the image shown in Fig. 43,
noting that your upper chest should be directly over the
top of your LEFT bent knee and your head up.
In one motion from the squat position, simultaneously
return to the single leg upright position while allowing
your left arm to return towards your body, bringing the
upper portion of the Rockin’ ABs® back towards your
body. Do NOT let go of the Rockin’ ABs® machine at
anytime during the up and down movement.
Repeat the same exercise on the same leg, keeping the
same pace, balance and form. Once your set is
complete, reverse your body position by turning 180
degrees facing in the opposite direction. The right side
of your body should now be closest to the back of the
Rockin’ ABs® machine. Perform the Sideways Single Leg
Squat, balancing on your Right leg following the same
directions described in Fig. 44.
Fig. 42
Fig. 43
Fig. 44
Next, align the pre drilled holes on the U-Shaped
brackets on each end of the Rear Upper Cross Bar
with the pre drilled holes on the Left and Right Arc
Frames. Once the holes are aligned insert one
M10/20 Button Head Screw (Part #19) in each set
of aligned holes and tighten them with the Hex
Key Wrench/Phillips Screwdriver (Part #21)
provided.
Fig. 10. shows the Rear Upper Cross
Bar fully assembled.
Now it’s time to tighten the screw
M10/20 Button Head Screw (Part# 19)
and screw M10/60 Button Head Screw
(Part# 16) (located on the left side of the
Back Rest Support Tube (Part# 7) with the
Hex Key Wrench/Phillips Screwdriver (Part# 21).
Please refer to Fig. 7 in Step 1.
STEP 4
Attaching the Right Front Cross Bar
and Accordion Sleeve to the
Right Arc Frame Underside
Locate the Right Front Cross Bar
(Part #11), two M10/20 Head Cap
Screws (Part# 18).
Turn the Rockin’ ABs® machine upside down as shown
in Fig. 11. Take the Right Front Cross Bar (Part #11) and align the holes with
the exposed holes on the underside of the tube on the Right Arc Frame (Part #6)
as shown in Fig. 9.
NOTE: That the entire curved U piece of the Right Front Cross Bar nests beneath
the opening of the Reinforced Seat Fabric’s bottom as shown in Fig. 12.
Take two of the M10/20 Head Cap Screws (Part #18)
and insert them into the aligned holes and hand tighten
each screw. These two screws should be fully tightened
once the Left Front Cross Bar is assembled.
NOTE: The top of each Head Cap Screw should
extend above the front and back side of the
Reinforced Seat Fabric’s opening as shown in Fig. 12.
Fig. 10
Fig. 12
Fig. 11
18

USER’S GUIDE
USER’S GUIDE
13 30
USER’S GUIDE
USER’S GUIDE
In one motion, bend your RIGHT knee while
simultaneously stepping straight backwards with the
LEFT leg as you extend both arms away from you,
rocking the upper portion of the Rockin’ ABs® machine
forward. Your ending body position should mirror the
image of Fig. 40. Your upper chest should be directly
over the top of the RIGHT bent knee and your head
should be up and looking forward at your extended
arms.
In one motion from the extended lunge position,
simultaneously return to the standing start position
while using your arms to rock the upper portion of the
Rockin’ ABs® back towards your body. Do NOT let go
of the Rockin’ ABs® machine at anytime during the up
and down movement.
Next, in one motion bend your LEFT knee while
simultaneously stepping backwards with the RIGHT leg
as you extend both arms away from you, rocking the
upper portion of the Rockin’ ABs® machine forward.
Your ending body position should mirror the image
shown in Fig. 41. Your upper chest should be directly
over the top of the LEFT bent knee and your head
should be up and looking forward at your extended
arms.
In one motion from the extended lunge position,
simultaneously return to the standing start position
while using your arms to rock the upper portion of the
Rockin’ ABs® back towards your body. Do NOT let go
of the Rockin’ ABs® machine at anytime during the up
and down movement.
Repeat the exercise at the same pace, keeping proper
balance and form.
Once you have mastered the Rockin’ Reverse Lunge
form, you can add a bit of challenge by changing the
direction of the leg that extends backwards during the
lunge movement. Instead of extending it straight back,
you can angle it slightly. while keeping your upper body
and arms in the same position.
Fig. 40
Fig. 41
STEP 5
Attaching the Left Front Cross Bar to the Left Arc Frame Underside
Locate the Left Front Cross Bar (Part #10), and two M10/20 Head Cap Screws (Part #18).
With one hand, push Accordion Sleeve (Part #2) back to expose the open end of
the Right Front Cross Bar (Part #11) as shown in Fig. 14. Insert the threaded screw
of the Left Front Cross Bar into the open end of the Right Front Cross Bar as shown
in Fig. 13 and Fig. 14. Once inserted, align the holes on the U-shaped piece of the
Right Front Cross Bar with the exposed holes on the underside of the tube on the
Left Arc Frame (Part #5).
NOTE: That the entire curved U piece of the Left Front Cross Bar nests beneath the
entire opening of the Reinforced Seat Fabric’s bottom as shown in Fig. 12 on page 12.
Take two of the M10/20 Head Cap Screws (Part #18) and insert, them into the
aligned holes and tighten each screw with the Hex Key Wrench (part # 23).
Now you can fully tighten the two M10/20 Head Cap Screws (Part #18) on the Right
Front Cross Bar with the Hex Key Wrench (part # 23).
NOTE: The top of each Head Cap Screw should extend
above the front and back side of the Reinforced Seat
Fabric’s opening as shown in Fig. 12 on page 12.
Congratulations! This was the trickiest part of
assembling your Rockin’ ABs® machine,
get ready to rock because you are almost
done!
Fig. 14
11
Fig. 13
18
18
2
Fig. 15
2
10

USER’S GUIDE
USER’S GUIDE
29 14
USER’S GUIDE
USER’S GUIDE
ROCKIN’ LOWER BODY EXERCISES
Rockin’ Squat and Calf Raise - Standing behind and
facing the Rockin’ ABs® machine with the handle
engaged in the Active Mode grab the foam covered
portion of the back rest frame with both hands as shown
in Fig. 36.
At no time during this exercise should you use the
Rockin’ ABs® machine to support your weight or control
your balance. The Rockin’ ABs® machine serves as a
focus bar for keeping you in proper form and rhythm.
In one motion, bend your knees to squat down as you
extend both arms away from you, rocking the upper
portion of the Rockin’ ABs® machine forward. Your
ending body position should mirror the image shown in
Fig. 37.
In one motion from the squat position, simultaneously
stand up rising to the balls of your feet while using your
arms to rock the upper portion of the Rockin’ ABs®
back towards your body. Do NOT let go of the Rockin’
ABs® machine at anytime during the up and down
movement. Your ending body position should mirror
the image shown in Fig. 38.
Repeat the exercise at the same pace keeping proper
balance and form.
Rockin’ Reverse Lunge - Standing behind and
facing the Rockin’ ABs® machine with the handle
engaged in the Active Mode, grab the foam covered
portion of the back rest frame with both hands as shown
in Fig. 39.
At no time during this exercise should you use the
Rockin’ ABs® machine to support your weight or control
your balance. The Rockin’ ABs® machine serves as a
focus bar for keeping you in proper form and rhythm.
Fig. 36
Fig. 37
Fig. 38
Fig. 39
STEP 6
Attaching the Handle Assembly and S Support Tube
Locate the Support Tube (Part #3),
the Handle Assembly (Part #12)
and two M8/12 Button Head
Screws (Part #20).
On the right frame,
insert the long thin portion of the
Handle Assembly (Part #12) in the
hole on the outside part of the
Right Arc Frame (Part #6) as
shown in Fig. 16. Ensuring that
the outer part of the handle is
inserted in the “LOCKED” position.
Once it is fully inserted, take the
Support Tube (Part #3) and place it
over the lever portion of the Handle
Assembly that is sticking out on the
underside of the Rockin’ ABs® machine,
and making sure that arrow heads on the
support tube and Right Arc Frame are aligned,
as shown in Fig. 17. Align the pre drilled holes on
the lever portion of the Handle Assembly
and the Support Tube.
Once the holes are aligned,
insert each M8/12
Button Head Screw and
tighten with the Hex Key
Wrench
provided.
NOTE:
Make sure
that the
Handle
Assembly is in
LOCKED
position.
Fig. 16
Fig. 17
3
6
Inside view Outside view

USER’S GUIDE
USER’S GUIDE
2815
ROCKIN’ UP RIGHT CRUNCH AND ADVANCED VARIATION
Rockin’ Up Right Crunch - With your Rockin’ ABs®
handle fully engaged in the Pilates Assist Mode,
descend back to the starting position shown below in
Fig. 32.
The seat back should be at an approximate 60 degree
angle, your feet should be on the ground, your entire
back should be contacting the seat back, your butt
should be on the rear part of the seat, and the Rockin’
ABs® machine should be motionless. Insert each hand
into a Challenge Strap (Optional Item) and bring your
hands to rest just off your upper chest/shoulders just
beneath each side of your chin as shown in Fig. 33.
Each Challenge Strap (Optional Item) should be taut but
not too tight so as to prevent you from crunching for-
ward.
With your feet remaining solidly on the floor. contract
your abs crunching forward in one continuous motion
while bringing your elbows towards your hips. You may
actually crunch to the point where you feel the Rockin’
ABs® machine roll slightly forward. Contract your abs
to hold for a beat and slowly return to the start position.
NOTE: The Challenge Straps (Optional Item)s should be
tight enough in the start position to enable you to feel
progressively harder resistance when you crunch for-
ward, but the amount or resistance should not prevent
you from achieving full range of motion.
Advanced Rockin’ Up Right Crunch - Perform the
exercise in the same manner as the Rockin’ ABs® Up
Right Crunch described above, but instead of keeping
your feet solidly on the floor, lift one foot off the floor
while simultaneously raising the knee of that leg towards
your chest as you begin each forward crunch as shown
in Fig. 35.
As your upper body returns to the start position, lower
your leg at the same pace so your upper body and leg
come to rest at the same time. Repeat at the same pace
and rhythm with the other leg.
Fig. 32
Fig. 34
Fig. 33
Fig. 35
STEP 7
Tighten the Hex Nut on the Left Front Cross Bar
Locate the Hex Nut Wrench (Part #22).
Slide the Accordion Sleeve (Part #2) to expose the threaded portion of the Left
Front Cross Bar (Part #10). Using the Hex Nut Wrench (Part# 22), rotate the hex nut
clockwise down the threaded screw towards the Right - Arc Frame (Part #6). Keep
rotating the hex nut until it is firmly in place against the outer edge of the Right
Front Cross Bar (Part #11) as shown in Fig. 18.
NOTE: Tightening the Hex Nut is crucial to ensure your Rockin’ ABs® machine has
a firm and strong frame that does not wobble or shake, as well as ensuring a taut
supportive seat. Through normal use, this hex nut
may need to be retightened from time to time to
realign your Rockin’ ABs® machine and/or to
tighten the seat fabric. Once the product is fully
assembled, it should look like Fig. 19.
CAUTION: Make sure that all screws are fully
tightened before resuming workout.
MAINTENENCE:
To maintain the high quality standard of this
product, check all screws connections and
ensure that all parts are properly tightened on
a regular basis. Damaged parts have to be
changed immediately. During the time of repair
the product must not be used by anybody.
Fig. 19
Fig. 18
2
22

USER’S GUIDE
USER’S GUIDE
27 16
ROCKIN’ JACK KNIFE
With your Rockin’ ABs® handle fully engaged in the
Active Mode, descend back to the starting position.
Note that your feet should be elevated off the ground,
with your legs straight. Your lower back should be
nestled deep into the lower portion of the backrest,
your butt should be nestled deep into the seats rear
part, and the Rockin’ ABs® machine should be motionless.
With your hands extended directly over head, use only
your abdominal muscles to put the Rockin’ ABs®
machine into a gentle rock. This motion should be
controlled and rhythmic and not too fast or jerky. Use
your abs to crunch against the descending portion of
the rocking motion. Your shoulders should lift slightly
off the upper portion of the Rockin’ ABs® backrest,
but your legs should remain straight and motionless
throughout the exercise. Your body position should be
as depicted in Fig. 31.
Contract your abdominal muscles at the peak of your
Jack Knife to slow and/or pause the rocking motion for a
beat for maximum muscle firing, then descend
backwards to return to the starting position and without
stopping the descent, stay in rhythm with the Rockin’
ABs®® machine and repeat the Rockin’ Jack Knife
exercise.
Fig. 31
ROCKIN’ ABS® EXERCISES
UNDERSTANDING YOUR ROCKIN’ ABS® PRODUCT
Your Rockin’ ABs® product is designed to assist you in performing a variety of
abdominal, core and total body exercises. There are basic, advanced and
enhanced variations for many of the exercises. To maximize your efforts, you need
to understand how the Rockin’ ABs® machine works. Closely reading this manual
will help you do this. You should also watch each Rockin’ ABs® workout featured
in the DVD accompanying this product prior to beginning any exercise because
each of the exercises described in this manual are demonstrated for you.
THREE HANDLE POSITIONS
Your Rockin’ ABs® machine includes a handle that helps control the Rockin’ ABs®
action. There are three handle positions as shown in the photos below:
Locked - With the Rockin’ ABs® handle fully engaged in the Locked position. your
Rockin’ ABs® machine remains essentially stable, basically functioning as a
comfortable chair, offering body support for stretching and sitting. This is called the
Locked Mode. In the Locked Mode, the Rockin’ ABs® machine will “roll” forward
slightly when you shift your weight and/or when you get in or out of the chair. The
Locked Mode is also used for performing certain upper and lower body exercises
demonstrated in this manual, as well as in the Rockin’ ABs® DVD workouts.
Pilates Assist - With the Rockin’ ABs® handle fully engaged, the Pilates Assist
position puts your Rockin’ ABs® in the Pilates Assist Mode. This allows the Rockin’
ABs® machine to perform similar to the way it does in the Locked Mode.
The Pilates Assist Mode also allows you to sit in a more reclined positioned and
enables your Rockin’ ABs® to have an expanded rolling motion which occurs
especially when your weight shifts forward. These key differences are important
when performing certain Pilates inspired exercises demonstrated in this manual as
well as in the Rockin’ ABs® DVD workout and/or when you get in or out of the chair.
Fig. 1
LOCKED PILATES ASSIST ACTIVE

USER’S GUIDE
USER’S GUIDE
17 26
Fig. 30
Advanced Rockin’ Oblique Twist - Perform the exercise
in the same manner as the Rockin’ Oblique Twist
described above but in lieu of placing your hands
behind your head extend one hand directly over head
and keep it there throughout the exercise as shown in
Fig. 29.
Enhanced Rockin’ Oblique Twist - Perform the exercise in
the same manner as the Rockin’ Oblique Twist described
above, but instead of placing your hands
behind your head, insert each hand in a Challenge Strap
(Optional Item) and bring your hands to just above your
upper chest/shoulders, just beneath each side of your
chin.
Each Challenge Strap (Optional Item) should be taut,
but not too tight so as to prevent you from crunching
forward. You should be able to feel progressively harder
resistance when you crunch forward, but the amount or
resistance should not prevent you from achieving a full
range of motion.
Fig. 29
Active - With the Rockin’ ABs® handle fully engaged in the Active position, you
essentially turn your Rockin’ ABs® machine into a moving exercise and muscle
isolation device. This is the Active Mode. Once your machine is in the Active
Mode, you must use your muscles, body position and activity in the chair to control
the machine’s rocking/rolling motion. The majority of the exercises demonstrated
in this manual as well as in the Rockin’ ABs® DVD workouts are performed in the
Active Mode.
GETTING IN AND OUT OF THE ROCKIN’ ABS® MACHINE
Do not be fooled! Know your body! Getting in and out of the Rockin’ ABs®
machine is an exercise in itself. Make sure you’re clear headed, alert and not out
of breath before getting in or out of your Rockin’ ABs® machine. This is especially
true after exercising in the Rockin’ ABs® because exercise often causes people
to get winded, tired or a bit light headed. It’s not a bad thing to pause a minute
or two to make sure you are in full control before getting in or out of your Rockin’
ABs® machine.
When getting in and/or out of the Rockin’ ABs® machine, the Rockin’ ABs® handle
should be in the Locked Mode. Your Rockin’ ABs® machine can provide some
assistance during the in and out process, but remember your Rockin’ ABs® still
moves a bit even in Locked Mode, so do not rely on it to support you. Your
concentration and your body are the key when getting in and out of the Rockin’
ABs® machine.
Always use the front of the Rockin’ ABs® machine when getting in and out. Never
try to enter the machine from the side. Never try to drop into your Rockin’ ABs®
in one motion.

USER’S GUIDE
USER’S GUIDE
25 18
With one hand behind your head and the other hand
holding the other side arm rest, use only your
abdominal muscles to put the Rockin’ ABs® machine
into a gentle rock. This motion should be controlled
and rhythmic and not too fast or jerky. Use your abs to
crunch against the descending portion of the rocking
motion, while rotating your upper body to the right side
of the Rockin’ ABs® machine. Your shoulders should lift
slightly off the upper portion of the Rockin’ ABs®
backrest, but your legs should remain motionless, with
your knees bent at 90 degrees. Your body position
should be as depicted in Fig. 27.
Contract your abdominal muscles at the peak of your
crunch to slow and/or pause the rocking motion for a
beat for maximum muscle firing, then descend
backwards to return to the starting position and without
stopping the descent, stay in rhythm with the Rockin’
ABs® machine and repeat the Rockin’ Oblique Twist
exercise 15 to 20 times. Once you complete the reps
switch position and rotate your body to the left side
of the Rockin’ ABs® machine. Again, your shoulders
should lift slightly off the upper portion of the Rockin’
ABs® backrest, but your legs should remain motionless
with your knees bent at 90 degrees. Your body position
should be as depicted in Fig. 28.
Contract your abdominal muscles at the peak of your
crunch to slow and/or pause the rocking motion for a
beat for maximum muscle firing, then descend
backwards to return to the starting position and without
stopping the descent, stay in rhythm with the Rockin’
ABs® machine and repeat the Rockin’ Oblique Twist
exercise 15 to 20 times.
Fig. 27
Fig. 28
When getting in your Rockin’ ABs® machine stand in front and face the machine,
as shown below. Bend at your knees, maintaining proper balance until you are
level with your Rockin’ ABs® machine. While on bended knee, grab one of the
Rockin’ ABs® arm rests and slowly turn yourself around and slide your butt in the
Rockin’ ABs® seat.
Once seated in the Rockin’ ABs® machine, your body should be positioned as
noted in Fig. 6.
When you’re ready to get out of the Rockin’ ABs®
machine, place the handle in the Rockin’ ABs®
locked position. Do NOT try to stand up or
rise to a standing position all at once when
getting out of the Rockin’ ABs® machine.
Fig. 3 Fig. 4 Fig. 5
Fig. 6
Fig. 7

USER’S GUIDE
USER’S GUIDE
19 24
Rockin’ Oblique Twist - With your Rockin’ ABs® handle fully engaged in the
Active Mode, descend back to the starting position shown in Fig. 21. Note that
your feet should be elevated off the ground, with your knees bent to 90 degrees.
Your lower back should be nestled deep into the lower portion of the backrest,
your butt should be nestled deep into the seat rear part, and the Rockin’ ABs®
machine should be motionless.
Enhanced Rockin’ Double Crunch - Perform the
exercise in the same manner as the Rockin’ Double
Crunch described above, but instead of placing your
hands behind your head, insert each hand in a Challenge
Strap (Optional Item) and bring your hands to just above
your upper chest/shoulders, just beneath each side of
your chin as shown in Fig. 25.
Each Challenge Strap (Optional Item) should be taut,
but not too tight so as to prevent you from crunching
forward. You should be able to feel progressively harder
resistance when you crunch forward, but the amount of
resistance should not prevent you from achieving a full
range of motion as shown in Fig. 26.
ROCKIN’ OBLIQUE TWIST, ADVANCED AND
ENHANCED VARIATIONS
Fig. 25
Fig. 26
Instead, grab both of the Rockin’ ABs® arm rests and then slide yourself forward to
the front edge of your Rockin’ ABs® machine. With both feet firmly on the floor,
rise out of the Rockin’ ABs® machine into a kneeling position. While still kneeling,
turn around to face your Rockin’ ABs® machine. Once comfortably balanced, rise
to a standing position, also as shown.
Fig. 8 Fig. 10
Fig. 11
Other manuals for Rockin' ABS
1
Table of contents
Other Thane Fitness Home Gym manuals

Thane Fitness
Thane Fitness Pilates Power Gym User manual

Thane Fitness
Thane Fitness BODYROW User manual

Thane Fitness
Thane Fitness Power Gym User manual
Thane Fitness
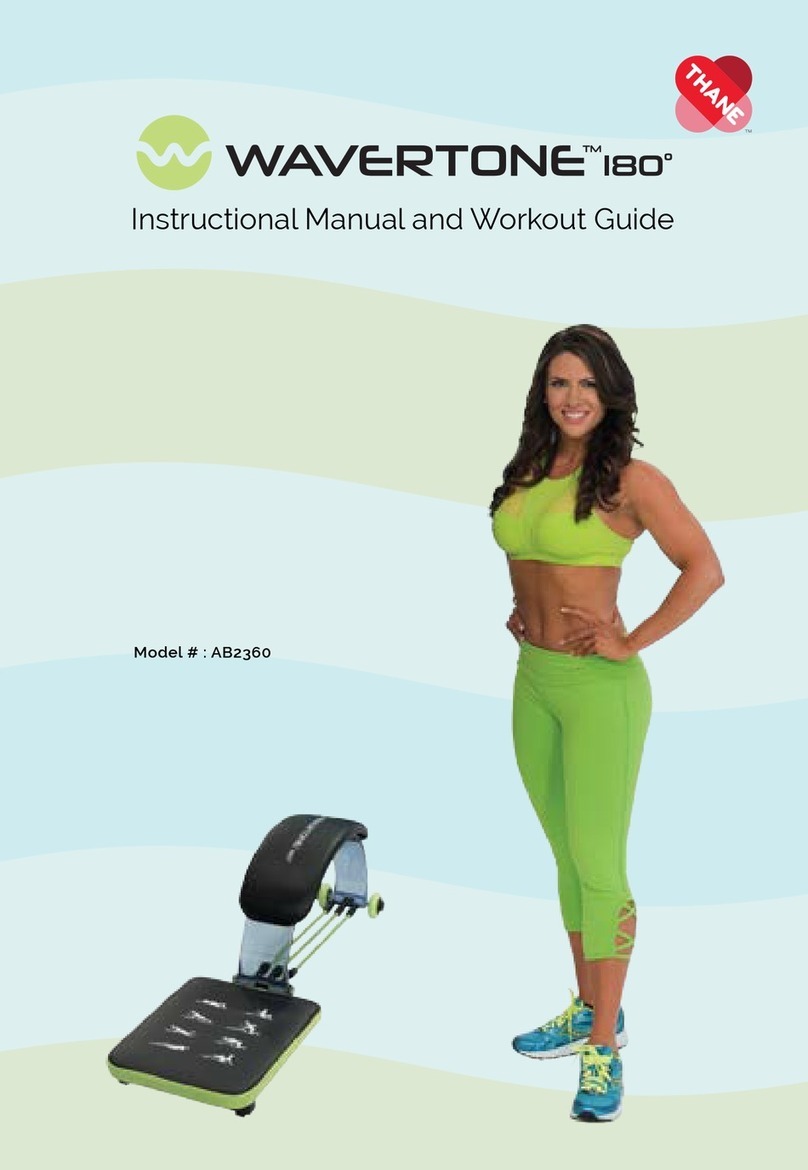
Thane Fitness WAVERTONE 180 AB2360 Operating and maintenance manual

Thane Fitness
Thane Fitness AB-DOer User manual

Thane Fitness
Thane Fitness Total FLEX User manual
