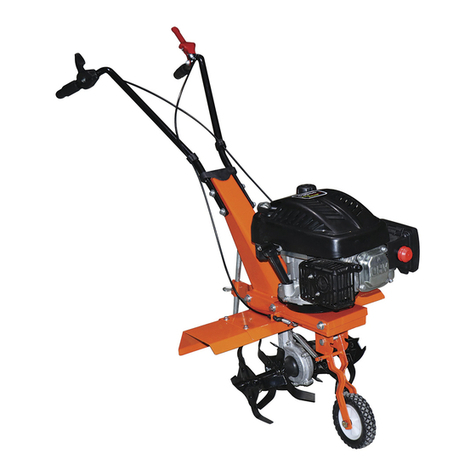
The Handy THTILL3.5 Installation and maintenance instructions

Page 1
OPERATOR’S MANUAL AND PARTS LIST
PETROL TILLER - THTILL3.5
Spares & Support: 01793 333212
www.thehandy.co.uk
Before use please read & understand this manual, paying particular
attention to the safety instructions.
2011v1

Page 2
CONTENTS
SAFETY INSTRUCTIONS 3
MAJOR PARTS 4-5
ASSEMBLY 6-8
OPERATION 9
MAINTENANCE 10
TROUBLE SHOOTING 11
PARTS DIAGRAM AND LIST 12-13
SPECIFICATION 14
EC DECLARATION OF CONFORMITY 15

Page 3
SAFETY INSTRUCTIONS
x
potential hazards. Retain these instructions for reference.
x Check your tiller before use. Keep guards in place and in working order.
You should only work with a machine that is in good condition. If you notice
any defect on the machine that may cause damage to the operator, do NOT
using only original spare parts.
x Do NOT
medication that could affect your ability to use the apparatus correctly.
x Dress appropriately – do NOT wear loose clothing, ties, jewellery or anything
that could be caught in the moving tines. Use of gloves and strong footwear
is recommended.
x
x Keep children and pets at least 23 metres away from the tiller at all times
and do NOT operate near underground electric cables, telephone lines,
pipes or hoses.
x Wear eye protection and a face or dust mask if working in dusty conditions.
x Do NOT operate on slopes of more than 10 degrees. When on slopes, slow
down and make sure you have a good footing.
x Never operate the machine with one hand and be aware that, if the tines hit
stones, frozen ground or buried roots and stumps, then it may unexpectedly
bounce upward and jump forward.
x If the tines hit a large stone, stump or other obstacle immediately turn off the
tiller and check for any damage to the tines. If the machine starts to vibrate
abnormally switch off the motor immediately and check for the cause.
x Always switch off the machine, wait for the tines to stopturning and disconnect
the spark plug before carrying out any inspection or maintenance. The tines
may not stop immediately after switching off.

Page 4
MAJOR PARTS
Throttle Control - Controls the engine speed and stops the engine.
Tine Clutch Control - Push down to engage the tines forward. Releasing
returns the machine to neutral.
Transport Wheels - Set the wheels down and the depth regulator rod will curve
up when transporting the tiller. Tilt the machine back until the tines clear the
ground. Push or pull the unit to the next location.
Handle Adjustment Knobs - Provides different handle heights for different
tilling conditions. Loosen both handle adjustment knobs and pivot hand to
desired height. Tighten knobs.
Depth Regulator Rod - Lowering the depth regulator rod will slow the tiller and
make it till deeper. Raising the rod will allow it to move faster and till shallower.
Do not adjust the tilling depth unless the clutch lever is in the neutral
position.
Upper Handle
Lower Handle
Depth Regulator Rod
Outer Tine
Transport Wheel
Inner Tine
Belt Guard
Handle Adjustment Knob
Tine Clutch Control
Throttle Control Lever

Page 5
MAJOR PARTS
1 Handle Adjustment Knobs (1 pair)
2Stop-Move Staff Bracket
3 Wheel Support Bracket
4 Chassis with Engine & Transmission
5 Lower Handle - Left
6 Lower Handle - Right
7 Wheel (1 pair)
8 Wheel Cover (1 pair)
9 Upper Handle
10 Depth Bar
11 Tilling Tine (1 pair)
12 Operator’s Manual
13. Hardware Bag, including:
The tiller is supplied partly assembled. All parts included in the carton are shown below.
1
11
2 3 4
7
8
5
6
9
12
10
13
2
1
2
2
1
3
M8 60
C
D
E
2.5
B
3
3
8 40
A
2
M8 20
F
G
2

Page 6
ASSEMBLY
A. Wheels:
• Slide the tube sleeves into the wheels.
• Mount the wheels on both sides of the bracket with
• Attach the wheel covers.
Lower Handles:
•
from the rear end of the tiller chassis.
• Mounting holes for the adjustment knob are arranged
in the top portion of each lower handle. Make sure
the 3-hole side of the handle is facing inward.
• Insert the bottom portions of the lower handles into
the mounting channels located in the underside of
each side of the tiller chassis.
•
up the holes in the bracket, handles and tiller
chassis.
• Slide the screw through the holes from one side
and secure with a locknut on the other side. Tighten.
B. Tailpiece and Depth Rod Brackets:
• Mount the depth regulator rod bracket on the tail-
C. Tilling Tines:
• Place tilling tines on the tine shaft on both sides of
the gearbox.
• Line up the holes in the tine frame sleeves and tine
shaft.
• Insert Ø8x40 clevis pins through the holes in the tine
frames and tine shaft.
• Insert Ø2.5 cotter pins through the holes in the
clevis pins to secure them.
A
2M8 60
B
2M8 20
C
2
2
8 40
2.5

Page 7
ASSEMBLY cont’d
D. Wheels Bracket:
• Insert the wheels support rod into the holes on
the tailpiece bracket.
• Insert a Ø3 cotter pin through the hole in the
support rod to secure it.
Upper Handle:
• Disassemble the handle adjustment knobs.
• Mount the upper handle on the lower handles
with the handle adjustment knobs.
E. Throttle & Clutch Controls:
• Unwind the throttle control and clutch control
from around the engine.
• Straighten the cables taking care not to bend or
kink them.
• Remove the M6x60 carriage bolt and nut from
the throttle control assembly.
• Mount the throttle control on the left side of the
upper handle with the hardware removed,
ensuring that the control is mounted outside the
handle.
• Remove the M6x40 socket screw and nut from
the clutch control lever assembly.
• Mount the clutch control lever on the right hand
side of the upper handle with the hardware
removed, ensuring that the lever is mounted on
the top.
• Use two cable clips to secure the cables. Attach
the clutch control cable to the upper handle with
another cable clip.
D
13
Upper
Handle
Retainer
Cone
Bolt
Inside
Adjuster
Lower
Handle
Konb
Outside
Adjuster
E
3

Page 8
ASSEMBLY cont’d
• Secure the throttle cable on the engine shield with a
cable fastener. This will help prevent it from
catching or snagging during normal operation.
• Keep the other cable fastener as a spare.
G. Depth Regulator Rod:
• Insert the depth regulator rod through the holes in
the bracket from the top down with the curve to the
rear of the unit and secure with a Ø3 cotter pin
through the holes in the bracket, passing through
the desired hole in the depth regulator rod.
F
2
G
1
3

Page 9
OPERATION
Starting the Engine:
The tiller is supplied without fuel or oil.
Fill the engine to the correct level with good quality SAE 30 engine oil.
Fill the fuel tank with unleaded petrol, in accordance with the engine manual which is
enclosed with the tiller. Take care to wipe up any spillages with a cloth.
3UHVVWKHSULPHUEXOEWLPHVWRDOORZIXHOLQWRWKHHQJLQHIRUWKH¿UVWXVHSUHVV
times).
Set the throttle lever to “FAST”.
+ROGWKHVWDUWKDQGOH¿UPO\DQGSXOOURSHRXWDVKRUWGLVWDQFHXQWLO\RXIHHOVRPH
resistance. Then pull the rope briskly and smoothly to start the engine. Allow the rope to
return gently. If necessary, pull the rope several times until the engine starts.
Allow the machine to idle for a short period before commencing work.
Manoeuvre the machine to the working area, remove the transport wheels and set the
depth rod to the required setting.
+ROGLQJWKHKDQGOHV¿UPO\JHQWO\VTXHH]HWKHFOXWFKOHYHUWRHQJDJHWKHWLQHVDQGPRYH
forward.
Idle Speed:
Set the throttle control lever to the “SLOW” position to reduce stress on the engine when not
tilling. Lowering the engine speed will extend the life of the engine and conserve fuel.
Shutting Down:
Set the clutch control lever to the neutral position to stop the tines.
Set the throttle control lever to the “STOP” position to stop the engine.
Operating Speed:
For normal tilling, set the throttle control lever to “FAST”. If the soil is particularly hard it
may be necessary to change the speed to “SLOW” to allow the tines to dig down into the
hard soil.
Putting pressure on the handles will encourage the tines to dig deeper, whereas releasing
the pressure will allow for shallower digging.
The best tilling depth is 100-150mm (4-6”). For cultivating around existing plants to
loosen the soil, set the depth rod to 50mm (2”) or less.
Tips:
Avoid tilling soil that is too dry as it will be pulverisedand produce dust that will not hold
water.
In some soils it may be necessary to pass the tiller over two or three times. In which case,
lower the depth rod a little further each time, and if possible cultivate across the length
and width of the garden alternately.
If the tiller stops in one place, rock the handles from side to side to start it moving again.

Page 10
MAINTENANCE
Keeping your tiller in top running condition will prolong its life and help
you obtain optimum performance whenever you wish to till your
garden.
Clean the tiller underneath the tine shield after each use. It is easier to
clean off immediately after use before it has had time to dry.
• Turn off the engine and allow to cool down.
• Keep the throttle position in the “STOP” position and remove the
spark plug.
• Remove all vegetation, string and other debris which has
accumulated around the axle and tines.
• Wipe off the tiller afterwards and apply a light coat of oil or silicone
to prevent rusting or water damage.
• Replace the spark plug.
Never use a pressure washer to clean the tiller as water can
penetrate the tiller and cause damage to the transmission and
engine.
At least once a season remove the tines and lubricate the shafts.
The worm gear housing is pre-lubricated and sealed at the
factory. At the beginning of the season ensure that there is
•
• Remove right side tines and place tiller on level surface.
• Remove the
until grease begins to come out. Do not
•
If the machine is not being used for at least six weeks:
• Drain the fuel tank completely of petrol by allowing the engine to
run until it stops.
• Allow the engine to cool, remove the spark plug and put a few
drops of high quality motor oil into the cylinder. Pull the starter
rope a few times to distribute the oil. Replace the spark plug.
• Clean off the outside of the tiller to keep the vents free of dust.
• Inspect the tiller for any loose or damaged parts. Repair or replace
and tighten any loose screws, nuts or bolts.
• To store with the handles folded down, loosen the knobs that
secure the upper and lower handles. Fold the upper handle down
being careful not to crimp any of the control
cables. Tighten the knobs.
Do not store the tiller with fuel in a non-ventilated area where fuel
s, sparks or any other ignition sources.

Page 11
TROUBLE SHOOTING
Problem Cause Remedy
Engine fails to start Spark plug wire disconnected
Out of fuel or stale fuel
Throttle control lever not in the
correct starting position
Blocked fuel line
Fouled spark plug
(QJLQHÀRRGLQJ
Tine clutch control not in
neutral position
Attach spark plug wire securely
to spark plug
Fill with clean fresh petrol
Move throttle lever to start
position
Clean fuel line
Clean, adjust gap, or replace
Wait a few minutes, restart but
do not prime
Set lever to neutral
Engine runs erratically Spark plug wire loose
Blocked fuel line or stale fuel
Vent plugged
Water or dirt in fuel system
Dirty air cleaner
Improper carburettor
adjustment
Connect and tighten wire
&OHDQIXHOOLQHUH¿OOZLWKIUHVK
fuel
Clear vent
'UDLQIXHOWDQNDQGUH¿OOZLWK
fresh fuel
Clean or replace air cleaner
5HIHUWR(QJLQH0DQXDO
Engine overheats Engine oil level low
Dirty air cleaner
$LUÀRZUHVWULFWHG
Carburettor not adjusted
properly
Fill crankcase with proper oil
Clean air cleaner
5HPRYHEORZHUKRXVLQJDQG
clean
5HIHUWR(QJLQH0DQXDO
Engine will not stop when
throttle control is at “STOP”
or engine speed does not
increase when throttle
control is adjusted
Debris interfering with throttle
linkage
Improper throttle linkage
adjustment
Clean dirt and debris
5HIHUWR(QJLQH0DQXDO
Tiller moves forward during
starting
Tine clutch control not in
neutral position
Tine clutch control must be set
to neutral to start the engine
7LOOHULVGLI¿FXOWWRFRQWURO
when tilling (jumps and
lurches forward)
Incorrect tilling depth set
Too high engine speed on
hard ground
5DLVHWKHWLQHVIRUVKDOORZHU
tilling by raising the depth rod
Set the throttle lever at lower
speed
Tines do not engage Foreign object lodged in tines
Tine clevis pin(s) missing
Belt worn and/or stretched
Pulley and idler not in correct
adjustment
Stop tiller completely, check and
remove foreign object.
5HSODFHWLQHFOHYLVSLQV
5HSODFHEHOW
Contact authorised service
dealer

Page 12
PARTS DIAGRAM

Page 13
PARTS LIST
No Part No Description Qty No Part No Description Qty
1 TH112-1 Engine 1 2 TH112-2 Locknut M8 14
3 TH112-3 Washer 8 3 4 TH112-4 Hexangular Bolt M8x35 4
5 TH112-5 Basis 1 5 TH112-6 Hexangular Bolt M8x40 2
7 TH112-7 U Shape Handle 1 8 TH118-8 Front Plant 1
9 TH112-9 Screw M6x12 10 10 TH112-10 Locknut M6 11
11 TH112-11 Transmission Case L 1 12 TH112-12 Shaft 2
13 TH112-13 Fork 2.5 2 14 TH112-14 Blade Assembly 2
14-1 TH112-14-1 Blade Jointing Set 2 14-2 TH112-14-2 Blade 16
14-3 TH112-14-3 Bolt M8x16 32 15 TH112-15 Bearing 2
16 TH112-16 Close Oil FA20x32x7 2 17 TH112-17 Inner Hexangular Screw
M6x25
9
18 TH112-18 7UDQVPLVVLRQ&DVH5 1 19 TH112-19 Bearing 2
20 TH112-20 Washer 2 21 TH112-21 Key 1
22 TH112-22 Worm Wheel 1 22-1 TH112-21-1 Output Axis 1
23 TH112-23 Washer 1 24 TH112-24 Bearing 2
25 TH112-25 Worm 1 26 TH112-26 Belt Groove 1
27 TH112-27 Screw M5x8 2 27-1 TH112-27-1 Washer M52
28 TH112-28 Belt 1 29 TH112-29 Engine Pulley 1
30 TH112-30 Lock Screw M8x12 2 31 TH112-31 Lock Pin 5x40 1
32 TH112-32 Transmission Case Pulley 1 33 TH112-33 Pulley Tightener Assy 1
33-1 TH112-31-1 T Plate 1 33-2 TH112-33-2 Pulley Tightener Sleeve 1
33-3 TH112-33-3 Bearing 608 1 33-4 TH112-33-4 Pulley Tightener 1
34 TH112-34 Spring Axis 1 35 TH112-35 Pulley Tightener Spring 1
36 TH112-36 Hexangular Bolt M8x45 1 37 TH112-37 Bolt Cap 1
38 TH112-38 Hexangular Bolt M8x40 1 39 TH112-39 Washer M89
40 TH112-40 Hexangular Bolt M8x250 2 41 TH112-41 Guard Plate 1
42 TH112-42 Inner Hexangular Screw
M5x12
8 43 TH112-43 Locknut M5 2
44 TH112-44 Left Lower Handle 1 45 TH112-45 Line Clip 3
46 TH112-46 Bolt M8x10 1 47 TH112-47 Hexangular Bolt M8x20 2
50 TH112-50 Wheel Cover 2 51 TH112-51 Hexangular Bolt M8x60 2
52 TH112-52 Wheel 2 53 TH112-53 Wheel Bush 2
54 TH112-54 Wheel Bracket 154-1 TH112-54-1 Fixing Bracket 1
54-2 TH112-54-2 Stop-Move-Staff 1 54-3 TH112-54-3 Stop-Move Staff Bracket 1
55 TH112-55 Fork 3.0 2 56 TH112-56 Hexangular Nut M8 34
57 TH112-57 5HYROYLQJ+DQGOH 2 58 TH112-58 Clip Cover 4
59 TH112-59 Clip Seat 4 60 TH112-60 Screw M8x100 2
61 TH112-61 Square Neck Screw M6x60 1 62 TH112-62 Accelerograph Handle Assy 1
63 TH112-63 Upper Handle 1 64 TH112-64 Handle Cover 2
65 TH112-65 Brake Armguard Hold Assy 1 66 TH112-66 Inner Hexangular Screw
M6x40
1
67 TH112-67 5RXQG3OXJ 2 68 TH112-685Lght Lower Handle 1
69 TH112-69 Clutch Cable 170TH112-70 Accelerograph Cable 1
71 TH112-71 Large Washer 1

Page 14
SPECIFICATION
Model THTILL3.5
Engine Briggs & Stratton Classic 35
Cultivating Width 380mm
Cultivating Depth 250mm
Tine Speed 120 rpm
Sound Power Level 93 dB(A)
Sound Pressure Level 81.1 dB(A)
Vibrating Level on Handle Grips Left: 4.06 m/s²
Right: 5.40 m/s²
Weight 29kg
Please recycle unwanted materials instead of disposing of
them as waste.
All tools, hoses and packaging should be taken to your
local recycling centre and disposed of in an environmentally
friendly way.


To order spare parts and see the complete range of garden
machinery and garden equipment from Handy, visit:
www.thehandy.co.uk
Spares & Support: 01793 333212
Table of contents
Other The Handy Tiller manuals
The Handy
The Handy THPMT User manual

The Handy
The Handy TH18VT User manual

The Handy
The Handy THET-A Installation and maintenance instructions

The Handy
The Handy THET1400 User manual

The Handy
The Handy THET 193874002 User manual

The Handy
The Handy THPMT User manual

The Handy
The Handy THPMT User manual

The Handy
The Handy THTILL6.5-A Installation and maintenance instructions

The Handy
The Handy 193820003 User manual
The Handy
The Handy 1938118001 User manual

