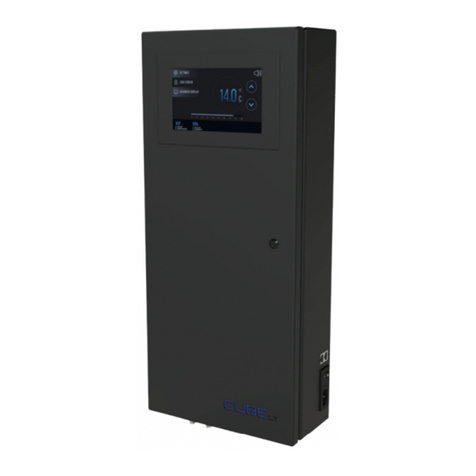
The Wine Square CUBE Series User manual

1 1www.thewinesquare.com User manual

2www.thewinesquare.com
CUBE°-RH CUBE°
CUBE°-RC
unit presentation, CUBE° / CUBE°-RC / CUBE°-RH

2 3www.thewinesquare.com
Thank you!
The team from Wine Square CUBE° thanks you for purchasing this product. This revo-
lutionary cooling system offers the most stable resting conditions for wine to mature.
Directions for Use
This system was carefully designed to recreate the same conditions as those found
in an underground wine cellar. Having the right temperature, plus an impeccable hu-
midity level will help achieve stability while creating the best conditions for your wine.
These perfect resting conditions cannot be reproduced by a compressor system. It’s
definitely not the same type of system. Choosing the CUBE° will be beneficial in the
long run.
Natural underground wine cellars experience internal variations in temperatures due
to seasonal changes. During the summer months, the inside of the cellar is warmer
while being cooler during the winter months. The CUBE° follows the same seasonal
pattern as a natural cellar. Following the seasonal pattern, the system reproduces the
same conditions related to seasonal changes by varying the temperature through an
automated process. This process helps avoid humidity and temperature issues. All you
have to do to achieve this peace of mind is to activate the temperature variation but-
ton in the menu.
unit presentation, CUBE° / CUBE°-RC / CUBE°-RH

44www.thewinesquare.com
Table of content
Security......................................................................................................................
Warranty....................................................................................................................
parts descriptions................................................................................................
Where to install your system ?.....................................................................
System control(s).................................................................................................
Main display...................................................................................................
advanced settings......................................................................................
Language selection...................................................................................
Temperature selection.............................................................................
Locking feature............................................................................................
time setting...................................................................................................
Temperature variation.............................................................................
Standby screen............................................................................................
Login................................................................................................................
Locking Feature...........................................................................................
Sound settings..............................................................................................
Hydraulic diagrams............................................................................................
Installation Procedures.....................................................................................
type A Installation......................................................................................
type B Installation......................................................................................
type C Installation.....................................................................................
type D Installation......................................................................................
System errors.........................................................................................................
part list......................................................................................................................
Control box....................................................................................................
Inside box.......................................................................................................
Inside assembly...........................................................................................
Hot water tank assembly........................................................................
Cold water tank assembly.....................................................................
CUBE° SCREEN ASSEMBLY......................................................................
MODULE E-COOL assembly.....................................................................
CUBE°-RH assembly..................................................................................
CUBE°-RC6L assembly.............................................................................
CUBE°-RC4 assembly...............................................................................
5
6
9
10
11
11
12
13
14
15
16
17
20
21
22
23
24
29
30
55
79
106
134
188
189
192
195
198
199
200
201
202
204
206

4 5www.thewinesquare.com
Security
4
Security
Read and understand the content of this section.
Inadequate handling can cause serious damage.
WARNING
• Never operate the unit while it is connected to a faulty socket or a loose wall outlet.
A damaged power cord must be replaced by the manufacturer or by an authorized
service agent.
• NEVER cover the CUBE°’s air inlet or outlet or those of the CUBE°-RH and CUBE°-RC
when the unit is in use.
• This product is not to be used by children.
• NEVER sit or place an object on the unit.
• ALWAYS disconnect and turn the system off should it require servicing or cleaning.
• Contact a Wine Square customer service agent if the unit requires maintenance.
• Disconnect the unit when not in use.
• NEVER place the power cord under a rug or carpet.
• Be aware of the surroundings when walking around the unit. This will avoid damag-
ing the pipes, power cord or unit.
• NEVER use the unit in an environment that is used to store gasoline, paint or other
inflammable products.
• Basic safety measures should always be followed when using electrical devices.
• This system was designed as a conditioning unit for a wine cellar. It should by no
means be used for any other purpose than that for which it was made.
• Only use the tools supplied by The Wine Square. NEVER attempt to service the unit
yourself, to connect or install it using other methods than those described in this
manual. One of the aforementioned actions could void the unit’s warranty.
• NEVER use an extension cord with this unit.

6www.thewinesquare.com
Warranty
Warranty
The purchase of the CUBE° (the “product”) is governed by the Terms and Conditions de-
tailed hereafter, which constitute the general conditions of the warranty, installation and
maintenance (the “Conditions”) of the product between you (known hereinafter as “You”
or the “user”) and The Wine Square Manufacturing Inc. (“Wine Square”). These Condi-
tions may be modified by Wine Square at any time and without prior notice.
PLEASE READ THE FOLLOWING CONDITIONS CAREFULLY BEFORE INSTALLING THE PROD-
UCT. BY INSTALLING THE UNIT, YOU HEREBY AGREE TO BE BOND BY THESE CONDITIONS
AND AGREE TO FULLY COMPLY TO EVERY ONE OF THEM.
1. Representations Regarding the Product, the CUBE°
For the system to function adequately and to guarantee optimal conditioning, the prod-
uct must be installed and maintained within the particular specifications described in
the User’s Manual. The power capacity of the conditioning unit presented in the User’s
Manual is based on a 10 °C difference between the CUBE°-RC (the radiator inside the wine
cellar) and the CUBE°-RH (the radiator outside the wine cellar).
2. Product related Warranty
Parts & Labour Warranty. Subject to any provisions made under the Terms and Condi-
tions, The Wine Square warrants that the product’s projected power capacity (measured
in Watts) indicated in the User’s Manual and the product itself is free from defects in ma-
terials or workmanship (the “Warranty”) during a two (2) year period from the date of
purchase by the user (the “Warranty Period”). If the product, within the Warranty Period,
becomes defective due to defects in materials or workmanship that cannot be corrected
by The Wine Square after it has had the opportunity to do so, The Wine Square commits,
subject to the limitations, exclusions and cessations mentioned hereafter, to do one or
more than one of the following gestures, as the case may be, in favour of the user, and
linked with the workmanship, parts and transportation:
1. Workmanship: Repair or replace the product at the sole discretion of The
Wine Square;
2. Parts: Supply replacement parts, new or refurbished, for the product in ex
change for the defective parts;
3. Transportation: Cover normal transportation costs for parts. In the event the
product cannot be repaired on site, normal transportation costs (in Canada
or the U.S.) for the product will also be covered.
3. Warranty Limitations & Exclusions
3.1 The Wine Square does not, in any way, guarantee the preservation of a given tempera-
ture.
3.2 The following damages are not covered by the warranty.
a. Cosmetic damages done during installation;
b. Any damages caused by the user or resulting from an accident, carelessnes
improper, abusive use or commercial use, or if parts or components of the pro
duct have been modified or repaired;

6 7www.thewinesquare.com
Warranty
c. Any damages by force ma jeure or unforeseeable events that are beyond the
control of The Wine Square;
d. Any damages arising from the lack or insufficient maintenance of the product,
improper installation, connection to an incorrect voltage supply or an attempt-
ed repair done by a technician other than a Wine Square authorized service
technician.
3.3 The warranty does not apply to a product malfunction that is related to the wine
cellar’s inadequate insulation or that the user did not buy a product with the level of perfor-
mance needed for the wine cellar’s surface area.
a. The product is installed in an area where the temperature increases due to heat
rejection, preventing the wine cellar from reaching the desired temperature or
if the product’s installation does not comply with its requirements as described
here and/or in the User’s Manual;
b. The user does not respect the maintenance conditions stipulated hereafter and/
or in the User’s Manual;
c. The repair work made to the product is done without The Wine Square’s prior
approval; or;
d. The product has been painted or modified.
3.5 Replacement of the product or a part under warranty does not extend or restart the
warranty period.
3.6 Proof of purchase in the form of a receipt, payment confirmation or the serial number
ensuring that the product is still under warranty at the time of the claim must be presented
by the user to The Wine Square in order for him to obtain services pursuant to the Warranty.
4. No Other Warranty or Limitation of Liability
4,1 Subject to the warranty as provided under Section 2, The Wine Square makes no
warranty, express or implied, legal or contractual, and may not be held liable for any di-
rect or indirect damages, exemplary, consequential, incidental, punitive or special damages
caused by the product, including the loss of profits or opportunity suffered by the user due
to the loss, damage or destruction caused to the wine cellar or its content, including the loss
or damage of wine bottles.
4,2 The Wine Square offers no warranties of merchantability, fitness for a particular pur-
pose, express or implied, legal or contractual, and will not be held liable if the product does
not fully meet the user’s requirements, needs and wishes.
4,3 The Wine Square’s liability arising under any cause whatsoever (including, without
limitations, breach of these Conditions or negligence), shall in no event exceed the sum ac-
tually paid by the user for the product

88www.thewinesquare.com
Warranty
5. Product Installation Requirements
For the system to function adequately and to ensure optimal conditioning, the product must
be installed according to the particular specifications described in the User’s Manual.
Before installing the product, the user must read the User’s Manual and follow the installa-
tion procedures described within. Any inadequate installation or one that does not comply
with installation standards may not only affect the product’s power capacity and efficiency,
but could also affect the product’s lifespan and render the warranty offered herein inap-
plicable. The product cannot operate to its maximum capacity if the product is stored in a
room with poor ventilation or insulation.
6. Maintenance and Certain Conditions of Use
Since the product is designed to maintain the wine cellar’s temperature between one and
four degrees above the cellar’s dew point (depending on the cellar’s surface area), it’s the
user’s responsibility to ensure that the room’s humidity is controlled so that the dew point
is sufficiently low.
7. Dispositions générales
The Conditions are subject to the following general provisions.
7.1 Applicable Laws
The present Conditions as well as their interpretation, validity and effect shall be subjected
to the applicable laws in force in the province of Quebec as well as Canadian federal laws
applicable therein.
7.2 Severability
If one of the present Conditions is deemed invalid or unwritten, only this Condition will be
severed from the present Conditions without affecting the document’s validity as a whole.
7.3 Notice and Communications
All notices required or provided pursuant to the present Conditions must be done in writing
and will be considered as validly given if they are sent by email or by registered mail to the
following address:
ATT: Customer Service
The Wine Square Manufacturing Inc.
500 Place de la Bonne-Entente
Trois-Rivières (Quebec) Canada
G9B 0H6
Email: info@thewinesquare.com

8 9www.thewinesquare.com
Part list
8
Parts description
The number of parts and components depends on your installation and the power
capacity of your system. However, you will definitely have a CUBE°, a CUBE°-RC and a
CUBE°-RH.
15.300
R1.500
8.337
5.383
15.125
13.130
15.125
CUBE°
The CUBE° represents the system’s power unit. This
box, located outside the wine cellar, is used to cool
the water needed to stabilize the temperature in the
cellar.
20.000
18.000
6.775
5.465
5.8
Dégagement Minimum pour installation
12.540
15.125
15.125
Dégagement Minimum
CUBE°-RC
The CUBE°-RC is located directly on the wine cellar’s
ceiling. This unit pumps the hot air found in the wine
cellar.
38.125
8.630
13.500
CUBE°-RH
The CUBE°-RH is the unit located outside the cellar
and serves to pump the hot air out of the wine cellar
and into the room where the CUBE°-RH is located.

1010www.thewinesquare.com
Where to install your system ?
Where to install your system ?
It is essential to find the correct location to ensure the proper operation of the system. Even
if many believe air-conditioning consists of blowing cold air in a room, the truth is that it
serves to take the hot air out. The CUBE° pumps the heat outside the cellar and the cold air
that you can feel coming out of the system is actually air without heat.
This being said, the CUBE°’s three units operate in the following order: The CUBE°-RC pumps
the heat out of the wine cellar and the CUBE°-RH pumps it into the room where it is located.
The proper operation of the system depends on the location of these two units. Both units
must be able to easily extract heat and push it out.
The CUBE°-RC must be positioned at the highest point of the wine cellar’s ceiling. It is de-
signed to absorb the heat found underneath it and expel the treated air towards the ceiling,
making sure that the cold air is not pushed towards the bottles. Since hot air rises, every-
thing that is located above the CUBE°-RC will not be air-conditioned. It’s important to keep
sufficient space under and around the CUBE°-RC so that the hot air can easily access the
unit and the cold air is blown out without obstruction.
The CUBE°-RH blows the hot air out of the system. It’s important that it be located in an
area sufficiently ventilated so that the hot air can be expelled. To give you an estimate, the
chart below represents the hot air expelled by each system. If you have a CUBE 400, your
CUBE°-RH must be located in a room where 8 people could be seated without changing the
room’s temperature.
CUBE°-400
8 or
800W
CUBE°-600
12 or 1200W
CUBE°-800
16 or 1600W
It must also be located in a room where the temperature will never rise above 25 °C. The
system’s power capacity is usually calculated to maintain a maximum 10 °C difference be-
tween your wine cellar and the location of the CUBE°-RH. In other words, if the room where
the CUBE°-RH is located is at 22 °C, the temperature inside your wine cellar cannot be pro-
grammed under 12 °C (22-10 = 12). It must therefore be located in an air-conditioned space.
A closet or a garage is an inadequate location for placing your CUBE°-RH.
The CUBE°-RH must absolutely be positioned vertically.
As for the CUBE°, it must be located in a ventilated space since it radiates the same amount
of heat as a computer. This means that it cannot be located in a non-ventilated cabinet.

10 11www.thewinesquare.com
System control(s)
10
System Control(s)
An appropriate location for all three units will guarantee an efficient and sustainable sys-
tem. Failure to comply with the proper positioning of these units will not allow your system
to reach the maturing conditions needed for your bottles.
If in doubt, please contact your Wine Square authorized dealer so that he may help you
with your system’s positioning.
The controls needed for using the system are located on the CUBE°’s touch screen. No other
button or user interface is available. The system starts functioning once it is connected in
an electrical outlet. The system must be disconnected for it to stop.
1-Main Display
4
3
2
1
5
6
7
8
9
1 Settings screen To access the settings screen and configure the sys-
tem’s various settings.
2 Lock screen Locks the system when this option is activated in
the settings. To activate/deactivate this feature: Set-
tings-Lock-On/Off.
3 Advanced settings To access the system’s advanced settings screen.
4 Desired temperature Displays the desired temperature inside the wine
cellar.

12www.thewinesquare.com
System control(s)
5 Humidity inside the wine cellar Displays the relative humidity inside the wine cellar.
6 Temperature inside the wine
cellar
Displays the actual temperature inside the wine cel-
lar. When using the control arrows (8), the displayed
value is the setpoint temperature (4).
7 Power Bar Displays the percentage of the system’s power ca-
pacity. As an example, when the display shows 60%,
this means that the system uses 60% of its power
capacity.
8 Control Arrows Used to adjust the setpoint temperature.
9 Sound Control To access the sound control screen for the system’s
ventilators.
2-Advanced settings
1 Settings Screen To access the settings screen and configure the sys-
tem’s various settings.
2 Lock Screen Locks the system when this option is activated in
the settings. To activate/deactivate this feature: Set-
tings-Lock-On/Off..
3 Advanced Settings To access the system’s advanced settings screen.
4 Temperature inside the wine
cellar
Displays the actual temperature inside the wine cel-
lar.
4
3
2
1
5
6
7
8
9
10 11 12

12 13www.thewinesquare.com
System control(s)
5 Humidity inside the wine cellar Displays the relative humidity inside the wine cellar.
6 Temperature inside the wine
cellar
Displays the actual temperature inside the wine cel-
lar. When using the control arrows (8), the displayed
value is the setpoint temperature (4).
7 Power Bar Displays the percentage of the system’s power ca-
pacity. As an example, when the display shows 60%,
this means that the system uses 60% of its power
capacity.
8 Control Arrows Used to adjust the setpoint temperature.
9 Sound Control To access the sound control screen for the system’s
ventilators.
10 Desired temperature Displays the desired temperature inside the wine
cellar.
11 Hot Water Temperature Displays the temperature inside the hot water loop
which supplies the CUBE°-RH.
12 Cold Water Temperature Displays the temperature inside the cold water loop
which supplies the CUBE°-RC.froide qui alimente le
CUBE°-RC.
3
2
1
3-Language selection

14www.thewinesquare.com
System control(s)
1 Language Selection To access the language selection screen.
2 Language To select the system’s display language.
3 Close To return to the home screen.
3
2
1
4-Temperature Selection
1 Temperature Displays the temperature.
2 Temperature Unit Display To select the system’s temperature unit display.
3 Close To return to the home screen.

14 15www.thewinesquare.com
System control(s)
3
2
1
5- Locking Feature
1 Locking Feature To access the locking feature screen.
2 On/Off To turn the locking feature screen On/Off.
3 Close To return to the home screen.
The screen’s locking feature enables you to protect your system against an unwanted
change in the control features. To deactivate the locking feature, you must navigate with
the arrows and activate this feature.

16www.thewinesquare.com
System control(s)
3
2
1
6- Time Setting
1 Time Setting To access the time setting screen.
2 Adjusting the Time To adjust the system’s clock, select the number or
month that needs to be modified. When the arrows
appear, adjust the desired values.
3 Close To return to the home screen.
Every minute, your system stores the humidity and temperature data. This information is
very useful when you want to trace the bottles’ maturing conditions inside the cellar or
when you need to detect a problem with the air-conditioning of your wine cellar. This data
is recorded for a 20-year period inside the system. Adjusting the date and time helps asso-
ciate the date with the exact moment when the data was recorded.

16 17www.thewinesquare.com
System control(s)
30°C
(86°F)
20°C
(68°F)
10°C
(50°F)
WATER
VAPOUR
WATER
VAPOUR
WATER
VAPOUR
28%
RELATIVE HUMIDITY
52%
RELATIVE HUMIDITY
100%
RELATIVE HUMIDITY
7- Temperature Variation
The temperature variation feature enables you to adjust the temperature to adapt it to the
realities of a changing climate just like in a natural cellar. Before moving on with this feature,
it’s important to fully understand the principle behind relative humidity. Relative humidity is
defined as the water vapour content in a given volume of air versus the maximum it could
contain at a specific temperature and pressure.
If you inflate two balloons with the air in your home, the relative humidity inside the balloons
won’t be the same if you put one of them in the refrigerator and the other one on the count-
er. The following picture represents well this principle. The green circle represents the water
volume that the air can absorb at a certain temperature.
The CUBE° does not dry the air nor does it create humidity. The humidity in your cellar is in
fact the humidity level contained in the air inside your home, but simply cooled. The same
phenomenon can be found in natural cellars of prestigious châteaux that offer exceptional
maturing conditions and simulated by the CUBE° The following table represents the humid-
ity inside your cellar depending on the temperature and humidity level inside your home.

18www.thewinesquare.com
System control(s)
Relative humidity in fonction of the temperature
HR% at 22°C 18 17 16 15 14 13 12 11 10 9 8 7
70% 88 94 100
65% 83 88 94 100
60% 78 83 88 94 100
55% 73 77 83 88 94 100
50% 64 68 72 77 82 88 94 100
45% 56 59 63 68 72 77 82 88 94 100
40% 49 52 55 59 63 67 72 77 82 87 93 100
35% 46 49 52 55 59 63 67 72 76 82 87 93
30% 40 42 45 48 51 55 58 62 67 71 76 81
25% 32 34 36 39 41 44 47 50 54 58 62 66
If, for example, the temperature inside your home is 22 °C with a 40% humidity level, your
cellar will naturally maintain a humidity level of 67% at 13 °C.
For health issues, experts agree that the humidity level in your home should be between 30
and 50%. Under 30%, the air is too dry, above 50%, the air becomes polluted (mould growth,
increase in allergens). Here are a few possible solutions if the humidity level in your home
is too high.
If the air-conditioner is too strong for your home, it will produce a much colder environ-
ment without lowering the humidity level, producing a cold and humid environment. Some
companies still calculate the power capacity of their air-conditioning with charts that don’t
represent today’s highly insulated buildings. Customers have systems that are much too
powerful for their homes.
Is your air exchange system activated? This unit is used to lower the humidity level of your
house. It should not be working when the humidity level outside is greater than the one in-
side your home. It’s important to turn the system off during the hot and humid months of
the year. Otherwise, you will never be able to control the humidity level of your home with a
system that renews the air completely in less than an hour.

18 19www.thewinesquare.com
System control(s)
3
2
1
4
1 Temperature Variation To access the temperature variation screen.
2 On/Off Temperature Variation
System
To turn the system’s temperature variation feature
On/Off.
3 Adjusting the Temperature
Variation
To adjust the system’s calendar related to the tem-
perature variation, select the number or month that
needs to be modified. When the arrows appear, ad-
just the desired values.
4 Close To return to the home screen.
As for the temperature variation feature, it automatically adjusts the temperature to the
summer and winter temperatures. As with natural cellars, you may mature your wines during
the summer months while keeping higher humidity and temperature levels and lower ones
during the winter months when the air’s humidity level is lower. This variation will slowly
take place within a 30-day period.
This is an optional feature. You may choose to activate it or not.

20www.thewinesquare.com
System control(s)
8- Standby Screen
1 Standby Screen To access the adjustment features of the standby
screen.
2 On/Off To turn the standby screen On/Off.
3 Time Limit To select the time limit (in minutes) before the stand-
by screen comes on after the last contact with the
screen.veille s’ajuste suite au dernier contact avec
l’écran.
4 Display To select the image that will appear when the sys-
tem enters the standby mode.
5 Colour To select the display colour of the standby screen.
6 Close To return to the home screen.
The standby screen enables you to choose what will be appearing on the screen when you
are not interacting with the CUBE°. You can activate this feature if you wish.
6
2
1
3
4
5
This manual suits for next models
7
Table of contents
Other The Wine Square Wine Cooler manuals
