Thenow HSN-JC5 User manual
1
Shanghai Thenow Purification Technology Co.Ltd
Wine Cellar Cooling Units
Self-contained
User Manual
Thank you for purchasing this “Thenow”product;
Please read this manual carefully before attempting to install, operate or service;
Please retain this booklet for future reference.

2
!!! WARNING !!!
To avoid the risk of electrical shock, property damage, personal injure or
death, please read the following instructions carefully with safety or
warning labels.
*During transportation or moving, please follow the correct direction on the packing case.
*After transportation or moved, it needs to be allowed to stand for more than 24 hours before it can be turned on.
* The power cord must be plugged into a 3-prong grounding-type wall receptacle.
*Do not attempt to carry out any measurement, device replacement or other maintenance work not covered in
this manual, otherwise it may lead to warranty failure, endanger normal operation, extend equipment downtime
and increase additional maintenance costs.
Disconnect electric power from the appliance before performing any
maintenance or repairs, failure to do so could result in death or electrical
shock.

3
1. Product Introduction..............................................................4
2. Dimensions & Technical Data...............................................6
3. Installation & Debugging.......................................................9
4. Introduction of Controller.....................................................19
5. Maintenance..........................................................................23
6. Troubleshooting..........................................................................24
7. Warranty................................................................................26
Table of Contents

4
Wine Cellar Cooling Units Self-contained (HSN-J15-Z)
Thenow wine cellar cooling units self-contained is best suited for home or light commercial proper wine storage.
This unit is intended for use in cabinets or smaller wine storage rooms. Designed to lower the temperature at its
best scope 10~18oC(50-64oF), and maintains the humidity at optimal levels, between 50 and 70 percent. With
build-in humidifier and PTC heater, our cooling units keep your collection area with perfect humidity and
temperature level.
Features:
Condenser and evaporator combined inside one appliance, easy and fast to install;
Intelligent control panel, famous brand sensors with stable quality, integrated ModBus connection;
Suitable temperature between 10~18℃(50-64oF) and humidity maintenance at 50~70% RH;
Unique appearance design, no vibration, lower noise;
Optimal air distribution ensures the most uniform temperature in the wine cabinet space;
Commercial-grade, corrosion resistant components and spray painting frame for long-term durability;
Build-in wet film humidifier and heater, maintaining proper constant temperature and humidity.
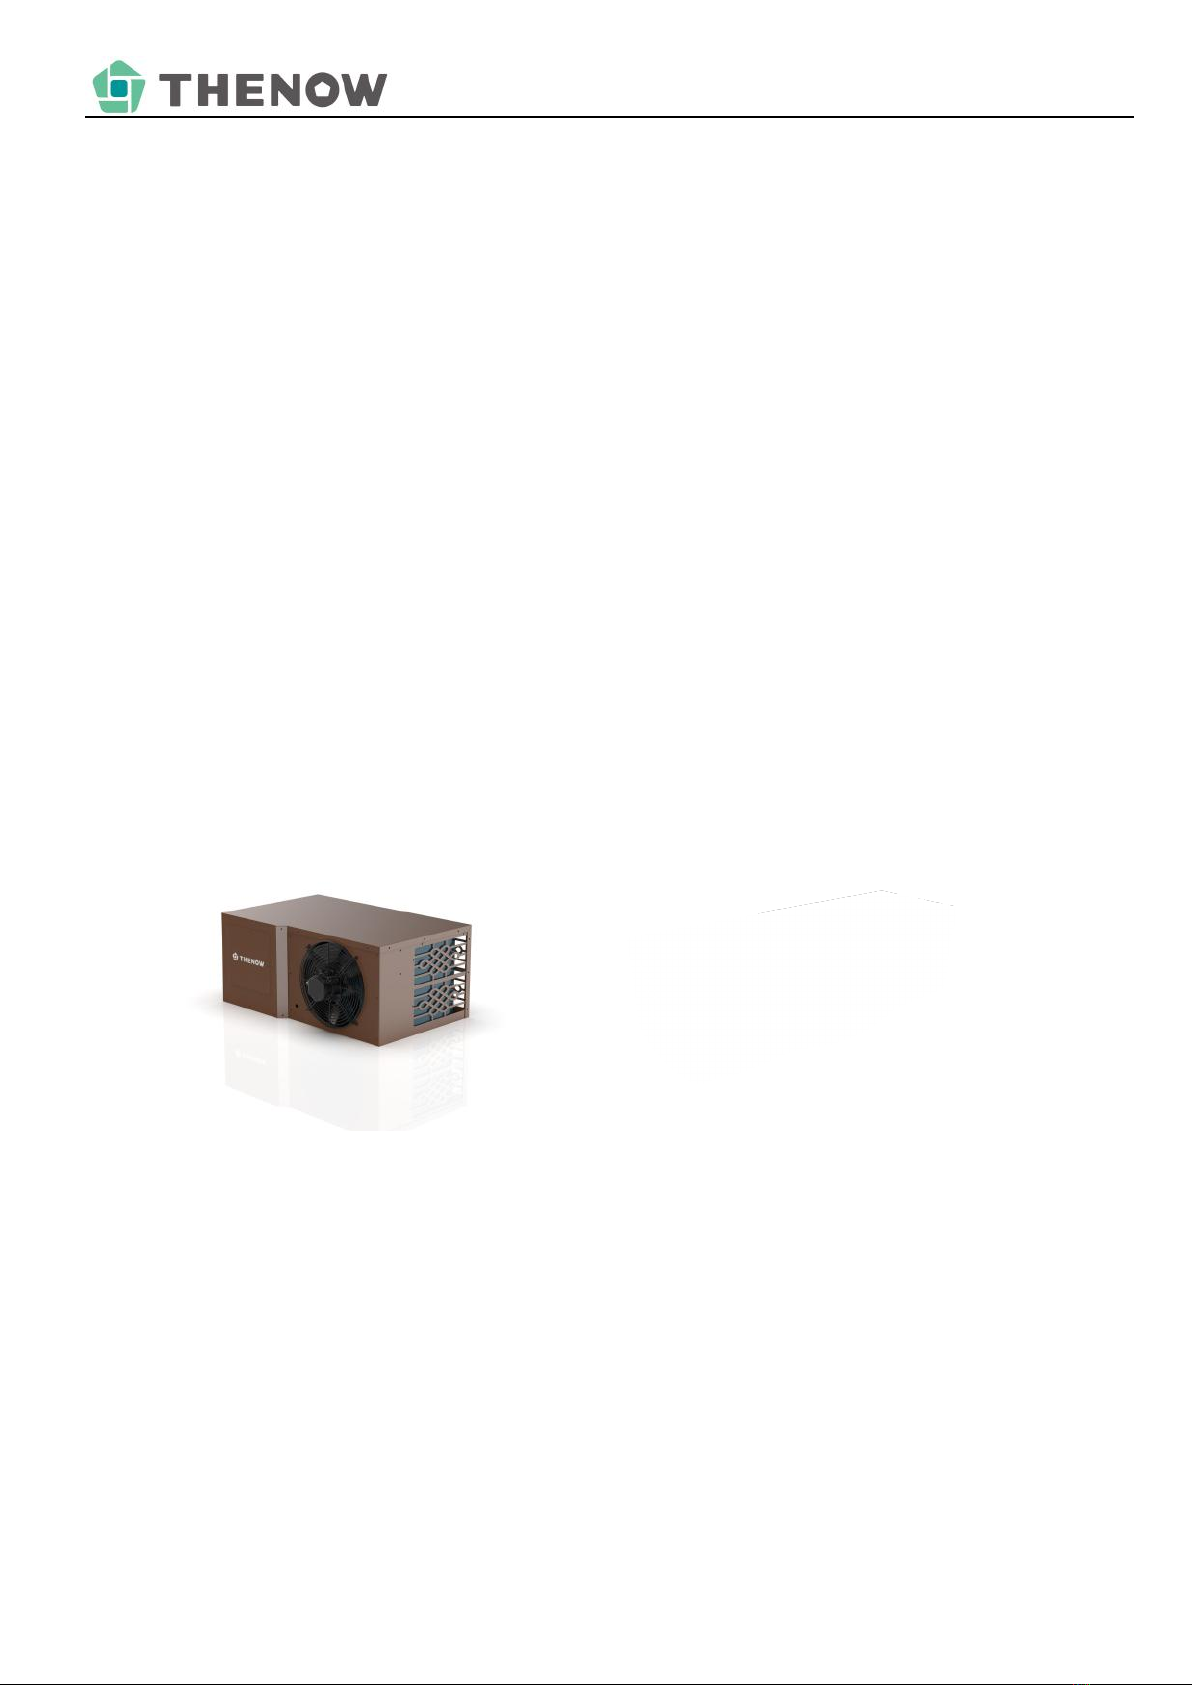
Wine Cellar Cooling Units Plug-in (HSN-JC5)
Thenow's plug-in type cooling unit is specially designed for smaller wine cabinet under 5 cubic meters, the
product volume is only 7% of 1m³, which can be put into the cabinet very easily. Besides, plug-in type makes the
installation becoming very simple and you don't need a licensed HVAC technician to install it for you, you may be
able to install the unit yourself or an experienced handyman.
Features:
Compact plug-in design, easy to install;
Quiet and efficient operation;
Unique self-absorption drainage design;
Intelligent control panel, famous brand sensors with stable quality, integrated ModBus connection;
Famous brand compressor, safe, stable and low energy consumption;
Product Introduction

5
Traditional Chinese knot design air grille, better heat dissipation.
Working Principle
1.Refrigeration
Using cycling vapor compression refrigeration system,when the compressor work, indraft low temperature and
pressure refrigerant gas from evaporator, compressed by compressor into high temperature and pressure gas,
and then into the condenser to condense into liquid, meantime release heat, after throttling under the function of
the thermal expansion valve, entering into the evaporator and absorbed heat,then evaporate into gas, finally
back to the compressor through the suction tube and complete a refrigeration cycle ; On the other hand,through
changing of refrigerant flow direction, total or partial condensing heat generated from refrigeration can be
exhausted to outside,to achieve the purpose of adjusting the indoor temperature.
2. Dehumidification Principle
When the wet air flows through the evaporator surface, the air temperature will drop, when it falls below the dew
point,the steam in the air will condense out, gathering and drainage of water pipes in the receiving plate, the
controller automatically adjusts the compressor start-up time according to the setting humidity , so as to achieve
the purpose of adjusting humidity.
3. Heating(Only HSN-J15-Z)
Inside PTC heater-Electric heating compensation
4.Humidification (Only HSN-J15-Z)
Adopt circulating water wet-film auto control humidification system, water was spurted to the room area under
large air volume to achieve the purpose of humidifying ,the wet film is made of Swedish organic polymer
material with sterilization and disinfection function.

6
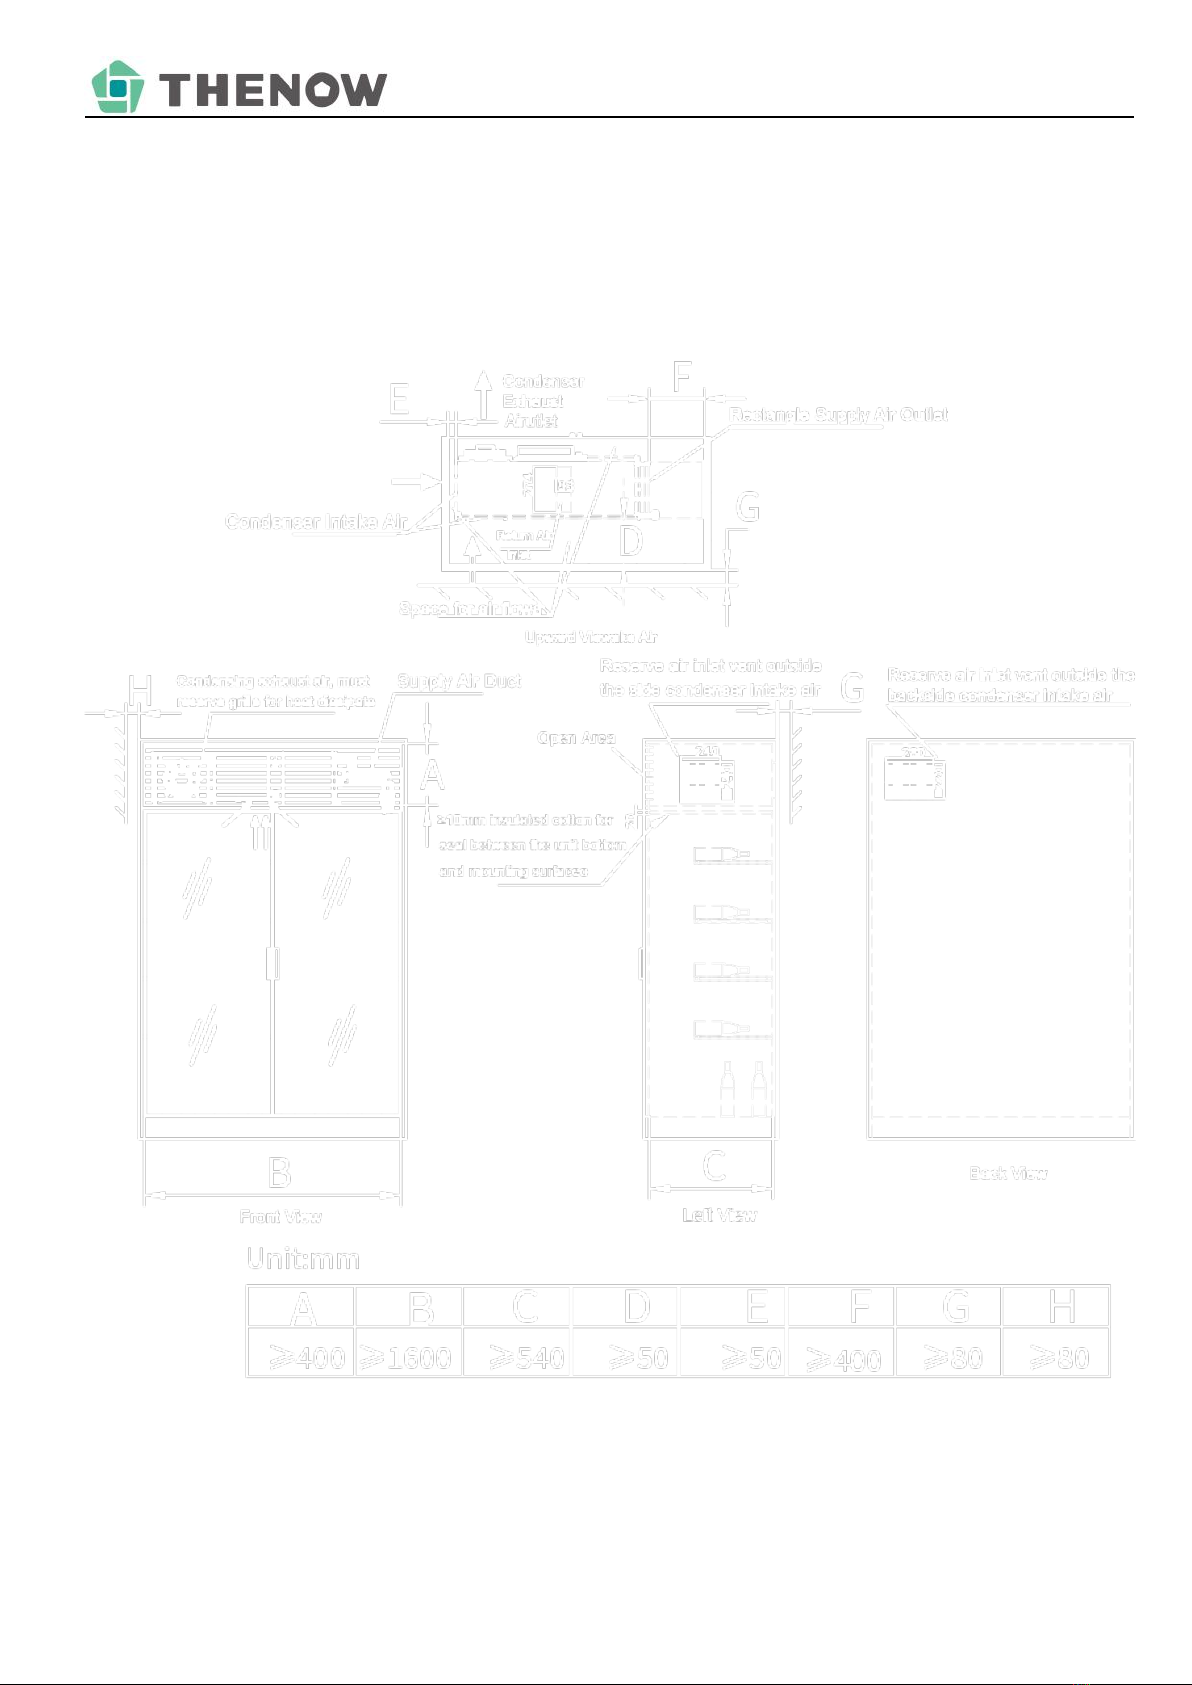
Dimensions HSN-JC5:
Dimensions & Technical Data

7
Dimensions HSN-J15-Z:

8
Technical Data
Model
Unit
HSN-JC5
HSN-J15-Z
Cellar Size (Up to)
m³
5
5
Power
V/HZ
220/50
Cooling
W
440
410
Heating(Electrical)
W
2000
Air Flow(M)
m³/h
170
170
Static Pressure
Pa
30
20
Nosie
dB(A)
44
42
Refrigerant
R134a
Control
PC Full-touch smart control
Temperature
℃
10-18℃, ±2℃
Humidity
℃
/
50~70%, ±5%
Total Power
W
700
2500
Humidifier
Type
/
Wet-film
Humidification
Kg/h
/
1
Size
mm
742*497*310
1176*440*350
Drainage
mm
Self-absorption
Φ20
Cooling capacity on above sheet test conditions:
Cellar inside dry-bulb t=12℃60% Outside dry-bulb t=35℃,wet-bulb t=28℃
Note: There are several factors such as glass,stone,concrete,insulation,ambient temperature,ventilation etc.
which will change the required amount of Kw needed to properly cool your wine room or wine cabinet. We
strongly recommend you contact with us or our distributors beforehand to help you to choose the model matched.
We do not bear the losses caused by the selection errors caused by the above reasons.

9
Pre-installation Inspection
A. Check the outer packing for breakage.
B. Machine model (nameplate), check whether it is consistent with what you ordered.
C. The appearance of the whole machine is intact.
D. Check the below packing details.
HSN-J15-Z Packing Details:
Item No.
Item
Q’ty
Size
Photo
1
Unit
1 set
See the nameplate
2
User Manual
1 pc
A5
3
Control Panel
1 pc
90*90mm
4
Water Inlet
Valve
1 pc
/
5
Head Outside
The Wire
1 pc
Φ14
6
Drain-Pipe
1 pc
Ø20
Length-15cm
Installation and Debugging

10
7
Inlet flange
1 pc
301x120x30mm
8
Screw
4pcs
ST4.2*9.5
9
Hoop
1 pc
Ø22~Ø28
HSN-JC5 Packing Details :
Item No.
Item
Q’ty
Size
Photo
1
Unit
1 set
Refer to the
namplate
2
User Manual
1pc
A5
3
Control Panel
1 pc
90*90mm
4
Controller
Cable
3m
/
Warning: Our company is not responsible for any accident caused by opening the panel and electric control
cabinet without the permission of the company.

11
Installation
Disconnect electric power from the appliance before performing any
maintenance or repairs,failure to do so could result in death or electrical
shock.
Because of potential safety hazards under a certain condition, we strongly recommend against the use of an
extension cord. However, if you still elect to use an extension cord, it is absolutely necessary that it will be a
related national standard LISTED 3-wire grounding type appliance extension cord having a 3- blade grounding
plug and a 3-slot receptacle that will plug into the appliance. The marked rating of the extension cord shall be
220V 15A.
(1) HSN-JC5 Installation Wine Cabinet & Wine Room
JC5 Installation I: Wine Cabinet with Small Space, Internal Fan with Low Speed

12
JC5 Installation II: Wine Cabinet with Large Space, Internal Fan with High Speed

13
JC5 Installation III: Wine Room
14
(2) HSN-J15-Z Wine Cabinet & Wine Room Installation
J15-Z Installation I: Wine Cabinet with Small Space, Internal Fan with Low Speed

15
J15-Z Installation II: Wine Cabinet with Large Space, Internal Fan with High Speed

16
J15-Z Installation III: Wine Room Installation

17
Wine Cabinet Installation Conditions
1. Place the wine cabinet in a properly ventilation location. Otherwise, heat exhausted by the cooling unit will
build up and it will not operate properly.
2. Equipment should install on horizontal ground or platform, tilt angle must not exceed one degrees, platform or
ground should be able to load-bearing unit weight;
3. To keep good ventilation and easy maintenance,requires that the wine cabinet grill can be flexibly
disassembled.
4. Never install the unit in danger areas,such as strong magnetic,steam,dust,heating source,corrosion and
combustible gases etc.
5. Unobstructed airflow to and from the unit is critical to unit’s overall performance and lifespan, make sure there
is a minimum of 50mm(100mm is better) of horizontal clearance in every direction around the unit.
6. Before install the unit, foam tape needs to be placed in the bottom and side of the unit.
7. Working environment: Temperature 5℃-35℃,Humidity RH<80%
8. Recommend air duct: A- Heat-insulating phenolic board, thickness 15~20mm
B- Stainless steel duct, 20mm insulation
9. If the back of the wine cabinet is close to the wall,and there is no space to reserve vents. Please make sure
left intake air vents at the two sides of the condensing intake air, and the larger the better. Meantime, keep at
least 100mm of horizontal clearance in every direction around the unit.
10. To better control the wet-film water inlet flow rate, electromagnetic water valve and ball valve are suggested
to be installed. Otherwise, the water will always be supplied to the machine in a normally open state, which will
cause the equipment to leak and fail to operate. (HSN-J15-Z)
The reference range of valve adjustment opening under the standard pressure of J15-Z is as follows:
Note: Make sure the smooth drainage too.
In order to avoid fire or electric shock hazard, please do not
expose the equipment to damp environment.
Model
HSN-J15-Z
Valve Opening
1/4

18
Online Debugging
Note: Always operate this machine from a 220V 1 phase or 3-phase 380V, 50Hz power source, and the
fluctuation amplitude does not exceed 10%, the junction box capacity meets the equipment electrical using
requirements; Take reference to the internal electrical schematic diagram of the unit, connect the indoor unit and
outdoor unit, and ensure that the unit is effectively grounded.
1.) Power the machine.
2.) Set the operation mode, temperature and humidity (For setting methods, please check the operation section
of the controller in the user manual)
3.) Humidity setting value is 95% (higher than the ambient humidity) and temperature is set at 8 ℃(lower than
the ambient temperature), the setting operation mode is auto. Then cooling, heating and humidification will be
calling automatically according to the setting value.
4.) Keep the machine running at least 30 minutes.
After the machine runs for 30 minutes:
1. Check the alarm record. If all functions work well, no alarm record will be generated.
2. Check the machine for leaks. In case of leakage, first check whether the drainage is smooth. If so, reduce the
opening of the ball valve to reduce the inlet water pressure. Run the machine for half an hour again and check
whether the leakage problem is solved.
3. Check whether the temperature is lower than that when the machine is started. Generally, the coil temperature
is reduced by 5-14℃as the normal range.
4. Check whether the humidity is higher or the same as when the machine is turned on.
5. If the cooling, heating and humidification of the equipment can operate normally and there is no water leakage,
the debugging work is completed.
Note: After transportation or moved, it needs to be allowed to stand for more than 24 hours before it can be
turned on.
19
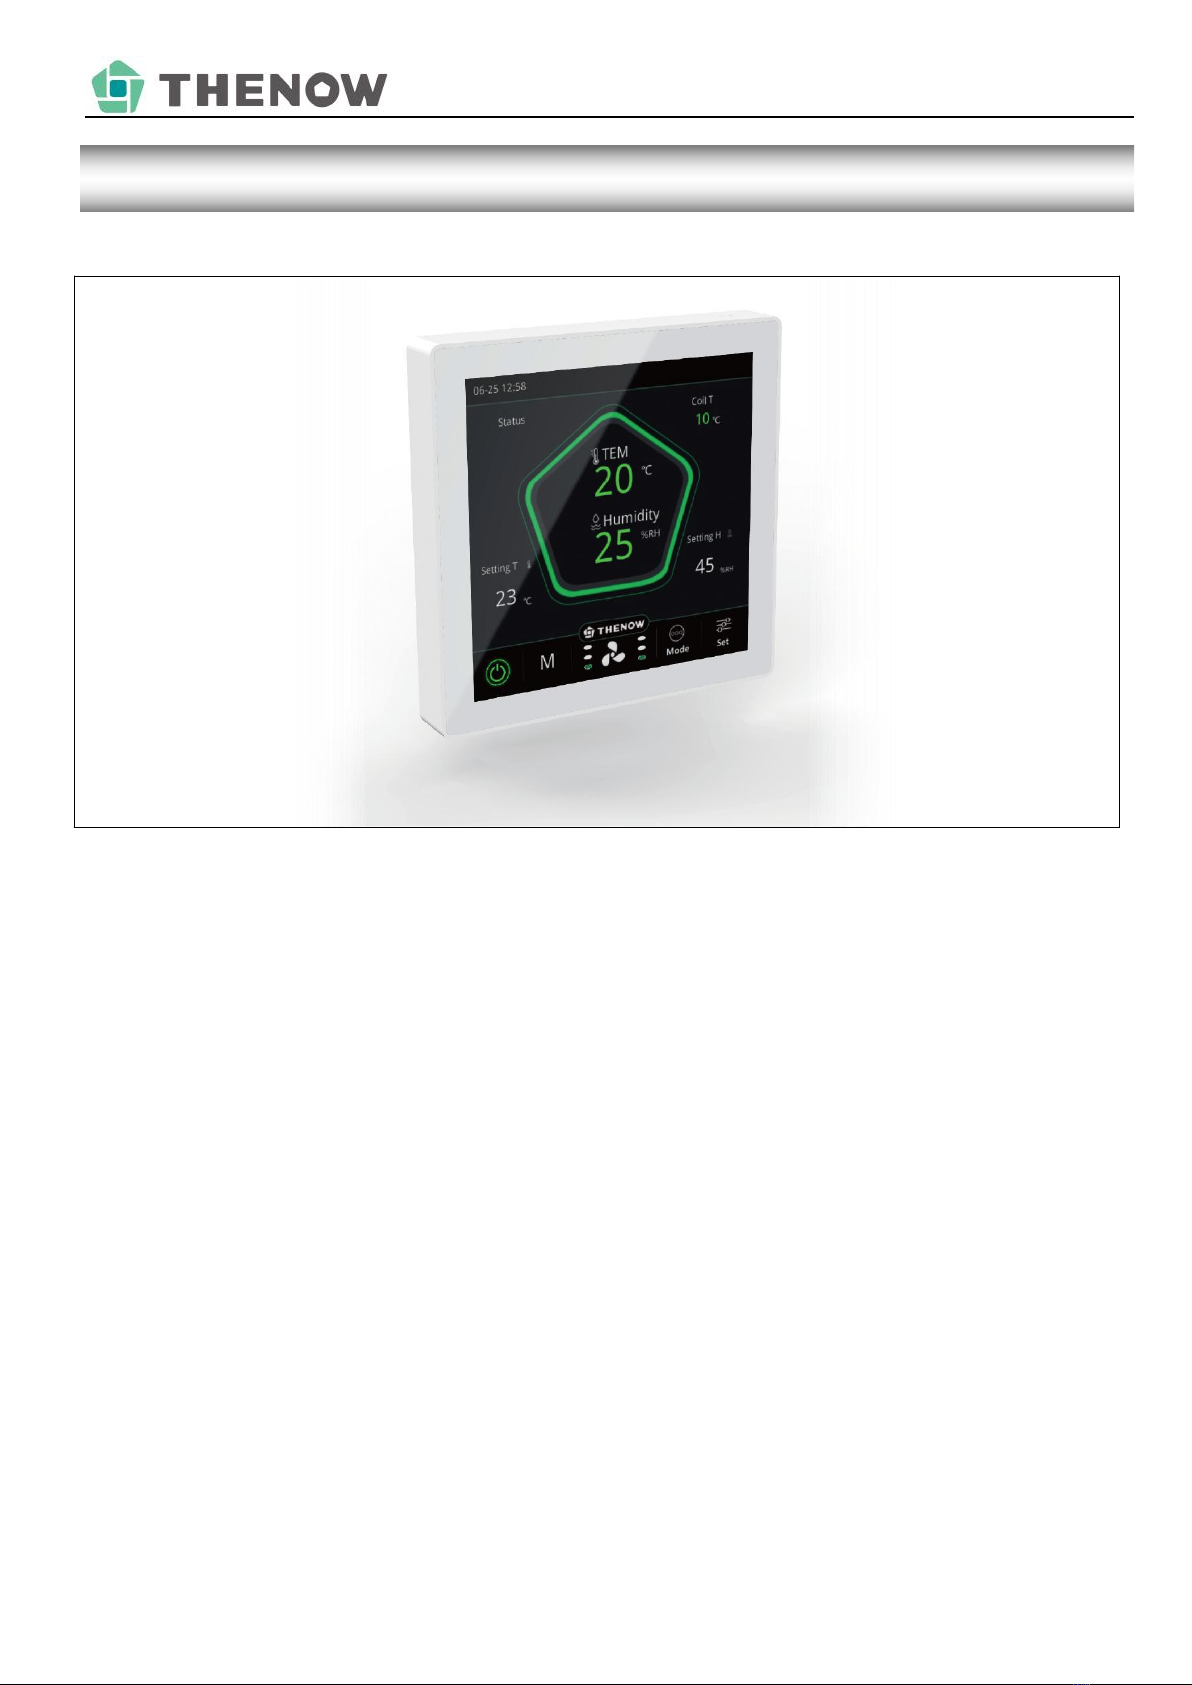
Controller Introduction:
CK-4C-86 series controller is a new type of controller to realize intelligent control of constant temperature and humidity for
a wine cellar and wine cabinet cooling units,which is widely used in precise temperature control places with small volume.
The controller adopts 4-inch large -screen colorful display technology,timing control,automatic/manual control of air flow
speed , automatic operation of the appropriate air flow speed , comfortable energy saving , accurate and reliable.
Functional features:
1. With 4-inch capacitive full-touch display, clear picture and easy to operate.
2. Real-time display of temperature, humidity and clock.
3. Timing control.
4. Fan speed manual/automatic control selection.
5. Multiple operating mode options.
6. Built-in advanced parameter settings,manufacturers can freely set according to different customer needs.
7. Standard 86 mounting bottom case for quick and easy installation.
8. Power off and restart function.
9. Alarm can be remembered.
Introduction of Controller
20
Technical Specifications
Power Supply
PCB:AC220V±10% 50/60HZ
Display:DC12V
Shall Material
Flame retardant ABS+PC
Power
<12W
Pich of Installation
60mm
Size
PCB:123mm×85mm
Display:91mm×90mm
Storage Environment
-10~~70℃5%~~95%RH
Working Condition
-10~~70℃5%~~95%RH
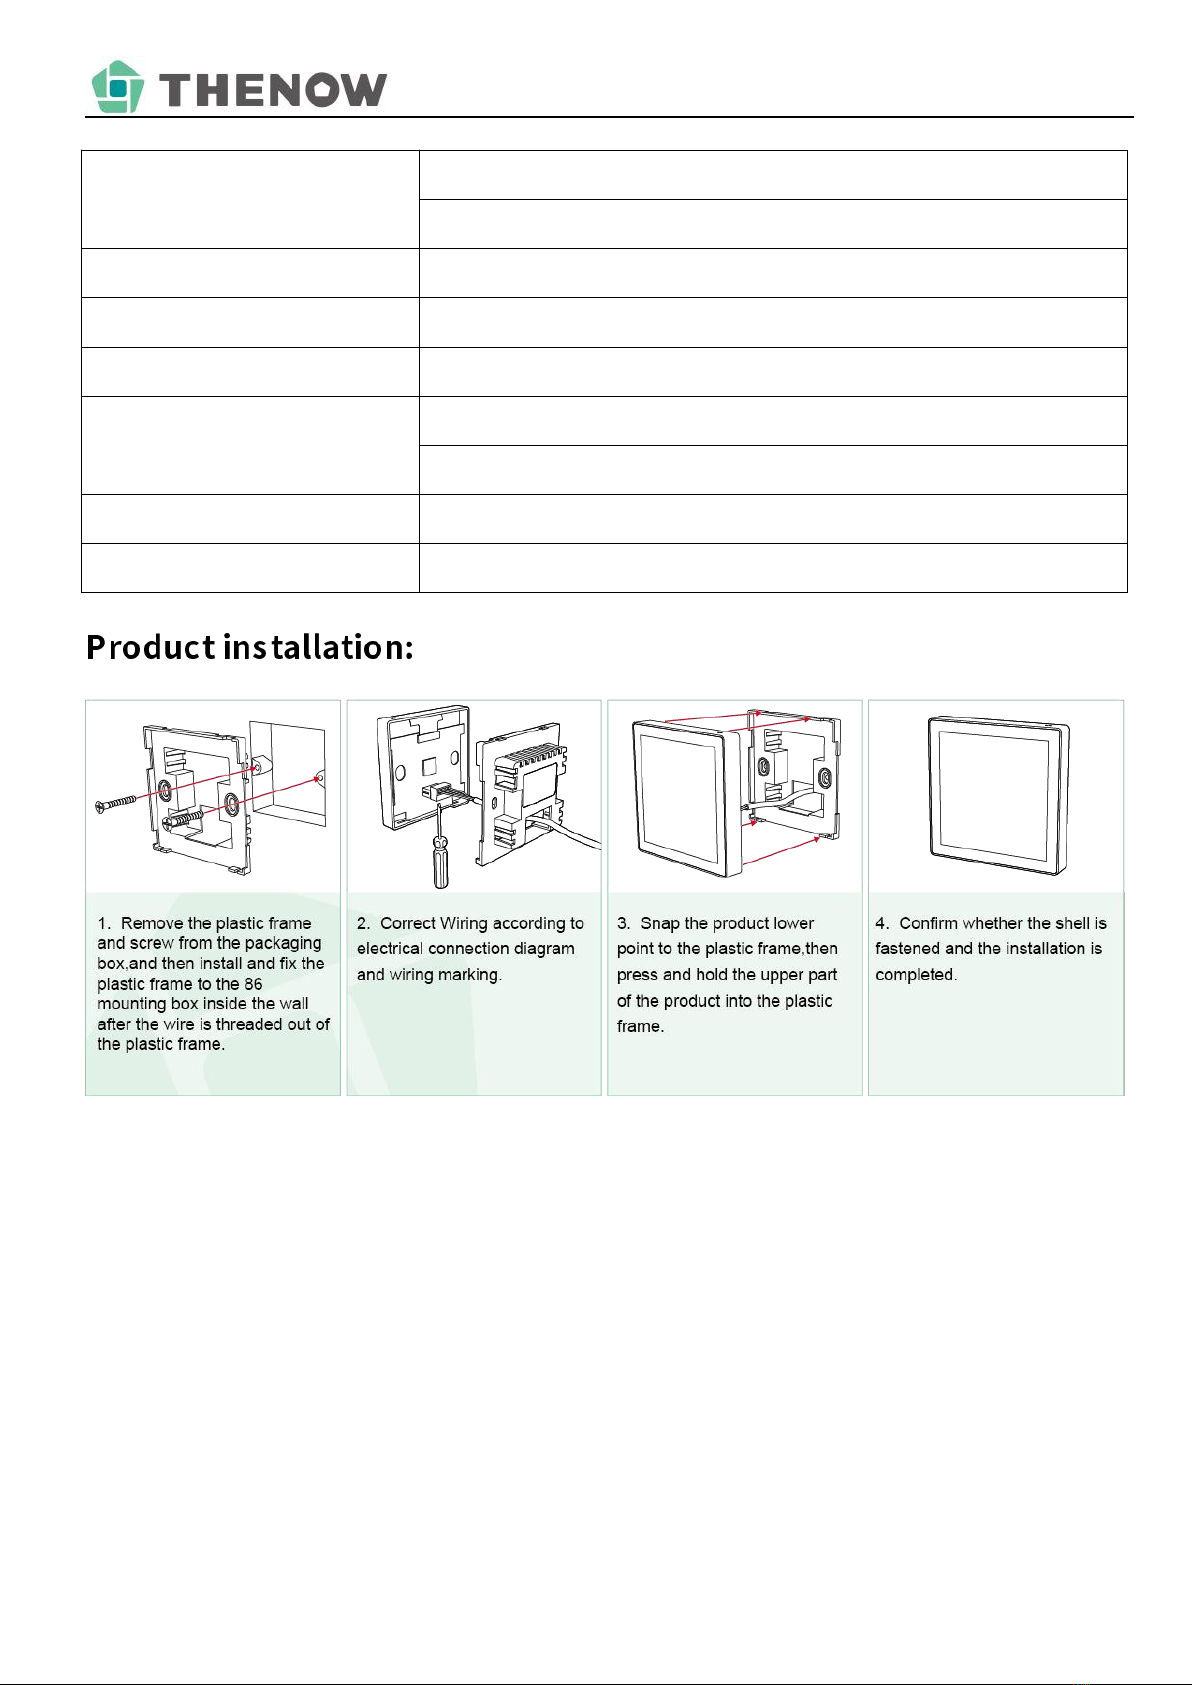
1. Remove the plastic frame and screw from the packaging box,and then install and fix the plastic frame to the 86 mounting
box inside the wall after the wire is threaded out of the plastic frame.
2. Correct wiring according to electrical connection diagram and wiring marking.
3. Snap the product lower point to the plastic frame,then press and hold the upper part of the product into the plastic frame.
4. Confirm whether the shell is fastened and the installation is completed.
This manual suits for next models
1
Table of contents
Other Thenow Wine Cooler manuals


Popular Wine Cooler manuals by other brands

Vinotemp
Vinotemp VT-46TS-2Z owner's manual

AGA marvel
AGA marvel M18SZ Installation, operation and maintenance instructions

Cellartec
Cellartec 1/3 Ton-DS Installation, operation & care manual

Miele
Miele KWT 1601 SF Operating and installation instructions

Electrolux
Electrolux ERW1573AOA user manual

Vinotemp
Vinotemp WINE-MATE VINO2500SSD Installation & operation manual


