THERMOMAXX JNSB-120Y2S User manual

Z 08387_V0
Gebrauchsanleitung
ab Seite 3
Instruction manual
starting on page 11
Mode d'emploi
à partir de la page 19
Handleiding
vanaf pagina 27
DE
GB
NL
FR
08387_de-gb-fr-nl_V0.indb 1 07.05.2013 12:05:52

08387_de-gb-fr-nl_V0.indb 2 07.05.2013 12:05:53

3
Sehr geehrte Kundin, sehr geehrter Kunde,
wir freuen uns, dass Sie sich für dieses Heizgerät entschieden haben. Damit gehören kalte Füße
der Vergangenheit an. Es verfügt über 3 Heizstufen und durch seinen automatischem Schwenk-
mechanismus sorgt es für gleichmäßige Wärmeverteilung.
Wir wünschen Ihnen viel Spaß mit Ihrem neuen Heizgerät.
Sollten Sie Fragen haben, kontaktieren Sie den Kundenservice über unsere Webseite:
www.service-shopping.de
Bitte lesen Sie vor dem ersten Gebrauch des Gerätes die Anleitung sorgfältig durch
und bewahren Sie sie gut auf. Bei Weitergabe des Gerätes ist diese Anleitung mit
auszuhändigen. Hersteller und Importeur übernehmen keine Haftung, wenn die An-
gaben in dieser Anleitung nicht beachtet werden!
Im Rahmen ständiger Weiterentwicklung behalten wir uns das Recht vor, Produkt,
Verpackung oder Beipackunterlagen jederzeit zu ändern.
DE
Inhalt
Bedeutung der Symbole in dieser Anleitung ____________________________ 4
Sicherheitshinweise _____________________________________________ 4
Bestimmungsgemäßer Gebrauch _________________________________________ 4
Verletzungsgefahren __________________________________________________ 4
Aufstellen und Anschließen _____________________________________________ 4
Gebrauch__________________________________________________________ 5
Gewährleistungsbestimmungen __________________________________________ 6
Lieferumfang __________________________________________________ 6
Geräteübersicht________________________________________________ 7
Vor dem ersten Gebrauch ________________________________________ 8
Auspacken _________________________________________________________ 8
Fuß montieren ______________________________________________________ 8
Benutzung ____________________________________________________ 8
Reinigung und Aufbewahrung ______________________________________ 9
Fehlerbehebung ________________________________________________ 9
Technische Daten______________________________________________ 10
Entsorgung __________________________________________________ 10
08387_de-gb-fr-nl_V0.indb 3 07.05.2013 12:05:53

4
Bedeutung der Symbole in dieser Anleitung
Alle Sicherheitshinweise sind mit diesem Symbol gekennzeichnet. Lesen Sie diese
aufmerksam durch und halten Sie sich an die Sicherheitshinweise, um Personen- und
Sachschäden zu vermeiden.
Tipps und Empfehlungen sind mit diesem Symbol gekennzeichnet.
Sicherheitshinweise
Bestimmungsgemäßer Gebrauch
❐Der Artikel ist zum Beheizen von geschlossenen Räumen bestimmt.
❐Das Gerät ist für den Privatgebrauch, nicht für eine gewerbliche Nutzung bestimmt.
❐Nutzen Sie das Gerät nur wie in der Anleitung beschrieben. Jede weitere Verwendung gilt
als bestimmungswidrig.
❐Das Gerät ist nicht dazu bestimmt, mit einer externen Zeitschaltuhr oder einem separa-
ten Fernwirksystem betrieben zu werden.
Verletzungsgefahren
❐Halten Sie Kinder und Tiere vom Gerät und Verpackungsmaterial fern.
❐Dieses Gerät ist nicht dafür bestimmt, durch Personen (einschließlich Kinder) mit ein-
geschränkten sensorischen oder geistigen Fähigkeiten oder mangels Erfahrung und/oder
mangels Wissen benutzt zu werden, es sei denn, sie werden durch eine für ihre Sicherheit
zuständige Person beaufsichtigt oder erhielten von ihr Anweisungen, wie das Gerät zu
benutzen ist.
❐Kinder müssen beaufsichtigt werden, um sicherzustellen, dass sie nicht mit dem Gerät
spielen bzw. sich nicht verbrennen.
❐VERBRENNUNGSGEFAHR! Das Schutzgitter und alle Metallteile auf der Gerätevorder-
seite werden während des Gebrauchs sehr heiß. Nach dem Ausschalten bleiben sie noch
einige Zeit heiß. Fassen Sie das Gerät nur am Tragegriff an, solange die Metallteile heiß sind.
❐Benutzen Sie das Gerät nicht, wenn es beschädigt ist.
Aufstellen und Anschließen
❐Dieses Gerät darf nicht in Räumen mit erhöhter Luftfeuchtigkeit wie zum Beispiel Bade-
zimmern, betrieben werden.
❐Dieses Heizgerät nicht in unmittelbarer Nähe einer Badewanne, einer Dusche oder eines
Schwimmbeckens benutzen.
❐Das Gerät darf nicht unmittelbar unter einer Wandsteckdose aufgestellt werden!
❐Verwenden Sie das Produkt nur in geschlossenen Räumen.
❐Stellen Sie das Gerät immer auf einen trockenen, ebenen, festen und hitzeunemp"ndlichen
Untergrund.
08387_de-gb-fr-nl_V0.indb 4 07.05.2013 12:05:53

5
❐Halten Sie brennbare Materialien, wie z.B. Papier, Stoff, Holz, Kunststoffe, Benzin oder Lö-
sungsmittel von dem Gerät fern. Achten Sie besonders darauf, dass Einrichtungsgegenstände
wie Polstermöbel oder Gardinen einen Mindestabstand von 1 m von der Heizfläche des Gerä-
tes haben. Von der Geräterückseite sollte ein Mindestabstand von 0,5 m eingehalten werden.
Beachten Sie diesen Hinweis auch dann, wenn das Gerät ausgeschaltet ist, damit bei verse-
hentlichem Einschalten keine Gefahr besteht.
❐Dieses Gerät darf nicht in Räumen verwendet werden, in denen sich hochentzündliche
Substanzen (z.B. Benzin, Lacke, Lösungsmittel, Gas) befinden.
❐Schließen Sie das Gerät nur an eine vorschriftsmäßig installierte Steckdose mit Schutzkon-
takten an. Die Steckdose muss auch nach dem Anschließen gut zugänglich sein. Die Netz-
spannung muss mit den technischen Daten des Gerätes übereinstimmen. Verwenden Sie
nur ordnungsgemäße Verlängerungskabel, deren technische Daten mit denen des Gerätes
übereinstimmen.
❐Achten Sie darauf, dass das Gerät und das angeschlossene Netzkabel keine Stolpergefahr
darstellen.
❐Verlegen Sie das Kabel so, dass es nicht gequetscht oder geknickt wird und nicht mit hei-
ßen Flächen in Berührung kommt. Achten Sie darauf, dass sich das Netzkabel stets auf der
Rückseite des Gerätes befindet. Hängen Sie es niemals über das Gerät.
❐Lassen Sie das Gerät nicht fallen und setzen Sie es keinen starken Stößen aus.
Gebrauch
❐Überprüfen Sie das Gerät vor jeder Inbetriebnahme auf Beschädigungen. Wenn das Gerät,
das Kabel oder der Stecker sichtbare Schäden aufweisen, darf das Gerät nicht benutzt
werden.
❐Wenn das Gerät heruntergefallen ist, können Teile im Inneren beschädigt sein, ohne dass
es von außen erkennbar ist. Deshalb muss das Gerät in diesem Fall von einem Fachmann
überprüft werden, bevor es wieder verwendet werden kann.
❐Sollte das Gerät defekt sein, versuchen Sie nicht, das Gerät eigenständig zu reparieren.
Kontaktieren Sie in Schadensfällen den Kundenservice.
❐Verwenden Sie kein zusätzliches Zubehör.
❐Lassen Sie das Gerät nicht ohne Aufsicht eingeschaltet.
❐Schützen Sie das Gerät vor Feuchtigkeit, Tropf- oder Spritzwasser: es besteht die Gefahr
eines elektrischen Schlages. Stellen Sie keine mit Flüssigkeiten gefüllten Gefäße, z.B. Vasen,
auf das Gerät.
❐Ziehen Sie den Netzstecker aus der Steckdose,
– wenn Sie das Gerät über einen längeren Zeitraum nicht verwenden,
– wenn während des Betriebes ein Fehler auftritt,
– vor einem Gewitter,
– bevor Sie es reinigen.
❐Wenn Sie den Netzstecker aus der Steckdose ziehen möchten, ziehen Sie nie am Kabel,
sondern am Stecker. Fassen Sie den Netzstecker nur mit trockenen Händen an.
❐BRANDGEFAHR! Decken Sie das Gerät auf keinen Fall ab. Hängen Sie auf gar keinen Fall
Wäschestücke o. Ä. zum Trocknen über das Gerät.
❐Stecken Sie keine Gegenstände in die Öffnungen des Gerätes.
08387_de-gb-fr-nl_V0.indb 5 07.05.2013 12:05:53

6
❐Sollten doch einmal Flüssigkeiten oder Fremdkörper in das Gerät gelangt sein, ziehen Sie
sofort den Netzstecker. Lassen Sie das Gerät vor einer erneuten Inbetriebnahme von
einer Fachwerkstatt überprüfen.
Gewährleistungsbestimmungen
Von der Gewährleistung ausgeschlossen sind alle Mängel, die durch unsachgemäße Behandlung,
Beschädigung oder Reparaturversuche entstehen. Dies gilt auch für den normalen Verschleiß.
Lieferumfang
• 1 Heizgerät
• 1 Fuß
• 2 Rändelschrauben
• diese Gebrauchsanleitung
08387_de-gb-fr-nl_V0.indb 6 07.05.2013 12:05:53

7
Geräteübersicht
4
13
11
5
12
1 32
8
10
96
7
Schalterposition 1einschalten, 0ausschalten:
1 TURN automatische Schwenkfunktion
2 unteres Heizelement (400 W)
3 oberes Heizelement (400 W)
4 POWER mittleres Heizelement
(400 W) und Hauptschalter zum Ein-
und Ausschalten des Gerätes
Die Funktionen 1bis 3können nur dann ak-
tiviert werden, wenn der POWER-Schalter
auf 1steht.
5 Schutzgitter
6 Sicherheitsschalter (schaltet das Gerät
aus, wenn es nicht gerade auf einer ebe-
nen Fläche steht)
7 Kabelhalterung
8 Netzkabel
9 Sockel
10 Rändelschrauben
11 Fuß
12 Heizelemente
13 Tragegriff auf der Rückseite
08387_de-gb-fr-nl_V0.indb 7 07.05.2013 12:05:53

8
Vor dem ersten Gebrauch
Bevor Sie das Gerät benutzen können, müssen Sie:
• den Lieferumfang auspacken,
• den Fuß am Gehäuse anbringen.
Auspacken
ACHTUNG!
❐Halten Sie Kinder und Tiere vom Verpackungsmaterial fern. Es besteht Erstickungsgefahr!
• Packen Sie alle Teile aus und überprüfen Sie den Lieferumfang auf Vollständigkeit (siehe Ab-
schnitt „Lieferumfang“) und Transportschäden. Falls die Bestandteile Schäden aufweisen
sollten, verwenden Sie diese nicht(!), sondern kontaktieren Sie unseren Kundenservice.
Fuß montieren
ACHTUNG!
❐Achten Sie bei der Montage darauf, dass sich das Netzkabel auf der Rückseite des Gerätes
be"ndet.
1. Legen Sie das Gerät mit dem Schutzgitter nach oben auf einen Tisch.
2. Schrauben Sie ggf. die beiden Rändelschrauben auf der Geräteunterseite ab.
3. Ziehen Sie das Netzkabel durch die Öffnung des Fußes und legen Sie es in die Aussparung.
4. Stecken Sie den Fuß auf den Sockel auf der Geräteunterseite.
5. Schrauben Sie den Fuß mit den beiden Rändelschrauben am Gerät fest.
6. Drücken Sie das Kabel in die Kabelhalterung.
Benutzung
ACHTUNG!
❐Halten Sie brennbare Materialien von dem Gerät fern. Achten Sie darauf, dass Einrich-
tungsgegenstände wie Polstermöbel oder Gardinen einen Mindestabstand von 1 m von
der Heiz#äche des Gerätes haben. Von der Geräterückseite sollte ein Mindestabstand von
0,5 m eingehalten werden.
❐Fassen Sie das Gerät während des Betriebs nur am Tragegriff an. Beachten Sie, dass das
Schutzgitter und alle Metallteile auf der Gerätevorderseite nach dem Ausschalten noch
einige Zeit heiß bleiben.
1. Stellen Sie das Gerät auf einen trockenen, ebenen, festen und hitzeunemp"ndlichen Un-
tergrund.
2. Stecken Sie den Netzstecker in eine gut zugängliche Steckdose. Achten Sie darauf, dass
sich das Netzkabel stets auf der Rückseite des Gerätes be"ndet.
08387_de-gb-fr-nl_V0.indb 8 07.05.2013 12:05:54

9
3. Stellen Sie den POWER-Schalter auf 1, um das Gerät und das mittlere Heizelement
(400 W) einzuschalten.
4. Über die entsprechenden Tasten könne Sie das obere und untere Heizelement mit je
400 W dazuschalten.
5. Stellen Sie den TURN-Schalter auf 1, wenn sich das Heizgerät automatisch nach links und
rechts drehen soll, um die Wärme gleichmäßig zu verteilen.
6. Zum Ausschalten stellen Sie die jeweiligen Schalter auf 0. Um das Gerät ganz auszuschal-
ten, kippen Sie den POWER-Schalter auf 0. Ziehen Sie nach dem Gebrauch den Netz-
stecker.
HINWEIS: Das obere und untere Heizelement sowie die Drehfunktion können nur dann
aktiviert werden, wenn der POWER-Schalter auf 1steht.
Reinigung und Aufbewahrung
ACHTUNG!
❐Ziehen Sie vor dem Reinigen immer den Netzstecker und lassen Sie das Gerät abkühlen.
❐Tauchen Sie das Gerät, das Netzkabel und den Stecker niemals in Wasser.
❐Verwenden Sie zum Reinigen keine ätzenden oder scheuernden Reinigungsmittel. Diese
können die Ober!äche beschädigen"
• Stauben Sie das Gerät bei Bedarf ab oder reinigen Sie es ggf. mit einem feuchten Tuch.
Anschließend vollständig mit einem trockenen Tuch nachwischen.
• Bewahren Sie das Gerät vor Staub geschützt an einem trockenen Ort auf.
Fehlerbehebung
Sollte das Gerät nicht ordnungsgemäß funktionieren, überprüfen Sie bitte zunächst, ob Sie ein
Problem selbst beheben können. Kontaktieren Sie ansonsten den Kundenservice.
Versuchen Sie nicht, ein defektes Gerät eigenständig zu reparieren"
Problem mögliche Ursache /Lösung
Dem Gerät entweicht
bei der Erstbenutzung
ein unbekannter Geruch.
Es be#nden sich Produktionsrückstände in/am Gerät.
Dies ist normal und tritt später nicht mehr auf. Sorgen Sie da-
bei für einen gut durchlüfteten Raum, z.B. über weit geöffnete
Fenster"
Das Gerät funktioniert
nicht.
• Be#ndet sich der POWER Schalter auf Position 1?
• Steckt der Netzstecker richtig in der Steckdose?
• Ist die Steckdose defekt? Probieren Sie eine andere Steckdose.
• Überprüfen Sie die Sicherung Ihres Netzanschlusses.
• Der Sicherheitsschalter wurde ausgelöst. Überprüfen Sie, ob
das Gerät gerade auf einer ebenen Fläche steht.
08387_de-gb-fr-nl_V0.indb 9 07.05.2013 12:05:55

10
Technische Daten
Modell: JNSB-120Y2S
Artikelnummer: Z 08387
Spannungsversorgung: 220-240V~ 50Hz
Leistung: 1200 W
Schutzklasse: 1
Entsorgung
Das Verpackungsmaterial ist wiederverwertbar. Entsorgen Sie die Verpackung um-
weltgerecht und führen Sie sie der Wertstoffsammlung zu.
Entsorgen Sie das Gerät umweltgerecht. Entsorgen Sie es an einem Recyclinghof für
elektrische und elektronische Altgeräte. Nähere Informationen erhalten Sie bei Ihrer
örtlichen Gemeindeverwaltung.
Kundenservice/Importeur:
DS Produkte GmbH, Am Heisterbusch 1, 19258 Gallin, Deutschland
Tel.: +49 (0)38851 314650 *)
*) 0 – 30 Ct./ Min. aus dem dt. Festnetz, Mobilfunkpreise können abweichen.
Alle Rechte vorbehalten.
08387_de-gb-fr-nl_V0.indb 10 07.05.2013 12:05:55

11
Dear customer,
We are delighted that you have decided on this halogen heater. Thanks to this device, cold
feet are a thing of the past. With its 3 heat settings and its automatic oscillating mechanism, it
ensures that heat is evenly distributed.
We wish you plenty of enjoyment with your new halogen heater.
If you have any questions, contact the customer service department via our website:
www.service-shopping.de
Please carefully read through the operating instructions prior to using the device for
the first time and store these instructions in a safe place. The instructions are to ac-
company the product when it is passed on to others. The manufacturer and importer
assume no liability in the event the data in these instructions has not been observed!
We reserve the right to modify the product, packaging or enclosed documentation at
any time in conjunction with our policy of continuous development.
GB
Contents
Meaning of the Symbols in these Instructions__________________________ 12
Safety Instructions _____________________________________________ 12
Proper Use _______________________________________________________ 12
Danger of injury ____________________________________________________ 12
Setup and Connection _______________________________________________ 12
Use _____________________________________________________________ 13
Warranty provisions _________________________________________________ 13
Product Contents _____________________________________________ 14
Device Overview______________________________________________ 15
Prior to first use ______________________________________________ 16
Unpacking the unit __________________________________________________ 16
Mounting the base __________________________________________________ 16
Use________________________________________________________ 16
Cleaning and Storage ___________________________________________ 17
Troubleshooting_______________________________________________ 17
Technical Data ________________________________________________ 18
Disposal ____________________________________________________ 18
08387_de-gb-fr-nl_V0.indb 11 07.05.2013 12:05:55

12
Meaning of the Symbols in these Instructions
All safety instructions are marked with this symbol. Read these instructions carefully
and follow them to avoid injury to persons or damage to property.
Tips and recommendations are marked with this symbol.
Safety Instructions
Proper Use
❐The product is designed for heating enclosed rooms.
❐This device is for personal use only and is not intended for commercial applications.
❐The device must only be used as described in the operating instructions. Any other use is
deemed to be improper.
❐The device is not designed to be operated with an external timer or a separate remote
control system.
Danger of injury
❐Please keep the packaging and the device out of the reach of children and pets.
❐This device should not be used by people (including children) with impaired sensory or
mental faculties or who do not have adequate experience and/or knowledge of such de-
vices, unless they are supervised by a person responsible for their safety, or have received
instructions from such a person on how to use the device.
❐Children must be supervised in order to ensure that they do not play with the device or
that they do not get burned.
❐DANGER OF BURNS! The protective grate and all metal parts on the front of the device
become very hot during use. After the device is turned off, they still remain hot for some
time. Only take hold of the unit by the carrying handle as long as the metal parts are still
hot.
❐Do not use the device in case of visible signs of damage.
Setup and Connection
❐The device may not be used in rooms with a high humidity such as washrooms.
❐This heater may not be used close to bath tubs, showers, or swimming pools.
❐The device may not be placed directly beneath a socket!
❐Only use the product in enclosed areas.
❐Always place the device on a dry, level, "rm, and heat resistant surface.
❐Keep #ammable materials such as paper, fabric, wood, plastics, petrol or solvents away
from the device. In particular, ensure that furnishings such as upholstered furniture or cur-
08387_de-gb-fr-nl_V0.indb 12 07.05.2013 12:05:55

13
tains are at a distance of at least 1 m from the heating surface of the device. There should
be at least 0.5 m of space behind the device. Please ensure that this is also the case when
the device is turned off so no risk arises if the device is accidentally activated.
❐This device may not be used in rooms containing highly !ammable substances (e. g. petrol,
paints, solvents, gas).
❐Only connect the device to a properly installed socket with protective ground contacts.
The socket must also be easily accessible after the device has been connected. The mains
voltage must comply with the device’s technical data. Only use proper extension cords,
whose technical data comply with those of the device.
❐Ensure that the device and the connected mains cord do not represent a tripping hazard.
❐Lay the cord such that it is not crushed or kinked and such that it does not come into
contact with hot surfaces. Ensure that the mains cord is always located on the back of the
device. Never hang it over the device.
❐Do not allow the device to fall and do not subject it to strong banging.
Use
❐Check the device for damages prior to each usage session. If the device, the cord or the
plug exhibit visible damages, the device may not be used.
❐If the device has fallen down, parts on the inside may have been damaged as a result with-
out this being apparent from the outside. For this reason, it is absolutely necessary that the
device is inspected by a quali"ed professional before it can be used again.
❐If the device is defective, do not attempt to repair it yourself. In case of damage, contact
our customer services department.
❐Do not use any additional accessories.
❐Do not leave the device on when unattended.
❐Protect the device against moisture, dripping water or being splashed. The risk of elec-
trocution exists. Do no place any containers "lled with liquids, e. g. vases, on the device.
❐Remove the mains plug from the socket
– if you do not use the device for a prolonged period of time,
– if a fault occurs during operation,
– before a storm,
– before you clean it.
❐If you wish to remove the mains plug from the socket, do not pull on the cable, but on the
plug. Only take hold of the mains plug when your hands are dry.
❐FIRE HAZARD! Do not in any case cover the device. Do not in any case hang laundry or
the like over the device in order to dry it.
❐Do not insert any objects in the openings on the device.
❐If any liquids or foreign objects do end up in the device, immediately disconnect the mains
plug. Before restarting the device, have it inspected by a qualified workshop.
Warranty provisions
Any defects caused by improper use, damage, or attempts at repair by third parties are exclud-
ed from the warranty. This also applies to normal wear and tear of the individual components.
08387_de-gb-fr-nl_V0.indb 13 07.05.2013 12:05:55

14
Product Contents
• 1 heater
• 1 base
• 2 knurled screws
• this instruction manual
08387_de-gb-fr-nl_V0.indb 14 07.05.2013 12:05:55

15
Device Overview
4
13
11
5
12
1 32
8
10
96
7
Switch position 1active and 0deactivate:
1 TURN automatic oscillation function
2 bottom heating element (400 W)
3 top heating element (400 W)
4 POWER middle heating element
(400 W) and main switch for activating
and deactivating the device
The functions from 1to 3can only be ac-
tivated when the POWER switch has been
set to I.
5 Protective grate
6 Safety switch (switches the device off if it
is not positioned levelly on a !at surface)
7 Mains cord bracket
8 Mains cord
9 Connector base
10 2 knurled screws
11 Base
12 Heating elements
13 Carrying handle on the backside
08387_de-gb-fr-nl_V0.indb 15 07.05.2013 12:05:55

16
Prior to first use
Before you use the product, you must:
• unpack the items supplied,
• mount the base.
Unpacking the unit
PLEASE NOTE!
❐Keep children and animals away from the packaging material. There is a danger of suf-
focation!
• Unpack the device and the accessories. Ensure that all product contents are present (see
section “Product Contents”) and check for any damages from transport. Should you iden-
tify any transport damages, please promptly consult the customer service.
Mounting the base
PLEASE NOTE!
❐When mounting, ensure that the mains cord is always located on the back of the device.
1. Place the device on a table with the protective grate facing up.
2. If necessary, screw off the two knurled screws on the bottom of the device.
3. Pull the mains cord through the opening on the base and insert it in the opening.
4. Place the base on the connector base on the bottom of the device.
5. Tighten the base on the device with the two knurled screws.
6. Press the cord into the bracket.
Use
PLEASE NOTE!
❐Keep "ammable materials away from the device. Ensure that furnishings such as uphol-
stered furniture or curtains are at a distance of at least 1 m from the heating surface of the
device. There should be at least 0.5 m of space behind the device.
❐Only hold the device by the handle during operation. Keep in mind that the protective
grate and metal parts on the front of the device may still be hot for some time after be-
ing deactivated.
1. Always place the device on a dry, "at, #rm and heat resistant surface.
2. Insert the mains plug in an easily accessible socket. Ensure that the mains cord is always
located on the back of the device.
3. Set the POWER switch to Iin order to activate the device and the intermediate heating
element (400 W).
08387_de-gb-fr-nl_V0.indb 16 07.05.2013 12:05:57

17
4. Using the corresponding keys, you can additionally activate the top and bottom heating
element, each with 400 W.
5. Set the TURN switch to I and the heater will automatically oscillate from left to right in
order to evenly distribute the heat.
6. To turn the device off, set the respective switch to 0. To completely turn off the device,
set the POWER switch to 0. After use, disconnect the mains plug.
PLEASE NOTE: It is only possible to activate the top and bottom heating element and the
oscillation function once the POWER switch has been set to I.
Cleaning and Storage
PLEASE NOTE!
❐Before cleaning, always disconnect the mains plug and let the device cool off.
❐Never immerse the device, the mains cord or the plug in water.
❐Do not use any corrosive or abrasive cleaning agents to clean the appliance. They could
damage the unit.
• If necessary, dust off the device or clean it with a damp cloth. Then wipe it off completely
with a dry cloth.
• Store the device in a dry place that is protected against dust.
Troubleshooting
If the device should stop working properly, !rst check whether you are able to correct the
problem yourself. Otherwise, contact our Customer Service department.
Do not try to repair a faulty device yourself"
Problem Possible cause/solution
When using the device for the
!rst time, it is emitting an un-
known odour.
There is still production residue in/on the device.
This is normal and no longer occurs later on. In this case,
ensure that the room is well ventilated e. g. by opening
windows all the way"
The unit is not functioning.
• Is the POWER switch set to I?
• Has the power plug been correctly inserted in the
socket?
• Is the socket defective? Try another socket.
• Check the fuse for your mains connection.
• The safety switch has been thrown. Check whether
the device is in a level position on a level surface.
08387_de-gb-fr-nl_V0.indb 17 07.05.2013 12:05:57

18
Technical Data
Model: JNSB-120Y2S
Article number. Z 08387
Voltage supply: 220-240V~ 50Hz
Power: 1200 W
Protection class: 1
Disposal
The packaging can be recycled. Please dispose of it in an environmentally friendly
manner and take it to a recycling centre.
Dispose of the device in an environmentally friendly manner. Dispose of it at a recy-
cling centre for used electrical and electronic devices. You can obtain more informa-
tion from your local authorities.
Customer service/importer:
DS Produkte GmbH, Am Heisterbusch 1, 19258 Gallin, Germany
Tel.: +49 (0)38851 314650 *)
*) Calls subject to a charge.
All rights reserved.
08387_de-gb-fr-nl_V0.indb 18 07.05.2013 12:05:57

19
Chère cliente, cher client,
Nous nous réjouissons que vous ayez décidé d’acheter cet radiateur halogène. Avec cet appa-
reil, •nis les pieds froids. Il dispose de 3 niveaux de chauffage et grâce à son mécanisme auto-
matique de pivotement, il permet de répartir uniformément la chaleur.
Nous souhaitons que votre nouveau radiateur halogène vous donne entière satisfaction.
Pour toute question, contactez le service après-vente à partir de notre site Internet :
www.service-shopping.de
Avant d’utiliser pour la première fois ce produit, veuillez lire attentivement ce mode
d’emploi et le conserver précieusement. Si vous cédez le produit à un tiers, veuillez
également lui remettre ce mode d’emploi. Le fabricant et l’importateur déclinent
toute responsabilité si les indications de ce mode d’emploi ne sont pas respectées !
Dans le cadre du développement continuel de nos produits, nous nous réservons le
droit de modi•er à tout moment le produit, son emballage ainsi que la documentation
jointe.
FR
Sommaire
Signi•cation des symboles contenus dans ce mode d’emploi _______________ 20
Consignes de sécurité __________________________________________ 20
Utilisation adéquate _________________________________________________ 20
Risques de blessure _________________________________________________ 20
Montage et branchement _____________________________________________ 20
Utilisation ________________________________________________________ 21
Dispositions de garantie ______________________________________________ 22
Contenu de la livraison__________________________________________ 22
Vue générale de l’appareil ________________________________________ 23
Avant la première utilisation ______________________________________ 24
Déballage_________________________________________________________ 24
Monter le pied _____________________________________________________ 24
Utilisation ___________________________________________________ 24
Nettoyage et rangement_________________________________________ 25
Dépannage __________________________________________________ 25
Données techniques____________________________________________ 26
Mise au rebut ________________________________________________ 26
08387_de-gb-fr-nl_V0.indb 19 07.05.2013 12:05:57

20
Signification des symboles contenus dans ce mode d’emploi
Toutes les consignes de sécurité sont marquées de ce symbole. Veuillez lire attentive-
ment et entièrement ces consignes et tenez-vous en aux consignes de sécurité pour
éviter les dommages corporels et matériels.
Tous les conseils et recommandations sont caractérisés par ce symbole.
Consignes de sécurité
Utilisation adéquate
❐L’appareil est destiné à chauffer dans des locaux fermés.
❐L’appareil est conçu pour un usage privé, pas pour une utilisation commerciale.
❐Utilisez l’appareil uniquement comme la description du mode d’emploi. Toute autre utilisa-
tion est considérée comme contraire aux dispositions.
❐Cet article n‘a pas été conçu pour une utilisation par minutérie externe ou partelecontrol
system.
Risques de blessure
❐Ne laissez pas l’appareil ni les emballages à la portée des enfants ou des animaux.
❐Cet appareil n’est pas destiné à être utilisé par des personnes (y compris des enfants) ayant
des capacités physiques, sensorielles ou mentales restreintes ou ayant un manque d’expé-
rience et/ou un manque de connaissance, sauf si elles sont surveillées par une personne
responsable de leur sécurité ou si elles ont reçu de celle-ci une instruction sur la manière
d’utiliser l’appareil.
❐Les enfants doivent être surveillés pour s’assurer qu’ils ne jouent pas avec l’appareil ou
qu’ils ne se brûlent pas.
❐RISQUE DE BRÛLURE ! La grille de protection et toutes les pièces métalliques sur le
devant de l’appareil sont très chaudes durant l’utilisation. Après avoir arrêté l’appareil,
elles restent chaudes encore un certain temps. Ne saisissez l’appareil que par la poignée
tant que les parties métalliques sont encore chaudes.
❐N’utilisez pas l’appareil si l’appareil montre des dommages visibles.
Montage et branchement
❐Cet appareil ne doit pas fonctionner dans des locaux à forte humidité, comme par exemple
des salles de bains.
❐Ce radiateur ne doit pas être utilisé à proximité d’une baignoire, d’une douche ou d’un
bassin.
❐Ne placez pas l’appareil directement au dessous d’une prise électrique.
❐Utilisez le produit uniquement dans des pièces fermées.
❐Posez toujours l’appareil sur une surface sèche, plate, solide et résistante à la chaleur.
08387_de-gb-fr-nl_V0.indb 20 07.05.2013 12:05:57
Table of contents
Languages:
Popular Heater manuals by other brands
Smartgen
Smartgen HWP40-3 user manual
EOS
EOS Bi-O Mat W Assembly and operating instruction

Cedarbrook
Cedarbrook Designer 4.5S Installation and operating instructions
Ceramicx
Ceramicx HERSCHEL ASPECT XL2 Original Installation & Operating Instructions

Dimplex
Dimplex PLXE Series Installation and operating instructions
Steba
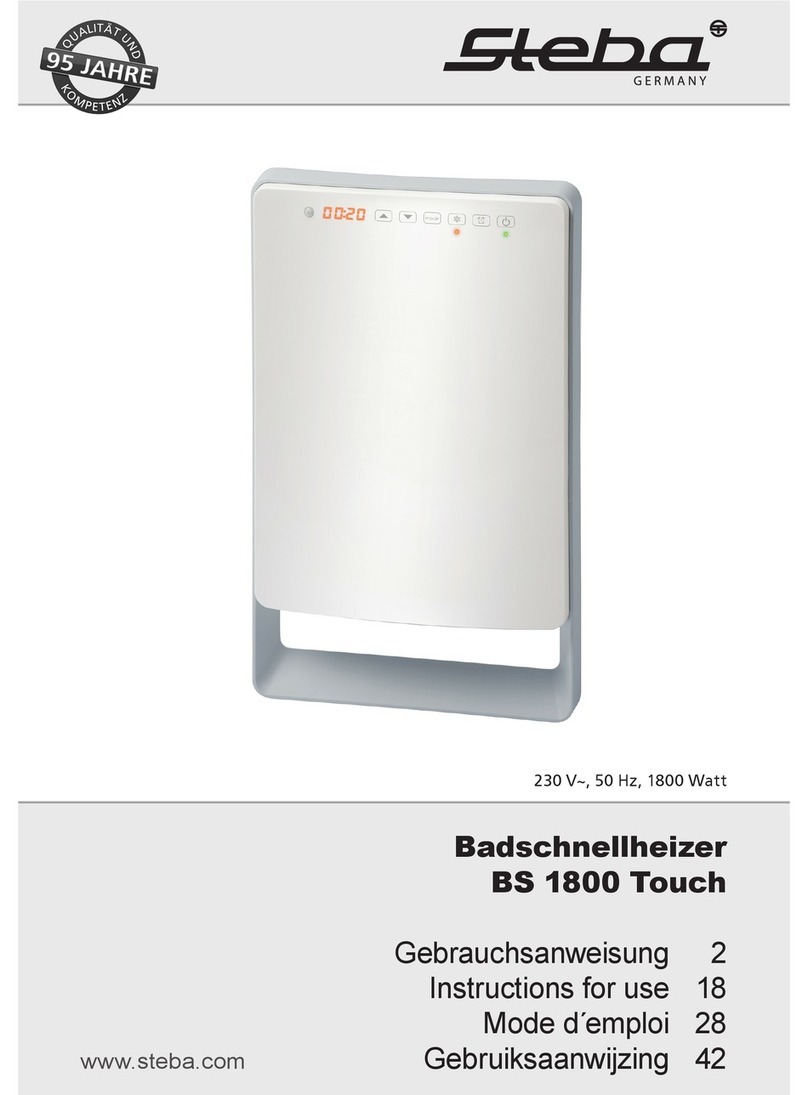
Steba BS 1800 Touch Instructions for use
