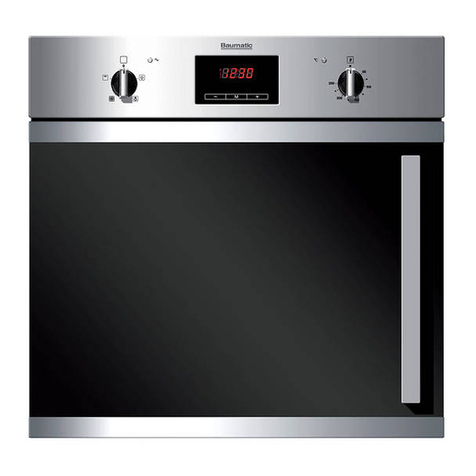
Think Appliances BAO9038 Operating instructions

COD. 1230000272 Ed. 0
Oven
Instructions for use, maintenance and
installation
Backofen
Gebrauchs-, instandhaltungs- und
installierungsanweisungen
Four
Mode d’emploi, entretien et installation
Forno
Istruzioni d’uso, manutenzione ed
installazione
Horno
Instrucciones de uso, manutención y
instalación
Forno
Instruções de uso, manutenção e
instalação
Oven
Gebruiksaanwijzing en instructies voor
onderhoud en installatie
BAO9038
USER AND INSTALLATION
INSTRUCTIONS

2
3
4
5
6
6
7-8
9
9
9
10
11
11
12
2
3
4
5
6
6
7-8
9
9
9
10
11
11
12
Table of Contents
Welcome to Think Appliances letter 3
Warning and safety instructions 4-7
Technical specifications 7
Control panel 8
Description of the cooking functions 9-10
Using the grill 11
Using the spit 11
Electronic programmer 12-13
Cleaning the removable glass panel 14
Removing the oven door 14
Replacing the bulb 14
Cleaning and maintenance 15
Instructions for building in 16-17

Dear Customer,
Congratulations on purchasing your new product from Think Appliances.
To register your parts and labour warranty (some conditions apply please refer to your
warranty card for more details) please contact out Customer Care team on:
1800 444 357
Our Customer Care centre is there to ensure you get the most out of your appliance. For
example, should you want to learn more about recommended cooking temperatures, the
various cooking functions available, how to set and program your LED clock, and importantly
taking care of your appliance when cleaning, please call us because we are here to help you.
It is important that you read through the following use and care manual thoroughly to
familiarize yourself with the installation and operation requirements of your appliance to
ensure optimum performance.
We also carry a complete range of spare parts for all Think products. For all your spare parts
enquiries please contact our team at Pronto Parts on:
1300 306 973
Again, thank you for choosing an appliance brought to you by Think Appliances and we look
forward to being of service to you.
Kind regards
Management
Think Appliances

DECLARATION OF CE COMPLIANCE
This appliance is in compliance with the following European Directives:
93/68 : General regulations
2006/95/CE : Concerning low tensions
89/336/CEE : Electromagnetic compatibility
CE Regulation n° 1935/2004
:
this appliance is suitable to come in contact with food products.
This appliance conforms to Australian Standards AS/NZS60335, parts 1 and 2.6 .
WARNING
To ensure the oven shelves operate safely, correct placement of the shelves between the side rails
(items 1 to 4) is imperative. This will ensure that during removal of the shelf or tray, hot food
items should not slide out completely.
4

IMPORTANT NOTE –
WARNING AND SAFETY INSTRUCTIONS
This appliance complies with all current European safety
legislation, however Baumatic do wish to emphasise that
compliance does not remove the fact that the appliance surfaces
will become hot during use and retain heat after operation.
Baumatic advise that this appliance is not intended for use by young
children or infirm persons unless they have been adequately supervised
by a responsible person to ensure that they can use the appliance
safely. Young children should be supervised to ensure they do not
play with the appliance. If it is necessary for younger family
members to be in the kitchen, please ensure that they are kept under
close supervision at all times. During use, the appliance becomes hot.
Care should be taken to avoid touching heating elements inside the oven.
Do not place heavy objects on or lean on the oven door when open
as this can cause damage to the hinges.
Do not leave heated oil or fat unattended as there is a risk of fire.
Do not place pans or baking trays on the bottom of oven cavities or
line any part of the oven cavity with aluminium foil.
Do not allow electrical fittings or cables to be in contact with hot
areas of the appliance.
Do not use the appliance for space heating or to dry clothes.
Do not install the appliance next to curtains or soft furnishings.
Do not attempt to lift or move cooking appliances by pulling on any
door or handle as this can cause damage.
Always use oven gloves when moving food in or out of the oven cavity.
Warning: this appliance must be earthed.
Do not pour water directly into the inside of a hot oven:
the enamel coating could be damaged.
Before any cleaning operation inside the oven, wait until it has cooled
down.
Do not use a steam cleaner with this appliance.
WARNING: accessible parts will become hot when in use.
To avoid burns and scalds children should be kept away.
5

THIS PRODUCT WAS DESIGNED FOR HOME USE.
THE MANUFACTURER WILL NOT BE HELD LIABLE FOR DAMAGE TO
PERSONS OR PROPERTY CAUSED BY IMPROPER INSTALLATION, OR BY
IMPROPER, WRONG OR SENSELESS USE.
WARNING: IN CASE OF DISASSEMBLY, MAINTENANCE AND CLEANING OF
THE APPLIANCE, BE CAREFUL SOME PARTS COULD BE SHARP.
PLEASE USE SUITABLE PREVENTION AND PROTECTION EQUIPMENT
(GLOVES, ECT.).
In case of a failure in operation or an indispensable repair job, ask for the intervention of
the customer technical service centre.
If the oven shows visible signs of damage, do not use it.
Unplug it and contact the customer technical service centre.
T
he oven must be unplugged as soon as an operating problem is discovered.
Make sure the power cord of the appliance is not crushed by the oven door as this may
damage the electrical insulation.
If the power cord has been damaged, it must be replaced by the technical service centre in
order to avoid the creation of hazardous situations.
Before closing the oven door, make sure there are no foreign bodies or pets inside the
oven.
Do not place heat-sensitive or flammable materials in the oven such as detergents, oven
sprays, and so on.
The oven gets extremely hot during operation.
Never use water in an attempt to extinguish burning grease or oil (there is the danger of
explosion). Suffocate the fire with wet cloths.
The rack, the plates and the cooking containers become extremely hot.
Use insulated glove or pot holders.
When using and maintaining the oven, be careful not to get fingers caught in the door
hinges to avoid crushing or other injuries.
This is specially important when children are around.
Leave the door open only in an ajar position.
Do not sit or lean on the door and do not use it as a work surface.
6

All work on the appliances must be carried out by qualified personnel.
For maintenance, moving, installation and cleaning of the appliance use suitable
prevention and protection
equipment (gloves, etc.).
Lifting and moving of appliances weighing more than 25 kg must be carried out using
proper equipment, or by two persons, in order to avoid risks or injuries.
Preparation of the oven and pre
-use
Attention: the oven must be unplugged from the electrical mains. Before using the oven,
carefully clean the interior, the racks and the drip pan with non-abrasive soap and
lukewarm water. Insert the racks and the drip pan into their respective runners. When this
operation is complete, plug the oven into the electrical mains and bring it up to maximum
temperature for at least 20 minutes in order to eliminate any residual grease, oil or resins
from manufacturing which may cause unpleasant odours during cooking; then ventilate
the room.
A
fter completing this simple operation, the oven is ready to cook for the first time.
Max outside dimensions:
Height 480mm
Width 897mm
Depth 569mm
Power supply voltage: 220/240V~ 50/60Hz kW 2,27/2,70
Absorption of heating elements (W)
Upper heating element 1050W
Lower heating element 1300W
Circular heating element 2300W
Grill heating element 2500W
Radial fan 25W
Oven light 25W
Cooling fan 25W
7

250
225
150
200 175
125
100
75
50
00
Control panel
_______ Electronic programmer
_______ Function selector
_______ Thermostat
Power supply light _______
Temperature pilot light_______
8

OVEN FUNCTIONS
Light
The separate Light function will illuminate the oven cavity. This function is also
useful when cleaning the oven interior also will give a low heat suitable for
proving dough.
Convection
top and lower element
This method of cooking provides traditional cooking with heat from the top and
lower elements. Particularly suitable for traditional roasting and baking on the
centre shelf only.
Lower element only
This method of cooking uses the lower element to direct heat upward to the food.
Fro slow
-cooking recipes or for warming up meals.
Top element only
This method of cooking uses the outer part of the top element to direct heat
downwards onto the food. For gentle cooking, browning or keeping cooked dishes
warm.
Centre gril
l and rotisserie
This function operates the centre grill element as well as the rotisserie motor.
An ideal way to produce a healthy small roast as all the fats are drained whilst
cooking. Always make sure that the oven pan is in place to collect the fats and
meat juices when cooking.
Centre grill, fan and rotisserie
For cooking a small roast. The fan eliminates any possibility of hot spots and
produces an evenly cooked small roasts.
Convection oven and fan assist
This method of cooking provides heat from the outer top and the lower elements,
plus the use of the fan to circulate the heat and ensure a fast and even distribution.
Suitable for baking pastries and biscuits on multiple levels when browning is
required.
9

Fan
This method of cooking use
s the circular element located around the fan while the
heat is distributed, resulting in a faster, more efficient operation. Cooking with the
fan on allows different kinds of food to be cooked simultaneously on different
shelves, preventing the transmission of smells and tastes from one dish onto
another.
Defrost
The fan runs without heat to reduce the defrosting time of frozen foods.
The time required to defrost the food will depend on the room temperature, the
quantity an type of food: remove frozen portions of meat completely from
packaging and place over the grill rack to allow proper circulation.
Using ther oven
To obtain good results, you are advised to pre-heat the oven to maximum
temperature for approximately 10 minutes. Place the food inside and set the
thermostat to the required temperature. When the oven has reached the se
temperature, the yellow light on the control panel will go out.
10

How to use the grill
Lay the food in the wire shelf or in a tray in case of small pieces.
The rack must be positioned in the highest runner possible and the grease drip pan
in the runner below. Close the door and turn on the element as follows:
Dishes for grilling
Cooking times in minutes
Top side
Under side
Slices of thin meat
6 4
Slices of meat of medium thickness
8 5
Slices of thin descaled fish
10
8
Fish (e.g. trout, salmon)
15 12
Sausages
12 10
Toast
5 2
11
Using the spit
Insert the spit rod A into the drive unit and the groove B into the bend C .
Turn the plastic handle D anticlockwise and slide the rack into the oven runners ensuring
that the rod E slots into the hole F .
The spit r
ack must always be fitted in the middle of the oven.

Fig. 2
0DQXDORSHUDWLRQ
6LPXOWDQHRXVO\ SUHVV WKH DQG WKH DXWR V\PERO ZLOO EH FDQFHOOHG WKH VDXFHSDQ
V\PEROZLOOOLJKWXS
$Q\SURJUDPVHWZLOOEHFDQFHOOHG
Fig. 2
0DQXDORSHUDWLRQ
6LPXOWDQHRXVO\ SUHVV WKH DQG WKH DXWR V\PERO ZLOO EH FDQFHOOHG WKH VDXFHSDQ
V\PEROZLOOOLJKWXS
$Q\SURJUDPVHWZLOOEHFDQFHOOHG
0DQXDORSHUDWLRQ
6LPXOWDQHRXVO\ SUHVV WKH DQG WKH DXWR V\PERO ZLOO EH FDQFHOOHG WKH VDXFHSDQ
V\PEROZLOOOLJKWXS
$Q\SURJUDPVHWZLOOEHFDQFHOOHG
Fig. 2
0DQXDORSHUDWLRQ
6LPXOWDQHRXVO\ SUHVV WKH DQG WKH DXWR V\PERO ZLOO EH FDQFHOOHG WKH VDXFHSDQ
V\PEROZLOOOLJKWXS
$Q\SURJUDPVHWZLOOEHFDQFHOOHG
12

13

4
5
!"#$%%
&'!(#%%
))$'
!*#$"$
+$+)
+,+)
$
$$
-$$
%&'!(#%
%+%
Fig. 4
Fig. 5
four
3
3
4
2
!"#$%%
&'!(#%%
))$'
!*#$"$
+$+)
+,+)
$
$$
-$$
%&'!(#%
%+%
Fig. 1
Fig. 2
four
1
5
!"#$%%
&'!(#%%
))$'
!*#$"$
+$+)
+,+)
$
$$
-$$
%&'!(#%
%+%
Fig. 4
Fig. 5
four
3
3
4
REPLACING THE BULB (fig. 3)
CAUTION: disconnect the oven power supply cable.
If you have to replace the bulb, remove the protective
cover A by turning it counterclockwise.
After replacing the bulb, refit the protective cover A.
14
Fig. 3

15
Cleaning and maintenance
Cleaning operations must only be carried out
when the oven is cool.
The appliance should be disconnected from your
mains supply before commencing any cleaning
process.
oThe oven should be thoroughly cleaned before it is operated for
the first time and after each use. This will avoid residual food
stuffs becoming baked on the oven cavity. After residues have
been baked on several times, they are far more difficult to
remove.
oNever clean the oven surfaces by steam cleaning.
oThe oven cavity should only be cleaned with warm soapy water,
using either a sponge or soft cloth. No abrasive cleaners should
be used.
oAny stains that may appear on the bottom of the oven will have
originated from food splashes or spilt food, these splashes occur
during the cooking process. These could possibly be a result of
the food being cooked at an excessively high temperature or
being placed in cookware that is too small.
oYou should make sure that the cooking temperature that is
selected is appropriate for the food that you are cooking. You
should also ensure that the food is placed in an adequately sized
dish and you the drip tray where appropriate.
oTHE MARK FREE COATING ON YOUR OVEN HAS BEEN DESIGNED
TO LAST THE LIFETIME OF THE OVEN.
Outer parts of the oven should only be cleaned with warm soapy
water, using either a sponge or soft cloth. No abrasive cleaners
should be used.
o
If you use any form of oven cleaner on your appliance, you must
check with Think Appliances of the cleaner that it is suitable for
use on your appliance.
o
Any damage that is caused to the appliance by an unauthorised
cleaning
product will not be fixed by Baumatic free of charge,
even
if the appliance is within the guarantee period.

IMPORTANT
To ensure the built-in appliance works correctly, the unit must correspond to certain characte-
ristics.
The panels of the units near the oven must be made of heat-resistant material. Especially as
regards veneered wooden furniture, the glues must withstand temperatures of up to 120°C:
plastic or binders that cannot withstand this temperature will deform or come unstuck.
In compliance with safety regulations, once the appliance is built in, contact with electrical
components must no longer be possible.
All protective coverings must be fixed so they cannot be removed without the aid of a tool.
INSTRUCTION FOR INSTALLATION
To ensure the built-in appliance works correctly, the unit must correspond to certain
characteristics.
The panels of the units near the oven must be made of heat-resistant material.
Especially as regards veneered wooden furniture, the glues must withstand temperatures
of up to 120°C:
plastic or binders that cannot withstand this temperature will deform or come unstuck.
In compliance with safety regulations, once the appliance is built in, contact with
electrical components must no longer be possible.
All protective coverings must be fixed so they cannot be removed without the aid
of a tool.
The oven can be used below the worktop or in a column unit by means of 4 screws.
Please see the drawing on the following page.
IMPORTANT
To ensure the built-in appliance works correctly, the unit must correspond to certain characte-
ristics.
The panels of the units near the oven must be made of heat-resistant material. Especially as
regards veneered wooden furniture, the glues must withstand temperatures of up to 120°C:
plastic or binders that cannot withstand this temperature will deform or come unstuck.
In compliance with safety regulations, once the appliance is built in, contact with electrical
components must no longer be possible.
All protective coverings must be fixed so they cannot be removed without the aid of a tool.
16

Tav
480
856
897
545
471
24
860
550 min
90
475
INSTALLATION SCHEME
17
Table of contents
Other Think Appliances Oven manuals
Popular Oven manuals by other brands

Atag
Atag OX9011T Instructions for use
Oster
Oster TSSTTVCG05-1MX instruction manual

Fulgor Milano
Fulgor Milano F1SP30 3 Series Use & care manual
Blodgett
Blodgett BG2136 Double Installation operating & maintenance manual

montpellier
montpellier SBFO56X Installation and operating instructions
CDA
CDA SC220L Series Manual for installation, use and maintenance
