Thor Hushovd Kid Racer Twin User manual

1
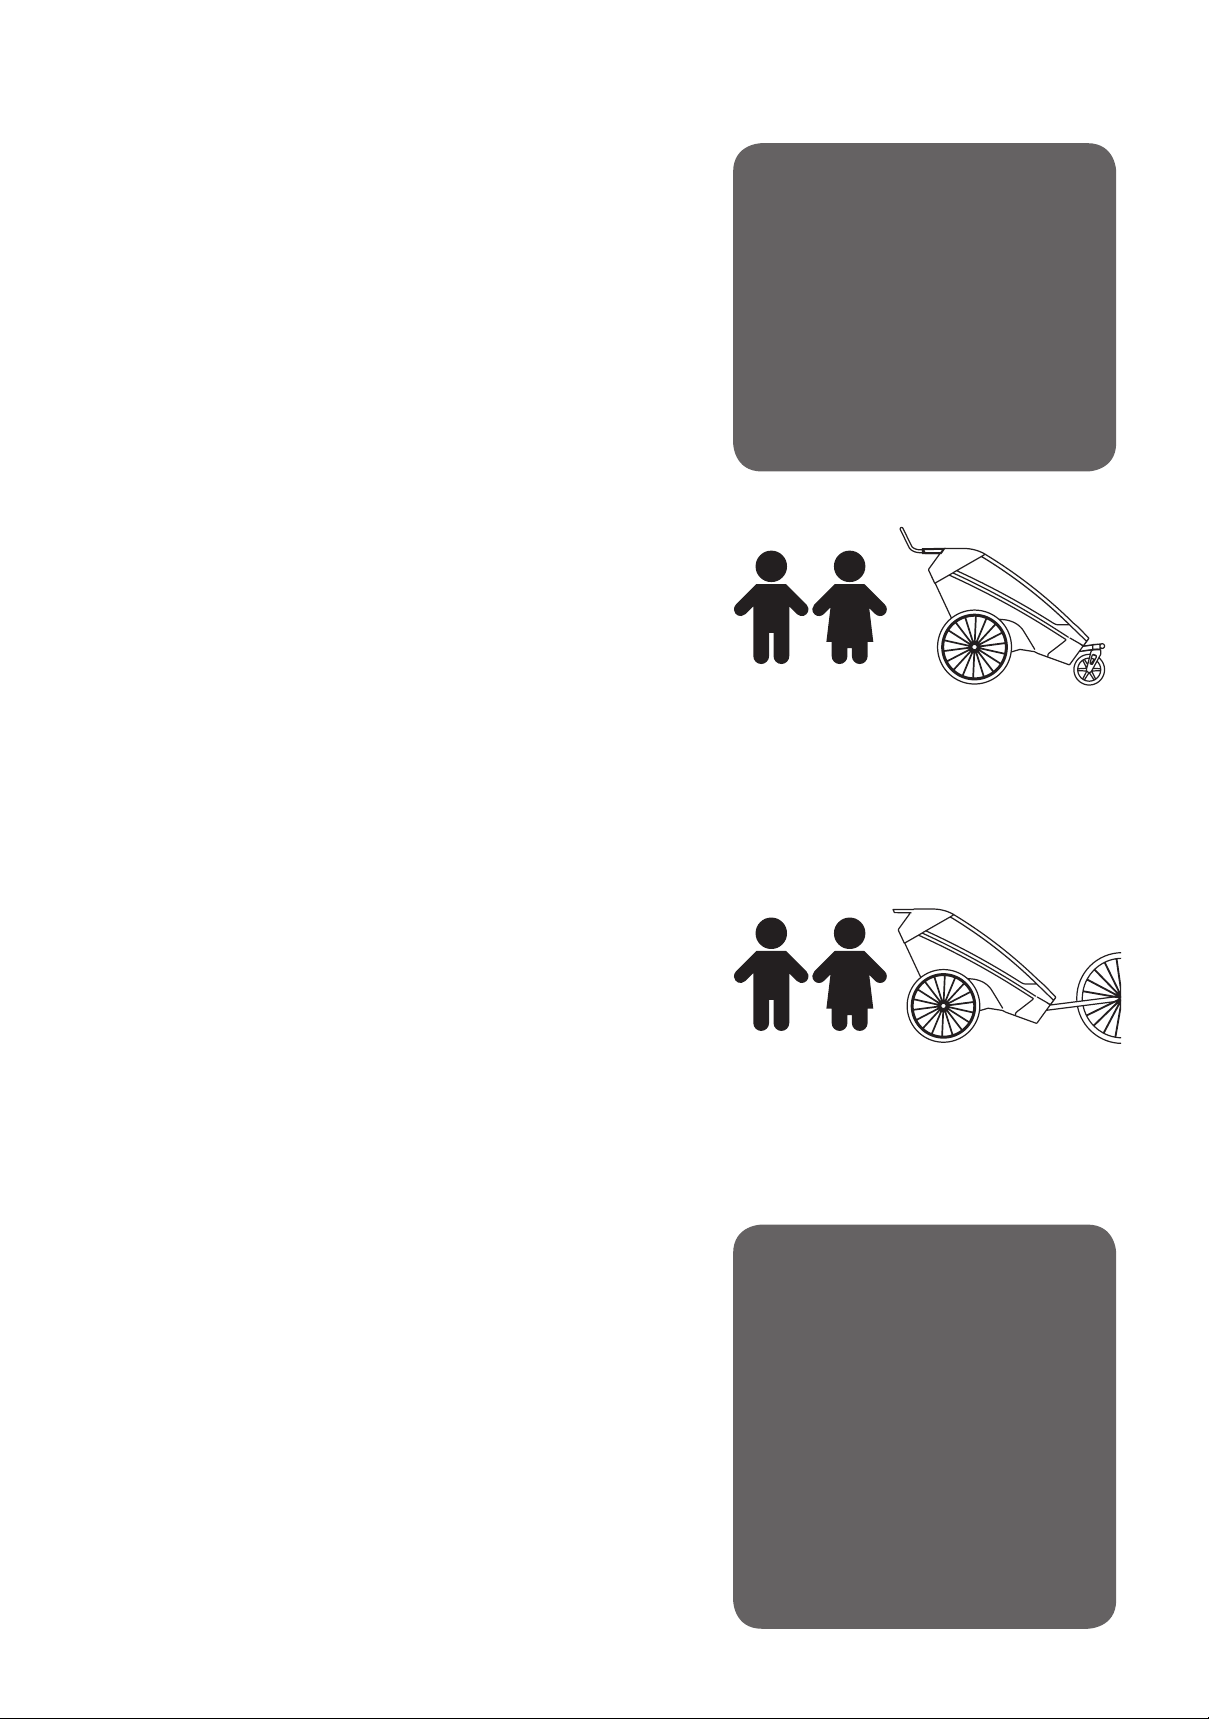
KID RACER
TWIN
INSTRUCTIONS
TH-BT02-22
EN

2
CONTENTS
PRODUCT AREA OF USE 3
USES THAT ARE NOT RECOMMENDED 3
CONTENTS IN THE BOX 4
1. PRODUCT ASSEMBLY 5
UNFOLDING THE TRAILER 5
FOLDING THE TRAILER 5
DEFLECTORS 5
MAIN WHEELS 6
LIGHTS AND REFLECTORS 6
FLAG 6
2. PUSHCHAIR MODE 7
PUSHCHAIR WHEEL 7
HANDLEBAR 7
3. BIKE TRAILER MODE 8
BIKE CONNECTOR BRACKET 8
DRAWBAR 8
ATTACHING THE TRAILER TO THE BIKE 8
REPLACING THE QUICK CONNECTOR 9
DRAWBAR LOAD 9
4. SECURING PASSENGERS 9
5. MORE FEATURES 10
PROTECTIVE COVERS 10
PARKING BRAKE 11
CARGO BAG 11
SAFETY STRAP 11
6. SERVICE AND CARE 12
118015U-D086-04, 09.05.2019
THOR HUSHOVD AS
www.thorhushovd.no
The trailer complies with the European safety requirements for bike
trailers
(EN 15918:2011+A2:2017) and for pushchairs for children from 15 kg
up to 22 kg (EN 1888-2:2018).
3
IMPORTANT - READ CAREFULLY AND KEEP
FOR FUTURE REFERENCE
PRODUCT AREA OF USE
The Thor Hushovd Kid Racer Twin is intended for
transporting maximum 2 children. The trailer can be xed to
a suitable bike, or used as a pushchair with the extra front
wheel tted.
The trailer can be used on:
• Sidewalks
• Light trafc roads
• Smooth paths
Be aware that the additional load of the trailer can impact
on the behaviour and stability of the bike. Reduce the overall
speed, and be especially careful when going downhill or
around corners. The braking distance of the bike will increase
due to the added weight of the trailer. Consult the bike
manufacturer’s information concerning the suitability of the
bike for towing the trailer.
When used as a pushchair, the product is suitable for
children older than 6 months who can sit unaided. When
used as a bike trailer, the product is suitable for children
older than 1 year who can sit unaided and wear a helmet.
Max. weight of the passengers is 21 + 21 kg, or max. 4 years of
age, whichever comes rst.
If visibility is poor due to darkness or weather conditions,
ensure extra lights are attached to the trailer. National
security regulations concerning lights, reectors or other
must be carefully reviewed and followed.
USES THAT ARE NOT RECOMMENDED
• Do not use the trailer in off-road terrain, on narrow
pathways or on heavy trafc roads.
• Do not overload the trailer by adding more than 2
children or extra cargo beyond the recommendations in
this manual.
• Do not place luggage or animals inside the main
compartment together with the passengers.
• Do not travel at speeds higher than 25 km/h. Reduce to
walking speed on rough roads or around sharp bends.
• Do not modify or improperly repair defects beyond the
specications of the manufacturer.
As part of the recommended use, you should also follow
this manual and comply with the prescribed maintenance
requirements. Failing to repair and properly maintain the
product may cause the product to fail. The manufacturer
is not liable for damages arising from use that is not
recommended – this is at the risk of the user.
BEFORE EACH RIDE:
MAKE SURE THE
FOLLOWING PARTS ARE
SECURELY FITTED AND IN
GOOD CONDITION:
• DRAWBAR AND
CONNECTOR
• WHEELS AND TYRES
• FRAME
• SAFETY BELTS
• LIGHTING EQUIPMENT
• REFLECTORS
WARNING
THE CONTENTS OF THIS
MANUAL MUST BE READ
CAREFULLY AND ALL
INSTRUCTIONS MUST BE
FOLLOWED.
ANY IMPROPER USE OF THE
PRODUCT MAY RESULT IN
SEVERE INJURY.
Max. passengers weight: 21 + 21 kg
Max. passenger height: 111 cm
Min. age: 6 months
Max. age: 4 years
Pushchair nominal weight: 17.5 kg
Max load including cargo: 42.5 kg
Max total weight: 60 kg
kg kg
kg kg
Max. passenger weight: 21 + 21 kg
Max. passenger height: 111 cm
Min. age: 1 year
Max age: 4 years
Bike trailer nominal weight: 17 kg
Max load including cargo: 43kg
Max total weight: 60 kg
PUSHCHAIR MODE
BIKE TRAILER MODE
21 21
21 21
4
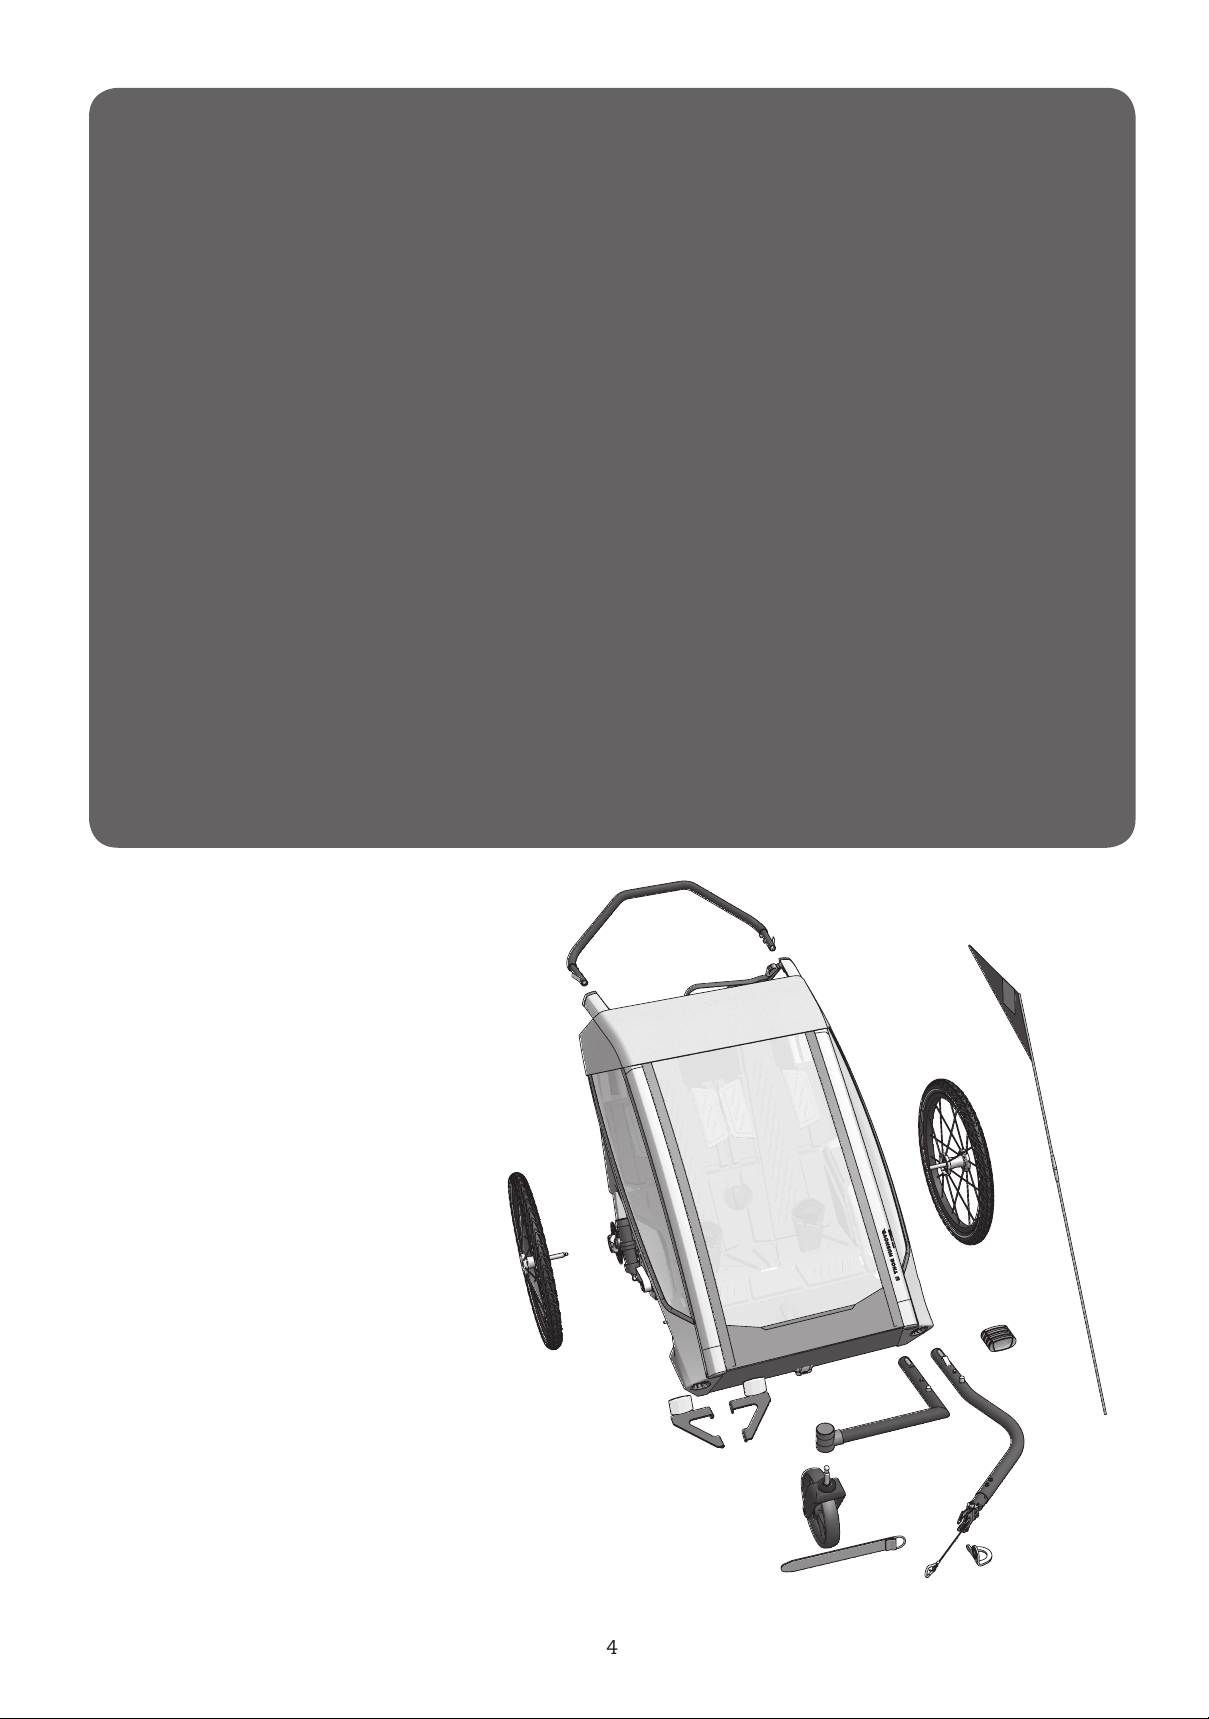
CONTENTS IN THE BOX
1. Bike Trailer,
2. Main wheels (x2)
3. Drawbar
4. Bike connector bracket
5. D ring with velcro
6. Handlebar
7. Pushchair wheel
8. Pushchair wheel bar
9. Deectors (x2)
10. Flag
11. Extra reectors
WARNINGS
• NEVER LEAVE THE CHILD UNATTENDED.
• DO NOT LET THE CHILD PLAY WITH THIS PRODUCT
• TO AVOID INJURY, ENSURE THE CHILD IS KEPT AWAY WHEN UNFOLDING AND
FOLDING THIS PRODUCT.
• ALWAYS USE THE HARNESS
• MAKE SURE THE BIKE IS SUITABLE FOR PULLING A BIKE TRAILER. CONSULT
THE MANUAL OR CONTACT THE BIKE MANUFACTURER BEFORE ATTACHING THE
TRAILER.
• USING AN ELECTRIC BIKE TO PULL THE TRAILER MAY BE SUBJECT TO
RESTRICTIONS BY LAW. CONSULT YOUR LOCAL AUTHORITIES.
• THIS PRODUCT IS NOT SUITABLE FOR CHILDREN UNDER 6 MONTHS.
• THIS PRODUCT IS DESIGNED FOR MAX. 2 CHILDREN AND MUST NOT BE USED
WITH MORE THAN 2 PASSENGERS.
• CHECK THAT THE SEAT BODY, WHEELS AND BIKE CONNECTION ARE CORRECTLY
ENGAGED BEFORE USE.
• ENSURE THAT ALL LOCKING DEVICES ARE ENGAGED BEFORE USE.
• THIS PRODUCT IS NOT SUITABLE FOR RUNNING OR SKATING.
• ANY LOAD ATTACHED TO THE HANDLE, TO THE BACK OF THE BACKREST AND/OR
TO THE SIDES OF THE TRAILER, WILL AFFECT THE STABILITY OF THE TRAILER.
• MAKE SURE CARGO IS PLACED IN SUCH A MANNER THAT IT CANNOT CAUSE
HARM TO ANYONE USING THE TRAILER.
• ACCESSORIES WHICH ARE NOT APPROVED BY THE MANUFACTURER SHALL NOT
BE USED.
• ONLY USE REPLACEMENT PARTS SUPPLIED OR RECOMMENDED BY THOR
HUSHOVD.
5
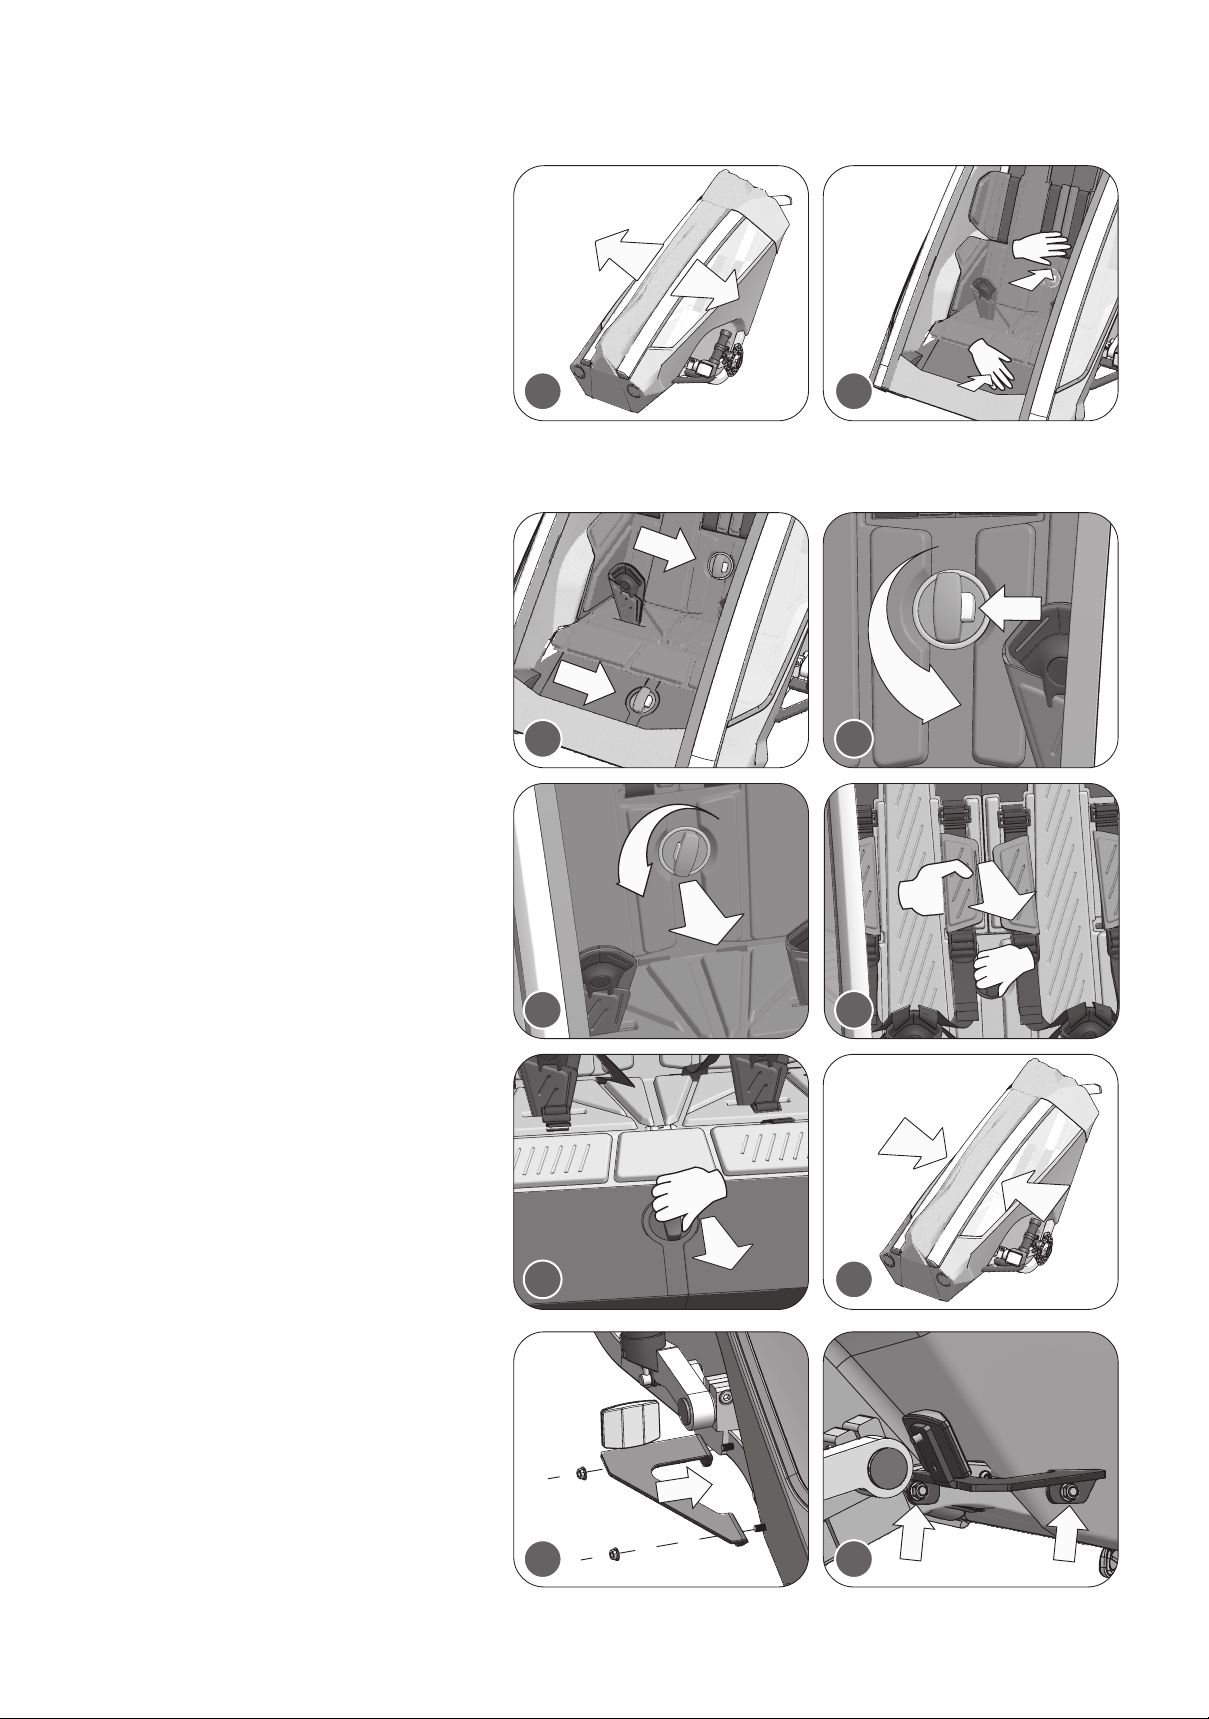
UNFOLDING THE TRAILER
The trailer arrives folded inside the
box. To unfold the trailer, start by
pulling the left and right frames apart
in a sideways motion. (g.1.)
Then, with the mesh and splash
covers opened, push down on the
seat/footrest and push back on the
backrest until they are both at. (g.2.)
Make sure the locking mechanism is
properly engaged.
FOLDING THE TRAILER
Open the mesh and splash covers to
reach the two release handles inside
the trailer. One handle is placed on the
seat, and the other on the backrest.
(g.3.)
The handles are released by pushing
the red button and then rotating the
handle almost half a turn until you
hear a click. (g.4.) When the handles
are released, the backrest and seat can
be folded inwards. (g.5.) Hold the two
center seatbelts with one hand while
rotating the backrest handle with the
other. Then give the seatbelt a quick
pull, while keeping the grip on the
handle, to fold the backrest. (g.6.)
Repeat for the seat handle and fold
both the seat and the backrest in a
simultaneous movement. (g.7.)
When both handles are released, push
the left and right frames together.
(g.8.)
DEFLECTORS
The two deectors protect the wheels
from getting caught on surrounding
objects during a ride.
Fasten the deectors to the frame of
the trailer, one in front of each wheel.
Slide the deector onto the two bolts
on the trailer frame. (g.9.)
Fasten the two nuts, one on each bolt,
visible from the bottom side of the
deector and tighten well. (g.10.)
1. PRODUCT ASSEMBLY
1 2
34
5 6
910
78
Table of contents
Popular Bicycle Accessories manuals by other brands


Specialized
Specialized Elite CylcoComputer user manual

Sigma
Sigma BC 16.16 manual

Playcore
Playcore Dero Setbacks installation instructions

VDO Cyclecomputing
VDO Cyclecomputing x3dw instruction manual

Cateye
Cateye RAPID X2 manual

buratti meccanica
buratti meccanica Clorofilla Trail Use and maintenance manual


