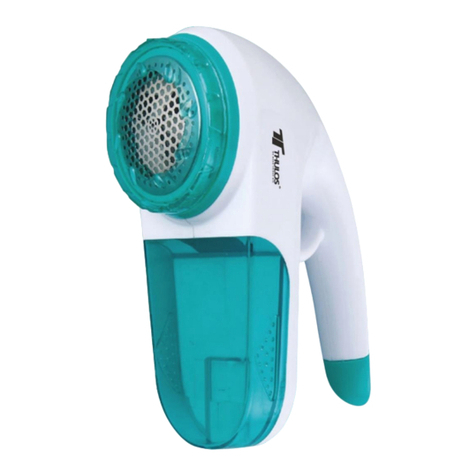
Thulos TH-BY04 User manual

DEPILADORA DE PRECISIÓN
PRECISION TRIMMER
TH-BY04
Por favor, lea cuidadosamente este manual antes de usar el dispositivo por
primera vez. Guarde el manual para futuras consultas.
For your safety and continued enjoyment of this product. Always read the instruction book
carefully before using.

ES
Estimado cliente
Agradecemos la confianza depositada en nosotros al
adquirir este producto THULOS®. Nuestro principal empeño
es ofrecer artículos excelentes, manteniendo los más
estrictos controles de calidad y cumpliendo todas las
normativas vigentes de seguridad, con el objetivo de
presentar un producto perfecto y seguro para el uso
doméstico.
Lea detenidamente el presente manual de instrucciones y
guárdelo para posterior consulta. En caso de entregar el
aparato a terceros, entregue también el presente manual
de instrucciones.
DESCRIPCIÓN DE LAS PARTES
ANTES DE USAR LA DEPILADORA DE PRECISIÓN
IMPORTANTE: Antes de usarla por primera vez, pruebe la
recortadora en un área pequeña de su brazo o pierna. Si se
produce alguna sensibilidad o reacción alérgica, deje de usarla
inmediatamente. No utilice la recortadora en pieles sensibles o
irritadas.

Insertar / Reemplazar la batería:
Para su comodidad, se ha incluido una batería 1*AAA con este
recortador.
1. Ponga el interruptor ON/OFF/LIGHT en la posición
"OFF" (ver figura 4) y quite la tapa.
2. Mientras sostiene firmemente la parte central de la
recortadora, deslice la tapa del compartimento de la
batería para exponer el compartimento de la batería
(figura 1).
3. Retire la batería vieja si es necesario, luego inserte una
nueva batería "AAA" siguiendo los signos -/+ (figura 2).
4. Vuelva a colocar la tapa del compartimento de la
batería alineando el punto del compartimento de la
batería con el punto de la tapa del compartimento de
la batería. Luego empuje la cubierta en el cierre (figura
3).

IMPORTANTE: Para evitar que su recortadora se dañe,
asegúrese de que la batería se inserte en la dirección correcta
indicada por los signos +/-. Si su recortadora no se va a utilizar
durante un largo período de tiempo, retire la batería de la
unidad.
ADVERTENCIA: Si intenta forzar la tapa de forma incorrecta,
puede dañar la unidad.
CÓMO USAR LA DEPILADORA DE PRECISIÓN
1. Retire la tapa y sitúe el interruptor de ON/OFF/LIGHT
en la posición "ON". 2. Gire el interruptor a la posición
"LIGHT" para encender la luz (figura 4).
2. Sostenga el recortador en un ángulo de 45 grados con
respecto al área deseada y recorte en la dirección
opuesta al crecimiento del vello (figura 5).
3. Continúe recortando en la dirección opuesta al
crecimiento del vello hasta que el vello sea eliminado
(figura 6).
CONSEJO: Para una depilación más limpia, estire la piel con una
mano mientras recorta el vello (figura 7).
ADVERTENCIAS:
•Manténgase fuera del alcance de los niños.

•No mire directamente a la luz durante su uso.
•Evite la exposición directa a los ojos.
USANDO LOS PEINES GUÍA
Con el recortador se incluyen dos peines para recortar las cejas
y el bigote. El peine de 2 mm / 4 mm es ideal para recortar los
pelos más largos de las cejas y el bigote.
1. Asegúrese de que la recortadora esté apagada.
2. Deslice el lado apropiado del accesorio del peine en el
cabezal de recorte (figura 8). Asegúrese de alinear las
ranuras del accesorio del peine con las ranuras del
cabezal de recorte.
NOTA: Cuando utilice el accesorio de peine de 2 mm / 4 mm
asegúrese de que el tamaño de la recortadora que prefiere esté
orientada en la misma dirección que la recortadora.
3. Para retirar el accesorio del peine, apague la depiladora,
sostenga el centro superior de la unidad y simplemente
deslice el peine.

CUIADOS Y MANTENIMIENTO
NOTA: El agua causará daños a su depiladora. No utilice la
recortadora en una habitación húmeda o cerca del agua.
Cuando no se use, asegúrese de que la recortadora esté
apagada.
Limpiando el cabezal de la recortadora:
1. Apague la recortadora y retire la batería (consulte el
paso 1 de "Insertar / sustituir la batería").
2. Retire la cubierta verde del cabezal de la recortadora
acuñando su dedo bajo el plástico y levantándolo
suavemente para separarlo del cabezal de la
recortadora (figura 9).
3. Separe cuidadosamente el cabezal de la recortadora y
retírelo de la misma.
4. Con el cepillo de limpieza, limpie suavemente cualquier
pelo o polvo (figura 10).
NOTA: Los accesorios del peine pueden ser lavados. Sin
embargo, asegúrese de que estén completamente secos antes

de volver a usarlos.
1. Reemplazar el cabezal de la recortadora y la cubierta
del cabezal de la recortadora.
2. Vuelva a colocar la tapa cuando guarde la recortadora.
IMPORTANTE: NO ELIMINE NINGUNA MATERIA EXTRAÑA CON
UN OBJETO PUNZANTE.
CONDICIONES DE GARANTÍA
1. Este aparato está cubierto contra cualquier defecto de
fábrica.
2. El aparato se cambiará siempre y cuando esté dentro
del plazo de cambio y se devuelva con todos sus
accesorios y embalaje.
3. La garantía será válida siempre y cuando el aparato vaya
acompañado de su factura o ticket de compra donde
salga reflejado el aparato, o también su tarjeta de
garantía debidamente cumplimentada y sellada.
4. El aparato estará exento de garantía (no cubierto)
cuando:
4.1. El aparato tenga señales de golpes y/o caídas.
4.2. El aparato presente signos de mal uso.
4.3. El aparato presente signos de uso excesivo.
4.4. El aparato esté manipulado inadecuadamente.
4.5. No tiene documento acreditativo (tarjeta, ticket o
factura compra)
4.6. El aparato no se ha usado según las instrucciones
de uso.

MEDIO AMBIENTE
Significado del cubo de basura
No deseche los aparatos eléctricos como residuos
municipales sin clasificar, use las instalaciones de
recolección por separado. Póngase en contacto con el
responsable local para obtener información sobre los sistemas
de recolección disponibles.
Si los aparatos eléctricos se desechan en vertederos no
controlados, las sustancias peligrosas pueden filtrarse en el
agua subterránea y entrar en la cadena alimentaria, dañando
su salud y bienestar.

EN
Dear Customer,
Thank you for purchasing this product. We kindly ask you to
read the instruction manual and keep it in a safe place for
future reference. Please read all the instructions before using
this heater.
PARTS DESCRIPTION
GETTING STARTED
IMPORTANT: Prior to first use, test the trimmer on a small area
on your arm or leg. If any sensitivity or allergic reaction occur,
discontinue use immediately. Do not use your trimmer on
sensitive or irritated skin.
Inserting / Replacing the battery:
For your convenience 1*AAA battery has been included with
this trimmer.
1. Turn the ON/OFF/LIGHT switch to the “OFF”position
(see figure 4) and remove the cap. While firmly holding

the center part of the trimmer, slide off the battery
compartment cover to expose the battery compartment
(figure 1).
2. Remove old battery if necessary, then insert a new
“AAA”battery following the -/+ signs (figure 2).
3. Replace the battery cover by aligning the dot on the
battery compartment with the dot on the battery
compartment cover. Then push the cover on the close
(figure 3).
IMPORTANT: To avoid damage to your trimmer, be sure that the
battery is inserted in the proper direction indicated by the +/-
signs. If your trimmer will not be used for a long period of time,
remove the battery from the unit.
WARNING: Attempting to force the cover on incorrectly may
cause damage to the unit.

HOW TO USE PRECISION TRIMMER
1. Remove the cap then turn the ON/OFF/LIGHT switch to
the “ON”position. Turn the switch to “LIGHT”position
to turn on the light (figure 4).
2. Hold the trimmer at a 45 degree angle to desired area
and trim in the opposite direction of your hair growth
(figure 5).
3. Continue to trim in the opposite direction of the hair
growth until the hair is removed (figure 6).
TIP: For the cleanest hair removal, pull your skin taut with one
hand while trimming (figure 7).
WARNING:
•Keep out the reach of children.
•Do not look directly into light during use.
•Avoid direct eye exposure.
USING THE COMB ATTACHMENTS
Included with your trimmer are two comb attachments for
trimmer eyebrows/mustaches. The 2 mm / 4 mm comb is for
trimming longer eyebrow/mustache hairs.
1. Make sure the trimmer is turned off.

2. Slide the appropriate side of the comb attachment onto
the trimmed head (figure 8). Be sure to align the
grooves on the comb attachment with the grooves on
the trimmer head.
NOTE: When using the 2 mm / 4 mm comb attachment be sure
the trimming size you prefer is facing the same direction as the
trimmer.
3. To remove the comb attachment, turn the power OFF,
hold the upper center of the unit and simply slide the
comb off.
CARE AND MAINTENANCE
NOTE: Water will cause damage to your trimmer. Do not use
trimmer in a damp room or near water. When not in use, be
sure the trimer is turned off.
Cleaning Trimmer Head:
1. Turn the trimmer OFF and remove the battery (see step
1 of “inserting / replace the battery).
2. Pop the green trimmer head cover off by wedging your

finger under the plastic and gently lifting up and away
from the trimmer head (figure 9).
3. Carefully take the trimmer head apart and remove from
the trimmer.
4. Using the cleaning brush, gently wipe away any hair or
dust (figure 10).
NOTE: The comb attachments may be washed. However, make
sure they are thoroughly dry before re-use.
5. Replace the trimmer head and the trimmer head cover.
6. Replace the cap when storing the trimmer.
IMPORTANT: DO NOT REMOVE ANY FOREIGN MATTER WITH A
SHARP OBJETC.
WARRANTY CONDITIONS
1. This appliance is covered against any factory defects.
2. The device is changed for a new one as long as it is
within the change period and is returned with all
accessories and packaging in good condition.
3. The guarantee will be valid as long as the appliance is
accompanied by your invoice or purchase ticket where

the exact device and model, or your warranty card duly
completed and sealed, is reflected.
4. The appliance will be exempt from warranty when:
4.1. The appliance has signs of knocks and / or falls.
4.2. The appliance shows signs of misuse.
4.3. The appliance has signs of overuse.
4.4. The appliance is improperly handled.
4.5. No supporting document. (card, ticket or invoice).
4.6. The appliance has not been used in accordance
with the instructions for use.
ENVIRONMENT
Meaning of the crossed-out wheeled dustbin:
Do not dispose of electrical appliances as unsorted
municipal waste, use separate collection facilities.
Contact your local council for information regarding
the collection systems available. If electrical appliances are
disposed of in landfills or dumps, hazardous substances can
leak into the groundwater and get into the food chain,
damaging your health and well-being.
This manual suits for next models
1
Table of contents
Languages:
Other Thulos Trimmer manuals

