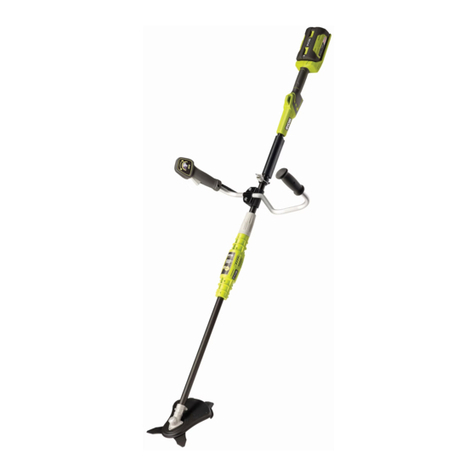
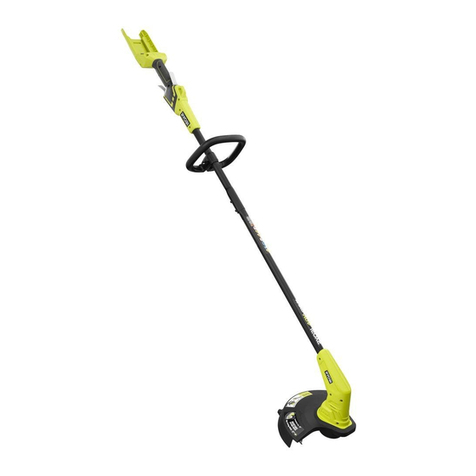
Ryobi OLT1831 User manual

TONDEUSE À FIL ÉLECTRIQUE SANS FIL MANUEL D’UTILISATION 1
ELECTRIC CORDLESS STRING TRIMMER USER’S MANUAL 10
KABELLOSER ELEKTRO-FADENTRIMMER BEDIENUNGSANLEITUNG 18
RECORTADORA ELÉCTRICA SIN CABLE MANUAL DE UTILIZACIÓN 27
BORDATORE ELETTRICO A FILO SENZA CAVI MANUALE D’USO 36
APARADOR ELÉCTRICO SEM FIOS MANUAL DE UTILIZAÇÃO 45
SNOERLOZE ELEKTRISCHE LIJNTRIMMER GEBRUIKERSHANDLEIDING 54
SLADDLÖS ELEKTRISK TRIMMER INSTRUKTIONSBOK 63
ELEKTRISK LEDNINGSFRI TRÅDTRIMMER BRUGERVEJLEDNING 72
ELEKTRISK KABELLØS SNORKLIPPER BRUKSANVISNING 81
JOHDOTON SÄHKÖTOIMINEN SIIMATRIMMERI KÄYTTÄJÄN KÄSIKIRJA 90
AKKUMULÁTOROS SZEGÉLYNYÍRÓ HASZNÁLATI ÚTMUTATÓ 98
BEZDRÁTOVÁ STRUNOVÁ SEKAČKA
NÁVOD K OBSLUZE 107
ЭЛЕКТРИЧЕСКИЙ БЕСПРОВОДНОЙ СТРУННЫЙ ТРИММЕР êìäéÇéÑëíÇé èé ùäëèãìÄíÄñàà 116
MOTOCOASĂELECTRICĂFĂRĂFIR MANUAL DE UTILIZARE 126
PODKASZARKA ŻYŁKOWA AKUMULATOROWA PODRĘCZNIK OBSŁUGI 135
ELEKTRIČNA BREZŽIČNA KOSILNICA NA NITKO UPORABNIŠKI PRIROČNIK 144
ELEKTRIČNI BEŽIČNI TRIMER S FLAKSOM KORISNI»KI PRIRU»NIK 153
ELEKTRILINE JUHTMEVABA JÕHVTRIMMER KASUTAJAJUHEND 162
ELEKTRINĖ BEVIELĖ JUOSTINĖ ŽOLIAPJOVĖ NAUDOJIMO VADOVAS 171
ELEKTRISKAIS BEZVADU AUKLAS TRIMMERIS LIETOTĀJA ROKASGRĀMATA 180
ELEKTRICKÝ AKUMULÁTOROVÝ DRÔTOVÝ STRIHAČ NÁVOD NA POUŽITIE 189
ЕЛЕКТРОНЕН БЕЗЖИЧЕН ТРИМЕР СРЕЖЕЩО ВЛАКНО êöäéÇéÑëíÇé áÄ ìèéíêÖÅÄ 198
OLT1831/RLT1830Li
Important! It is essential that you read the instructions in this
manual before assembling, maintaining and operating
this machine.
FR
EN
DE
ES
IT
PT
NL
SV
DA
NO
FI
HU
CS
RU
RO
PL
SL
HR
ET
LT
LV
SK
BG
OLT1831&RLT1830Li 23lgs.indd A1OLT1831&RLT1830Li 23lgs.indd A1 2010/11/17 2:092010/11/17 2:09

Attention ! Il est indispensable que vous lisiez les instructions contenues dans ce manuel avant le
montage et la mise en service de l’appareil.
Important! It is essential that you read the instructions in this manual before assembling, maintaining
and operating this machine.
Wichtig! Es ist notwendig, dass Sie die Anweisungen in dieser Bedienungsanleitung lesen bevor Sie
das Gerät bedienen.
Importante: Es indispensable que lea las instrucciones detalladas en este manual antes de encender
la máquina.
Importante! Leggere attentamente le istruzioni contenute nel presente manuale prima di mettere in
funzione l’apparecchio.
Importante! É essencial que leia as instruções neste manual antes de começar a utilizar esta máquina.
Belangrijk! Het is van essentieel belang dat u de instructies in deze gebruiksaanwijzing leest voordat
u dit toestel gebruikt.
Viktigt! Det är viktigt att du läser instruktionerna i denna manual innan du använder maskinen.
Vigtigt! Det er væsentlig at du læser anvisningerne I denne manual før du betjener denne maskine.
Viktig! Det er meget viktig at du leser instruksjonene i denne brukerhåndboken før du bruker
denne maskinen.
Tärkeää! On tärkeää, että luet tämän oppaan ohjeet ennen koneen käyttöä.
Fontos! Fontos, hogy a gép használata előtt elolvassa a kézikönyvben található utasításokat.
Důležité! Nepoužívejte tento přístroj dříve, než si přečtete pokyny uvedené v tomto návodu.
Важно! Это существенно чтобы вы прочитали инструкции вэтом руководстве перед
использованием этой машины.
Important! Este esenţial săcitiţi instrucţiunile din acest manual înainte de operarea acestui produs.
Uwaga! Przed rozpoczęciem użytkowania koniecznie należy zapoznaćsięz niniejsząinstrukcją
obsługi.
Pomembno! Bistvenega pomena je, da si pred uporabo naprave preberete ta navodila za uporabo.
Važno! Neophodno je da pročitate upute prije uporabe ovog uređaja.
Tähtis! On ülimalt tähtis, et te loeksite enne selle masina kasutamist seda kasutusjuhendit.
Svarbi informacija! Prieš pradedant darbąsu šiuo instrumentu, būtina perskaityti čia pateikiamas instrukcijas.
Svarīgi! Ir svarīgi, lai pirms mašīnas darbināšanas jūs izlasītu instrukcijas šajārokasgrāmatā.
Dôležité! Je nevyhnutné si prečítaťtento návod pred použitím výrobku.
Важно! От изключителна важност еда прочетете инструкциите втова ръководство,
преди да боравите стази машина.
OLT1831&RLT1830Li 23lgs.indd A2OLT1831&RLT1830Li 23lgs.indd A2 2010/11/1 3:422010/11/1 3:42

Sous réserve de modifications techniques / Subject to technical modifications / Technische Änderungen vorbehalten /
Bajo reserva de modificaciones técnicas / Con riserva di eventuali modifiche tecniche / Com reserva de modificações técnicas
/ Technische wijzigingen voorbehouden / Med förbehåll för tekniska ändringar / Med forbehold for tekniske ændringer /
Med forbehold om tekniske endringer / Tekniset muutokset varataan /
A műszaki módosítás jogát fenntartjuk / Změny technických údajůvyhrazeny / åÓ„ÛÚ ·˚Ú¸ ‚ÌeÒeÌ˚ ÚeıÌ˘eÒÍËe ËÁÏeÌeÌËfl /
Sub rezerva modificaţiilor tehnice / Z zastrzeżeniem modyfikacji technicznych / Tehnične spremembe dopuščene
Podloæno tehniËkim promjenama / Tehnilised muudatused võimalikud /
Pasiliekant teisędaryti techninius pakeitimus / Paturam tiesības mainīt tehniskos raksturlielumus / Technické zmeny vyhradené
/ èÓ‰ÎÂÊË Ì‡ ÚÂıÌ˘ÂÒÍË ÏÓ‰ËÙË͇ˆËË
OLT1831&RLT1830Li 23lgs.indd A3OLT1831&RLT1830Li 23lgs.indd A3 2010/11/1 3:422010/11/1 3:42

1
Français
FR EN DE ES IT PT NL SV DA NO FI HU CS RU RO PL SL HR ET LT LV SK BG
Votre tondeuse a été conçue et fabriquée selon de hauts
standards en matière de fiabilité, de facilité d'utilisation et
de sécurité. Si vous en prenez soin, vous pourrez l'utiliser
sans problèmes durant des années.
Nous vous remercions d’avoir acheté un produit Ryobi.
CONSERVEZ CE MODE D’EMPLOI POUR VOUS-Y
RÉFÉRER DANS LE FUTUR
INTRODUCTION
Cet appareil ne doit pas être utilisé par des personnes
(enfants compris) aux capacités physiques, sensorielles
ou mentales réduites, ou par des personnes manquant
d’expérience et de savoir à moins qu’elles n’aient été
initiées à son utilisation et qu’elles ne soient surveillées
par une personne en charge de leur sécurité.
Les enfants doivent être surveillés afin de s’assurer qu’ils
ne jouent pas avec l’appareil.
Ce produit comporte de nombreuses caractéristiques qui
le rendent plus agréable à utiliser.
Lors de la conception de l’appareil, la plus grande priorité
a été donnée à la sécurité, aux performances et à la
fiabilité afin de le rendre facile à utiliser et à entretenir.
Utilisation prévue
Cette tondeuse est destinée à couper l'herbe et autres
végétaux tendres et à tailler les bordures dans les jardins
privés et d'agrément non accessibles à une tondeuse à
gazon.
Il n'est pas autorisé d'utiliser cet appareil dans les jardins
publics, dans les parcs, dans les centres sportifs ou au
bord des routes, ni pour l'agriculture ou la foresterie.
Il n'est pas autorisé d'utiliser ce taille-bordures pour la
coupe ou le broyage de: Haies, arbustes et buissons,
Fleurs.
CONSIGNES DE SÉCURITÉ GÉNÉRALES
AVERTISSEMENT
Lisez tous les avertissements de sécurité et toutes
les instructions. Le non-respect des avertissements
et instructions peut entraîner un choc électrique, un
incendie et/ou de graves blessures.
Conservez ces avertissements et instructions pour
pouvoir vous y reporter ultérieurement.
AVERTISSEMENT
Lisez attentivement tous les avertissements et toutes
les instructions. Le non-respect des instructions
présentées ci-après peut entraîner des accidents tels
que des incendies, des chocs électriques et/ou des
blessures corporelles graves.
LISEZ TOUTES LES INSTRUCTIONS.
■Veillez à maintenir votre espace de travail propre et
bien éclairé. Les espaces encombrés et sombres sont
propices aux accidents.
■"Tenez compte de votre environnement de travail.
N'exposez pas les outils électriques à la pluie.
N’utilisez pas d’outils électriques dans des endroits
mouillés ou humides. Veillez à ce que votre espace
de travail soit bien éclairé. N'utilisez pas d’outils
électriques dans des lieux présentant des risques
d’incendie ou d'explosion."
■Eloignez tout spectateur de la zone de travail. Tous
les visiteurs et spectateurs, en particulier les enfants
et les handicapés doivent être tenus à bonne distance
de l'endroit où vous travaillez. Ne laissez personne
alentour entrer en contact avec l'appareil ou son câble
d'alimentation.
■Rangez les outils de façon sûre. Les outils non utilisés
doivent être rangés en un endroit sec et verrouillé,
hors de portée des enfants.
■Ne faites pas forcer l'outil. L'outil effectuera un meilleur
travail dans de meilleures conditions de sécurité s'il
est utilisé dans les limites de ses capacités.
■Utilisez un outil adapté au travail à effectuer. Ne forcez
pas sur un petit outil ou sur un petit accessoire dans le
but de lui faire effectuer un travail pour lequel un outil
de plus grande puissance serait mieux adapté. Ne
faites jamais effectuer à un outil un travail pour lequel
il n'a pas été conçu.
■Choisissez une tenue adaptée à votre travail. Ne
portez pas de vêtements ou de bijoux amples; ils
pourraient se prendre dans des pièces en mouvement.
Il est recommandé de porter des gants en caoutchouc
et des chaussures antidérapantes lorsque vous
travaillez à l'extérieur. Si vous avez les cheveux longs,
contenez-les.
■Utilisez des équipements de protection individuelle.
Vous devriez toujours porter des lunettes de sécurité
et une protection auditive. Il est également nécessaire
de porter un masque facial ou anti-poussières.
■Restez vigilant. Regardez bien ce que vous faites et
fiez-vous à bon sens. N'utilisez pas votre outil lorsque
vous êtes fatigué.
■Vérifiez qu'aucune pièce n'est endommagée. Avant
de continuer à utiliser votre outil, vérifiez qu'une pièce
1
OLT1831&RLT1830Li 23lgs.indd 1OLT1831&RLT1830Li 23lgs.indd 1 2010/11/1 3:422010/11/1 3:42
2
Français
FR EN DE ES IT PT NL SV DA NO FI HU CS RU RO PL SL HR ET LT LV SK BG
ou un accessoire endommagé pourra continuer à
fonctionner ou à remplir sa fonction.
■Vérifiez que les pièces en mouvement sont bien
alignées et non tordues, qu'aucune pièce n'est
cassée ou mal montée, et qu'aucun autre problème
n'est susceptible d'affecter le bon fonctionnement
de l'appareil. Une protection ou toute autre pièce
endommagée doit être correctement remplacée ou
réparée par un service après-vente agréé sauf avis
contraire dans ce mode d'emploi. Faites remplacez
les interrupteurs défectueux par un service après-
vente agréé. N'utilisez pas un outil dont l'interrupteur
marche/arrêt ne fonctionne pas ou fonctionne mal.
■N'utilisez que des pièces détachées agréées.
N'effectuez les réparations qu'en utilisant des pièces
détachées identiques. Faites appel à un service
après-vente agréé pour le remplacement des pièces
détachées.
■Prenez garde aux poussières dangereuses/toxiques
soulevées par la tonte de l'herbe, etc., (par ex. engrais,
pesticides).
■L'utilisation d'accessoires inadaptés ou d'accessoires
autres que ceux recommandés peut entraîner des
blessures.
■Cet outil électrique a été fabriqué en respectant les
exigences de sécurité appropriées. Seuls des experts
sont en mesure de réparer cet outil électrique. Dans
le cas contraire, votre vie pourrait s'en trouver mise
en danger.
■Tension - assurez-vous que l'alimentation électrique
est adaptée à votre appareil. La tension de cet appareil
est indiquée sur la plaque signalétique.
ATTENTION: NOTES DE SÉCURITÉ ADDITIONNELLES
CONCERNANT VOTRE TONDEUSE.
■Au cours du montage, prenez garde lors de la mise en
place du carter de protection car il comporte un bord
de coupe très acéré destiné à la taille du fil de coupe
en nylon.
■Pendant utilisation, ne maintenez jamais la tête
de coupe au dessus du niveau de vos pieds et ne
la dirigez jamais vers des personnes ou vers des
animaux.
■Si la tondeuse se met à vibrer de façon excessive,
arrêtez-la immédiatement et faites-la vérifier par un
réparateur qualifié.
ATTENTION
La tête de coupe continue de tourner pendant quelques
secondes après la mise hors tension.
■Retirez toujours les pierres, bâtons, etc. avant d'utiliser
la tondeuse.
■Gardez à tout moment vos pieds et vos mains éloignés
des éléments de coupe, en particulier lors de la mise
en marche du moteur.
■Ne traversez pas des routes ou des allées en gravier
lors de l'utilisation de la tondeuse.
■Sur les fortes pentes travaillez de façon transversale,
jamais de haut en bas. Ne courrez jamais lorsque
vous utilisez la tondeuse.
■Ne remplacez jamais le fil de coupe par un fil en métal.
■N'utilisez jamais la tondeuse sous la pluie ou par
temps humide.
■Utilisez la tondeuse en plein jour ou sous un bon
éclairage artificiel. Ne l'utilisez jamais lorsque la
visibilité est mauvaise.
■Ne travaillez pas en extension. Gardez un bon appui
et un bon équilibre en toute circonstance.
■Prenez garde aux risques de blessures provenant de
tout dispositif destiné à tailler le fil de coupe. Après
avoir déroulé une nouvelle longueur de fil de coupe,
remettez toujours la machine en position normale de
travail avant de la remettre en marche.
■Assurez-vous que les ouïes de ventilation sont en
permanence exemptes de débris.
■Ne laissez jamais les enfants ou les personnes
non familiarisées avec le mode d'emploi utiliser cet
appareil.
OLT1831&RLT1830Li 23lgs.indd 2OLT1831&RLT1830Li 23lgs.indd 2 2010/11/1 3:422010/11/1 3:42

3
Français
FR EN DE ES IT PT NL SV DA NO FI HU CS RU RO PL SL HR ET LT LV SK BG
SYMBOLES
Certains des symboles ci-après peuvent figurer sur votre outil. Apprenez à les reconnaître et mémorisez leur signification.
Une interprétation correcte de ces symboles vous permettra dʼutiliser votre outil avec plus de sécurité et de manière
adéquate.
SYMBOLE DÉSIGNATION / EXPLICATION
Indique des précautions à prendre pour votre sécurité.
Lisez le manuel d’utilisation et respectez toutes les consignes de sécurité et les avertissements.
Portez des lunettes de protection et des protections auditives lorsque vous utilisez cet outil.
Les objets projetés peuvent ricocher et provoquer de graves blessures ou créer des dommages
matériels.
Maintenez tout visiteur, en particulier les enfants et les animaux, à 15 m minimum de votre
zone de travail.
Prenez garde à la projection d'objets vers les spectateurs. Gardez les spectateurs à une bonne
distance de sécurité de la machine.
Ne pas exposer à la pluie ni utiliser en un lieu humide.
The following signal words and meanings are intended to explain the levels of risk associated with this product.
SYMBOLE SIGNAL SIGNIFICATION
DANGER Indique l’imminence d’une situation dangereuse, qui, si l’on n’y prend
garde, peut entraîner la mort ou de graves blessures.
AVERTISSEMENT Indique une situation potentiellement dangereuse, qui, si l’on n’y
prend garde, peut entraîner la mort ou de graves blessures.
ATTENTION Indique une situation potentiellement dangereuse, qui, si l’on n’y
prend garde, peut entraîner des blessures légères à moyennes.
ATTENTION (Sans symbole d’Alerte de Sécurité) Indique une situation pouvant
entraîner des dommages matériels.
RÉPARATIONS
Les réparations nécessitent un soin et des connaissances
extrêmes et ne doivent être effectuées que par un
réparateur qualifié. Nous vous suggérons de retourner
votre appareil à réparer à votre CENTRE DE SERVICE
AGRÉE le plus proche. N’utilisez que des pièces
détachées identiques lors d’une réparation.
AVERTISSEMENT
L’utilisation de tout outil électrique comporte le risque
que des objets soient projetés vers vos yeux, ce qui
peut entrainer de graves blessures aux yeux. Avant
d’utiliser un outil électrique, portez toujours des lunettes
équipées de protections latérales, ou un masque facial
complet au besoin. Nous recommandons l’utilisation
d’un masque de sécurité à vision large s’il doit être porté
par-dessus des lunettes de vue, ou bien de lunettes
de protection à écrans latéraux. Portez toujours une
protection oculaire répondant à la norme EN 166.
OLT1831&RLT1830Li 23lgs.indd 3OLT1831&RLT1830Li 23lgs.indd 3 2010/11/1 3:422010/11/1 3:42

4
Français
FR EN DE ES IT PT NL SV DA NO FI HU CS RU RO PL SL HR ET LT LV SK BG
CARACTÉRISTIQUES DE L’APPAREIL
Tension 18V
Vitesse à Vide 8000/min
Bobine Avance de fil automatique
Diamètre du Fil de
Coupe 1.6mm
Largeur de Coupe 30 cm
Niveau de pression
sonore garanti LPA=84dB(A), KPA=3dB(A)
Niveau de puissance
sonore garanti 96dB(A)
Vibrations 3.8 m/s² , K=1.5 m/s²
Pack batterie (RLT830Li) 1 x BPL-1815
Chargeur (RLT830Li) 1 x BCL1418
Pack batterie (OLT1831) -
Chargeur (OLT1831) -
Packs batterie
compatibles
BPL-1820 / BPL-1815 /
BPL-1820G
Chargeurs Compatibles BCL-1800 / BCL1418 /
BCL-1800G
APPRENEZ À CONNAÎTRE VOTRE DE COUPE TÊTE
Cf. Figure 1.
L’utilisation en toute sécurité de ce produit nécessite de
bien comprendre les informations apposées sur l’outil et
présentes dans ce mode d’emploi, ainsi que le travail
à effectuer.
POIGNÉE AVANT RÉGLABLE
La poignée frontale peut être ajustée afin d'en faciliter
l'utilisation et de diminuer les risques de perte de contrôle.
GUIDE POUR BORDURES
Le guide pour bordures permet à la tondeuse d'être
utilisée comme un coupe-bordures et évite également de
couper accidentellement les fleurs et les plantes.
BOUTON DE VERROUILLAGE
Le bouton de verrouillage permet d'éviter les mise en
marche accidentelles.
POIGNÉE ARRIÈRE PIVOTANTE
La poignée arrière pivotante peut être verrouillée dans
deux positions différentes, ce qui est pratique pour utiliser
l'appareil comme une tondeuse et comme un coupe-
bordures.
ARBRE TÉLESCOPIQUE
Le tête de la tondeuse peut être ajustée à l'aide du bouton
de pivotement pour faciliter le travail lors de l'utilisation en
tondeuse ou en coupe-bordures sur des pentes.
TÊTE PIVOTANTE À 3-POSITIONS
Le tête de la tondeuse peut être ajustée à l'aide du bouton
de pivotement pour faciliter le travail lors de l'utilisation en
tondeuse ou en coupe-bordures sur des pentes.
MONTAGE
DÉBALLAGE
Cet appareil doit être assemblé.
■Sortez délicatement l’appareil ainsi que tous ses
accessoires de l’emballage. Assurez-vous que tous
les éléments listés sont bien présents.
AVERTISSEMENT
N’utilisez pas cet appareil si une des pièces présentes
dans la liste est y déjà montée lorsque vous le déballez.
Les pièces présentes sur la liste ne sont pas montées
sur l’appareil par le fabricant et doivent l’être par
l’utilisateur. L’utilisation d’un appareil qui aurait pu
être mal monté est susceptible d’entraîner de graves
blessures.
■Vérifiez l’appareil avec soin afin de vous assurer qu’il
n’a pas été cassé ou endommagé durant le transport.
■Ne jetez pas les emballages avant d’avoir vérifié et
utilisé avec succès l’appareil.
CONTENU DE L'EMBALLAGE
Tondeuse à Fil
Montage du Déflecteur d'herbe à l'aide des Vis
Poignée avant
MANUEL D’UTILISATION
Chargeur (RLT830Li)
Batterie (RLT830Li)
OLT1831&RLT1830Li 23lgs.indd 4OLT1831&RLT1830Li 23lgs.indd 4 2010/11/1 3:422010/11/1 3:42

5
Français
FR EN DE ES IT PT NL SV DA NO FI HU CS RU RO PL SL HR ET LT LV SK BG
AVERTISSEMENT
Si une quelconque pièce ou partie de cette
tronçonneuse est endommagée, ne l’utilisez pas avant
de l’avoir réparée. L'utilisation de cet appareil avec
des pièces manquantes ou abîmées peut entraîner de
graves blessures.
AVERTISSEMENT
Ne tentez pas de modifier cet appareil ou de fabriquer
des accessoires non recommandés pour l’utilisation
avec ce produit. Toute altération de la sorte constitue
un mésusage et peut mener à des blessures graves.
AVERTISSEMENT
Débranchez toujours le câble d'alimentation de la
bougie lorsque vous montez des pièces. Le non-
respect de cette consigne peut entraîner un démarrage
involontaire et provoquer des blessures graves.
DESCRIPTION
Figure 1
1. Gâchette-interrupteur
2. Surmoulage GripZone™
3. Bouton de verrouillage
4. Poignée avant réglable
5. Poignée arrière pivotante
6. Arbre télescopique
7. Tête pivotante à 3-Positions
8. Guide pour bordures
9. Déflecteur d’herbe
Figure 2
9. Déflecteur d’herbe
10. Glissez-le sur la tête puis tournez-le dans le sens
inverse des aiguilles d'une montre
11. Lame de taille du fil de coupe
Figure 3
12. Trous de vis
13. vis
Figure 4
1. Gâchette-interrupteur
3. Bouton de verrouillage
Figure 5
14. Loquets
Figure 6
6. Arbre télescopique
15. Coupleur de l'arbre télescopique
Figure 7
16. Bouton
Figure 8
17. Bouton de pivotement
Figure 11
18. Bouton de déroulement du fil de coupe
19. Fil de coupe
Figure 12
8. Guide pour bordures
11. Lame de taille du fil de coupe
Figure 13
5. Poignée arrière pivotante
20. Coupleur d'arbre
Figure 15
21. Couvercle de bobine
22. Bobine
23. Boutons de verrouillage du couvercle de bobine
24. Fentes
25. Oeillet
Figure 16
22. Bobine
26. Trou
MONTAGE DU DEFLECTEUR D’HERBE
Cf. Figure 2 - 3.
AVERTISSEMENT
La lame de taille du fil de coupe est très coupante.
Evitez d'entrer en contact avec la lame. Le non-respect
de cette précaution peut entraîner de graves blessures.
■Retirez les vis fournies de la tête de la tondeuse à
l'aide d'un tournevis cruciforme.
■Ajustez le déflecteur d'herbe dans les fentes de la tête
de la tondeuse.
■Tournez dans le sens des aiguilles d'une montre pour
verrouiller le déflecteur d'herbe en place.
■Alignez les trous de vis du déflecteur d'herbe avec les
trous de la tête de la tondeuse.
■Mettez les vis fournies en place et serrez-les en les
tournant dans le sens des aiguilles d'une montre à
l'aide d'un tournevis cruciforme.
OLT1831&RLT1830Li 23lgs.indd 5OLT1831&RLT1830Li 23lgs.indd 5 2010/11/1 3:422010/11/1 3:42

6
Français
FR EN DE ES IT PT NL SV DA NO FI HU CS RU RO PL SL HR ET LT LV SK BG
UTILISATION
AVERTISSEMENT
Ne laissez pas l’habitude de l’appareil vous rendre
moins prudent. Rappelez-vous qu’il suffit d’une fraction
de seconde d’inattention pour que se produisent de
graves blessures.
AVERTISSEMENT
Portez toujours un masque de protection oculaire
ou des lunettes avec protections latérales lors de
l’utilisation d’un outil électrique. Dans le cas contraire,
des objets pourraient être projetés vers vos yeux et
provoquer de graves blessures.
AVERTISSEMENT
N'utilisez jamais de lame, de fléau, de câble ou de
corde avec cet appareil. N’utilisez aucun accessoire qui
ne soit pas recommandé par le fabricant de ce produit.
Il pourrait en résulter de graves blessures.
Cet appareil accepte les packs batterie lithium-ion 18V
Ryobi One+.
Reportez-vous au Mode d'emploi de votre pack batterie
Ryobi One+ et de votre chargeur pour des instructions
complètes sur la méthode de charge.
NOTE: Pour éviter de graves blessures, retirez toujours
le pack batterie et éloignez vos mains du bouton de
verrouillage lorsque vous portez ou que vous transportez
l'outil.
DÉMARRAGE / ARRÊT DE LA TONDEUSE
Cf. Figure 4.
■Pour mettre la tondeuse en marche, poussez le
bouton de verrouillage vers la gauche ou vers la droite
et enfoncez la gâchette-interrupteur. Pour arrêter la
tondeuse, relâchez la gâchette-interrupteur.
MISE EN PLACE DU PACK BATTERIE
Cf. Figure 5.
■Insérez le pack batterie dans l'appareil tel qu'illustré.
■Assurez-vous que les languettes de chaque côté du
pack batterie se verrouillent bien et que le pack batterie
est bien en place avant de commencer l'opération.
RETRAIT DU PACK BATTERIE
Cf. Figure 5.
■Appuyez sur les languettes de chaque côté du pack
batterie.
■Retirez la batterie.
ARBRE TÉLESCOPIQUE
Cf. Figure 6.
L'arbre peut être allongé ou raccourci pour faciliter le
travail.
■Retirez la batterie.
■Desserrez le coupleur de l'arbre télescopique en
le tournant dans le sens inverse des aiguilles d'une
montre. Faites coulisser l'arbre dans la position
désirée.
■Serrez le coupleur en le tournant dans le sens des
aiguilles d'une montre. Assurez-vous que l'arbre est
bien serré avant de remettre le pack batterie en place.
POIGNÉE AVANT RÉGLABLE
Cf. Figure 7.
L'angle de la poignée avant peut être ajusté sur 180°.
■Retirez la batterie.
■Posez la tondeuse sur une surface plane et tournez
le bouton dans le sens inverse des aiguilles d'une
montre pour desserrer la poignée.
■Pour tondre, réglez la poignée en position haute.
■Pour couper les bordures, réglez la poignée en
position basse.
■Tournez le bouton dans le sens des aiguilles d'une
montre jusqu'à ce que la poignée soit bien serrée
avant de remettre le pack batterie en place.
TÊTE PIVOTANTE À 3-POSITIONS
Cf. Figure 8.
La tête de la tondeuse peut être réglée sur trois positions
différentes.
■Retirez la batterie.
■Appuyez sur le bouton de pivotement et déplacez la
tête de la tondeuse vers le haut ou vers le bas sur une
des trois positions indiquées par les encoches.
Note: Réglez la tête de la tondeuse sur la première ou
sur la deuxième encoche pour tondre et pour couper
les bordures. N'utilisez la troisième encoche que pour le
rangement.
■Assurez-vous que la tête de la tondeuse est bien
serrée avant de remettre le pack batterie en place.
UTILISATION DE LA TONDEUSE
Cf. Figure 9.
Suivez ces conseils lorsque vous utilisez la tondeuse:
■Tenez la tondeuse avec votre main droite sur la
poignée arrière et votre main gauche sur la poignée
avant.
OLT1831&RLT1830Li 23lgs.indd 6OLT1831&RLT1830Li 23lgs.indd 6 2010/11/1 3:422010/11/1 3:42

7
Français
FR EN DE ES IT PT NL SV DA NO FI HU CS RU RO PL SL HR ET LT LV SK BG
■Maintenez fermement l'appareil des deux mains
pendant son utilisation.
■Reggere il bordatore in una posizione comoda con il
manico posteriore all'altezza del fianco.
■Tagliare l'erba alta con un movimento dall'alto verso il
basso. In questo modo si eviterà che l'erba si arrotoli
attorno all'albero e che la testa di taglio possa riportare
danni da surriscaldamento.
Si de l'herbe s'enroule autour de la tête de coupe:
■Retirez le pack batterie de la tondeuse.
■Retirez l'herbe.
AVERTISSEMENT
Tenez toujours la tondeuse à distance de votre corps.
Tout contact avec la tête de coupe de la tondeuse en
cours d'utilisation peut entraîner de graves blessures.
CONSEILS POUR LA COUPE
Cf. Figure 10.
Suivez ces conseils lorsque vous utilisez la tondeuse:
■Gardez l'appareil incliné vers la zone à couper; ceci
correspond à la zone de coupe optimale.
■La coupe se fait de droite à gauche. Vous éviterez
ainsi que des débris soient projetés vers l'opérateur.
Evitez de couper dans la zone dangereuse indiquée
dans l'illustration.
■Coupez à l'aide de l'extrémité du fil de coupe; ne faites
pas forcer la tête de coupe dans l'herbe non coupée.
■Les fils et clôtures accélèrent l'usure du fil, et vont
jusqu'à le briser. Les pierres et briques, les margelles,
ainsi que le bois peuvent accélérer l'usure du fil.
■Evitez les arbres et les arbustes. Les écorces, les
moulures, les revêtements, et les piquets de clôture
peuvent facilement être endommagés par le fil de
coupe.
AVANCE DU FIL DE COUPE
Note: La tondeuse est équipée d'une tête à avance
automatique du fil. Le fait de taper sur la tête dans le but
de dérouler du fil de coupe endommagera la tondeuse et
annulera la garantie.
■Tondeuse en marche, relâchez la gâchette-
interrupteur.
■Attendez deux secondes, puis enfoncez la gâchette-
interrupteur.
Note: Le fil de coupe se déroulera d'environ 6, 35 mm à
chaque arrêt et redémarrage jusqu'à ce que la longueur
de fil de coupe soit suffisante pour atteindre la lame de
taille du fil.
■Reprenez la coupe.
AVANCE MANUELLE DU FIL DE COUPE
Cf. Figure 11.
■Retirez la batterie.
■Poussez sur le bouton noir situé sur la tête de coupe
tout en tirant à la main sur le fil de coupe pour le
dérouler manuellement.
LAME DE TAILLE DU FIL DE COUPE
Cf. Figure 12.
Cette tondeuse est équipée d'une lame de taille du fil de
coupe située sur le déflecteur d'herbe. Pour une meilleure
coupe, déroulez le fil jusqu'à ce qu'il soit taillé par la lame
de taille. Déroulez du fil de coupe chaque fois que vous
entendez le moteur tourner plus vite que la normale, ou
lorsque l'efficacité de la coupe diminue. De cette façon,
vous maintiendrez des performances optimales et la
longueur de fil sera suffisante pour le faire avancer.
POIGNÉE ARRIÈRE PIVOTANTE
Cf. Figure 13.
La poignée arrière pivotante est utilisée en combinaison
avec le guide pour bordures.
■Retirez la batterie.
■Poussez le coupleur d'arbre vers le bas et tournez
l'extrémité de la poignée dans le sens des aiguilles
d'une montre jusqu'à ce que le coupleur se verrouille.
■Relâchez le coupleur.
COUPE DES BORDURES
Cf. Figure 12 - 14.
■Retirez la batterie.
Pivotez la poignée arrière lorsque vous utilisez le guide
pour bordures pour la coupe des allées et des trottoirs.
Pour utiliser le guide pour bordures, basculez-le vers le
bas à partir de sa position de rangement.
AVERTISSEMENT
Seules des pièces de rechange d'origine doivent
être utilisées en cas de remplacement. L’utilisation
de toute autre pièce peut présenter des dangers ou
endommager le produit.
AVERTISSEMENT
Pour éviter de graves blessures, retirez toujours le pack
batterie de l'outil lorsque vous le nettoyez ou que vous
effectuez une quelconque opération d'entretien.
ENTRETIEN GÉNÉRAL
Avant chaque utilisation, vérifiez l'intégralité de l'appareil
OLT1831&RLT1830Li 23lgs.indd 7OLT1831&RLT1830Li 23lgs.indd 7 2010/11/1 3:422010/11/1 3:42

8
Français
FR EN DE ES IT PT NL SV DA NO FI HU CS RU RO PL SL HR ET LT LV SK BG
à la recherche de pièces endommagées ou manquantes
telles que vis, écrous, boulons, couvercles, etc. Serrez
fermement toutes les fixations et tous les couvercles
et n'utilisez pas cet appareil tant que toutes les pièces
manquantes ou endommagées n'ont pas été remplacées.
Veuillez appeler le Service Clientèle Ryobi pour obtenir
de l'aide.
Evitez d'utiliser des solvants pour nettoyer les parties en
plastique. La plupart des plastiques sont susceptibles
d'être endommagés par différents types de solvants du
commerce. Utilisez des chiffons propres pour retirer la
saleté, les poussières, l'huile, la graisse, etc.
AVERTISSEMENT
Ne laissez jamais du liquide de frein, de l'essence, des
produits pétroliers, des huiles pénétrantes, etc. entrer
en contact avec les parties en plastique. Les produits
chimiques peuvent endommager, affaiblir ou détruire
les plastiques, ce qui pourrait entraîner de graves
blessures.
Seuls les éléments mentionnés dans la liste des
pièces détachées peuvent être remplacés ou réparés
par l'utilisateur. Toutes les autres pièces doivent être
remplacées par un Service Après-vente Agréé.
RETRAIT ET PRÉPARATION DU PACK BATTERIE EN
VUE DE SON RECYCLAGE
AVERTISSEMENT
Lors du retrait d'une batterie, couvrez ses bornes
avec un morceau de ruban adhésif épais. N'essayez
pas de détruire ou de démanteler le pack batterie ou
de démonter l'un de ses composants. Les batteries
Cadmium-nickel et Lithium-ion doivent être jetées ou
recyclées de façon appropriée. De même, ne touchez
jamais les deux bornes avec un objet métallique et/ou
avec une partie du corps, cela pourrait occasionner
un court-circuit. Gardez les enfants à l'écart. Le non-
respect de ces avertissements pourrait entraîner un
incendie et/ou de graves blessures.
REMPLACEMENT DE LA BOBINE
Cf. Figure 15.
N'utilisez que du fil rond monobrin de 0.065" (1,65mm) de
diamètre. Pour de meilleures performances, utilisez du fil
de coupe d'origine constructeur.
■Retirez la batterie.
■Enfoncez les languettes situées sur les côtés du
couvercle de bobine.
■Tirez sur le couvercle pour le retirer.
■Retirez la vieille bobine.
■Pour mettre la nouvelle bobine en place, assurez-vous
que le fil est pris dans la fente de la nouvelle bobine.
Assurez-vous que l'extrémité du fil dépasse d'au
moins 15cm de la fente.
■Mettez la nouvelle bobine en place de telle façon que
le fil et la fente soient alignés avec l'oeillet de la tête de
coupe. Faites passer le fil à travers l'oeillet.
■Tirez sur le fil afin qu'il se déroule à travers la fente
de la bobine.
■Remettez le couvercle de bobine en place en enfonçant
les languettes dans les fentes et en appuyant jusqu'à
ce que le couvercle s'emboîte.
REMPLACEMENT DU FIL DE COUPE
Cf. Figure 15 - 16.
■Retirez la batterie.
■Retirez la bobine de la tête de coupe.
Retirez tout fil restant sur la bobine.
■Coupez une longueur de fil d'environ 2.75m de long.
N'utilisez que du fil rond monobrin de 0.065" (1,65mm)
de diamètre.
■Insérez le fil dans le trou d'accroche de la partie
supérieure de la bobine. Enroulez le fil dans le
sens des aiguilles d'une montre autour de la partie
supérieure de la bobine, comme indiqué par les
flèches situées sur la bobine. Faites passer le fil
dans la fente supérieure de la bobine, en en faisant
dépasser environ 15cm. Ne remplissez pas trop la
bobine. Après avoir bobiné le fil, il doit rester au moins
6,35mm de jeu entre le fil enroulé et le bord extérieur
de la bobine.
■Remettez en place le support plastique, la bobine, et le
couvercle de bobine. Reportez-vous à Remplacement
de la Bobine plus haut dans ce mode d'emploi.
RANGEMENT DE LA TONDEUSE
■Retirez le pack batterie de la tondeuse avant de la
ranger.
■Débarrassez la tondeuse de tous les corps étrangers.
■Rangez la en un endroit hors de portée des enfants.
■Gardez-la à l'écart des produits corrosifs tels que
les produits chimiques de jardinage et les sels de
déneigement.
■Rangez et rechargez la batterie dans un endroit frais.
Les températures inférieures ou supérieures à une
température ambiante normale réduisent la durée de
vie d'une batterie.
■Ne rangez jamais une batterie déchargée. Après
utilisation, attendez que la batterie refroidisse et
rechargez-la immédiatement.
OLT1831&RLT1830Li 23lgs.indd 8OLT1831&RLT1830Li 23lgs.indd 8 2010/11/1 3:422010/11/1 3:42

9
Français
FR EN DE ES IT PT NL SV DA NO FI HU CS RU RO PL SL HR ET LT LV SK BG
■Toutes les batteries perdent de leur capacité de
charge avec le temps. Plus la température est élevée,
plus vite la batterie perd de sa capacité de charge.
Si vous n'utilisez pas votre taille-haies pendant des
périodes prolongées, rechargez la batterie tous les
mois ou tous les deux mois. Cela prolongera la durée
de vie de la batterie.
TROUBLESHOOTING
PROBLÈME CAUSE POSSIBLE SOLUTION
Le fil de coupe ne se déroule pas
lorsque vous utilisez la tête à avance
automatique.
Le fil de coupe est soudé à
lui-même.
Lubrifiez à l'aide de silicone en bombe.
Plus assez de fil dans la tête. Mettez plus de fil. Reportez-vous à la
section de ce mode d’emploi traitant du
remplacement du fil de coupe.
Le fil est devenu trop court. Tirez sur le fil de coupe tout en appuyant
sur le bouton
.
Le fil est emmêlé sur la tête
de coupe.
Tirez toute la longueur du fil et
rembobinez-le. Reportez-vous à la
section de ce mode d’emploi traitant du
remplacement du fil de coupe.
L'herbe s'enroule autour du carter de
l'arbre et autour de la tête de coupe.
Vous coupez l’herbe trop
près du sol.
Coupez les herbes hautes du haut vers
le bas pour éviter qu'elles ne s'enroulent.
Le moteur ne démarre pas lorsque
vous appuyez sur la gâchette-
interrupteur.
La batterie n'est pas bien en
place.
Pour verrouiller le pack batterie, assurez-
vous que les loquets de chaque côté de
la batterie s'emboîtent bien en place.
La batterie est déchargée. Chargez le pack batterie en respectant
les instructions relatives à votre modèle.
OLT1831&RLT1830Li 23lgs.indd 9OLT1831&RLT1830Li 23lgs.indd 9 2010/11/1 3:422010/11/1 3:42

10
English
EN
FR DE ES IT PT NL SV DA NO FI HU CS RU RO PL SL HR ET LT LV SK BG
Your trimmer has been engineered and manufactured to
a high standard for dependability, ease of operation, and
operator safety. When properly cared for, it will give you
years of rugged, trouble-free performance.
Thank you for buying a Ryobi product.
SAVE THIS MANUAL FOR FUTURE REFERENCE
INTRODUCTION
This appliance is not intended for use by persons
(including children) with reduced understanding, or lack of
experience and knowledge, unless they have been given
supervision or instruction concerning use of the appliance
by a person responsible for their safety.
Children should be supervised to ensure that they do not
play with the appliance.
This product has many features for making its use more
pleasant and enjoyable.
Safety, performance, and dependability have been given
top priority in the design of this product making it easy to
maintain and operate.
INTENDED USE
This trimmer is designed for cutting grass and soft
vegetation alike and for trimming grass edges in private
garden areas which are not accessible with a lawnmower.
The device is not allowed to be used in public gardens,
parks, sports centres or at roadsides as well as in
agriculture and forestry.
This trimmer is not allowed to be used for cutting or
chopping hedges, shrubs, bushes, and flowers.
GENERAL SAFETY RULES
WARNING
Read all safety warnings and all instructions. Failure
to follow the warnings and instructions may result in
electric shock, fire and/or serious injury.
Save all warnings and instructions for future reference.
WARNING
When using power tools, basic safety precautions
should always be taken to reduce the risk of fire, electric
shock and personal injury. Also, please read and heed
the advice given in the additional safety instructions.
READ ALL INSTRUCTIONS
■Keep the workplace clean and tidy. Cluttered work
areas invite accidents and injury.
■Consider the environment in which you are working.
Do not use electric power tools in damp or wet
locations. Keep the work area well lit. Do not expose
power tools to rain or high humidity. Do not use power
tools in the presence of flammable liquids or gas.
■Keep visitors away from the worksite. All visitors and
onlookers, especially children and the infirm person
should be kept well away from where you are working.
Do not let others in the vicinity make contact with the
tool or extension cord.
■Store tools safely. When not in use tools should be
stored in a dry place and locked up out of the reach
of children.
■Do not force the tool. The tool will do the job better
and more safely working at the rate for which it was
designed.
■Use the correct tool for the job. Do not force small tools
or attachments to do the job best handled by a heavy
duty tool. Never use a tool for a purpose other than
that for which it was intended.
■Dress correctly. Do not wear loose clothing or
jewellery; they can get caught in moving parts. Rubber
gloves and non-slip footwear are recommended
when working outdoors. If you have long hair wear a
protective hair covering.
■Use safety accessories. Safety glasses and ear
protectors should always be worn. A face or dust mask
is also required.
■Stay alert. Watch what you are doing. Use common
sense. Do not operate a power tool when you are tired.
■Check for damaged parts. Before using a tool, check
that there are no damaged parts. If a part is slightly
damaged, carefully determine if it will operate properly
and perform its intended function. Check for alignment
of moving parts, binding of moving parts, breakage
of part’s proper mounting and any other conditions
that may affect the operation of the tool. A guard
or other part that is damaged should be properly
repaired or replaced by an authorised service facility
unless otherwise indicated in this Instruction Manual.
Defective switches must be replaced by an authorised
service facility. Do not use a tool if the switch does not
turn the tool on and off correctly.
■Use only approved parts. When servicing use only
identical replacement parts. Use an authorised service
facility to fit replacement parts.
■Be aware of the harmful/toxic dusts arising from grass
trimming etc, (e.g. fertilizers, insecticides).
■The use of improper accessories or attachments other
than recommended can lead to personal injury.
■This electric tool is constructed in accordance with the
relevant safety requirements. Only experts may repair
OLT1831&RLT1830Li 23lgs.indd 10OLT1831&RLT1830Li 23lgs.indd 10 2010/11/1 3:422010/11/1 3:42

11
English
EN
FR DE ES IT PT NL SV DA NO FI HU CS RU RO PL SL HR ET LT LV SK BG
the electric tool. Otherwise, it may endanger your life.
■Voltage — make sure power supply is correct for your
machine. The voltage of this machine is on the rating
plate.
IMPORTANT: ADDITIONAL SAFETY NOTES FOR
YOUR TRIMMER.
■During assembly take great care when fitting the guard
as this has a very sharp cutting edge on one side for
cutting the nylon line.
■Never hold the cutter head above foot height or point it
towards people or animals when in use.
■If the trimmer starts to vibrate excessively switch off
immediately and have it checked by a qualified service
engineer.
CAUTION
The cutter head will continue to rotate for a few seconds
after switching off.
■Always remove any sticks and stones etc. before
using the trimmer.
■Keep hands and feet away from the cutting means at
all times and especially when switching on the motor.
■Do not cross roads or gravel paths while operating
trimmer.
■On steep slopes cut across the slope, never in an up
and down. Never run while using trimmer.
■Never fit a metal replacement line.
■Never use the trimmer while it is raining or in damp
condition.
■Use the trimmer in daylight or good artificial light.
Never use when visibility is bad.
■Do not over-reach. Keep proper footing and balance
at all times.
■Take care against injury from any device fitted for
trimming the filament line length. After extending new
cutter line, always return the machine to its normal
operating position before switching on.
■Always ensure the ventilation openings are kept clear
of debris.
■Never allow children or people unfamiliar with the
instructions to use the machine.
OLT1831&RLT1830Li 23lgs.indd 11OLT1831&RLT1830Li 23lgs.indd 11 2010/11/1 3:422010/11/1 3:42

12
English
EN
FR DE ES IT PT NL SV DA NO FI HU CS RU RO PL SL HR ET LT LV SK BG
SYMBOLS
Some of the following symbols may be used on this tool. Please study them and learn their meaning. Proper interpretation
of these symbols will allow you to operate the tool better and safer.
SYMBOL DESIGNATION/EXPLANATION
Precautions that involve your safety.
Read the operation manual and follow all warnings and safety instructions.
Wear eyes protection and ears protection.
Thrown objects can ricochet and result in personal injury or property damage. Wear protective
clothing and boots.
Keep all bystanders, especially children and pets, at least 15m from the operating area.
Beware of thrown or flying objects to bystanders. Keep bystanders a safe distance away from the
machine.
Do not expose to rain or in damp conditions.
The following signal words and meanings are intended to explain the levels of risk associated with this product.
SYMBOL SIGNAL MEANING
DANGER: Indicates an imminently hazardous situation, which, if not
avoided, will result in death or serious injury.
WARNING: Indicates a potentially hazardous situation, which, if not avoided,
could result in death or serious injury.
CAUTION: Indicates a potentially hazardous situation, which, if not avoided,
may result in minor or moderate injury.
CAUTION: (Without Safety Alert Symbol) Indicates a situation that may
result in property damage.
SERVICE
Servicing requires extreme care and knowledge and
should be performed only by a qualified service technician.
For service we suggest you return the product to your
nearest AUTHORISED SERVICE CENTRE for repair.
When servicing, use only identical replacement parts.
WARNING
The operation of any power tool can result in foreign
objects being thrown into your eyes, which can result
in severe eye damage. Before beginning power tool
operation, always wear safety goggles, safety glasses
with side shields, or a full face shield when needed.
We recommend Wide Vision Safety Mask for use
over eyeglasses or standard safety glasses with side
shields. Always use eye protection which is marked to
comply with EN 166.
OLT1831&RLT1830Li 23lgs.indd 12OLT1831&RLT1830Li 23lgs.indd 12 2010/11/1 3:422010/11/1 3:42
13
English
EN
FR DE ES IT PT NL SV DA NO FI HU CS RU RO PL SL HR ET LT LV SK BG
SPECIFICATIONS
Voltage 18V
No Load Speed 8000/min
String Head Automatic feed
Cutting Line Diameter 1.6mm
Cutting Path Diameter 30 cm
Guaranteed Sound
pressure level LPA=84dB(A), KPA=3dB(A)
Guaranteed sound
power level 96dB(A)
Vibration 3.8 m/s² , K=1.5 m/s²
Battery pack (RLT830Li) 1 x BPL-1815
Charger (RLT830Li) 1 x BCL1418
Battery pack (OLT1831) -
Charger (OLT1831) -
Compatible battery
packs
BPL-1820 / BPL-1815 /
BPL-1820G
Compatible Chargers BCL-1800 / BCL1418 /
BCL-1800G
KNOW YOUR TRIMMER
See Figure 1.
The safe use of this product requires an understanding of
the information on the tool and in this operator’s manual
as well as a knowledge of the project you are attempting.
Before use of this product, familiarize yourself with all
operating features and safety rules.
ADJUSTABLE FRONT HANDLE
The front handle assembly can be adjusted for ease of
operation and to help prevent loss of control.
EDGER GUIDE
The edger guide allows the trimmer to perform as an edger
and also prevents accidental trimming of flowers or plants.
LOCK-OUT BUTTON
The lock-out button prevents accidental starting.
ROTATING REAR HANDLE
The rotating rear handle can be locked in two different
positions for ease of use when edging and trimming.
TELESCOPING SHAFT
The trimmer can be adjusted to different lengths to
accommodate people of different heights.
THREE-POSITION PIVOTING HEAD
The trimmer head can be adjusted with the pivot button for
ease of use when edging or trimming on slopes.
ASSEMBLY
UNPACKING
This product requires assembly.
■Carefully remove the product and any accessories
from the box. Make sure that all items listed in the
packing list are included.
WARNING
Do not use this product if any parts on the Packing
List are already assembled to your product when you
unpack it. Parts on this list are not assembled to the
product by the manufacturer and require customer
installation. Use of a product that may have been
improperly assembled could result in serious personal
injury.
■Inspect the product carefully to make sure no breakage
or damage occurred during shipping.
■Do not discard the packing material until you have
carefully inspected and satisfactorily operated the
product.
PACKING LIST
String Trimmer
Grass Deflector Assembly with Screws
Front Handle Assembly
Operator’s Manual
Charger (RLT1830LI)
Battery (RLT1830LI)
WARNING
If any parts are damaged or missing do not operate this
product until the parts are replaced. Use of this product
with damaged or missing parts could result in serious
personal injury.
OLT1831&RLT1830Li 23lgs.indd 13OLT1831&RLT1830Li 23lgs.indd 13 2010/11/1 3:422010/11/1 3:42

14
English
EN
FR DE ES IT PT NL SV DA NO FI HU CS RU RO PL SL HR ET LT LV SK BG
WARNING
Do not attempt to modify this product or create
accessories not recommended for use with this product.
Any such alteration or modification is misuse and could
result in a hazardous condition leading to possible
serious personal injury.
WARNING
To prevent accidental starting that could cause serious
personal injury, always remove the battery pack from
the product when assembling parts.
DESCRIPTION
Figure 1
1. Switch trigger
2. GripZone™ overmold
3. Lock-out button
4. Adjustable front handle
5. Rotating rear handle
6. Telescoping shaft
7. 3-Position pivoting head
8. Edger guide
9. Grass deflector
Figure 2
9. Grass deflector
10. Slide over head and turn counterclockwise
11. Line cut-off blade
Figure 3
12. Screw holes
13. Screws
Figure 4
1. Switch trigger
3. Lock-out button
Figure 5
14. Latches
Figure 6
6. Telescoping shaft
15. Telescoping shaft coupler
Figure 7
16. Knob
Figure 8
17. Pivot button
Figure 11
18. Line release button
19. String
Figure 12
8. Edger guide
11. Line cut-off blade
Figure 13
5. Rotating rear handle
20. Edging coupler
Figure 15
21. Spool cover
22. Spool
23. Spool cover lock buttons
24. Slots
25. Eyelet
Figure 16
22. Spool
26. Hole
ATTACHING GRASS DEFLECTOR
See Figure 2 - 3.
WARNING
The line cut-off blade on the grass deflector is sharp.
Avoid contact with the blade. Failure to avoid contact
can result in serious personal injury.
■Remove supplied screws with a phillips screwdriver
from the trimmer head.
■Fit the grass deflector into the slots on trimmer head.
■Turn counterclockwise to lock grass deflector into
place.
■Line up the screw holes in the grass deflector with the
holes in the trimmer head.
■Install supplied screws and tighten by turning
clockwise with a phillips screwdriver.
■
OPERATION
WARNING
Do not allow familiarity with products to make you
careless. Remember that a careless fraction of a
second is sufficient to inflict serious injury.
WARNING
Always wear eye protection. Failure to do so could
result in objects being thrown into your eyes resulting
in possible serious injury.
OLT1831&RLT1830Li 23lgs.indd 14OLT1831&RLT1830Li 23lgs.indd 14 2010/11/1 3:422010/11/1 3:42
15
English
EN
FR DE ES IT PT NL SV DA NO FI HU CS RU RO PL SL HR ET LT LV SK BG
WARNING
Never use blades, flailing devices, wire, or rope on this
product. Do not use any attachments or accessories not
recommended by the manufacturer of this product. The
use of attachments or accessories not recommended
can result in serious personal injury.
This product will accept Ryobi One+ 18V lithium-ion
battery packs.
For complete charging instructions, refer to the Operator’s
Manuals for your Ryobi One+ battery pack and charger
models.
NOTE: To avoid serious personal injury, always remove
the battery pack and keep hands clear of the lock-out
button when carrying or transporting the tool.
STARTING/STOPPING THE TRIMMER
See Figure 4.
■To start the trimmer, push the lock-out button to either
the right or left side and pull the switch trigger. To stop
the trimmer, release the switch trigger.
TO INSTALL BATTERY PACK
See Figure 5.
■Insert the battery pack into the product as shown.
■Make sure the latches on each side of the battery pack
snap into place and the battery pack is secured before
beginning operation.
TO REMOVE BATTERY PACK
See Figure 5.
■Depress the latches on each side of the battery pack.
■Remove the battery pack.
TELESCOPING SHAFT
See Figure 6.
The shaft can be extended or shortened for ease of use.
■Remove the battery pack.
■Loosen the telescoping shaft coupler by turning
it counterclockwise. Slide the shaft to the desired
position.
■Tighten the coupler by turning clockwise. Make sure
the shaft is securely tightened before reinstalling the
battery pack.
ADJUSTABLE FRONT HANDLE
See Figure 7.
The angle of the front handle can be adjusted 180°.
■Remove the battery pack.
■Set the trimmer on a flat surface and turn the knob
counterclockwise to loosen the handle.
■For trimming, adjust the handle upward.
■For edging, adjust the handle downward.
■Turn the knob clockwise until the handle is securely
tightened before reinstalling the battery pack.
THREE-POSITION PIVOTING HEAD
See Figure 8.
The trimmer head can be adjusted to three different
positions.
■Remove the battery pack.
■Depress the pivot button and move the trimmer head
up or down to one of the three positions indicated by
the notches.
NOTE: Adjust the trimmer head to the first and second
notches for trimming and edging. Adjust to the third notch
for storage only.
■Make sure the trimmer head is securely locked into
place before reinstalling the battery pack.
OPERATING THE TRIMMER
See Figure 9.
Follow these tips when using the trimmer:
■Hold the trimmer with your right hand on the rear
handle and your left hand on the front handle.
■Keep a firm grip with both hands while in operation.
■Trimmer should be held at a comfortable position with
the rear handle about hip height.
■Cut tall grass from the top down. This will prevent grass
from wrapping around the shaft housing and string
head which may cause damage from overheating.
If grass becomes wrapped around the string head:
■Remove the battery pack from the trimmer.
■Remove the grass.
WARNING
Always hold the trimmer away from the body keeping
clearance between the body and the trimmer. Any
contact with the trimmer cutting head while operating
can result in serious personal injury.
CUTTING TIPS
See Figure 10.
Follow these tips when using the trimmer:
■Keep the trimmer tilted toward the area being cut; this
is the best cutting area.
■The trimmer cuts when passing the unit from left to
right. This will avoid throwing debris at the operator.
OLT1831&RLT1830Li 23lgs.indd 15OLT1831&RLT1830Li 23lgs.indd 15 2010/11/1 3:422010/11/1 3:42

16
English
EN
FR DE ES IT PT NL SV DA NO FI HU CS RU RO PL SL HR ET LT LV SK BG
Avoid cutting in the dangerous area shown in figure
10.
■Use the tip of the string to do the cutting; do not force
string head into uncut grass.
■Wire and picket fences cause extra string wear, even
breakage. Stone and brick walls, curbs, and wood may
wear string rapidly.
■Avoid trees and shrubs. Tree bark, wood moldings,
siding, and fence posts can easily be damaged by the
string.
ADVANCING STRING
NOTE: The trimmer is equipped with an auto-feed head.
Bumping the head to try to advance the line will damage
the trimmer and void the warranty.
■With the trimmer running, release the switch trigger.
■Wait two seconds, and press the switch trigger.
NOTE: The string will extend approximately 1/4 in. with
each stop and start of the switch trigger until the string
reaches the length of the grass deflector cut-off blade.
■Resume trimming.
ADVANCING THE STRING MANUALLY
See Figure 11.
■Remove the battery pack.
■Push the black button located on the string head while
pulling on string to manually advance the string.
LINE CUT-OFF BLADE
See Figure 12.
This trimmer is equipped with a line cut-off blade on the
grass deflector. For best cutting, advance line until it is
trimmed to length by the line cut-off blade. Advance line
whenever you hear the engine running faster than normal,
or when trimming efficiency diminishes. This will maintain
best performance and keep line long enough to advance
properly.
ROTATING REAR HANDLE
See Figure 13.
The rotating rear handle is used in combination with the
edger guide.
■Remove the battery pack.
■Push down on the edging coupler and turn handle end
clockwise until the edging coupler locks into place.
■Release the edging coupler.
EDGING
See Figures 12 - 14.
■Remove the battery pack.
Rotate the rear handle when using the edger guide for
edging sidewalks and walkways. To use the edger guide,
flip down from its stored position.
WARNING
When servicing, use only identical replacement parts.
Use of any other parts may create a hazard or cause
product damage.
WARNING
To avoid serious personal injury, always remove the
battery pack from the tool when cleaning or performing
any maintenance.
GENERAL MAINTENANCE
Before each use, inspect the entire product for damaged,
missing, or loose parts such as screws, nuts, bolts, caps,
etc. Tighten securely all fasteners and caps and do not
operate this product until all missing or damaged parts
are replaced. Please call Ryobi Customer Service for
assistance.
Avoid using solvents when cleaning plastic parts. Most
plastics are susceptible to damage from various types of
commercial solvents and may be damaged by their use.
Use clean cloths to remove dirt, dust, oil, grease, etc.
WARNING
Do not at any time let brake fluids, gasoline, petroleum-
based products, penetrating oils, etc., come in contact
with plastic parts. Chemicals can damage, weaken or
destroy plastic which may result in serious personal
injury.
Only the parts shown on the parts list are intended to
be repaired or replaced by the customer. All other parts
should be replaced at an Authorised Service Centre.
BATTERY PACK REMOVAL AND PREPARATION FOR
RECYCLING
WARNING
Upon removal, cover the battery pack’s terminals with
heavy-duty adhesive tape. Do not attempt to destroy
or disassemble battery pack or remove any of its
components. Lithium-ion and nickel-cadmium batteries
must be recycled or disposed of properly. Also, never
touch both terminals with metal objects and/or body
parts as short circuit may result. Keep away from
children. Failure to comply with these warnings could
result in fire and/or serious injury.
SPOOL REPLACEMENT
See Figure 15.
Use only round type .065 in. diameter monofilament string.
OLT1831&RLT1830Li 23lgs.indd 16OLT1831&RLT1830Li 23lgs.indd 16 2010/11/1 3:422010/11/1 3:42
17
English
EN
FR DE ES IT PT NL SV DA NO FI HU CS RU RO PL SL HR ET LT LV SK BG
Use original manufacturer’s replacement string for best
performance.
■Remove the battery pack.
■Push in tabs on side of spool retainer.
■Pull spool retainer up to remove.
■Remove the old spool.
■To install the new spool, make sure the string is
captured in the slot on the new spool. Make sure
the end of the string is extended approximately 6 in.
beyond the slot.
■Install the new spool so that the string and slot align
with the eyelet in the string head. Thread the string
into the eyelet.
■Pull the string extending from the string head so the
string releases from the slot in the spool.
■Reinstall the spool retainer by depressing tabs into
slots and pushing down until spool retainer clicks into
place.
STRING REPLACEMENT
See Figures 15 - 16.
■Remove the battery pack.
■Remove the spool from the string head.
NOTE: Remove any old string remaining on the spool.
■Cut a piece of string approximately 9 ft. long. Use only
.065 in. diameter monofilament string.
■Insert the string into the anchor hole in the upper part
of the spool. Wind the string around the upper part of
the spool clockwise, as shown by the arrows on the
spool. Place string in the slot on upper spool flange,
leaving about 6 in. extended beyond the slot. Do not
overfill. After winding the string, there should be at
least 1/4 in. between the wound string and the outside
edge of the spool.
■Replace the plastic retainer, spool, and the spool
retainer. Refer to Spool Replacement earlier in this
manual.
STORING THE TRIMMER
■Remove the battery pack from the trimmer before
storing.
■Clean all foreign material from the trimmer.
■Store it in a place that is inaccessible to children.
■Keep away from corrosive agents such as garden
chemicals and de-icing salts.
■- Store and charge your batteries in a cool area.
Temperatures above or below normal room
temperature will shorten battery pack life.
■Never store batteries in a discharged condition. Wait
for battery pack to cool and fully charge immediately.
■All batteries gradually lose their charge. The higher the
temperature, the quicker they lose their charge. If you
store your unit for long periods of time without using it,
recharge the batteries every month or two. This
practice will prolong battery pack life.
TROUBLESHOOTING
PROBLEM POSSIBLE CAUSE SOLUTION
String will not advance when using the auto-
feed head.
String is welded to itself. Lubricate with silicone spray.
Not enough string on spool.
Install more string. Refer to String
Replacement earlier in this manual.
String is worn too short.
Pull string while pressing button.
String is tangled on spool. Remove string from spool and rewind.
Refer to String Replacement earlier in this
manual.
Grass wraps around shaft housing and
string head.
Cutting tall grass at ground level. Cut tall grass from the top down to prevent
wrapping.
Motor fails to start when switch trigger is
depressed.
Battery is not secure. To secure the battery pack, make sure the
latches on each side of the battery pack
snap into place.
Battery is not charged. Charge the battery pack according to the
instructions included with your model.
OLT1831&RLT1830Li 23lgs.indd 17OLT1831&RLT1830Li 23lgs.indd 17 2010/11/1 3:422010/11/1 3:42
Other manuals for OLT1831
1
This manual suits for next models
1
Table of contents
Languages:
Other Ryobi Trimmer manuals

Ryobi
Ryobi rlt4025 User manual

Ryobi
Ryobi RY28120 User manual

Ryobi
Ryobi RPT2543C, RY7011 User manual

Ryobi
Ryobi RY25CSEMC User manual

Ryobi
Ryobi RY40600 User manual

Ryobi
Ryobi RY24200 User manual

Ryobi
Ryobi RY30542 User manual

Ryobi
Ryobi P20015 User manual

Ryobi
Ryobi Expand-It RYSST44 User manual

Ryobi
Ryobi RLT1825Li13 User manual

Ryobi
Ryobi P2000 User manual

Ryobi
Ryobi RCT2800AD User manual

Ryobi
Ryobi AC04156 User manual

Ryobi
Ryobi RLT1238 User manual

Ryobi
Ryobi RLT2500QF User manual

Ryobi
Ryobi CLT1830B User manual

Ryobi
Ryobi RHT185020 User manual

Ryobi
Ryobi P20102 User manual

Ryobi
Ryobi RY29550 User manual

Ryobi
Ryobi RBC1020 User manual