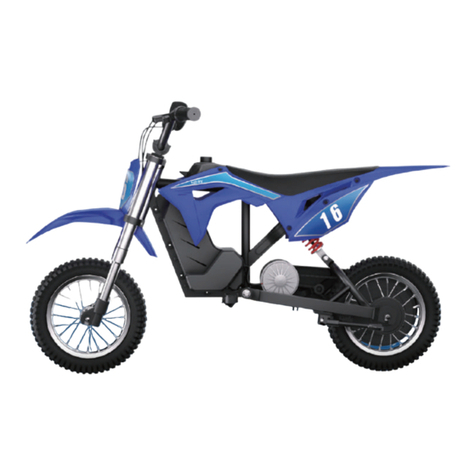
Thumpstar TSE 12 E3-BASE User manual

ELECTRIC BALANCER
THUMPSTAR
OWNER’S
MANUAL
Read and understand this entire manual before riding. Thumpstar
Motorbikes strongly recommend having this machine assembled
by a skilled mechanic. Assembly should include, but is not
limited to checking over the entire bike including
the engine.
VIN & ENGINE NUMBER
NOTE:
Manual illustrations are for demonstration purposes only. Illustrations
may not reflect exact appearance of actual product. Specifications
subjected to change without notice.
www.thumpstar.com.au
www.thumpstar.co.nz
/thumpstarmoto
/genuinethumpstar
MANUAL # 3941

Owner’s Manual
THUMPSTAR BALANCER, FOR AGES 3-12
IMPORTANT: READ MANUAL CAREFULLY BEFORE
OPERATING
We care about the safety and comfort of our customers. is manual will
guide you through proper techniques in operating your THUMPSTAR
balancer.
For any additional information, please visit:
www.umpstarUSA.com
NOTE: Manual illustrations are for demonstration purposes only. Illustrations may not
reect the exact appearance of the actual product. Specications are subject to change
without notice. Please have your product Serial Number (S/N) and a copy of your receipt
before contacting us for warranty assistance and/or replacement parts.
WARNING: Riding a TSE balancer does present potential risks and caution is required.
Like any riding product, a TSE balancer has inherent hazards associated with its use (for
example, falling o or riding it into a hazardous situation). When riding the TSE balancer,
it is possible to lose control or otherwise get into dangerous situations. Both children
and the adults responsible for supervising them, must recognize that if such hazards
occur, a rider can be seriously injured or die even when using safety equipment and other
precautions. RIDE AT YOUR OWN RISK.

ese pages give an overview of the contents of your owner’s manual
Introduction ...........................................................................................
A Few Words About Safety ....................................................................
Electric Balancer Pre-Riding Safety ......................................................
Before Riding ..........................................................................................
Safety Equipment ...................................................................................
Message To Riders ..................................................................................
Loading, Accessories & Modications ................................................
Safety Labels .........................................................................................
TSE Bike Components ..........................................................................
Acceptable Riding Practices & Conditions ..........................................
Powered and Rotating Parts Warning ....................................................
Proper Riding Attire ..............................................................................
Starting Process ....................................................................................
Safely Approaching & Remounting the Bike .......................................
Loading and Un-loading .......................................................................
Check and Maintain .............................................................................
Pre-Ride Inspection & Checklist ..........................................................
rottle Components / Features ..........................................................
rottle Operation ...............................................................................
Changing Power Modes ........................................................................
Activate Program Selection ...................................................................
Select Program .....................................................................................
Exit Program Selection .........................................................................
Led Information ..................................................................................
Repair & Maintenance .........................................................................
Test Brake ............................................................................................
Adjust Brake ........................................................................................
Replace Tire and Tube ..........................................................................
Battery .................................................................................................
Troubleshooting Guide ........................................................................
Specications ........................................................................................
Spare Part Catalogue ...........................................................................
Parts Finder .........................................................................................
Warranty ..............................................................................................
Disclaimer ............................................................................................
Contents
1
3
4
5
6
9
10
11
13
14
15
15
16
18
18
18
19
20
21
22
23
24
24
25
27
27
28
29
29
30
31
34
40
41
42

1
Introduction
Congratulations on the purchase of your new TSE Balancer! With
proper assembly and maintenance, it will oer you years of enjoyable riding!
IMPORTANT:
Carefully read and follow this manual (and any other materials included
with this bike) before riding. Please retain this manual for future use. If this
bike was purchased for a child, it is the responsibility of the purchaser to
verify the bike has been properly assembled, and that the user has been
properly trained and instructed in use of the bike.
is manual is provided to assist you and is not intended to be a
comprehensive manual covering all aspects of maintaining and repairing
your bicycle. e bicycle you have purchased is a complex piece of
equipment that must be properly assembled and maintained in order to be
ridden safely. You must have it assembled and maintained by one of our
authorized dealers.
e user or consumer assumes all risk of personal injuries, damage, or
failure of the bicycle or system and all other losses or damages to themselves
and others and to any property arising as a result of using the bicycle. (need
to ensure that you hold no liability for injury to the user or damage to
property)
DO NOT DISASSEMBLE, MODIFY OR REPLACE ELECTRICAL PARTS.
If you need to change any parts, please consult one of our authorized
dealers or contact customer service for additional help.
NOTE: YOUR INSURANCE POLICIES MAY NOT PROVIDE
COVERAGE FOR ACCIDENTS INVOLVING THE USE OF THIS
BICYCLE. TO DETERMINE IF COVERAGE IS PROVIDED YOU
SHOULD CONTACT YOUR INSURANCE COMPANY OR AGENT.

2
Introduction
DANGER: Failure to properly assemble and maintain your bicycle could
result in serious injury or death to the rider.
is manual contains important safety, performance and service
information. e purpose of this Owner’s Manual is to help you use your
bike safely in the manner it is intended and allow you to enjoy the benets
it oers for many years to come. Please read it before you take the rst ride
on your new bicycle, and keep it for reference. If you have any questions
or do not understand something, take responsibility for your safety and
contact umpstar customer service at 330-298-5107 or
support@thumpstarusa.com
ALWAYS WEAR A PROPERLY FITTED HELMET WHEN YOU RIDE YOUR
BICYCLE. DO NOT RIDE AT NIGHT. AVOID RIDING IN WET CONDITIONS.

3
A Few Words About Safety
Your safety, and the safety of others, is very important and operating
this electric balancer safely is an important responsibility.
WARNING
Always use an
approved helmet &
protective gear
Never use on
public roads
Never carry
passengers
is section presents some of the most important information and
recommendations to help you ride your electric balancer safely.
Please take a few moments to read these pages. is section also includes
a special message for parents and location information for the safety
labels on your electric balancer.
You could be SERIOUSLY HURT if you don’t
follow instructions.
You could be HURT if you don’t follow
instructions.

4
Electric Balancer Pre-Riding Safety
CAUTION: For your safety you must carefully read this manual and
follow its instructions. Your bicycle may come with additional instruction
sheets that cover features unique to your bike. Please ensure that you read
and become familiar with their contents and retain them with this manual
for future reference. Remember bicycles, in most areas, are subject to the
same laws, rules, and regulations as motor vehicles.
Always wear a CPSC approved helmet when riding your bike.
Learn and follow local and state trac use laws.
Any major service or adjustments on your bike not covered in this manual
should be carried out by a professional bicycle mechanic. If you wish to
make adjustments yourself, this manual contains important tips on how to
do it.
CAUTION: Any adjustments you make are entirely at your own risk. Do
NOT use your bike for freestyle and stunt riding, jumping or competitive
events. Do not ride your bike when any part is damaged or not working
properly. You must, for your safety and the safety of other users, consult a
professional bicycle mechanic for any questions on repairs or maintenance.
WARNING: As with all mechanical components, the bicycle is subjected
to wear and high stresses. Dierent materials and components react to
wear or stress fatigue in dierent ways. As your bicycle ages, you should
inspect it more frequently to look for deformed, cracked, bent, or loose
components. Such conditions may lead to sudden failure. is may
possibly cause injuries to the rider. If something is cracked or broken,
do not ride until repairs have been made.

5
Electric Balancer Pre-Riding Safety
BEFORE RIDING
1. WARNING - ON AND OFF ROAD CONDITIONS: e condition of the
riding surface is very important to your safety. If the surface is wet, or has
sand, leaves, small rocks or other loose debris on the surface where you
plan to ride, carefully decrease the speed of the bicycle and ride with extra
caution. It will take a longer time and more distance to stop. Apply the
brakes sooner and with less force. Always apply the rear brake rst allowing
time and distance for it to take eect. en follow by cautiously applying the
front brake, in order to maintain control of the bicycle. Rapid front brake
application rst may cause a front pitch over or fall. Learn to use your brakes
properly under controlled conditions until you learn proper braking under
all road conditions.
2. NOTICE: State and federal regulations require a full set of reectors.
Some state and local laws may require that your bike be equipped
with a warning device, such as a horn or bell and most states require a
light. e manufacturer and many legal authorities DO NOT approve or
encourage riding at night. Vision is quite limited at dawn, dusk and at night
for bike riders, motorists and by-standers. If you must ride at night, take
extra precautions, use front and rear lights, wear ashers on your arms,
wear light-colored clothing, and plan your route to ride in well lighted areas
avoiding heavy trac areas.
3. NOTE: Always wear shoes when riding a bicycle and avoid loose
tting clothes. Wear a cu band or trouser clip to keep pants or other loose
clothing from getting caught in the chain wheel. Long sleeves, long pants,
gloves, eye protection, a CPSC approved helmet, elbow and knee pads are
recommended. Helmet use is required by law in many states and is always a
good idea for your safety.

6
Electric Balancer Pre-Riding Safety
4. CAUTION: WET WEATHER WARNING: Check your brakes frequently.
e ability to stop is critical to your safety. Roads are slippery in wet weather
so avoid sharp turns and allow more distance for stopping. Brakes become
less ecient when wet. Leaves, loose gravel and other debris on the road
can also lengthen stopping distance. If at all possible, do not ride in wet
weather. Vision and control are impaired, creating a greater risk of accidents
and injury.
5. CAUTION: A bicycle rider’s best defense against accidents is to be alert
to road conditions and trac in the area. Do not wear anything that restricts
your vision or your hearing.
6. When riding, ALWAYS WEAR A APPROVED BIKE HELMET. It may save
your life.
7. Obey all trac regulations. Most trac regulations apply to bike riders as
well as automobile operators. Observe all state and local trac regulations,
signs and signals. Check with your local police station on bicycle licensing
and inspection, and where it is legal to ride your bike.
8. ON AND OFF ROAD OPERATION: Avoid the following road hazards: drain
grates, pot holes, ruts, so road edges, gravel, leaves (especially when they
are wet), uneven pavement, railroad crossings, manhole covers, curbs, speed
bumps, puddles, and debris as all have an eect on your riding and may
result in loss of control. Adjust your speed and the way you use your brakes
if you must ride in such areas.
9. If any components become loose while riding, (STOP!!) immediately and
tighten, or bring to a mechanic for repair.

7
Electric Balancer Pre-Riding Safety
TO AVOID INJURY, THIS PRODUCT MUST BE PROPERLY ASSEMBLED
BEFORE USE. WE STRONGLY RECOMMEND THAT YOU REVIEW THE
COMPLETE ASSEMBLY GUIDE AND PERFORM CHECKS SPECIFIED IN
THE OWNER’S MANUAL BEFORE RIDING.
Just a minute spent before each ride can signicantly improve your safety
and the enjoyment of your ride. So, EACH TIME before you ride make a
habit of performing the following safety checks:
• Stand in front of the bicycle facing rearward and hold the front wheel
securely between your legs.Try to twist the handlebar and verify that they do
not move. en pull the handlebars up, trying to li the bike. ere should
be no movement.
• Try to push the front wheel from side to side and conrm that it feels tight
and will not wobble. Li the front wheel up by the handlebars and strike the
wheel downward with the heel of your hand to conrm that it is securely
attached to the wheel. Spin the front wheel and conrm that it does not
wobble or contact the fork or brake pads.
• Try to li/push down on and twist the seat to conrm it is tight.
• Look at the connection of the pedals to the crank arm. You should not see
pedal screw threads and the pedal should feel rm and be parallel to the
ground.
• Apply your brake(s) and make sure they feel rm to the touch, and then
spin the wheel(s). Apply the brakes. e brakes should stop the wheel(s).
• Check to be sure that the fenders and accessories (if equipped) are rmly
attached and will not contact any moving parts. Make sure all reectors are
in position and not broken.
Now, put on your BICYCLE SAFETY HELMET and enjoy your ride. Your
safety is well worth just a minute. Also, be sure to read and follow the warn-
ings and instructions in this manual

8
Electric Balancer Pre-Riding Safety
SAFETY EQUIPMENT
umpstar promote the use of safety equipment during the use of your
electric balancer; the following list is an advisory guideline of the equipment
that should be obtained before using your electric balancer for the rst time,
and to be used for every ride regardless of experience and skill level.
HELMET
EYE PROTECTION
GLOVES
FOOTWEAR
CLOTHING
A helmet is the most important piece of protective equipment and
should be worn at all times the electric balancer is being ridden.
Ensure the helmet ts the operator snugly, is securely fastened and
provides good, all-round visibility. A poorly-tting or loose helmet
can become dislodged in an incident and then oer no protection
at all.
Recommended to prevent eye injuries and prevent branches, bugs,
dust or sand hitting your face and distracting you. Sunglasses are
unlikely to provide adequate physical protection.
Arms and legs should be covered to reduce abrasions to the body,
even in hot weather. Trousers should be close-tting and in good
condition.
Sturdy footwear is recommended

9
Message To Riders
Your safety is very important to umpstar. at’s why we urge you to
read this message before riding this electric balancer. You can help prevent
accidents by making good decisions about if, when, and how you ride this
electric balancer.
THINGS TO CONSIDER WHEN RIDING
e rst decision you’ll need to make is whether you’re ready to ride. Riding
readiness varies widely from one person to another, and age and size are not
the only factors.
PHYSICAL ABILITY
An important consideration is that riders must be big enough to hold the
electric balancer up, get on, and comfortably sit on the seat with both feet
touching the ground. ey should also be able to easily reach and
work the brakes, throttle, and all other controls.
If you decide that you’re ready to safely operate this electric balancer,
make sure you carefully read and understand the owner’s manual
before riding. Also be sure that you have a helmet and other
appropriate riding equipment, and always wears it when
operating the electric balancer or sitting on it.
SAFE AND RESPONSIBLE RIDING
When you put safety rst, you can enjoy more peace of mind, and
you can enjoy more hours of safe oroad riding.

10
Loading, Accessories & Modifications
umpstar designed a rider-only electric balancer. It was not designed
to carry a passenger or cargo. A passenger or cargo could interfere with
your ability to move around to maintain your balance and control of
the electric balancer.
In addition, exceeding the weight limits or carrying an unbalanced load
can seriously aect your electric balancer’s handling, braking, and stability.
Adding accessories or making modications that change this
electric balancer’s design and performance can also make it unsafe. Also,
the weight of any accessories will reduce the maximum load the
electric balancer can carry
We recommend that you do not carry any cargo on this electric balancer.
ACCESSORIES & MODIFICATION
Modifying your electric balancer or using non-umpstar accessories can
make your electric balancer unsafe.

11
Loading, Accessories & Modifications
ACCESSORIES
We strongly recommend that you use only umpstar Genuine Parts and
Accessories that have been specically designed or approved and tested for
your electric balancer. Because umpstar cannot test all other accessories,
you must be personally responsible for proper selection, installation, and
use of non-umpstar accessories. Check with your dealer for assistance
and always follow this guideline:
Make sure the accessory:
- Does not reduce ground clearance and lean angle
- Limit steering travel
- Alter your riding position
- Interfere with operating any controls
MODIFICATIONS
We strongly advise you not to remove any original equipment or modify
your electric balancer in any way that would change its design or operation.
Such changes could seriously impair your electric balancer handling,
stability, and braking, making it unsafe to ride.
We also advise you not to make any modications or remove any equipment
that would make the electric balancer illegal in your area.

12
Safety Labels

13
TSE Bike Components
1. Frame
2. Handlebar
3. Handlebar Grip
4. Brake Lever
5. rottle
6. Front Fork
7. Stem
8. Headset
9. Front Wheel
10. Front Axle Nuts
11. Charger Interface
12. Foot Rest
13. Seat
14. Seat Post
15. Seat Clamp
16. Rear Motor Wheel
17. Rear Axle Nuts
18. Brake
19. Brake Disc
20. Electric Speed Controller
21. Battery
22. Battery Nuts

14
Acceptable Riding Practices & Conditions
Always check and obey any local laws or regulations, which may aect
the locations where the TSE bike may be used. Keep safely away from
cars and motor vehicle trac at all times, and only use where allowed and
with caution. Never ride your umpstar TSE bike on public streets, roads,
highways, at night or when visibility is limited.
Do not activate the speed control on the hand grip unless you are on
the TSE bike and in a safe, outdoor environment suitable for riding. e
maximum speed of the bike is limited by the selected power mode (See
rottle Operation section below). Avoid excessive speeds that can be
associated with downhill rides. Maintain a grip on the handlebars with both
hands at all times. Do not touch the brake or motor immediately on your
TSE bike when in use or aer riding, as these parts can become very hot.
Ride defensively. Watch out for potential obstacles that could catch
your wheel or force you to swerve suddenly or lose control. Be careful to
avoid pedestrians, skaters, skateboards, scooters, bikes, children or animals
who may enter your path, and respect the rights and property of others.
ese TSE bikes are intended for use on at, dry surfaces, without loose
debris, such as sand, leaves, rocks or gravel. Wet, slick, bumpy, uneven or
rough surfaces may impair traction and contribute to possible accidents.
Do not ride your TSE bike through mud, over ice, through puddles, in wet
or icy weather and never immerse or wash the TSE bike with water, as he
electrical and drive components could be damaged by water or create other
possibly unsafe conditions. Never use near steps or swimming pools. Avoid
sharp bumps, drainage grates, and sudden surface changes. Do not attempt
or do stunts or tricks on your TSE bike. ese TSE bikes are not made to
withstand abuse from misuse, such as jumping, curb grinding or any other
type of stunts. Racing, stunt riding, or other maneuvers also enhance risk of
loss of control, or may cause uncontrolled rider actions or reactions. Never
allow more than one person at a time to ride the TSE bike. Do not ride at
night or when visibility is limited. Never use headphones, a cell phone or
text when riding. Never risk damaging surfaces, such as carpet or ooring,
by use of a TSE bike indoors. Never tow anything or anyone with or allow
your umpstar TSE bike to be towed by any other person or vehicle,
motorized or not.

15
Acceptable Riding Practices & Conditions
POWERED & ROTATING PARTS WARNING:
Do not allow hands, feet, hair, any body parts, clothing, or similar articles
to contact with any rotating or moving parts, such as wheels, or drive train
components and chain while the motor is running or while the wheels and
tires are rotating.
PROPER RIDING ATTIRE:
Always wear proper protective equipment, such as an approved and
properly tted safety helmet (with chin strap securely buckled), eye
protection, athletic shoes (lace-up shoes with rubber soles) elbow pads
and knee pads. Keep shoelaces tied and out of the way of the wheels,
motor and drive system. Never ride barefooted or in sandals. Long-sleeved
shirt, long pants, and gloves are recommended. Furthermore, a helmet may
be required by local law or regulation in your area. Your child’s brain is their
most valuable asset, MAKE THEM WEAR AN APPROVED, PROPERLY FITTED
AND BUCKLED HELMET!

16
Starting Process
THE STARTING PROCESS: SIT, PUSH, COAST, BRAKE,
PRACTICE
(Perform under adult supervision, wearing protective equipment, in an
open and safe area)
Non-powered training: (Turn Power Switch to the “OFF” posi-
tion)
1. Sit on bike with feet on ground. Familiarize rider with seat, foot platform,
brake(s), handlebars , throttle and their function.
2. Push bike around with feet on ground learning balance and condence.
3. Coast and practice controlled turning with feet on platform.
4. Brake to a safe stop using hand brake while maintaining control.
5. Practice standing and stopping while maintaining control without falling
Powered Mode Qualifying Checklist:
Can rider push and coast safely with feet on platform?
Can rider maintain control while standing on platform?
Can rider control bike from start to stop?
Can rider use hand brake to stop on command?
Can rider coast and turn while navigating mild hills and obstacles?
Has rider demonstrated enough control to move to powered riding
without being a risk to themselves and others?
If so, move to Powered Mode training!
Power Mode:
Training Mode:
1. Press the Power Switch to the “ON” position.
2. Ensure GREEN LED is lit, indicating “Training Mode” selected. If not,
see rottle operation and Changing Power Mode sections in this manual.
3. Have child carefully push TSE bike forward and practice slightly twisting
throttle learning to feel the TSE bike beginning to move forward under
power.

17
Starting Process
Standard Mode:
1. Press the Power Switch to the “ON” position.
2. Ensure YELLOW LED is lit, indicating “Standard Mode” selected. If not,
see rottle operation and Changing Power Mode sections in this manual.
3. Adult should supervise child as the top speed and acceleration have both
increased in this mode.
4. Coach child to demonstrate ability to roll o throttle and use brake to slow
to a stop and maintain a safe distance for obstacles and other riders.
5. A majority of users will nd this speed to be adequate for signicant skill
building and lots of fun!
Advanced Mode:
1. Press the Power Switch to the “ON” position.
2. Ensure RED LED is lit, indicating “Advanced Mode” selected. If not, see
rottle operation and Changing Power Mode sections in this manual.
3. Adult should supervise child as the top speed and acceleration are at their
maximum in this mode.
4. Teach child to demonstrate ability to roll o throttle and use brake to slow
to a stop and maintain a safe distance for obstacles and other riders.
5. is mode is for Advanced and Older Riders only!
This manual suits for next models
2
Table of contents

