PXID Mantis P6 User manual

USER MANUAL
Tips: Please read this manual carefully before use and keep it properly.
Do not ride until you know the performance of this product.

Welcome
Thank you for choosing PXID Mantis P6 electric bike (hereinafter referred to as Mantis P6 ). This bicycle is a safe and fashionable transpor-
tation tool. Enjoy free riding and speed control from now on!
In order to ensure the safety, please read this manual carefully before riding to meet the relevant conditions.
Join PXID Cycling Club and we look forward to meeting you on social media!
Contact us
Company: Huaian PX Intelligent Manufacturing Co.,Ltd.
Add: No.18, Shenzhen East Road, Qingjiangpu District, HuaiAn, JiangSu
Email: [email protected]
Website: www.pxid.com
Tag us! @PXID #PXID
Bike Pxid
pxid_bike
Pxid Bike
@PxidBike

Content
1. Must read before assembling and riding............................................................................................................. 1
2. Unboxing and checklist ........................................................................................................................................ 3
3. Installation instructions ........................................................................................................................................ 5
4. Operating instructions .......................................................................................................................................... 7
5. Moving and storage instructions ....................................................................................................................... 11
6. User Maintenance Instructions .......................................................................................................................... 17
7. Frame code & motor code .................................................................................................................................. 21
8. Warranty service ................................................................................................................................................. 22
9. Safety instructions ............................................................................................................................................. 24
10. Legal statements ................................................................................................................................................ 27

1. Must read before assembling and riding
1. Please read this manual throughout before assembling this e-bike or the rider’s first time riding it.
2. Before unboxing, please check the shipping damages on the box and take the photo(s) to record it.
3. You may need a friend’s assistance to avoid hurting yourself or damaging the bike when unboxing.
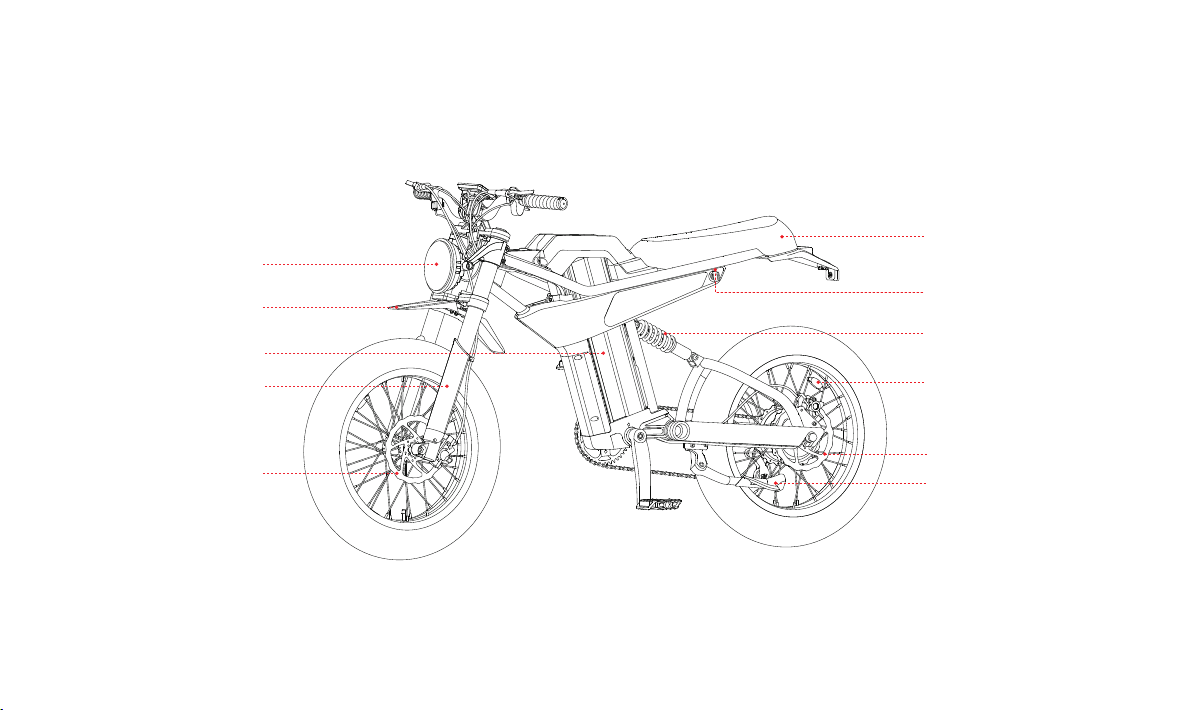
4. The serial number is on the front side of the head tube. Please take a photo of it and back it up. It’s required for
:
• warranty;
• insurance;
• lost & found;
• report a stolen bike.
5. Seriously check
:
• the brake system (both front and rear) works fine;
• the handlebar steers smoothly;
• the frame & other construction components are intact;
• all bolts and screws have been tightened properly before your first ride.
6. Know and obey the local traffic regulations.
7. Do necessary tests (brake, steer, shift, etc.) and wear a helmet before every ride.
8. DO NOT pursue high speed, haul overload, or carry a passenger.
9. The owner is responsible for using and maintaining it according to our instructions and suggestions.
10.The battery and bike can be dangerous with improper operation and maintenance. Please keep the “Safety instructions” in mind and take
care.
11.DO NOT modify the original components or use a third-party aftermarket replacement part before confirming with us.
1

E-bike specifications
Model Mantis P6
Battery 46.8V 20.4Ah Removable battery
Charger info 54.6Vdc American charger
Motor 750W
Range 32 ~ 38 miles with throttle only,
38 ~ 44 miles with pedal assist ( load is about 198 lb)
Top speed 28 Mph
Tire 20*4.0 Inch
Brakes Front and rear disc brakes, 180mm rotors
Payload capacity 310Lbs
IP rating IPX4
Temperature limit -10~40°
Net weight 88.2Lbs
Size 1753*720*976mm
Minimum age/height for use 16 years old
You can choose the appropriate version according to your own needs, and in the future Mantis P6 will launch various optional upgrade
accessories and color style kits, please consult your dealer for details.
2

2. Unboxing and checklist
1. Take the bike and all items on the Checklist out of the box.
2. Remove all wrapping materials and put them back into the box.
3. Recycle the box and wrapping materials after 15 days or when you decide to keep the bike.
3

User manual * 1
Accessories
User manual
If there are missing parts or shipping damages to be found, please contact us within 15 days from receipt of the bike.
Headlight*1Key*3 Gasket*2 Pedal*2 Front fender*1 Press block assembly*1
Bike body*1
Handlebar assembly*1
Hexagon wrench * 3
4# 5# 6#
13-15#
wrench * 1
M8*25
Screw*2 Charger*1
4

3. Installation instructions (INSTRUCTIONS D'INSTALLATION)
5
1.As shown in the figure, the four screws on the
press block assembly are twisted.
2. Place the press assembly, handlebar assembly,
and screws as shown in the picture, align the holes
and tighten them with 5
Allen wrench.
4.Align the handlebar kit with the mounting slot of
the upper link plate, and then put the correspond-
ing screws into the corresponding position from
top to bottom.
5. Tighten with a hexagon screwdriver. The inst-
allation is complete, as shown in the figure above.
3. As shown in the figure, use the 5
Allen wrench to
unscrew the four screws from the press .
6. As shown in the figure, aglin the front fender
with the scew hole, and install M5 screws.
#
#

6
L
11.Install the pedals, first distinguish between
the left and right pedals, and screw the left pedal
counterclockwise.
9. Place the M8*25 screws in the holes on both
sides of the headlight.
10.Use the 6 Allen wrench to tighten the screws,
and the headlight installation is complete.
8. Place the gasket inside of the bracket.
R
12.Turn the pedal in clockwise slowly with your
hand, and then tighten it with the 15 open wrench
after confirming it.
7. Tighten the screws with the 4 Allen wrench, and
the front fender installation is complete.
#
#
#

4. Operating instructions (INSTRUCTIONS D'UTILISATION)
Front fender
Battery pack
Reflector
Battery lock
Shock absorber
Front fork
Rear disc brake
Cushion
Front disc brake
LED light
Kickstand
7

Reflector
Rear lamp
Rear tire
Motor
Power lock
Multi-function button
Dashboard
Pedal
Front tire
Disc brake handle
Electric horn
Charge port
8

Display
Battery
Mode
Error code Headlight
Total milage
Trip mileage
Max speed
Average speed
Speed
km/h
MPH
Current speed
Walk
9

Head combination switch
Power button Long press to start working and power the controller. In the boot state, long press the button to turn
off the power supply.
Add speed button Short press key to switch the electric vehicle power gear to change the output power of the motor.
Press and hold for three seconds to turn on the high beam.
Reduce speed button
Info-switch button Short press the key display information switches between the total mileage (km), single mileage (km),
maximum speed (km/h), and average speed (km/h).
Headlight button Press the button to turn on the near-light lamp and press it again to turn off the near-light lamp.
In the factory default setting, if the electric vehicle is not used for more than 10 minutes, the instrument will automatically shut down.
Electric horn
Add speed button
Reduce speed button
Power button
Throttle
Info-switch button
Headlight button
Long press to a power implementation state, the bike travels at a constant speed of 3km/h and the
screen display also works. Release the button immediately and the bike will return to the booster state.
10

Error code meaning sheet
Error number Failure type Error number Failure type
E001 Controller error E004 Throttle error
E002 Communication error E005 Brake lever error
E003 Motor hall error E006 Motor error
11

1.
2.
3.
4.
occur.
Check before riding
Tire pressure examination
Riding in Wet Conditions
5. Moving and storage instructions (INSTRUCTIONS DE DÉPLACEMENT ET DE STOCKAGE)
To reduce the occurrence of accidental injuries, the following items should be checked before each ride:
Check bike status, tire and brake effect, etc. Ensure that no parts including the handlebars, risers, tires, brake lines, brake handles, fenders,
and screws show any signs of loosening or damage.
When the power is low, the electric bike/scooter does not have enough power to maintain normal cycling. Please make sure that the power
is sufficient to avoid danger.
Must wear a helmet and a full set of knee pads, wrist pads, elbow pads, wear sports shoes, and wear clothes suitable for sports. Long hair
or enough to affect the line of sight bangs, broken hair should be tied up, so as not to block the line of sight affect normal riding.
For your first ride, please do not choose the areas where children, pedestrians, pets, vehicles or other obstacles and potential hazards may
Inflate tires to a pressure within recommended range: 35P.S.I in summer, 40P.S.I in winter. Check the tire pressure of both wheels before riding
to ensure the tires are inflated to the recommended pressure.
This electric bicycle can withstand light rain and small splashes but is not designed to be subjected to inclement weather, heavy showers, or
submersion in water. Use caution when riding in wet conditions as it will take longer to use the brakes to slow down, and also when turning as
the tires may slip. The electrical components on the e-bike are not waterproof, and water damage is not covered under warranty.
Riding at Night
Riding at night comes with more risks than riding during the day due to decreased visibility so riders are encouraged to exercise increased
Note: If there are any abnormal signs, please stop using it immediately and contact the after-sales service for testing guidance.
12

caution. Before riding at night make sure that reflectors are installed on your e-bike. Riders should wear bright-colored clothing at night.
Max weight
Important safety instructions
1. WARNING - When using this product, basic precautions should always be followed, including the following:
2. Read all the instructions before using the product.
3. To reduce the risk of injury, close supervision is necessary when the product is used near children.
4. Do not put fingers or hands into the product.
5. Do not use this product if the flexible power cord or output cable is frayed, has broken insulation, or any other signs of damage.
6. For all equipment,the instructions shall indicate “This equipment is not intended to be used at ambient temperatures less than ( bike ) -10 C°
14 °F) or above ambient temperatures of 40 °C ( 104 °F).”
7. For all equipment, the instructions shall indicate “The battery is intended to be charged when the ambient temperature is between ( battery )
10 °C ( 50 °F) and 45 °C ( 113 °F). Never charge the battery when ambient temperatures are outside this range.”
(
The e-bike can safely carry a total weight of 310 lbs. The recommended loading is 300 lbs.Heavier loading than 310 lbs will affect the
e-bike performance. Failure to adhere to these weight limits may result in damage to the e-bike, the rack, or cause serious injury to the
rider. Note range and top speed will be affected by the total weight being carried by the e-bike.
13

14
Helmet Protective
2. Operating: ①Use the key to turn on the power lock.②Press
on/off to unlock and power on; and check battery status, if the
charge is too low, please charge it immediately.
1. Preparation:There is a risk of falling and injury, so wear a helmet and
protective gear all the time.
1
3. Start: Adjust the sitting position, slowly
press the accelerator at speed gear; pedal it
after balancing.
4. Gear Switching: Acceleration gear and
deceleration gear can be gear changes.
5. Slow down and brake: Release the throttle
and slow down. Emergency brake requires a
quick press on the brake lever.
Warning: Quick braking may fall due to insufficient.
2

15
7. Warning: remind other pedestrians and
vehicles to ensure driving safety.
6. Turning: When turning, lean your center of
gravity slightly and slowly turn your handle. 8. Get off: After riding, stop the bike on the
flat road and turn off the power, put down the
Kickstand.
Battery disassembly method
1. As shown in the picture, insert the key into
the battery box lock and turn it to the right.
2. Rotate the middle battery cover and open it
as shown in the picture.
3. Hold the battery box handle and pull it out
along the direction of the battery box.

Wholevehicle charging
Duetobatteryitself consumptionduringtransportationandstorage,itisnormalforthebatterytobelowornobatterywhenusedforthefirst
time.Pleasefollow these charging steps tocharge.Youcanchoosetwowaysforcharging:outsidechargingandwholescooter charging.Do
notallowminorstousethechargingequipment.
Find the charging port on the right side of the bike body, open the rubber plug of the charging port, connect the output end of the charger, then
connect the power supply, and fasten the rubber plug after charging.
16

Externalcharging
Warning
Take out the battery, open the rubber plug of the charging port, first connect the output end of the charger to the charging port of the body, then
turn on the power supply, and fasten the rubber plug after charging.
1. Please charge with the power off.
2. Please use the original charger to charge, only use the charger designated or approved, otherwise the battery may be damaged or in danger
of fire.
3. Do not charge when the charging port, power socket or charging line is wet. If the vehicle is flooded, and the battery is damaged or flooded,
it is prohibited to charge or continue to use the battery.
4. In the process of charging, if the indicator light is abnormal or there is abnormal smell, stop charging immediately and contact the
after-sales service or replace the charger.
5. The charger shall be kept away from inflammables and explosives when working. The charger is not a toy. Please place it in a safe place
where child cannot touch.
6. Disconnect the power immediately after charging. Do not connect the charger to the power supply for a long time when it is not charged.
7. It is necessary to regularly check whether the charger wire, plug, shell and other parts are damaged, and stop using it if it is found to be
damaged, until it is repaired or the charger is replaced.
17
Table of contents