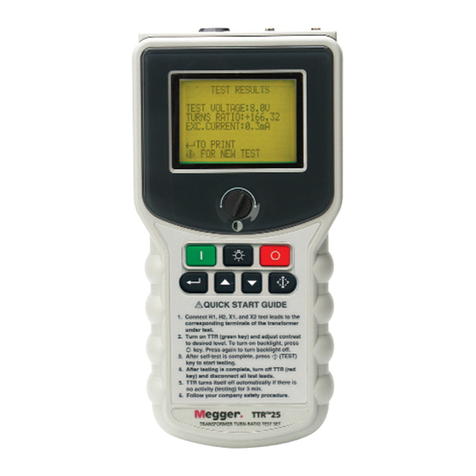
Thunderbird 5A User manual

Thunderbird Fault Locator
Instructions
Model 5A
1. Warnings and precautions in using yourThunderbird Fault Locator.
To avoid the possibility of electrical shock it is essential that certain precautions be taken during
both storage and use. Some important do’s and don’ts are:
Do always store your Thunderbird Fault Locator in a dry environment and never use
this instrument if there is any possibility that water has entered into it.
Don’t store your Thunderbird Fault Locator in a place where it may be exposed to
corrosive fumes, for example, near an automotive battery or near any chemicals.
Don’t use this instrument for measuring any voltage or current other than that of an
electrified fence. Never attempt to use this instrument to measure live mains voltage.
Don’t, under any circumstances, attempt to use this instrument if the case is cracked
or otherwise damaged. If the case is damaged, return it to the place of purchase or to an
authorized Thunderbird dealer for repair.
2. Battery installation
The Thunderbird fault locator comes with a 9V battery fitted. To replace a battery,
first remove the three screws underneath the cover using a Phillips type screwdriver. Disconnect
the old battery by pulling it away from the plug which is attached to the battery lead.
The battery terminals and the plug terminals are polarized so that the plug can be
connected in only one way. Make sure that the terminals of the plug are correctly orientated to
lock with the corresponding terminals of the battery. Do not allow the plug terminals to touch
the battery terminals in the reversed orientation.
When you have connected the battery leads to the battery, fit the battery into the
battery compartment and replace the cover. Make sure that the cover is securely attached to the
case and that battery wires are not protuding from the case.
3. Operation
This fault locator may be used without an earth lead attached when used for finding
faults on an electric fence. It is safe to touch the earthing clip, and will provide a more accurate
fence voltage if it is touched. The earth lead should be attached and connected to the fence earth
if an accurate fence voltage is required. The earth lead must be attached to measure the voltage
directly from an energiser’s terminals.
Press the “ON” pad to turn the fault locator on. It will stay on for approximately 15
seconds after detecting any fence voltage or current pulse.
There are 2 metal contacts in a groove across the bottom at the front of the fault
locator. These contacts are for connecting to the live fence wire. Place the fault locator on the
live fence wire so that the wire is in this groove, and rub the contacts on the wire to make good
contact.
7. Specifications
Battery: 9V standard or alkaline
Voltage display: 0 - 15.0kV (kilovolts)
Current display: 0 - 99A (amps)
Low battery indication: “Lo Bat” is displayed. Replace battery
Operating temperature: 0 deg. C to 50 deg. C @ 90% humidity (non condensing)
Storage temperature: -20 deg. C to 60 deg. C @ 90 % humidity (non condensing)
Power mode: Press button to turn on, auto off
Dimensions: 148x66x29mm
Weight: 189g (including battery)
Accuracy (voltage display): +/- (10% reading + 1 digit)
Accuracy (current display): +/- (25% reading + 2 digits)
Thunderbird warrants the fault locator against defective workmanship and
faulty materials for 12 months from the date of purchase. We undertake, at our
option, to replace or repair free of charge this product, or part thereof, on
condition that it is returned to our factory freight prepaid, and found on
examination to be suffering from material or constructional defect. We cannot
be held responsible for any repair other than those carried out by us or our
authorised agent.
A photocopy of your proof of purchase and a request for warranty must also be
returned with the item.
This warranty is void if the product is subject to improper use or handling,
incorrect power input voltage, damage through contact with chemicals, flood-
ing, fire, explosion, excessive heat, lightning strikes, insect damage, moisture
damage or damage to external wiring.
WARRANTY
THUNDERBIRD
Country Electronics Pty Ltd
ABN 38 003 806 040
11 Industrial Avenue PO Box 391
Mudgee NSW 2850 Mudgee NSW 2850
Phone: 02 63723600

When voltage and/or current pulses are present on the fence, the pulse will be indicated
on the display, and the voltage and current will be displayed. If the current in the fence wire
exceeds 4 amps, an arrow will pulse on the display. The arrow points towards the fault in the
fence.
4. Normal and fault conditions of a fence
An electric fence in normal (good) condition will usually give a relatively high voltage
reading and a relatively low current reading everywhere along the fence. The reverse usually
applies to an electric fence in which a fault condition exists. Fault conditions occur in several
forms. Some of the most common of these include:
Poor connections - These are often accompanied by rust on fence wires and often
arise when improper connecting techniques are used. A poor connection can often be detected by
measuring the fence voltage at either side of the connection. If the voltage readings are similar
then the connection is probably satisfactory but any significant difference in voltage readings
indicate a bad connection.
Broken fence wires - Abreak in a fence wire can be detected by a relatively high
voltage reading on the fence at the energizer side of the break, and the absence of any significant
voltage on the other side.
Shorts - Often a fallen object causes an active fence wire to short-circuit to an earth
wire or to ground, causing a marked drop in voltage on both sides of the fault. In these cases, the
voltage readings (if any) do not usually differ significantly on either side of the fault. However,
the current readings may differ greatly. In such cases the higher current reading will occur on the
side of the fault nearer the energizer.
Excessive vegetative growth around fence, especially during wet weather - The
effect of excessive vegetative growth is usually distributed over a much wider distance and the
fall in voltage is usually not as great. It is therefore much more difficult to pinpoint exactly where
the fault occurs. The fault locator will most likely show a slightly lower fence voltage and an
increase in fence current. Ensure that any lush vegetation is kept clear of the active wires.
Resistance and Capacitance – Under normal conditions voltage readings are
relatively high over most or all of a fence and the current readings are low. However if the fence is
very long, or if the live wire(s) runs close to an earthed wire or fence, the voltage readings can be
somewhat less than might be expected and the current readings may be higher. The electrical
resistance of the fence wires is cumulative with length of fence, which diminishes the power
available with distance from the source of power. The capacitance acts somewhat like a
resistance in parallel with the fence wire(s) and increases the current that might otherwise flow
in the fence. In general, the longer the fence, the greater the overall capacitance, and the greater
the current flowing in the fence due to that capacitance. In this respect, the effect of capacitance
is similar to that of vegetative growth, for example, and can often be mistaken for a fault
condition in a fence even when the fence appears to be otherwise in perfect condition.
5. Interpretation of readings
The voltage reading is the peak value of any voltage pulses that may exist on the
fence. The reading is given in units of kV (1 kV = 1,000 volts). The highest voltage that can be
displayed is 15.0 kV. Typically a voltage reading will be from 6 kV to 8 kV for a fence in good
condition. The reading may be somewhat less if there is a fault on the fence.
The current or amps reading indicates current flowing along the wire. The current may
be due to capacitance of the fence, especially if the fence is a long one. Current may also flow
along the fence due to a load across the fence. The load may be an animal touching the fence, or
some other object or it may be due to vegetative growth touching the fence.
When a fault occurs in a fence that results in an abnormally high current reading, the
direction of the fault will be indicated by the arrow displayed. Thus if the right arrow lights then
the fault will be in the direction to the right. Conversely, if the left arrow lights then the fault will
be in the opposite direction. The unit needs a reasonable value of both voltage and current to
determine the direction, otherwise the direction indication may not be accurate.
The best approach to locate a fault (if the fault causes an abnormally high current
reading) is to start somewhere near the energiser. Don’t start closer than about 10 m because
many energisers generate magnetic fields which may cause the fault locator to give a misleading
amps reading and direction indication. Follow the direction indicated by the directional indicator
lamps.
As you move closer to the fault you may find that the voltage reading diminishes but
the current reading remains roughly the same. Don’t rely on the direction indication if the
voltage is very low, use the current as a guide. If the current reading suddenly drops it indicates
that you have gone past the fault. In that case retrace your steps to locate the cause of the fault.
The current into the load depends upon the voltage on the fence as well as the
resistance of the load according to the formula:
current (A) = voltage (V) / resistance (ohms)
For example, suppose that voltage = 5,000 (5,000 volts = 5.0kV) and that
resistance = 500 (ohms). In this example, the current is:
current = 5000 / 500 = 10A
So, if the voltage and current readings are 5 (kV) and 10 (A) respectively, these
readings would indicate that a load of about 500 ohms is present across the fence. A load of
2,000 ohms to 10,000 ohms is relatively light. It might be caused by dry vegetative growth
alongside the fence. 500 ohms to 2,000 ohms is moderate. It might be caused by an animal or
green grass growing alongside the fence. A load of 100 ohms to 500 ohms is heavy. It might be
caused by a tree fallen onto a fence or by thick wet grass growing alongside the fence. Anything
less than 100 ohms is extreme.
6. Care and maintenance
Always store your Thunderbird Fault Locator in a dry place, away from corrosive
chemical substances. Examine the unit each time before use to make sure that the case has not
been damaged. Do not use if a crack develops in the case because such use could result in a
possible electrical shock.
Never attempt to use the Thunderbird Fault Locator for any purpose other than as
described in these instructions as to do so may result in the severe hazard of a possible electrical
shock.
If the battery is flat, remove the battery from the unit to prevent the danger of
corrosion due to leaking battery terminals. Likewise, please remove the battery if you do not
expect to use the unit for some significant period of time (e.g. six months or longer).
To clean the unit, use only a slightly damp cloth and allow to dry before using. Never
use cleaning fluids.
