Actron OBD II PocketScan Code Reader CP9125 User manual

Safety Precautions ...................... 4
Signal Words and Symbols ............ 4
Important Safety Messages ............... 5
Tool Parts ............................. 6
PocketScan® Code Reader Features ........ 6
Read Codes ........................ 6
MIL Conditions...................... 6
Inspection/Maintenance Monitors (I/M
Monitors ........................... 7
Reading Diagnostic Trouble Codes and Data.. 7
Erasing Diagnostic Trouble Codes and Data .. 9
Diagnostic Trouble Codes................ 10
Code Structure..................... 11
Powertrain Codes................... 11
Body Codes ....................... 11
Network Communication Codes........ 11
Decommissioning ...................... 11
Disposal and Scrapping .............. 11
Electromagnetic compatibility (EMC).... 11

4|User guide | CP9125 |
Safety Precautions
For safety, read, under-
stand and follow all
safety messages and
instruction in manual be-
fore operating the Pock-
etScan® Code Reader.
Always refer to and follow safety
messages and test procedures
provided by manufacturer of vehicle
and PocketScan® Code Reader.
Signal Words and Symbols
DANGER!
Indicates a possible haz-
ardous situation that, if
not avoided, will result in
death or serious injury to
operator or bystanders.
WARNING!
Indicates a possible haz-
ardous situation that, if
not avoided, could result
in death or serious injury
to operator or bystanders.
CAUTION!
Indicates a possible haz-
ardous situation that, if
not avoided, may result in
moderate or minor injury
to operator or bystanders.
IMPORTANT
Indicates a condition that
may result in damage to
test equipment or vehicle
or lost information.

| CP9125 | User guide | 5
Important Safety Messages
Always wear ANSI-ap-
proved goggles for eye
protection.
• Always operate vehicle in a
well-ventilated area.
• Always keep people, tools, and
test equipment away from all
moving or hot engine parts.
• Before testing a vehicle, make
sure the transmission is in PARK
(automatic transmission) or
NEUTRAL (manual transmission)
and the parking brake is set.
• Always block drive wheels and
never leave vehicle unattended
while testing.
• Always keep a fire extinguisher
suitable for gasoline/electrical/
chemical fires redily available.
• Never lay tools on the vehicle
battery.
• Always use caution when work-
ing around ignition coil, distribu-
tor cap, ignition wires, and spark
plugs. Components can produce
a High Voltage while engine is
running.
• Battery acid is caustic. If con-
tacted, rinse with water or neu-
tralize with a mild base (i.e.
baking soda). If in eyes, flush
with water and call a physician
immediately.
• Never smoke or have open
flames near vehicle. Vapors from
gasoline and battery during
charge are explosive.
• Never use the PocketScan® Code
Reader if internal circuitry has
been exposed to moisture.
Internal shorts could cause a fire
and damage.
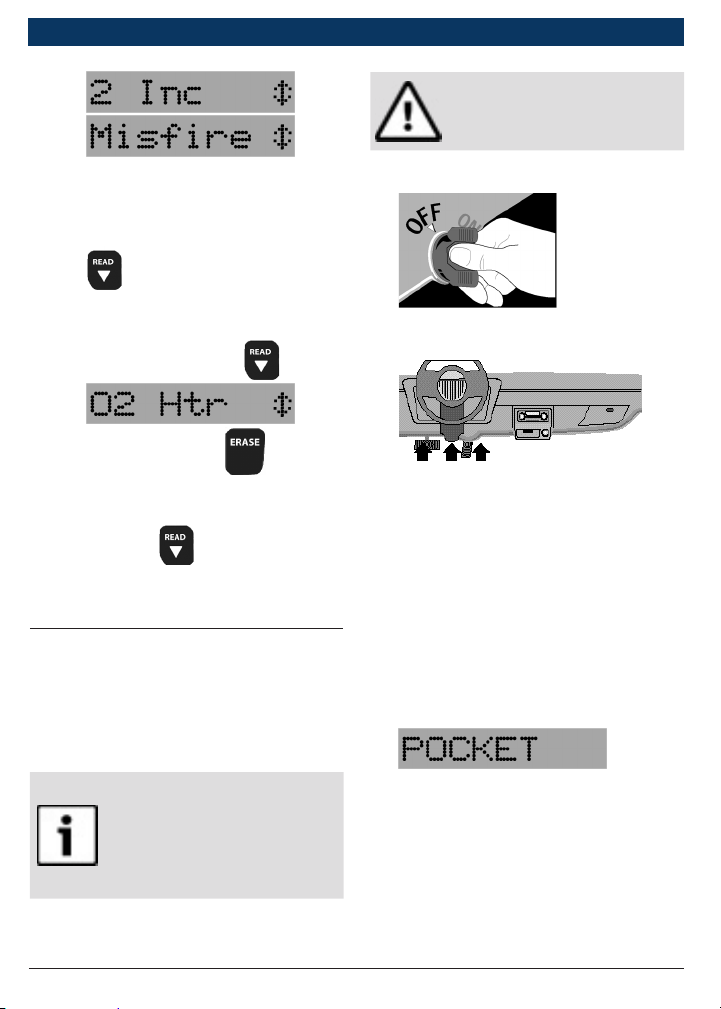
• Always turn ignition key OFF
when connecting or disconnect-
ing electrical components,
unless otherwise instructed.
Some vehicles are equipped with
safety air bags. Follow vehicle ser-
vice manual cautions when working
around air bag components or
wiring.
WARNING!
A vehicle airbag can open
for several minutes after
the ignition has been
turned off.
• Always follow vehicle manufac-
turer’s warnings, cautions, and
service procedures.

6|User guide | CP9125 |
Tool Parts
4
3
2
1
Part Description
1LCD
display Single-line display with 8 char-
acters.
2ERASE
Used to Erase Trouble Codes and
I/M Monitor status from Vehicle’s
Computer Modules and scroll up
through screens. (I/M Monitors
are currently used for state emis-
sions tests.)
3READ Used to view Read Codes, MIL
Status, I/M Readiness Status and
scroll down through screens.
4OBD II
Connector Used to communicate with OBD II
compliant vehicles.
PocketScan® Code Reader
Features
Read Codes
Reading Diagnostic Trouble Codes
allows the PocketScan®
Code Reader to read the codes
from the vehicle’s computer
modules.
• Diagnostic Trouble Codes:
Diagnostic Trouble Codes are
used to help determine the
cause of a problem or problems
with a vehicle. Diagnostic Trou-
ble Codes are set when a fault is
present for a sufficient amount
of time.
• Pending Codes:
Pending Codes are also referred
to as “continuous monitor
codes” and “maturing codes.”
Pending Codes occurs when the
code has not occurred a specific
number of times (depending on
vehicle,) causing the code to
mature.
MIL Conditions
MIL (Malfunction Indicator Lamp)
Status displays the
state of the vehicles computer
module(s).
• MIL ON:
Indicates that the Malfunction
Indicator Lamp on vehicle should
be ON indicating a possible
emissions problem.
9If the MIL Status is ON and the
MIL is not illuminated with the
engine running, then a problem
exists in the MIL circuit.
• MIL OFF:

| CP9125 | User guide | 7
Indicates the Malfunction Indica-
tor Lamp should be off and there
should be no emission problems.
9Some manufacturers will turn
the MIL off if a certain number
of drive cycles occur without the
same fault being detected.
9Diagnostic Trouble Codes
related to a MIL are erased from
the computer’s memory after 40
warm-up cycles if the same fault
is not detected.
Inspection/Maintenance Monitors
(I/M Monitors
The I/M Monitors (Inspection /
Maintenance) function displays a
SNAPSHOT of the operations for the
Emission System.
9After a specific amount of drive
time (each monitor has specific
driving conditions and time
required), the computer’s “moni-
tors” will decide if the vehicles
emission system is working
correctly.
9Some states MAY NOT require all
monitors listed to be “Ready” to
pass the emissions test. Check
with state testing site for exact
requirements. All states will fail
a vehicle that has the “MIL
Light” lit at time of test.
• Monitors Viewed:
Monitor Expanded Name
Misfire Misfire monitor
Fuel Fuel system monitor
Comp Comprehensive components monitor
Catlyst Catalyst monitor
Htd Cat Heated catalyst monitor
Evap Evaporative system monitor
Sec Air Secondary air system monitor
A/C Air conditioning refrigerant monitor
O2 Snsr Oxygen sensor monitor
O2 Htr Oxygen sensor heater monitor
EGR Exhaust gas recirculation
• Monitor Status:
Status Description
Ready Vehicle was driven enough under proper
conditions to complete the monitor.
Inc (Incomplete) Vehicle was not driven
enough under proper conditions to com-
plete the monitor.
• Monitors may be cleared by:
•Using the erase codes function.
• Disconnected or discharged
battery (on some vehicles.)
• Computer module losing
power (on some vehicles.)
Reading Diagnostic Trouble
Codes and Data
WARNING!
Avoid cooling fan. Fan
may turn on during test.
1. Turn ignition key to the OFF
position.

8|User guide | CP9125 |
2. Locate and plug in data link
connector (DLC).
NOTE: The data link connector
should be located under the
dashboard on the driverside of
the vehicle. If the data link con-
nector is not located under the
dashboard as stated, a label
describing the location of the
data link connector should be
there.
3. Observe display toggles between
“Pocket” and “Scan”.
NOTE: For a correct reading for
diagnostic trouble codes and I/M
monitor status, ignition key must
be in the ON position and engine
does not require starting. To get
a correct reading for MIL status,
engine must be started.
4. Start engine.
5. Press and release key.
NOTE: If diagnostice trouble
codes (DTCs) are already being
displayed from a previous read
operation, press and hold
for 3 seconds and release.
6. Observe a moving * on display.
NOTE: If “No Link” message
displays, cycle ignition key to the
OFF position for 10 seconds,
then back ON and repeat “Read-
ing Diagnostic Data” procedure.
7. View codes on display.
NOTE: If
there are no codes present, the
tool will display “0 Codes” and
proceed to display MIL Status
when is pressed.
• To view codes, press and
release .
• If the code is a pending code,
pd will be displayed.
8. View MIL status:
• Press and release .
9. View I/M monitors that are
incomplete.
• Press and release .

| CP9125 | User guide | 9
NOTE: If there are no more
I/M monitors that are incom-
plete, the tool will then
display ready monitors when
is pressed.
10.View I/M monitors that are
ready.
• Press and release .
NOTE: Pressing will
scroll up to review diagnostic
trouble codes and data.
Holding down for 3
seconds will read diagnostic
trouble codes and data again.
Erasing Diagnostic Trouble
Codes and Data
Erasing allows the PocketScan®
code reader to delete the codes and
IM monitor status from the vehicle’s
computer modules.
NOTICE
Only erase diagnostic data
after checking
system completely and
writing down results.
WARNING!
Avoid cooling fan. Fan
may turn on during test.
1. Turn ignition key to the OFF
position.
2. Locate and plug in data link
connector (DLC).
NOTE: The data link connector
should be located under the
dashboard on the driverside of
the vehicle. If the data link
connector is not located under
the dashboard as stated, a label
describing the location of the
data link connector should be
there.
3. Observe display toggles between
“Pocket” and “Scan”.
4. Turn ignition key to the ON
position leaving engine off.
NOTE: Make sure that the igni-
tion key is ON and NOT in the
accessory position.

10 |User guide | CP9125 |
5. Press and hold for 3 sec-
onds and release.
6. Observe “ERASE?” displays.
7. Press and hold for 3 sec-
onds and release.
8. Observe a moving — on display.
NOTE: If a “NO LINK” message
displays, cycle ignition key to the
OFF position for 10 seconds,
then back ON, and repeat “Eras-
ing Diagnostic Data” procedure.
9. Observe “DONE” displays.
NOTE: If the problem causing
diagnostic trouble code(s) still
exists, the code will return. The
diagnostic trouble code may
return immediately or may
return after vehicle has been
driven.
NOTE: Pressing will read
diagnostic trouble codes and
data and holding will erase
results again.
Diagnostic Trouble Codes
This section contains the J2012
Diagnostic Trouble Codes (DTCs) as
defined by the Society of Automotive
Engineers (SAE).
DTCs are recommendations not a
requirement. Manufacturers may not
follow these, but most do.
Check vehicle’s service manual for
DTC meaning if the code(s) you are
getting does not make sense.
DTC definitions have been assigned
or reserved by the Society of Automo-
tive Engineers (SAE) to direct to
proper service area(s).
Codes not assigned or reserved by
the SAE are reserved for the manu-
facturer and referred to as Manufac-
turer Specific DTCs.
Remember:
•Visual inspections are important!
•Problems with wiring and connec-
tors are common, especially for
intermittent faults.
•Mechanical problems (vacuum
leaks, binding or sticking linkages,
etc.) can make a good sensor look
bad to the computer.
• Incorrect information from a
sensor may cause the computer
to control the engine in the
wrong way. Faulty engine opera-
tion might even make the com-

| CP9125 | User guide | 11
puter show a known good sen-
sor as being bad!
Code Structure
1. Bx = Body
Cx = Chassis
Px = Powertrain
Ux = Network comm.
x - 0, 1, 2, or 3
2. Vehicle specific system
3. Specific fault designation
Example:
P0101 - Mass or volume air flow
circuit range/performance problem
Powertrain Codes
Code Type
P0xxx Generic (SAE)
P1xxx Manufacturer specific
P2xxx Generic (SAE)
P30xx–P33xx Manufacturer specific
P34xx–P39xx Generic (SAE)
Chassis Codes
Code Type
C0xxx Generic (SAE)
C1xxx Manufacturer specific
C2xxx Manufacturer specific
C3xxx Generic (SAE)
Body Codes
Code Type
B0xxx Generic (SAE)
B1xxx Manufacturer specific
B2xxx Manufacturer specific
B3xxx Generic (SAE)
Network Communication Codes
Code Type
U0xxx Generic (SAE)
U1xxx Manufacturer specific
U2xxx Manufacturer specific
U3xxx Generic (SAE)
Decommissioning
Disposal and Scrapping
This CP9125 is subject to Euro-
pean guidelines 2012/19/EU
(WEEE).
Old electrical and electronic
devices, including cables and acces-
sories or batteries must be dis-
posed of separate to household
waste.
• Please use the return and collec-
tion systems in place for dis-
posal in your area.
Electromagnetic compatibility
(EMC)
The CP9125 is a class B product as
per EN61326-1:2013.
Shop for other automotive tools on our website.
Other manuals for OBD II PocketScan Code Reader CP9125
3
Table of contents
Other Actron Test Equipment manuals

Actron
Actron OMEGA Series User manual

Actron
Actron CP7818 User manual

Actron
Actron CP7817 Installation guide

Actron
Actron Digital Multitester CP7672 User manual

Actron
Actron AutoTroubleShooter User manual

Actron
Actron Battery/Alternator Tester CP7611 User manual

Actron
Actron CP9680 AutoScanner Plus User manual

Actron
Actron CP7838 User manual