Installation Instructions
After unpacking and ensuring that
FDU-2500 and all its accessories are
intact and present, proceed with the
installation. Please read the instructions
carefully. If you encounter any difficulty
in installation, contact your service
provider for assistance.
Antenna Installation
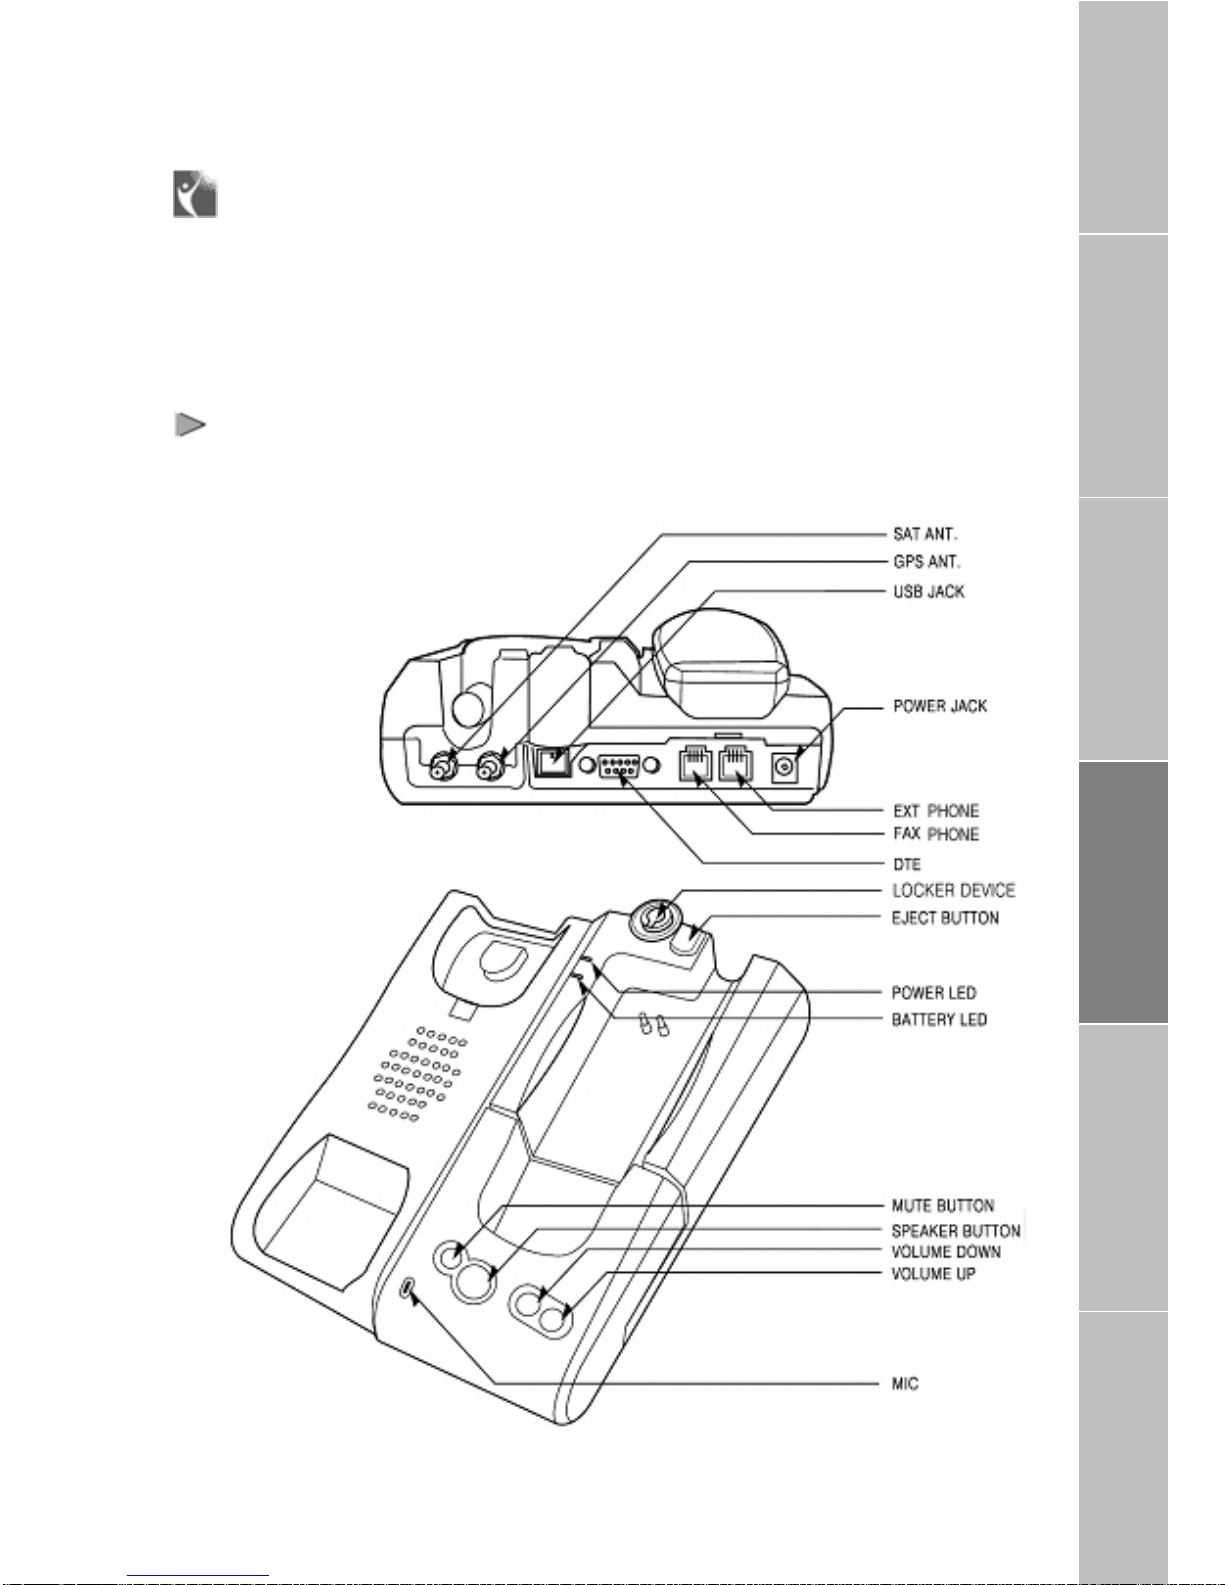
The FDU-2500 antennas set consists
of the following components:
1. Satellite Antenna with mounting
adapter.
2. Satellite antenna cable for
connecting Satellite antenna to
FDU-2500 (25meter).
3. GPS Antenna with attached
coaxial cable for connecting
with FDU-2500 (25meter).
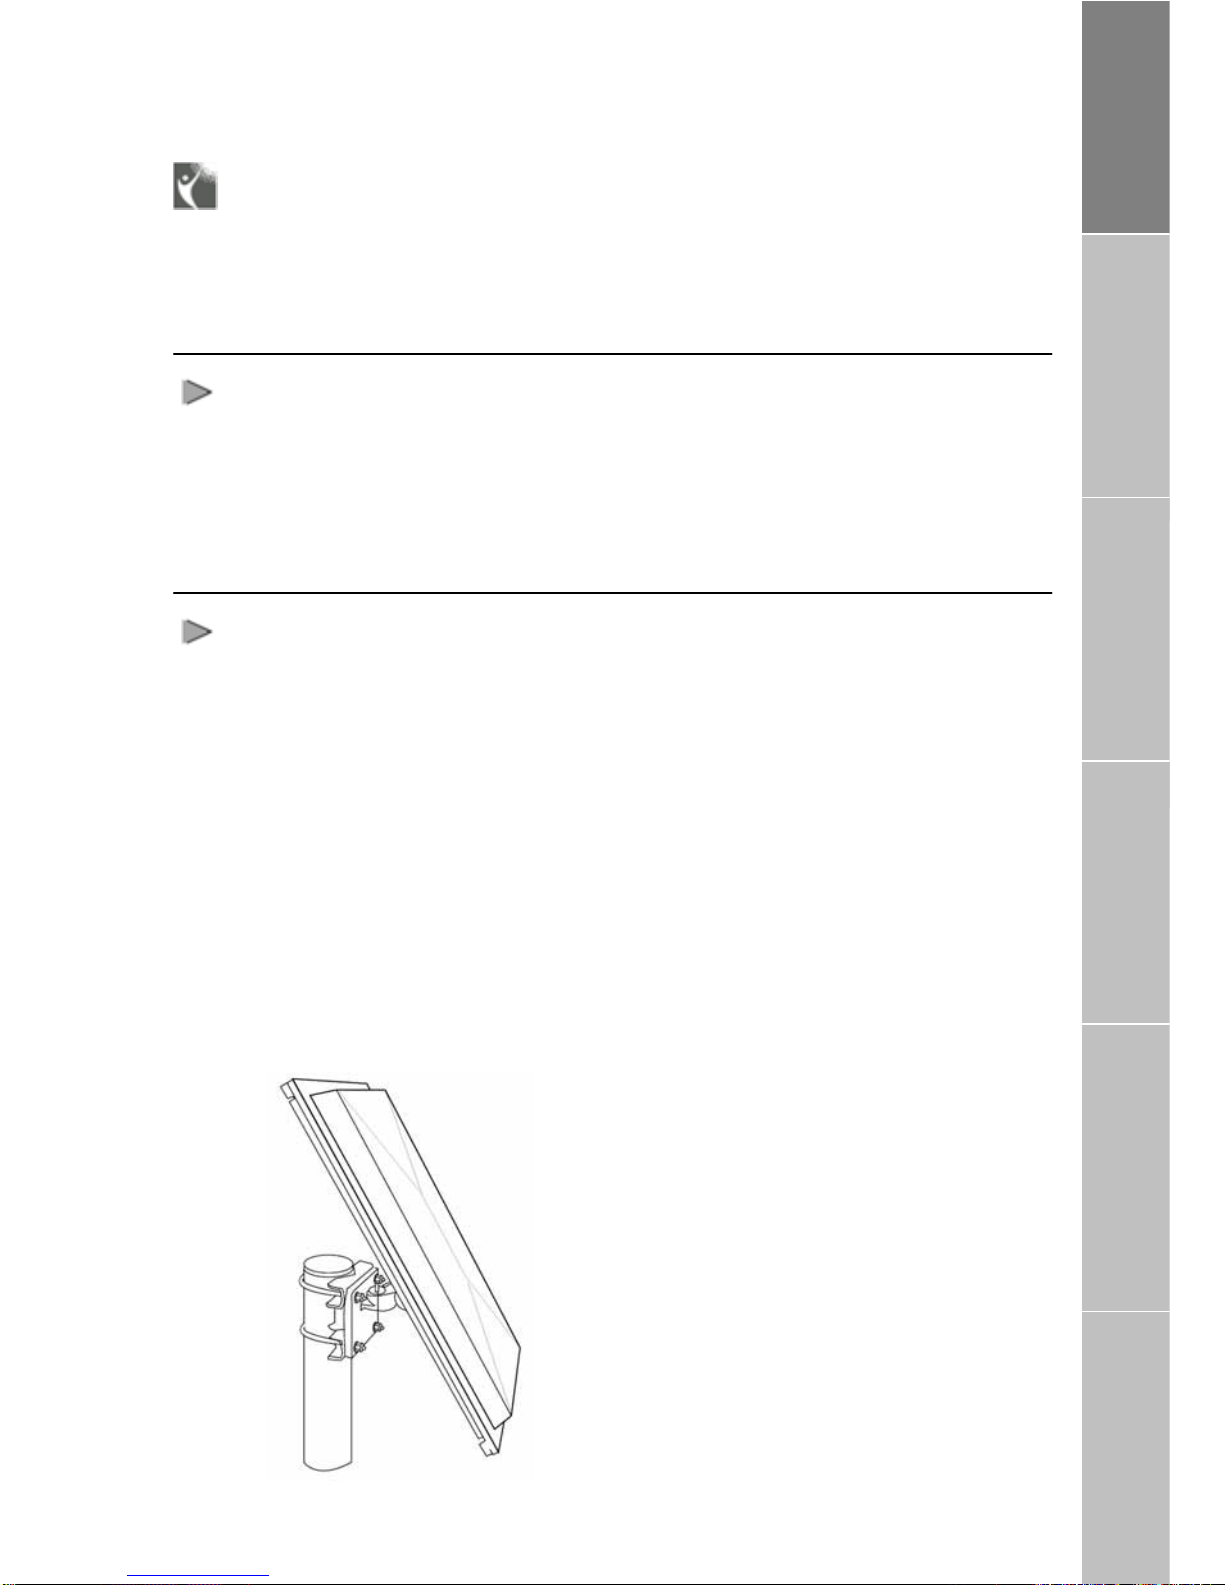
Installing Satellite Antenna
The satellite antenna is a rectangular
patch antenna, and is supplied along
with a mounting adapter. The mounting
adapter also has an elevation angle
adjust function.
1. Mount the antenna on to any
suitable fixture (mounting pole
or wall) on the rooftop using
the mounting brackets and the
bolts provided. The antenna
should be facing skywards in
the direction of the THURAYA
sa
a
p
p
r
o
p
r
i
a
t
e
angle. The angle can be
adjusted using the angular
information provided on the
mounting adapter (De ails will
be provided in the antenna
installation guide book).
Fix the antenna in such a
tellite and should be at the
t
2. way
3. e
r t
a lo
4. nd of the
S e
that the connector at the base
is accessible when mounted.
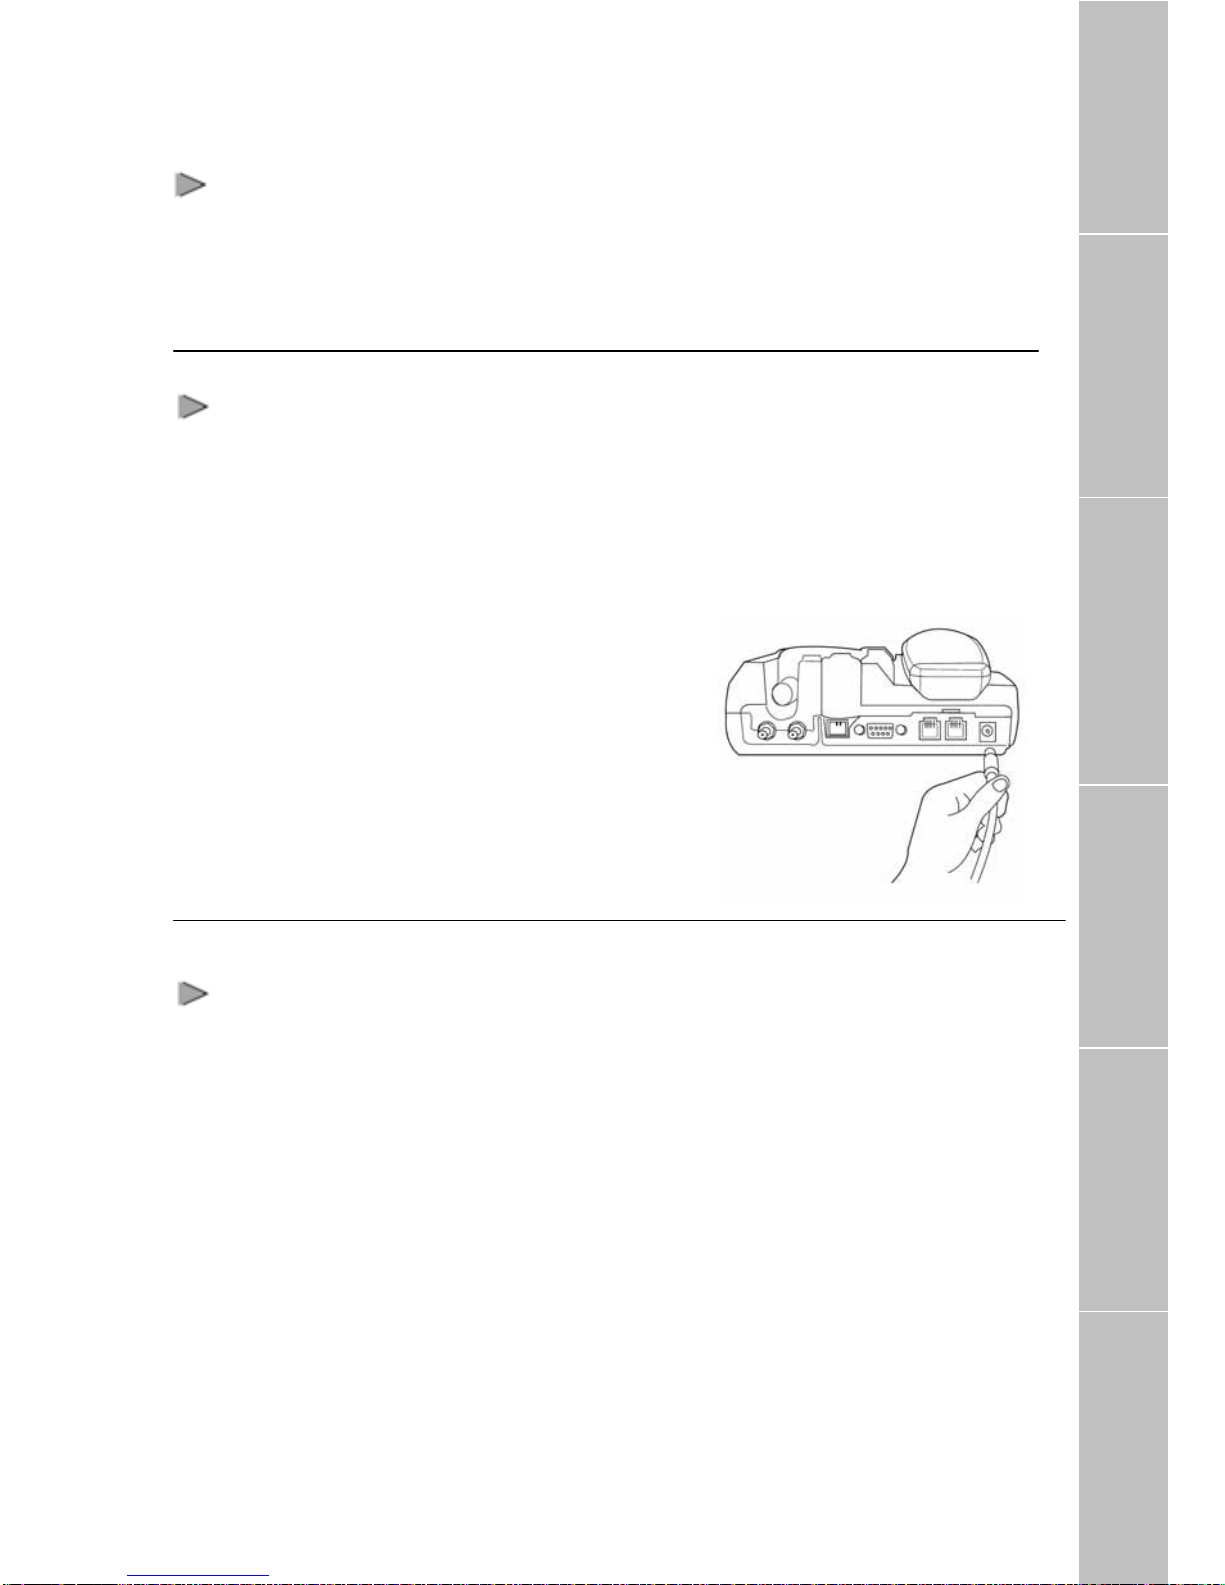
Connect the coaxial cabl
(marked “Satellite Antenna
Cable”) to the antenna
connecto loca ed at the base
of the satellite antenna and
tighten it properly by turning it
clockwise. Leave enough
length for small op and
secure the rest of the cable
using the cable ties.
Connect the other e
satellite antenna cable to the
satellite antenna connector
marked “ AT” on th FDU-2500
by the side of the connectors.
Installation Instructions
Package Contents Installation Instructions Getting Started
Receiving / Making Calls
Fax Message
5