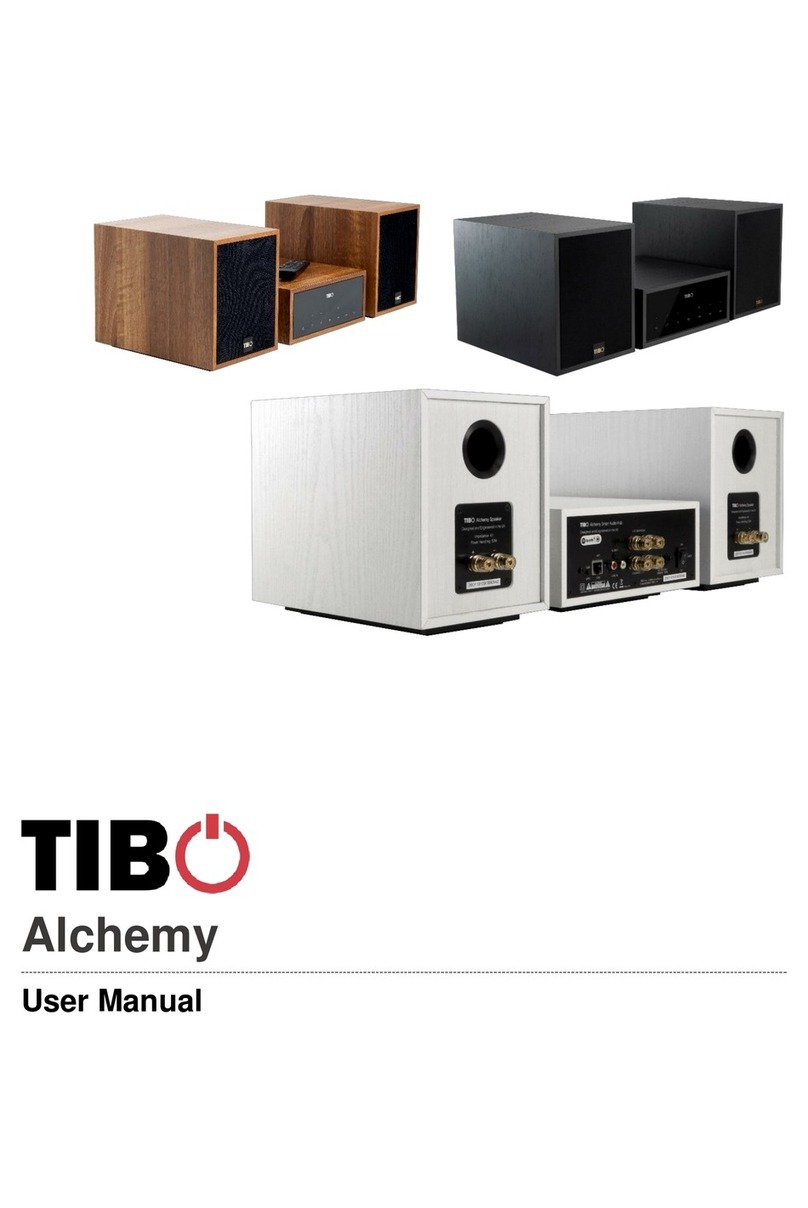
Tibo TI420 User manual

User Guide
TI420
Turn it back on
Please read this user manual carefully before using your TI420 Hi-Fi system and retain for future reference.

2
Turn it back on
CONTENTS
SAFETY
Safety precautions . . . . . . . . . . . . . . . . . . . . . . . . . . . . . . . . . . . . . . . . . . . . . . . . . . 3
Important safety instruction . . . . . . . . . . . . . . . . . . . . . . . . . . . . . . . . . . . . . . . . . . . 4
INCLUDED IN THE BOX . . . . . . . . . . . . . . . . . . . . . . . . . . . . . . . . . . . . . . . . . . . . . . . . . . . . . . . . 5
SETTING UP THE SYSTEM
Connecting to the mains . . . . . . . . . . . . . . . . . . . . . . . . . . . . . . . . . . . . . . . . . . . . . 6
Audio connection layout. . . . . . . . . . . . . . . . . . . . . . . . . . . . . . . . . . . . . . . . . . . . . . 6
BT / Amplifier connection . . . . . . . . . . . . . . . . . . . . . . . . . . . . . . . . . . . . . . . . . . . . . 7
CD-Player connections. . . . . . . . . . . . . . . . . . . . . . . . . . . . . . . . . . . . . . . . . . . . . . . 7
DAB/FM Tuner connections . . . . . . . . . . . . . . . . . . . . . . . . . . . . . . . . . . . . . . . . . . . 7
CONNECTING A TV TO THE TI420
Option 1 . . . . . . . . . . . . . . . . . . . . . . . . . . . . . . . . . . . . . . . . . . . . . . . . . . . . . . . . . . 8
Option 2 . . . . . . . . . . . . . . . . . . . . . . . . . . . . . . . . . . . . . . . . . . . . . . . . . . . . . . . . . . 8
REMOTE CONTROL
Installing batteries . . . . . . . . . . . . . . . . . . . . . . . . . . . . . . . . . . . . . . . . . . . . . . . . . . 9
Using the remote control . . . . . . . . . . . . . . . . . . . . . . . . . . . . . . . . . . . . . . . . . . . . . 9
Remote control functions . . . . . . . . . . . . . . . . . . . . . . . . . . . . . . . . . . . . . . . . . . . . . 10
AMPLIFIER
Front panel . . . . . . . . . . . . . . . . . . . . . . . . . . . . . . . . . . . . . . . . . . . . . . . . . . . . . . . . 11
Using the function menu . . . . . . . . . . . . . . . . . . . . . . . . . . . . . . . . . . . . . . . . . . . . . 11
Volume . . . . . . . . . . . . . . . . . . . . . . . . . . . . . . . . . . . . . . . . . . . . . . . . . . . . . . . . . . . 11
Bass . . . . . . . . . . . . . . . . . . . . . . . . . . . . . . . . . . . . . . . . . . . . . . . . . . . . . . . . . . . . . 12
Treble . . . . . . . . . . . . . . . . . . . . . . . . . . . . . . . . . . . . . . . . . . . . . . . . . . . . . . . . . . . . 12
Balance . . . . . . . . . . . . . . . . . . . . . . . . . . . . . . . . . . . . . . . . . . . . . . . . . . . . . . . . . . 12
Loudness . . . . . . . . . . . . . . . . . . . . . . . . . . . . . . . . . . . . . . . . . . . . . . . . . . . . . . . . 12
DAB/FM TUNER
Front panel . . . . . . . . . . . . . . . . . . . . . . . . . . . . . . . . . . . . . . . . . . . . . . . . . . . . . . . . 13
Adjusting the antenna . . . . . . . . . . . . . . . . . . . . . . . . . . . . . . . . . . . . . . . . . . . . . . . 13
On/Off and standby . . . . . . . . . . . . . . . . . . . . . . . . . . . . . . . . . . . . . . . . . . . . . . . . . 13
Info and function . . . . . . . . . . . . . . . . . . . . . . . . . . . . . . . . . . . . . . . . . . . . . . . . . . . 14
DAB tuning . . . . . . . . . . . . . . . . . . . . . . . . . . . . . . . . . . . . . . . . . . . . . . . . . . . . . . . . 14
Saving and selecting channels . . . . . . . . . . . . . . . . . . . . . . . . . . . . . . . . . . . . . . . . 14
FM tuning - automatic. . . . . . . . . . . . . . . . . . . . . . . . . . . . . . . . . . . . . . . . . . . . . . . . 15
FM tuning - manual. . . . . . . . . . . . . . . . . . . . . . . . . . . . . . . . . . . . . . . . . . . . . . . . . . 15
Reset channels . . . . . . . . . . . . . . . . . . . . . . . . . . . . . . . . . . . . . . . . . . . . . . . . . . . . 15
CD PLAYER
Front panel . . . . . . . . . . . . . . . . . . . . . . . . . . . . . . . . . . . . . . . . . . . . . . . . . . . . . . . . 16
VFD display . . . . . . . . . . . . . . . . . . . . . . . . . . . . . . . . . . . . . . . . . . . . . . . . . . . . . . . 16
On/Off and standby . . . . . . . . . . . . . . . . . . . . . . . . . . . . . . . . . . . . . . . . . . . . . . . . . 16
Load a disc . . . . . . . . . . . . . . . . . . . . . . . . . . . . . . . . . . . . . . . . . . . . . . . . . . . . . . . 17
Play a disc . . . . . . . . . . . . . . . . . . . . . . . . . . . . . . . . . . . . . . . . . . . . . . . . . . . . . . . . 17
Pause a disc . . . . . . . . . . . . . . . . . . . . . . . . . . . . . . . . . . . . . . . . . . . . . . . . . . . . . . 17
Stop/Clear. . . . . . . . . . . . . . . . . . . . . . . . . . . . . . . . . . . . . . . . . . . . . . . . . . . . . . . . . 17
Previous/Next . . . . . . . . . . . . . . . . . . . . . . . . . . . . . . . . . . . . . . . . . . . . . . . . . . . . . . 18
Forward/Rewind . . . . . . . . . . . . . . . . . . . . . . . . . . . . . . . . . . . . . . . . . . . . . . . . . . . . 18
Random playback . . . . . . . . . . . . . . . . . . . . . . . . . . . . . . . . . . . . . . . . . . . . . . . . . . 18
LOUDSPEAKERS
Connecting speakers to the amplifier . . . . . . . . . . . . . . . . . . . . . . . . . . . . . . . . . . . 19
Loudspeakers positioning . . . . . . . . . . . . . . . . . . . . . . . . . . . . . . . . . . . . . . . . . . . . 19
TECHNICAL DATA
Amplifier . . . . . . . . . . . . . . . . . . . . . . . . . . . . . . . . . . . . . . . . . . . . . . . . . . . . . . . . . . 20
DAB/FM tuner . . . . . . . . . . . . . . . . . . . . . . . . . . . . . . . . . . . . . . . . . . . . . . . . . . . . . . 20
CD player . . . . . . . . . . . . . . . . . . . . . . . . . . . . . . . . . . . . . . . . . . . . . . . . . . . . . . . . . 20
Loudspeakers. . . . . . . . . . . . . . . . . . . . . . . . . . . . . . . . . . . . . . . . . . . . . . . . . . . . . . 20
TROUBLE SHOOTING . . . . . . . . . . . . . . . . . . . . . . . . . . . . . . . . . . . . . . . . . . . . . . . . . . . . . . . . . 21
INDEX . . . . . . . . . . . . . . . . . . . . . . . . . . . . . . . . . . . . . . . . . . . . . . . . . . . . . . . . . . . . . . . . . 21
CONTACTS . . . . . . . . . . . . . . . . . . . . . . . . . . . . . . . . . . . . . . . . . . . . . . . . . . . . . . . . . . . . . . . . . 21

3
Turn it back on
A triangle with a
lighting symbol draws
the user’s attention to
“dangerous voltage”
without insulation in the cabinet,
which may be high enough to
entail a risk of an electric shock.
A triangle with an ex-
clamation mark draws
the user’s attention to
important instructions
for use and maintenance in the ac-
companying manual, which should
be studied and adhered to.
The symbol for a
CLASS II (double
insulation) product.
Safety precautions
Warning:
To minimise the risk of re or electric shock, do not expose the unit to liquid or moisture. Do not open the cabinet
as it contains dangerous voltages. Only qualied technicians are allowed to carry out repair and service of this
system.
If the plug of the power cord needs to be replaced. It is important that the replacement is identical to the plug that
needs to be replaced, or that the new plug has been recommended by the manufacturer.
Caution:
To avoid electric shock, it is important to insert the plug correctly into the wall outlet.
Warning:
It is important that you read and observe both the instructions in this manual and the instruction on the unit.
Keep this manual for safe future reference. This unit was designed and manufactured with a view to providing
maximum safety for the user. Incorrect use of the unit may cause an electric shock or re. The protection devices
built into this unit will protect the user if the procedures below are observed in connection with installation, use
and repair. This unit is fully electronic and contains no parts that can be repaired by the user.
Do not remove the covers. Risk of dangerous voltage. Only qualied technicians are allowed to repair the unit.
Important safety instructions
Read the manual
After unpacking the unit, please read the manual care-
fully and observe all the instructions given.
Power supply
Only the power supply indicated on the rating plate
must be used for this unit. If you are not sure which
power supply you have, please contact your local
dealer.
Earthing or polarisation
If the plug cannot be inserted properly into the
socket, or if the plug does not t, the unit must not be
used in your country.
Ventilation
The cabinet is provided with slots and openings to
ensure ventilation and reliable operation and to protect
the unit against overheating. Do not block or cover
these openings. The openings must never be blocked,
for instance by placing the unit on a bed, a sofa, a
carpet or similar surface.
Heat
Do not place the unit near sources of heat such as
radiators, ovens or other units that produce heat.
Water and moisture.
The unit must not be placed close to water, such
as bathtub, wash basin, kitchen sink or washing
machine, in a damp cellar or close to a swimming
pool, etc.
Cleaning
Unplug the unit before cleaning. Do not use liquid de-
tergents and aerosol cleaning agents. Use a dry cloth.
Power cords
Wiring must be organised to prevent people from step-
ping on the cables and to avoid pinching by objects
placed on or beside them. Take special care around
sockets and plug boxes and where the power cords
leave the unit.
Lightning
Unplug the unit for additional protection during storms
or when the unit is not used for prolonged periods.
This will prevent damage to the unit from lightning and
power surges.
SAFETY

4
Turn it back on
Important safety instructions
SAFETY
Penetration of objects and liquid
Never push any foreign objects through the openings into the unit, as they may touch dangerous voltage points
or short-circuit parts and cause re or an electric shock. Do not spill liquid onto the unit.
Accessories
Do not place the unit on unstable surfaces such as a trolley, stand, tripod, shelf or table. The
unit may fall and cause serious injury to persons or damage to the unit. Use only trolley, stand,
tripod, shelf or table that is very stable or provided with the unit. The unit must be installed in
accordance with the manufacturer’s instructions and by means of installation equipment recom-
mended by the manufacturer. If the unit is placed on a trolley, the trolley must be moved very
carefully. Sudden stops, unnecessary force and uneven surfaces may cause the trolley to turn
over.
Loads
Do not place heavy loads on the unit and do not step on it. The load may fall and cause serious injury to persons
or damage to the unit.
Damage
Unplug the unit and contact qualied technicians in the following cases:
A. If the power cord or the plug is damaged.
B. If liquid has been spilled on the unit or objects have
fallen into the unit.
C. If the unit has been exposed to liquid or moisture.
D. If the unit does not work properly after adhering to the instructions in the operation manual. Only the settings
described in the operation manual must be made as incorrect setting may result in damage and often will
make it difficult for a qualied technician to make the unit work properly again.
E. If the unit has been dropped or damaged in any other way.
F. When the operation of the unit changes drastically, the unit requires service.
Service
Do not attempt to carry out any service work by yourself.By opening or removing the cover, you will be exposed
to dangerous voltage or other hazards. Any service work should be carried out by qualied technicians.
Recycling
If at any time in the future you need to dispose of this product please note that waste electrical
products should not be disposed of with household waste. Please recycle where facilities exist.
Check with your Local Authority or retailer for recycling advice.
Approval
This product complies with European Low Voltage and Electromagnetic Compatibility Directives
when used and installed according to this instruction manual.

5
Turn it back on
Please save your packaging as you will need this in the event of warranty/service repair or support. We are
unable to carry out warranty/service if you are unable to package it correctly. The safest way to package your
item in the event of warranty/service repair is in it’s original box/packaging.
INCLUDED IN THE BOX
Accessories
Included with this TI420 Hi-Fi system are the following accessories:
Box 1
Box 2
1 x User Manual
1 x Pair of Speakers
1 x TI420 BT/Amplier
1 x Bluetooth Antenna
1 x TI420 CD Player
3 x Main Plugs
2 x RCA Audio Cables
1 x TI420 DAB/FM Tuner
1 x FM Antenna
1 x Extensions Lead
1 x Quick Start Guide
1 x Remote Control
(2 x AAA batteries included)
2 x Speaker Cables
User Guide
TI410i
Turn it back on
Pleaseread this user manual carefully before using your TI410i Hi-Fi system and retain for future reference.
Turn it back on
QUICK START GUIDE
Package content
Connecting the system
Remote control installation
1. Connect all cables as illustrated above
2. Turn on the mains power on the front of each of the units
3. Press the Input Source button for the source that you want to listen to
Remove the cover Insert two type AAA
batteries in the battery
compartment. Make sure
that the orientation of the
batteries is correct.
Close the cover
UserGuide
TI410i
Turnitbackon
PleasereadthisusermanualcarefullybeforeusingyourTI410iHi-Fi system and retain for future reference.
Turnitbackon
QUICKSTARTGUIDE
Packagecontent
Connectingthesystem
Remotecontrolinstallation
1.Connectallcablesasillustratedabove
2.Turnonthemainspoweron the front of each of the units
3.PresstheInputSourcebuttonfor the source that you want to listen to
Removethecover InserttwotypeAAA
batteriesinthebattery
compartment.Makesure
thattheorientationofthe
batteriesiscorrect.
Closethecover
UserGuide
TI410i
Turnitbackon
PleasereadthisusermanualcarefullybeforeusingyourTI410iHi-Fisystemandretainforfuturereference.
UserGuide
TI410i
Turnitbackon
PleasereadthisusermanualcarefullybeforeusingyourTI410iHi-Fisystemandretainforfuturereference.
1x 1x 1x 1x 1x 3x 1x1x 2x 2x 1x
1x 1x 1x 1x 1x 3x 1x 1x 2x 2x 1x

6
Turn it back on
Connecting to the mains
TI 420 DAB/FM TUNER
TI 420 CD-PLAYER
TI 420 BT/AMPLIFIER
Check that all other connections have been made correctly before inserting the mains plug into the wall outlet.
Audio connection layout
SETTING UP THE SYSTEM
Turntable (optional)
Speakers
(right)
(left)
Active subwoofer
(Optional)
DAB/FM Tuner
DVD Player (optional)
CD Player
TI 420 BT/AMPLIFIER
TI 420 DAB/FM TUNER

7
Turn it back on
SETTING UP THE SYSTEM
BT / Amplier
1. Antenna: For connection of the supplied Bluetooth antenna.
2. Line-out: For connection to an optional powered subwoofer of an external amplier.
3. CD: For connection of the TI 420 CD-PLAYER.
4. DVD: For connection of a DVD player.
5. Tuner: For connection of the TI 420 FM/DAB TUNER.
6. Phono: For connection of a turntable (Note: Additional ground terminal available above inputs).
7. Speaker left & right: For connection of the TI 420 SPEAKERS.
Note: The cable ends must not come into contact with each other or the cabinet back panel.
8. AC input: For connection of the mains supply. Make sure that the plug is correctly inserted into the wall
outlet.
TI 420 BT/AMPLIFIER
123456 7 8
1. Stereo output: Analogue stereo output. For connection to the TI420 BT/AMPLIFIER.
2. AC input: For connection of the mains input. Make sure that the plug has been correctly inserted into the wall
outlet.
CD Player
TI 420 CD-PLAYER
1
TI 420 DAB/FM TUNER
DAB/FM Tuner
1. Stereo output: Analogue stereo output. For connection to the TI420 BT/AMPLIFIER.
2. Antenna: Connect the supplied FM antenna.
3. AC input: For connection of the mains input. Make sure that the plug has been correctly inserted into the wall
outlet.
12 3
2

8
Turn it back on
Option 1
How to connect without a scart adaptor?
1. Connect a line cable L/R to TI420 BT/Amplier – Line-in.
2. Connect a 3.5 mm end to headphones output on a TV.
Option 2
How to connect to a TV using a scart adaptor?
1. Connect a line cable to TI420 BT/Amplier – Line-in.
2. Connect a line cable to scart adaptor.
3. Make sure the scart adaptor is set to output - not input.
4. Insert scart adaptor in to the scart socket on the TV.
Scart out on TV
Headphones out on TV
TI420 BT/Amplier
TI420 BT/Amplier
CONNECTING A TV TO THE TI420
Note: RCA audio to 3.5 mm jack cable not included.
Note:
a) Line cable is not included.
b) Scart adaptor is not included.

9
Turn it back on
1. Remove the cover as illustrated. 2. Position two batteries of
the type AAA in the battery
compartment. Make sure that
the polarity of the batteries is
correct (see drawing at bottom
of the remote control).
3. Replace the cover.
Installation of batteries
Using the remote control
Direct the remote control at the sensor on the front panel of the unit. When the remote control signal is received,
the unit reacts accordingly. The remote control works within a range of 6 meters.
Sometimes the remote control does not work well in strong light.You may have to move the unit if it is a problem.
Malfunction may occur if other remote controls are used near the unit.
Do not place any objects on the remote control, as the batteries may become at if a key is depressed constantly.
Make sure that there are no obstacles between remote control and the unit.
Do not position the unit behind tinted glass as it may reduce the maximum range of the remote control.
TI 420 BT/AMPLIFIER
Maximum 6m
REMOTE CONTROL
Note:
A) Do not mix new and old batteries and do not use different types of batteries.
B) If the remote control is not used for prolonged periods, remove the batteries from the remote control to
avoid corrosion.

10
Turn it back on
Remote control functions
113
2
14
315
16
4
175
6
10
18
7
11
19
8
22
25
20
23
9
12
21
24
1. Power: Sets TI420 BT/AMP, TI420 CDP, TI420 DAB/FM into
standby.
2. 0-9 digits: Selects tracks on the TI420 CDP and pre-set
stations on TI420 DAB.
3. Fast forward: Fast forward playback.
4. Enter: For TI420 DAB only.
5. Previous: Select the previous track.
6. Stop: Stop playback.
7. Fast rewind: Rewinds playback.
8. Repeat: Repeat a single or all tracks on CD disc.
9. DVD: To activate the DVD source.
10. Line-in: To activate the Line-in source.
11. Function: Enters the menu on the TI420 BT/AMP.
12. Volume decrease: turns down the volume.
13. Eject: Opens and closes the disc tray on the TI420 CDP.
14. +10: Use this button along with the 0-9 digits to select tracks
on the TI420 CDP and pre-set sattions on TI420 DAB above
10. For example press the +10 button and the 5 digit to select
track 15 on a disc.
15. Autotune: Press once to automatically tune for a station at a
higher frequency.
16. Info: Displays the RDS and DAB information for the tuner.
17. Next: Selects the next track on.
18. Play/Pause: Starts and pauses playback.
19. Mute: Mutes the sound.
20. Random: All tracks are played in a random order.
21. Phono: To activate the phono function.
22. DAB/FM: To activate the TI420 DAB and FM function.
23. Bluetooth: To activate the Bluetooth audio function.
24. CD: To activate the TI420 CD Player and the TI420 AMP on
and selects the CD input on the TI420 BT/AMP.
25. Volume increase: Turns up the volume.
REMOTE CONTROL
Some of the functions of the unit can only be performed by means of the remote control. Some functions are
connected with the selected signal input source. Some buttons on the remote control may therefore not be
available if the corresponding signal input source has not been selected.

11
Turn it back on
Front panel
TI 420 BT/AMPLIFIER
13711
5913
2481261014
1. Mains switch: Used to turn On/Off the mains power.
2. LED indicator: Lights up blue when the amplier is turned On. Lights red in standby mode.
3. Treble: Adjusts the treble level.
4. Volume: Adjusts the master volume, Bass, Treble, Balance and Loudness.
5. Bass: Adjusts the Bass level.
6. Phono: Activates the phono input.
7. Tuner: Activates the tuner input.
8. DVD: Activates the DVD input.
9. CD: Activates the CD input.
10. Bluetooth: Activates the Bluetooth function.
11. Line-in: Activates the line-in.
12. Function: Gives access to menu functions such as Balance and Loudness.
13. Line-in: Connection for line-in input with mini jack.
14. Headphone: 6 mm jack that suits most headphones.
AMPLIFIER
Note: The volume control on the front panel can be turned both clockwise and anticlockwise to change the vol-
ume. The volume control includes 64 steps, from -78, -75 dB for minimum volume and up to 0 dB for maximum
volume.
TI 420 BT/AMPLIFIER
Volume
Using the function menu
The TI420 AMP features a “function menu” that allows the adjustment of the following when accessed via the
remote: Bass, Treble, Balance and Loudness (see menu structure on right side). A description of the individual
functions will follow on the next few pages.
1. Press the VOL+ button to increase the volume and press VOL- to reduce the volume.
2. Turn the volume control to the right to increase the volume and turn the volume control to the left to reduce the
volume.
1 2

12
Turn it back on
Treble
This amplier features a treble control that allows adjustment of the Treble level. Please note
that the high Treble boost level offered by the Treble control may lead to permanent damage
to your loudspeakers if high volume is used for prolonged period of time.
1. Press the Function button on the remote control to enter the Function menu. Keep
pressing the Function button on the remote control until the display on the amplier shows
Treble.
2. Press VOL+ or VOL- to adjust the Treble level.
3. If you want to adjust the Treble level through the front panel, you must turn the Treble
button clockwise or counter clockwise to adjust the Treble level.
1
2
TREBLE 0
3
Bass
This amplier features a bass control that allows adjustment of the bass level. Please note
that the high bass boost level offered by the bass control may lead to permanent damage to
your loudspeakers if high volume is used for prolonged period of time.
1. Press the Function button on the remote control to enter the Function menu. Keep
pressing the Function button on the remote control until the display on the amplier shows
Bass.
2. Press VOL+ or VOL- to adjust the Bass level.
3. If you want to adjust the Bass level through the front panel, you must turn the Bass button
clockwise or anticlockwise to adjust the Bass level.
BASS 2
3
1
2
Balance
This amplier features a balance control that allows the adjustment of the vol-
ume of one loudspeaker. This function is used to compensate for a non-centred
listening position, and makes it possible to adjust the stereo perspective.
1. Press the Function button on the front panel or the remote control until
information on balance control is displayed.
2. Turn the volume control to adjust the balance.
21
Loudness
This amplier features a loudness function that allows boosting the volume
of the low frequencies at low volume. This function is active at frequencies
between 20 Hz and 800 Hz and the function is dampened when the amplier
volume is increased. When the volume is at the maximum setting, the loudness
function has completely cut out.
1. Press the Function button on the front panel or the remote control until information on loudness is displayed.
2. Turn the volume control to right to activate the loudness function or to left deactivate the loudness function.
AMPLIFIER
Note: If the Bass control is not operated within ve seconds, the display will return to the volume information
display.
Note: If the Treble control is not operated within ve seconds, the display will return to the volume information
display.
Note: If the balance control is not operated within ve seconds, the display will return to the volume
information display.
Note: If the loudness control is not operated within ve seconds, the display will return to the volume
information display.
21

13
Turn it back on
TI 420 DAB/FM TUNER
13759248610
Front panel
1. Mains switch: Used to turn On/Off the mains power.
2. LED indicator: Lights up blue when the amplier is turned On. Lights red in standby mode.
3. Control/Tuning: Used to switch between the tuned in DAB stations. Manual tuner in FM mode.
Press the button to select the DAB station.
4. Preset No. 1: Selects the station saved under no. 1. If the button is pressed for more than two Seconds, the
station is saved as No. 1.
5. Preset No. 2: Selects the station saved under No. 2. If the button is pressed for more than two Seconds, the
station is saved as No. 2.
6. Preset No. 3: Selects the station saved under No. 3. If the button is pressed for more than two Seconds, the
station is saved as No. 3.
7. Preset No. 4: Selects the station saved under no. 4. If the button is pressed for more than two Seconds, the
station is saved as No. 4.
8. DAB/FM: Switches between DAB and FM.
9. Autotune: Press once to automatic tune into DAB stations. Press the button for two seconds to initiate an
international search.
10. Info: Switches between RDS and DAB information (program information, time and date, signal strength,
etc.).
DAB/FM TUNER
Adjusting the antenna
The sound quality depends on the signal strength of the antenna inputs. The position of the radio in relation to
the transmitter thus directly inuences the quality of the signal received. For an optimal result it is therefore very
important that you make sure that the radio receives the best possible antenna signal.
On/Off and standby
1. Turn On the unit by pressing the mains switch.
2. Press the standby button on the remote control to
switch into standby mode. The display will turn Off
and all functions will be reduced to a minimum to
make sure that the unit uses minimal power. When in standby mode the unit only reacts to the
Tuner button of the remote control (3).
3. If you want to turn Off the unit to avoid any power consumption, you must press the mains switch.
A good tip is to let the antenna ends point in the vertical direction and x them on a wall.
For an optimal result it is recommended to install a DAB antenna on the roof or in a loft.
TI 420 DAB/FM TUNER
100 OOMHZ FM
3
1
Protect the enviroment and turn Off the unit after use.
TI 420 DA
B
TI 420
2
3

14
Turn it back on
Info and function
1. As this tuner can receive both normal FM radio
and DAB (Digital Audio Broadcasting), it features a
function that can switch between the two reception
types. To switch between DAB and FM, you must
either press the DAB/FM button on the front panel
or the DAB/FM button on the remote control.
2. This tuner features RDS (Radio Data System) on the FM receiver. DAB also offers some in-
formation possibilities that resemble RDS as we know it from FM. To activate this information
from both DAB and FM, you must press the INFO button either on the front panel or on the
remote control. The display will show information about the time and date, the name of the
station, the name of artist, title, etc.
1
DAB tuning
When the unit is turned on for the rst time,
all settings will be set to the default settings.
The settings can be changed according to your
preferences. When the unit is turned off the next
time, these settings will automatically be saved as
the new default settings.
This also applies if you unplug the unit.
When the unit has been turned On, channels must be saved. This is
done by means of the Autotune function.
1. To use the Autotune function through the front panel controls, press the Autotune button for two seconds. An
international search will be initiated.
2. You can also press the Autotune button on the remote control for two seconds.
If no channels are found, you must check if the antenna has been correctly connected and adjusted.
TI 420 DAB/FM TUNER
FULL SCAN
Saving and selecting channels
1. If you want to save a channel under one of the
presets, you must press down the button with
the desired number concerned for two seconds.
When the channel has been saved and you wish
to listen to that channel, press the button with the
number that you have saved the channel to. The
procedure is the same for both FM and DAB.
2. Channels that have not been saved can be selected either by means of the << or >>
buttons on the remote control or the Control/Tuning button on the front panel. Note that
when the channel is selected, you must conrm your choice by pressing the Control/Tuning
button on the front panel or the Play/Pause button on the remote. This function can be deactivated by pressing
the Control/Tuning button on the front panel or the Play/Pause button on the remote control for two seconds.
DAB/FM TUNER
Note: If the Info button is pressed in DAB mode after channels have been saved, the strength of the antenna
signal will also be displayed.
Note: If the button is only pressed once, the unit will search once again for the channels already found (Quick
scan).
Note: In order to tune on the L band manual tuning must be selected. Press the Info button for two seconds,
until the message Manual tune appears, then press Select. Use the Control/Tuning button on the front panel or
the << or >> buttons to select a channel, and press Play/Pause again to store the channel.
1
2
12
2
21
1

15
Turn it back on
FM tuning
The TI420 DAB offers both manual and automatic tuning on the FM band. This makes it possible to save just one
specic channel. It also makes it possible to adjust the supplied antenna for the best possible signal.
Automatic tuning
1. To use the Autotune function through the front
panel controls, you must press the Autotune button.
The unit will search for a higher frequency with a
proper signal. Press and hold the Autotune button
for two seconds, the unit will search for a lower
frequency with a proper signal.
2. You can also activate the Autotune function by using the remote control.
On the display you can see that the frequency increases or decreases. When the tuner has found a channel, the
tunning process will automatically stop, and the sound from the found channel will play.
If no channels are found, you must check if the antenna has been correctly connected an adjusted.
DAB/FM TUNER
Note: If there are channels from FM band that have not been saved, you must tune into them again either
manually or automatically, if you wish to listen to them again.
2
1
Manual Tuning
1. To activate the manual tuning function through the
front panel controls, simply turn the Control/Tuning
button. If you turn it clockwise, the unit will tune in
to a station at a higher frequency and if you turn
the button anticlockwise, the unit will tune in to a
station at a lower frequency. It is also possible to
activate the manual tuning function with the remote control.
2. Use the << or >> buttons this works in the same manner as the Control/Tuning button on the
front panel.
Reset
This tuner can be reset. This is used to delete all channels stored in the unit. Press and hold Info button for two
seconds. Press the Info button once again until the display shows the message System Reset, then press Select.
All stored channels have now been removed from the unit.
12

16
Turn it back on
Explanation of VFD display
This unit does not feature any OSD (On Screen Display). Instead it features a more descriptive VFD display that
displays all information required. Below you can see a picture of the display and an explanation of the various
symbols.
Front panel
TI 420 CD-PLAYER
13759248610
1. Mains switch: Used to turn On/Off the mains power.
2. LED indicator: Lights up blue when the amplier is turned On. Lights red in standby mode.
3. Rewind/Forward: Fast forward and reverse.
4. Program: Play the tracks of a CD in a programmed order.
5. Random: Play tracks on a CD in a random order.
6. Previous: Selects the previous track.
7. Next: Selects the next track.
8. Play/Pause: Starts playback when pressed once and stops playback when pressed twice.
9. Stop: Stops playback completely.
10. Open/Close: Opens and closes the CD tray.
CD 12-12-59:47
Track number Track time
On/Off and standby
1. Turn On the unit by pressing the mains switch.
2. Press the standby button on the remote control to switch the unit into standby mode. The
display will turn Off and all functions will be reduced to a minimum to make sure that the
unit uses minimal power. When in standby mode the unit only reacts to the Tuner button
on the remote control (3).
3. If you want to turn Off the unit to avoid any power consumption, you must press the mains
switch.
Protect the enviroment and turn Off the unit after use.
CD-PLAYER
2
3
TI 420 DAB/FM TUNER
100 OOMHZ FM
3
1

17
Turn it back on
Load a disc
If you want to play a disc, you must load a CD.You do this by pressing the eject button the remote control or on
the front panel of the CD player. When the disc has been read, the display will show the number of tracks on the
disc and the total playback time.
If there is no disc in the tray, the message No Disc will be displayed. If the unit has trouble reading a disc, you
must check if the disc is clean and free from dirt and scratches. If the disc is still not playing, you must contact
your dealer.
Play
Press the Play/Pause button on the remote control or on the front panel once to start playback. The counter on
the left side of the display will start to count upwards.
CD 12-12-59:47
CD 12-12-59:47
NO DISC
CD-PLAYER
Pause a disc
Press the Play/Pause button once more to stop playback. The counter on the left side of the display will start to
blink. To continue playback, press the Play/Pause button again.
Stop/Clear
To stop playback completely press Stop button once. The display will again display the number of tracks on
the disc and the total playback time. When the stop button is pressed all previous programming settings will be
deleted.

18
Turn it back on
CD-PLAYER
Previous/Next
When a CD track is being played it is possible to switch to the previous track or to the next track. If you want
to continue to the next track, you must press the >>| (next) button on the remote control or on the front panel
once. If you want to move on several tracks, you must press >>| until you reach the desired track. If you want to
go back to one of the previous tracks, you must use the same procedure but not the same button. Use the |<<
(previous) button instead.
Forward/Rewind
It is possible to perform a search in the track played. If you want to search forward, press the >> (forward) button
on the remote control until you get to the part of the track that you wish to hear, then press play. You will see that
the time counter in the display counts up very quickly.
To increase the search speed press 2 or 3 times on the >> button.You will see that the information on the display
changes between >, >> and >>>, which indicates the speed.
If you wish to search backward use the same procedure as forward, but use the << (rewind) button instead.
It is possible to activate the search function by turning the Rewind/Forward button on the front panel.
Random playback
It is possible to select random playback by pressing the Random button on the remote control or on the front
panel.
The CD tracks will be played in random order. The dash between the rst and second number from the left starts
to ash, when this function has been activated. It is possible to activate random play both in stop mode and dur-
ing playback. Press the Random button again if you wish to deactivate random play.
CD 12-12-59:47
Flashing when random is activated
Note: When you press |<< or >>| during random play, it will not be possible to select the next track or any other
track.

19
Turn it back on
Connecting to amplier
The TI420 loudspeakers are supplied with high quality multi strand speaker cables, colour coded to assist
checking polarity. Always switch OFF your amplier before making any connections or adjustments to the
system. Wire the right-hand channel cable so that the positive (RED) terminal of your loudspeaker is connected
to the positive (RED) on your amplier, The negative (BLACK) terminal of your loudspeaker is connected to the
negative (BLACK) terminal on your amplier. Repeat the instructions for the left-hand channel. Do NOT connect
more than one loudspeaker to one terminal on your amplier.
Loudspeakers positioning
Ideally the TI420 loudspeakers should be positioned at least 50 cm from a rear wall, 1 meter from a side wall
and at least 2 metres apart. The space between the two loudspeakers and the distance form the listeners
are important. If loudspeakers are placed too close together or too far apart, stereo images will not be fully
developed. In average living rooms, speaker distance between 2 and 4 metres will usually give the best results.
The listeners distance from the loudspeakers should be at least equal to and preferably greater than the distance
between the loudspeakers. Tests should be made with both speech and music before deciding upon nal
locations.
2 m
2.5 m
Left
Right
TI 420 BT/AMPLIFIER
LOUDSPEAKERS

20
Turn it back on
Amplier
Max. power consumption:
Signal to noise ratio:
Power output:
Tone controls - Bass:
Tone controls - Treble:
Distortion:
Inputs:
Speaker terminals:
Line-out:
Dimensions (HxWxD):
Weight:
150 Watts
> 90 dB
2 x 50 Watts
+/- 14 dB
+/- 14 dB
< 0.1 % THD
6 x line-in including Bluetooth, 3.5 mm jack and phono
High quality binding posts
1 x line-out
70 x 430 x 285 mm
5.6 kg
DAB/FM tuner
Max. power consumption:
Signal to noise ratio:
Wavebands:
Presets:
Sensitivity:
Dimensions (HxWxD):
Weight:
30 Watts
105 dB typical
DAB band III, DAB L-band, FM
10
96 dBm typical
50 x 430 x 285 mm
2.8 kg
CD-Player
Max. power consumption:
Signal to noise ratio:
Frequency response:
Disc format (playback):
Distortion:
Analog audio outputs:
Dimensions (HxWxD):
Weight:
30 Watts
> 90 dB
20 - 20,000 Hz
Audio CD/CD-R
< 0.1 % THD
Stereo RCA
50 x 430 x 285 mm
3.5 kg
Loudspeakers
Frequency response:
Long term power
Short term power
Sensitivity:
Terminals:
Impedance:
Tweeter:
Midd/woofer:
Woofer:
Dimensions (HxWxD):
Weight:
35 - 20,000 Hz
200 Watts
400 Watts
90 dB
High quality binding posts
4 - 8 Ohm
25 mm soft dome
165 mm
165 mm
903 x 213 x 280 mm
2 x 10.8 kg
TECHNICAL DATA
We reserve the right to change the technical data and the design of the product without notice as a result of further development.
This manual suits for next models
1
Table of contents
Other Tibo Stereo System manuals
Popular Stereo System manuals by other brands
Sony
Sony ZS-D10 Marketing Specifications & Features operating instructions

Vitek
Vitek VT-3497 Manual instruction
Honeywell Home
Honeywell Home Tuxedo Touch TUXWIFIS Quick user guide

Multilaser
Multilaser SP112 Black Wood user manual
Williams AV
Williams AV Pointmaker CPN 5600 quick start guide
MOODY
MOODY Baby Box v 3.1 user manual
