TIFATECH HTCLW User manual

S21-037
Coffee Machine Control Board
HTCLW
Instruction Manual

S21-037
PREFACE
Thank you for purchasing our HTCLW, Control board for the Coffee machine.
This manual contains instructions for the mounting, functions, operations, and
notes when operating the HTCLW. To ensure safe and correct use, thoroughly
read and understand this manual before using this product.
To prevent accidents arising from the misuse of this product, please ensure the
operator receives this manual.
HAZARD INTENSITY LEVELS
The level of risk and importance of the notification is determined by the
following definitions. Always observe the warnings to ensure safety and prevent
potential injury and product damage.
Important:
Alerts against unsafe practices. Observe Important notifications to
prevent possible minor personal injury or damage to the board.
Warning:
Indicates a potentially hazardous situation that, if the Warning is
ignored, could result in injury or death.
Note:
Gives additional information which may be helpful for the proper
operation of the board.

S21-037
WARNINGS:
Note: TIFATECH Co., Ltd declines all responsibility for damage to
persons or property resulting from failure to follow the instructions and warning
listed below when installing and using this board.
Ensure every part of the machine including actuators and sensors is working
properly before replacing the new control board.
Ensure that the power supply voltage does not fluctuate by more than 6%.
Before mounting or removing the control board, disconnect it from the power
supply and wait a while for it to cool down.
Do not remove any original electrical part of the board.
Repairing, cleaning, or parts replacement should only be performed by
TIFATECH or other qualified service personnel.
Children should never be allowed to play with the board.
This board is intended to only use for the espresso coffee machine control
board. Do not use it for any other purpose.
PRECAUTIONS
Installation precautions
Read thoroughly the following conditions before installing the HTCLW board
to the coffee machine.
The mounting location must be:
No flammable, explosive gases
No exposure to water.
An ambient temperature of 0 to 70°C that does not change rapidly, and
no icing.
An ambient non-condensing humidity of 35 to 85 %RH.
Operation and Maintenance Precautions

S21-037
Do not touch live terminals. This may cause an electrical shock or
problems in operation.
Ensure the board surface is completely dry before powering.
Periodic cleaning will reduce the risk of damaging the board.

S21-037
*** CONTENTS ***
I. GENERAL ......................................................................................................... 1
1. Introduction......................................................................................................1
II. TECHNICAL SPECIFICATIONS ................................................................... 2
1. Dimensions (mm) ............................................................................................. 2
2. Specifications ...................................................................................................2
III. WIRING............................................................................................................. 3
IV. PROGRAMMING AND USE ........................................................................... 5
1. Programming standard dose..............................................................................5
2. Coffee dispensing .............................................................................................6
3. Automatic group cleaning................................................................................. 6
4. Pre-infusion......................................................................................................6
5. Filling...............................................................................................................6
6. Setting of operational parameters......................................................................7
Temperature setting.......................................................................................7
Other parameters setting................................................................................8
V. ERROR DETECTION AND TROUBLESHOOTING.................................. 10

1
S21-037
I. GENERAL
1. Introduction
This manual contains important instructions regarding the safe intended use of
the machine.
If any damaged or loss to this manual, request a copy from the TIFATECH
manufacturer.
Important: Please note the following conditions for your machine to function
properly:
Only machines with temperature control function can use this control board
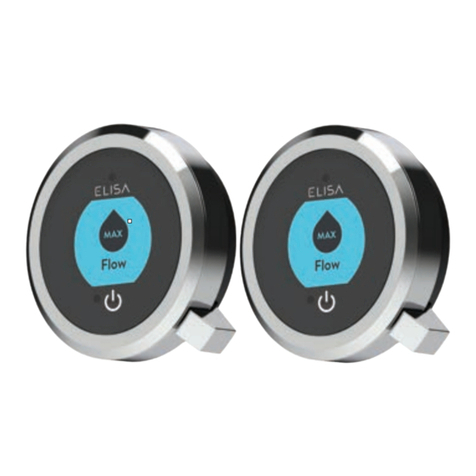
This board must be used along with our accompanied display HTCLS-LT
for optimal performance and also the proper operation.
Additionally, we provide the PBL-22F0B button, which is exclusive to our
business. Tests showed that it is durable and suitable to use with this board.
Note: Please adhere to the wiring guidelines below if you use different
button items to ensure proper functionality.

2
S21-037
II. TECHNICAL SPECIFICATIONS
1. Dimensions (mm)
2. Specifications
Power supply: 230V AC 50/60Hz
Actuator voltage: 230V AC
Button and LED nominal voltage: 12V
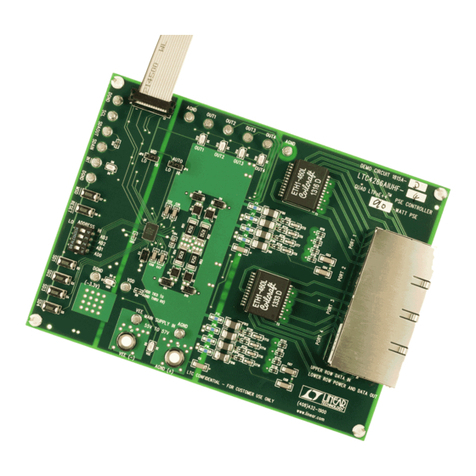
HTCLW control board
HTCLS-LT display

3
S21-037
III. WIRING
(1) V12
(2) 2ShotLED
(3) GND
(4) 2ShotBtn
(5) V12
(6) 1ShotLED
(7) GND
(8) 1ShotButton
((17) V5
(9) V12
(10) SettingLED
(11) GND
(12) SettingBtn
(13) WL1
(14) GND
(15) GND
(16) WL2
(18) OUT
(19) OUT
(20) DISPLAY
(1) AC(L)
(1) AC(L)
(3) AC(N)
(4) Filling
(5) Group
(6) Pump
(7) Heat
(8) Unused
(9) K-
(10) K+

4
S21-037
Important:
Any mistake in connecting actuators will affect the normal operation of the
coffee machine, and even cause damage.
Đầu nối
Mô tả
2ShotLED
2 Shot espresso LED input
2ShotBtn
2 Shot espresso button input
1ShotLED
1 Shot espresso LED input
1ShotBtn
1 Shot espresso button input
SettingLED
Setting LED input
SettingBtn
Setting button input
V12
12V output
GND
Ground
WL1
Water level probe of boiler
WL2
Water level probe of tank
V5
5V output
OUT
Water flow meter
DISPLAY
Display input
AC(L), AC(N)
Power supply
Filling
Filling solenoid input
Group
Group solenoid input
Display cable input

5
S21-037
Pump
Pump input
Heat
Heating element input
K-, K+
Type K thermocouple
IV. PROGRAMMING AND USE
Three buttons are integrated into this control board and each serves a particular
purpose. The 1 Shot and 2 Shot espresso buttons allow for automatic coffee delivery,
while the Stop button is for continuous coffee brewing.
1. Programming standard dose
Please follow the instructions below for programming coffee dosage for drink
buttons.
Step 1: Press and hold the 1 Shot espresso button or 2 Shot espresso
buttons for 3 seconds to start to program on that one. Siren sounds
and the selected button begin flashing.
Step 2: Press the Stop button to dispense coffee and press it again when
reaching the desired coffee dose. The Stop button light is on while dispensing.
Step 3: Press and hold the programmed button for 3 seconds to save its new dose
and finish the setting process.

6
S21-037
Repeat the procedure above for programming on the remaining button.
2. Coffee dispensing
Press the Stop button once to start the coffee brewing process, then
press it again to stop
Press the 1 shot espresso button or 2 shot espresso button
to dispense a preset coffee dose that is previously programmed.
3. Automatic group cleaning
It’s feasible to automate the group cleaning procedure by step below:
Press and hold the 2 shot espresso button for at least 5 seconds until the
siren stops sounding and the machine starts to discharge water.
The cleaning time and period can be modified by the user (page 9).
4. Pre-infusion
To enable the pre-infusion mode, press and hold the button for 3
seconds until the siren sounds.
Do similarly the step above to disable it
Note: The coffee dose on buttons needs to be reprogrammed for it to work
correctly.
5. Filling
When the boiler is in an out-of-water state for more than 2.7 seconds, the pump
and filling valve will automatically open to fill up the boiler. The siren sounds
continuous until the boiler’s water level is enough.
After being full of water for 2.7 seconds, the filling process will automatically
stop.

7
S21-037
Note: The water source should always be available for filling operation.
6. Setting of operational parameters
In addition to the core functions, a machine’s operational parameters can be changed
to improve the user experience.
Button
Name
Replace function
1 shot espresso
Increase (+)
2 shot espresso
Change/Confirm
Stop
Decrease (-)
Temperature setting
Press and hold the 1 shot espresso and 2 shot espresso
simultaneously for 3 seconds until the siren sound.
The display starts to alternate between two states like the illustration below.
Use the increase/decrease button to adjust the threshold temperature of the boiler
heating process.

8
S21-037
Temperature range:0 -120°C
Step: 1
Default: 114°C
Press and hold the Confirm button for 3 seconds to exit the setting process.
Other parameters setting
Press and hold the 2 shot espresso and the Stop button
simultaneously for 3 seconds until the siren sound. The 2 shot espresso light begins
to flash.
Use the Increase/Decrease button to adjust the parameter value.
Use Confirm/Change button to save your changes and move on to set a new
parameter.
Press and hold the Confirm button for 3 seconds to leave the setup
mode. All lights return to the off state.

9
S21-037

10
S21-037
Table of parameters explanation :
Parameter
Range
Step
Default
Description
P
0 - 100
1
0
Propotional coefficient
(Recommend: P = 0)
HYS
1 - 10
1
2
The smallest
temperature difference
required to activate the
heating element
ACT
1 - 10
1
7
Auto cleaning time
ACC
1 - 10
1
7
Period of the cleaning
process
SCF
1 - 5
1
3
Pre-infusion time
Unit: second
V. ERROR DETECTION AND TROUBLESHOOTING
Note: The following mistakes will result in thesiren sounding continuous and
the deactivation of all machine operations. When there is no error, the
machine will resume its normal operation.

11
S21-037
Error
code
Display
status
Cause
Purpose
Solution
Er1
Tank is out of
water
To protect
pump and
heating element
Supplement water for tank.
Check the water source.
Check the water level probe
(Just apply with the machine has
water tank)
Er2
Pump is
opened over
60 seconds
To protect
pump from
overworking
Restart the machine
If it's not user mistake, get in
touch with us for support.
Er3
Boiler
overheating
To avoid
harming the
components
inside
Turn off the machine at least 5
minutes
Er4
Thermocouple
connection
error
To protect the
heating element
Check the thermocouple
connection on board
Er5
Thermocouple
is broken
To protect the
heating element
Replace the new one or contact
us for support
TIFATECH Co., Ltd
Address: 14 Tran Tu Binh Street, Hoa Chau Ward, Hoa Vang District, Da
Nang City, Viet Nam
Email: tifatech.vn@gmail.com
Tel: +84(0)899.600.009
Website: https://tifatech.vn/
https://hardtech.vn/
Table of contents

