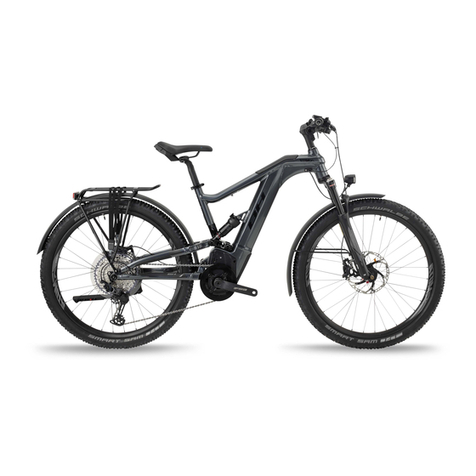
Tiller ROADMASTER User manual


Thank you and welcome
Thank you for choosing a Tiller Rides Roadster. You have not
only chosen to ride one of the most advanced e-bikes on the
planet but you are now also part of the Tiller Rider
Community.
Roadster was the name given to the first bikes that were
used for transport and we have carefully designed your
Roadster to make everyday transport a breeze.
Our dream is that your Roadster becomes an integrated part
of your everyday life so you can enjoy all the health,
wellbeing and cost saving benefits it affords while reducing
your footprint on the planet. What a Win - Win - Win!
This manual will show you how to safely ride your Roadster
and how to maintain it so that it is a joy to use for many
years.
Welcome aboard the Tiller Rider Community and have fun
out there!
Kind Regards
Julian Ilich & Ray Glickman
Co-Founders

Contents
Using this manual 1
Icons 1
The owner’s responsibility 2
Vehicle laws apply 2
General warnings 3
Unboxing your Roadster 4
Getting to know your Roadster 5
Roadster components 7
Tiller Rides app 8
Setting up to ride 9
Attach handlebars 9
Fit the front wheel 10
Attach pedals 13
Adjust seat position 13
Adjusting seat height 14
Adjusting seat forward-aft position 15
Adjust brake lever 17
Fit your helmet 18
Wear bright visible clothing 20
Learn safe riding tactics 20
Safety checks before you ride 21
Riding a Roadster 27
Max rider weight and load carrying 27
Using the brakes 27
Changing gears 28
Control Switch 29
Electronic system modes 30

Shipping Mode 30
Pairing Mode 30
Ride Mode 30
Armed Mode 30
Sleep Mode 31
Pedal assist 31
Power and speed limits 31
Controlling power assist level 31
The inbuilt and app displays 32
Lights 33
Brake light 34
The bell 35
Using the stand 35
USB device charging 40
Walk Assist 40
Activating Walk Assist 41
Terrains that you can ride a Roadster 42
Using the anti-theft features 43
The ‘eVin’ ID 43
The Quicktether 43
Extra security using the lock hole 44
Using the electronic security system 45
Turning on the alarm 46
Auto-arm 46
Preventing false alarms 46
Disarming the alarm 46
Battery charging, removal and care 47
Charging your battery 48
Charging safety 50
Removing your battery 50
Maximising battery lifespan 53

Battery storage 54
Carrying things 54
Using the rear carrier 54
Using trailers 59
Other accessories 61
Spare parts 62
Ongoing care, inspection and maintenance 62
Belt care, inspection and maintenance 62
Belt care 63
Belt inspection 65
Brake care, inspection and maintenance 66
Brake disc care 66
Brake pad inspection and maintenance 67
Brake oil level inspection and maintenance 68
Seat area care, inspection and maintenance 69
Saddle care and inspection 69
Clamp and seat post care and inspection 70
Removing or changing anti-theft seat post 71
Handlebar area care, inspection and maintenance 71
Tyre care, inspection and maintenance 72
Caring for your tyres 72
Tyre inspection 73
Tyre maintenance/replacement 73
Internally geared hub care, inspection and maintenance 86
Internally geared hub care and adjustment 86
Internally geared hub maintenance 87
Pedal care and maintenance 88
Pedal care 88
Pedal inspection 88
Pedal maintenance 88

Front and rear light care, inspection and maintenance 89
Storing your Roadster 89
Cleaning your Roadster 90
Bucket or spray? 90
Suitable cleaning products 90
General lubrication 90
End of life recycling 91
Your 2-year or 20,000km warranty 95
The Tiller Rides promise 95
Warranty details 95
Cease and inform 95
Do not fix 96
What the warranty doesn’t cover 96
Fair wear and tear 96
Other things not covered by warranty 97
Claiming your warranty 97
Warranty related freight costs 97
Australian Consumer Law 97
Compliance with standards 98
Servicing schedule 98
Do It Yourself (DIY) servicing 99
APPENDIX A: 100
Fastener Torques 100
Approximate Torque Conversion 101

Using this manual
The information contained in this manual is important for safely operating
your Roadster. We recommend that you read the complete manual,
paying particular attention to any warnings and checks denoted with
icons. Please ensure that anyone riding your Roadster is familiar with the
safety information in this manual.
Following the guidance in this manual will ensure your Roadster is safe to
use, however, please ensure you always obey your local road traffic
rules/laws and be wary of other road users.
Icons
The following icons are used in this manual to identify certain types of
important information.
WARNING: Potential for injury due to mechanical
or electrical hazard
TELLTALE: These are things to keep an eye on
that will tell you if something is worn or degraded
beyond acceptable level
CHECK: Something to check now and again
TIP: Smart safety or other tips that will enable you
to maximise enjoyment of your Roadster
Revision 2 For more information go to tillerrides.com Pg 1

The owner’s responsibility
Your Roadster has been carefully designed to conform to the relevant
design standards in the country you bought it in to ensure that it is safe to
use. Now that it is yours it becomes your responsibility to ensure it is
maintained in good working order. This manual provides all the
information required to do this, however, please check our website
tillerrides.com or contact customer support if there is something that you
do not understand.
Please ensure that you are familiar with the relevant local laws in your
state or country and follow them when riding your Roadster.
Vehicle laws apply
The roadster has been designed in order to meet regulations which
classify it as a bicycle and not a road vehicle. However, to ensure safe
riding, please abide by road safety rules such as signalling, respecting
signage and traffic lights, etc.
Revision 2 For more information go to tillerrides.com Pg 2

General warnings
WARNING:Your Roadster's frame is constructed from high
grade aluminium and is designed to last a very long time. In the
event that there is a cause of significant overloading of the
frame, such as riding it on rocky terrain or a crash, the frame
may crack. It is good practice to monitor the frame for any
cracks, deformation or changes. If any appear, immediately
stop riding and contact Tiller Rides for a full assessment.
WARNING: Your Roadster is a quality machine made from a
range of mechanical and electrical components. However,
some parts may eventually wear out and need replacing. If you
don’t feel competent in monitoring the bike’s wear and tear you
should have your bike inspected as per the service schedule
provided in this manual or after an event that may have
overloaded the frame, front forks, handlebars, seat post, wheels
or brakes.
WARNING: This manual contains all the information on the
maintenance that can be performed on the Roadster by people
not directly certified by Tiller Rides. Any other operations, either
on the mechanical or electrical systems, is considered
‘tampering’ and may make your Roadster unsafe and may also
void your warranty. Please refrain from tampering with your
Roadster.
WARNING: This manual contains instructions on a range of
mechanical and electrical checks and procedures required to
maintain a Roadster. If you do not know how to competently
perform the required operations please refrain from ‘having a
go’ and instead seek a qualified e-bike technician to do it or
train you how to do it.
WARNING: Fixings on the Roadster have been fitted with
threadlocker to prevent them loosening. Threadlocker has been
supplied in order to be applied when required (refer to
APPENDIX A), including installing the front wheel during
unboxing.
Revision 2 For more information go to tillerrides.com Pg 3

Unboxing your Roadster
In the box, you’ll find the following items along with your Roadster.
Revision 2 For more information go to tillerrides.com Pg 4

Getting to know your Roadster
The Roadster is the ultimate urban transportation choice. When you ride
the Roadster you are helping to reduce your carbon footprint and staying
active all while enjoying the journey. The Roadster is much more than just
a bike, it’s a lifestyle.
The switch controller is found on your left handle and controls your
Roadster. On the frame, you’ll find the display which shows your
Roadster’s status, assist level and battery level.
The Roadster is packed with features that make riding easy, like:
● USB phone charging to make sure you’re never stranded.
● The QuickTether integrated locking mechanism to quickly and
easily lock up your Roadster.
● A mobile app to track your odometer, speed and the location of
your Roadster.
Revision 2 For more information go to tillerrides.com Pg 5

Revision 2 For more information go to tillerrides.com Pg 6

Roadster components
Revision 2 For more information go to tillerrides.com Pg 7

Tiller Rides app
Your Roadster has an app that will walk you through the pairing process.
Download the app from the App Store or Google Play. Simply search
“Tiller Rides” or scan the QR codes below.
Revision 2 For more information go to tillerrides.com Pg 8

Setting up to ride
Refer to the quickstart guide to assemble your Roadster.
Attach handlebars
Ensure handlebars are centred and rotated to a comfortable position. Use
a 5mm hex key to fix the handlebars in position by screwing the two
screws on the faceplate. Press down on the handlebars to ensure they do
not rotate.
WARNING: Do not flip your Roadster upside down, this may
damage the control switch.
Revision 2 For more information go to tillerrides.com Pg 9

Fit the front wheel
First, remove the protection components from the front forks and calliper.
Loosen the nuts on the wheel to make a gap for the forks to be inserted.
Next, take the front wheel and line it up with the front forks, ensuring that
the cable and anti-rotation washer on the front wheel are both pointing
down (i.e. not getting pinched by the forks. Ensure that the brake disc
slides into the calliper.)
Revision 2 For more information go to tillerrides.com Pg 10

Once the wheel sits in the forks correctly, tighten the nuts on the axle
using a 15mm spanner.
Revision 2 For more information go to tillerrides.com Pg 11

Lastly, connect the motor cable from the front wheel to the bike, ensuring
the arrows align. Use a 3mm hex key to make sure that the cable is held
to the fork and not loose.
Revision 2 For more information go to tillerrides.com Pg 12

Attach pedals
Take the left and right pedals from the toolbox and attach them to the
appropriate crank arms. They will have an “L” or “R” stamped near the
hex key slot to make sure you have the right ones. Apply a couple drops
of medium strength threadlocker and use a 6mm hex key to tighten them.
Once your Roadster is assembled, it is time to adjust it to suit your size
and prepare yourself to ride safely.
Adjust seat position
Your Roadster has a one-size-fits-all frame. It has been designed with a
large seat position adjustment range so that riders of all shapes and sizes
can move the seat into a comfortable position.
Because the Roadster has electric assist, there is less need to be in a
forward leaning racing-like position to deliver maximum power to the
pedals. Instead, we recommend a more upright ‘comfort’ or ‘relaxed’
position. The following instructions will show you how to achieve your
desired seat height and seat forward-backwards positions.
Revision 2 For more information go to tillerrides.com Pg 13

Adjusting seat height
When adjusting seat height, the goal is to have it high enough so that
your legs can straighten out as much as possible, but low enough so that
you can touch the ground when on the seat – which is important for
stopping at traffic lights.
We recommend adjusting the seat as high as possible so that you can
comfortably balance the bike when sitting on the seat using one or two
feet. The minimum saddle height is 830mm and the maximum is
1170mm.
Adjusting the seat height:
1. Open the quick-release lever on the seat clamp
2. With hands on the seat, slide up or down to the desired position
3. Close the quick-release lever on the seat clamp
4. Sit on the seat and check that it doesn’t slide down. If it does
slide down:
a. Release the quick-release lever on the seat post clamp,
then;
b. Tighten the thumb nut on the seat post clamp a little,
then;
c. Re-close the seat clamp until the handle is up against
the clamp body (i.e. not sticking out at an angle), then;
d. Check the seat doesn’t slide down once seated.
Revision 2 For more information go to tillerrides.com Pg 14
Table of contents
