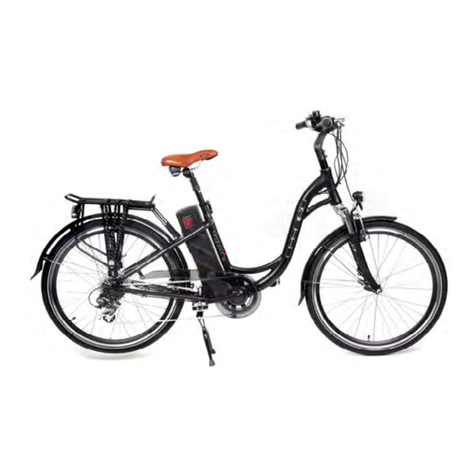
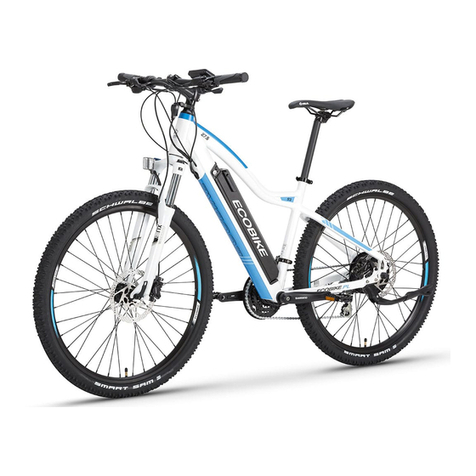
Ecobike Basic User guide

1

2

3
1. INTRODUCE
First of all, we would like to thank you for purchasing our electric bike, which has been
carefully designed and manufactured in accordance with the requirements of the highest
international standards. We wish your new bike to be a new way of your life.
Please read the following instructions carefully before proceeding with the bicycle. The
manual contains important information related to the safety, operation and assembly of
the bicycle. The bike has electrical parts which, according to the Act, are considered
dangerous, which means the obligation to dispose of - it cannot be disposed of in standard
garbage. Please remember that it’s offence.
2. SAFETY
➢We suggest using the appropriate helmet in accordance with the European standards.
➢Observe the traffic regulations.
➢We recommend that you take extra care when moving with crowded traffic.
➢Perform a bicycle service only at bicycle service points.
➢Regular service will provide you with a greater safety of bicycle use and prolong its life.
➢Carry out regular maintenance according to the instructions.
➢Do not make any repairs to electrical parts yourself, only at designated service points.
➢Never ride a bicycle if you have drunk or taken other intoxicants.
➢The user should have front and rear lights and reflectors on the wheels.
➢When cleaning the bicycle, always use soft wiper.
➢Hold the steering wheel with both hands while ridding.
➢Do not catch or other vehicles.
➢Avoid sudden braking.
➢Do not wear loose clothing for cycling.
➢Only use original spare parts for components.
➢When installing bicycle accessories, it is recommended that you use these accessories
for assembly instructions.
➢Parents should pay special attention to the safety of children while they are being
transported.
➢Children should be transported in special chairs permanently attached to the bicycle.
2.1 FOR PARENTS / GUARDIANS
Parents / guardians are responsible for the conduct and safety of their child. Before ridding
by a child, they should instruct them about the proper use of the bicycle. Before allowing
a child to ride, parents are required to:
✓Read the entire manual, and to familiarize the child with the warnings and functions
and principles of the bicycle.
✓Make sure that the child has an approved bicycle helmet when driving, and that he
understands all safety rules.
3. USE ACCORDING TO THE INTENDING
Improper use of the bike or use contrary to its intended use may involve danger and expose
you to loss of health or life. If you have any doubts whether the purpose of the bike matches
your ridding style - ask the seller.
3.1 CITY BICYCLE
This type of bicycle work well on paved surfaces and paths. They combine comfort and
driving dynamics. It has a sturdy frame and large, 28-inch wheels. The user’s position on the

4
bike is very comfortable and allows hours of riding. These types of bicycles, and in particular
their braking system, have been designed for a maximum load of 125 kg (bicycle + cyclist
+ luggage), the weight of the cyclist with luggage may not exceed 100 kg.
This bike is designed for recreational purposes, not for competitive purposes. For riding on
public roads, bicycles without standard accessories, should be equipped with front and
rear lighting, bell, reflections on the pedals and spokes of the wheels, in such a way that
the bike meets the requirements of the traffic regulations.
3.2 REAR HUB MOTOR
Optimal conditions for electric bikes equipped with a hub motor are evenly shaped and
paved surfaces. In the case of inclines on the road, the user should take the load off the
engine, using sufficient force to maintain continuous electrical assistance. The support
system has been equipped with a safety device that prevents further operation of the
engine when the overload causes a rapid increase of its temperature. The system will restart
the engine when the temperature returns to normal.
Improper use of the bike or use contrary to its intended use may involve danger and expose
you to loss of health or life. If you have any doubts whether the destination of the bicycle
corresponds to your ridding area (mountains, city, asphalt, etc ...) - ask the seller if the
chosen model will be suitable.
4. STORAGE AND USING
➢The bicycle is not intended for long-term outdoor storage (max 12 hours a day.
➢The bicycle should be stored in a dry place at room temperature.
➢The bicycle should be stored away from corrosive products and places.
5. BEFORE RIDDING
Always check the technical condition of the bicycle before every ride, especially:
✓Air pressure in the wheels, remember to observe the pressure range specified by the
manufacturer on the tire.
✓Check the tire condition for deformation, cracks and whether the tire adheres to the
rim and does not stick out beyond the rim.
✓Checking wheel screws.
✓Checking the handlebar and stem (whether it does not rotate or is not loose).
✓Checking the screws of saddle (does not rotate or fall under the weight).
✓Check if the bicycle lighting (front and rear) works well.
✓Checking the beep (bell).
✓If there is no visible safety groove on the side surfaces of the rim, the rim should be
replaced.
✓Checking the correct operation of the front and rear brake.
6. TECHNICAL INFORMATION
6.1 RIMS
Before using your bike, always check that the wheels are centered and that the rims are
undamaged. During operation of the bicycle, and especially in any collisions, cracks and
cracks may appear. When you see a damaged rim, immediately contact an authorized
service center for replacement with a new one. A damaged rim may damage the tire, for
example, which may involve danger and expose you to health or life.

5
6.2 WHEELS
Properly adjusted wheels should rotate slightly and smoothly, without jerks, perceptible
slack. In the case of loosening in the wheel hub, it must be eliminated by adjusting. In order
to adjust the wheel, you must have specialist tools, therefore, if a fault is found, please go
to an authorized service point.
6.3 SADDLE
Please remember to set the saddle correctly
(according to the figure below), it is important for
the user because the incorrectly positioned
saddle causes the cyclist to tire more quickly, pain
in the legs and back.
The final adjustment of the saddle position is carried
out by moving the saddle in the saddle clamping
bracket forward or backward. Please remember
not to go out of the scale placed on the saddle,
otherwise the saddle may be damaged, due to
excessive load.
6.4 HANDLEBAR AND BEARINGS OF HANDLEBAR
The handlebar, when placed in the most comfortable position for the user, must be
tightened so that it does not loosen during riding.
The steering bearings should be tightened so that
the fork rotates slightly, smoothly without
appreciable clearances. When checking the
clearances on "classic" wheels, tighten the top
ring. When you get rid of the slack, tighten the
counter ring. When tightening the counter ring,
the upper ring should be locked with a suitable
key if we do not the counter ring will rotate with
the upper ring and the steering bearings will
loosen again.
6.5 TIRES
For tires, the pressure range specified by the manufacturer must be observed on the side
of the tire (pressure unit indicated on the tires 1000 kPa = 14.22 P.S.I = 1 bar = 1 at). The tire
should be placed in the direction indicated on its side (the arrow shows the direction of
rotation). The tire should not have any deformations or cracks and should adhere to the rim
The saddle should be tightened after setting the
correct and most comfortable height for the user.
When setting the saddle, pay attention to the
maximum extension of the saddle post. The
seatpost must be inserted in the frame in such a
way that the safety indicator (see picture) on the
seat post is invisible, if the indicator is visible, there is
a possibility of the saddle post breaking through its
low load.

6
in parallel. After finding out that the tire has any of the defects, immediately go to an
authorized service point.
6.6 SPOKES
Spokes in wheels should be evenly stretched. The spokes loosened during the bicycle's
operation may cause radial and axial runout of the wheels or rupture of the spokes, which
affects the service life of the rim and hub bearings, as well as negatively affects the braking
performance. These irregularities should be removed at service points.
6.7 V-BRAKES
Correctly adjusted brakes - after pressing both brake levers simultaneously on 2/3 of their
travel, brake pads, they must be in their entire working surface in contact with the side walls
of the rim. After releasing the lever, the pads should return to their original position.
1. Adjust the brake pads using the screw 1 (fig). The blocks must be adjusted so that the
entire surface of the brake pads during the braking touches the side walls of the rim.
Rubbing against the tire is unacceptable.
2. The tension adjustment of the brake cable is
made via screw 2 (fig). It is necessary to slightly
loosen the screw 2 so that the brake cable can be
adjusted freely, after the brake cable has been
correctly adjusted, it should be tightened again.
3. Adjust the brake arms by means of a screw 3
tightening or loosening the screw 3, position the
arms so that they are symmetrically aligned with
the wheel.
4. Brake pads should be regularly adjusted, and when rubbing out brake pads should be
immediately replaced with new ones.
6.8 CRANKSET
The crank mechanism with cranks mounted on
the axis with the screw requires systematic control.
The contribution of the crank mechanism
together with the screw-in bowls, showing
excessive clearance, is regulated by tightening
the main screw with an Allen wrench. Using a
bicycle with a loose crankset causes indentation
of the crank seat and its destruction.
6.9 PEDALS
The axles of the pedals should be sufficiently
tightened to the crank arm. Incorrect tightening
will loosen the threaded connection, which will
consequently destroy the thread of the pedal and
crank! The right pedal axis has a right-hand thread
marked "R". The left pedal axis has a left-hand
thread marked "L".

7
6.10 CHAIN
Depending on the conditions and frequency of travel, the chain is worn and lengthened,
destroying the sprockets at the same time. To check the correct chain tension, set the gears
so that the chain is on the largest chainring in the front. Then try to pull the chain away from
the dial. If it sticks out more than 3 mm, it can be replaced and should be reported to an
authorized service center.Too strong strain can increase the effort put in pedaling and
reduce the chain's strength. Too little tension can cause the chain to fall. Regularly it should
be cleaned of dirt (sand, mud etc.) and treated with a special grease.
6.11 DERAILLEUR
To adjust the derailleurs, both front and rear, first
set the trailing edge of the rails out of the rack. For
this adjustment, use the extreme deflection
screws on the gears body. In a properly adjusted
derailleur the guide is in line with the smallest and
largest sprocket. Both the rear and front derailleur
should properly control the ratios.
These are components with a complex structure that requires proper operation,
operation and maintenance. When using and storing the bicycle, make sure that the
guide 1 (Figure below) is not subjected to side impacts which do not occur when properly
used. The alignment of the guide will cause the derailleur to operate incorrectly. Further
exploitation may lead to pulling the derailleur into the spokes of the wheel and irreversibly
damaging it.
6.12 TROLLEY
Do not exceed the maximum capacity marked on the trolley by its manufacturer.
6.13 RACK (OPTION)
Before ridding, check that the rack is correctly attached to your bike. Regularly check that
the fasteners are properly tightened. Do not exceed the maximum capacity marked on
the luggage compartment (25 kg). The luggage compartment is not designed to tow a
bicycle trailer. If you plan to mount a child seat on the rack, make sure that its load does
not exceed the maximum load capacity of the rack and bicycle specified by the
manufacturer.
6.14 LIGHTING
Lighting is a basic element of the user's safety. If the bicycle is used on public roads and it
is not equipped with lighting and reflections, it should be additionally equipped with the
bicycle in accordance with the provisions of the traffic regulations.
7. ASSMBLY
7.1 PREPARING
Pull the bike out of the carton with all the elements in it. Be careful not to scratch the bike
and at the same time be careful not to damage any cable or other components. Make
sure that there is no missing item in the bike and report any comments to the seller.
7.2 FRONT WHEEL ASSEMBLY (PIC. 1- 2)
The front wheel is dismantled, therefore after opening the cartoon it is necessary to remove
the protective foils and mount it on the front fork.

8
Picture 1 –Put front wheel into the fork.
Picture 2 –insert the "pin" through the wheel,
tighten the nut on the left side so that the
quick-release closure is tightened with the
appropriate resistance.
7.3 HANDLEBAR ASSEMBLY
1. Put the handlebar in the most
comfortable position for you and tighten
all screws according to the picture below.
2. The handlebar should be mounted so
that there are no clearances.
7.4 SADDLE ASSEMBLY
1. Loosen the quick-release nut on the
bicycle frame and insert the saddle post.
2. Tighten the clamps of the seatpost clamp
in such a way that the quick coupling
clamps with the appropriate resistance.
7.5 PEDALS ASSEMBLY
➢Tighten the pedal with the letter "R" on the right side clockwise,
➢Tighten the pedal with the letter "L" on the left hand side clockwise.
8. GREASE
Lubricated elements must be clean. Before lubricating the bearing, after dismantling it
should be thoroughly cleaned and wiped dry with a clean cloth. Then apply a quantity of
grease to the balls of the balls to fill all the gaps.
Excess grease adversely affects the work of the ball bearing - its heating occurs. We
lubricate ball bearings with a grease at the following time intervals:
✓Every 6 months, the bearings of the front wheel hub of the rear hub bearing.
✓Every 12 months the steering bearings.
We lubricate the following moving parts of the bicycle every six months:
✓brake lever axles,
✓brake lining axles,
✓brakes,
✓gears,
✓moving parts of gears

9
Special oils and greases should be used to lubricate the shock absorbers. Do not use lithium-
containing greases - they may damage some internal components. In the case of more
complex activities, such as dismantling the fork, replacement of silencers, etc., we
recommend that you consult a professional bicycle service.
9. USING BATTERY AND CHARGER
9.1 BATTERY
ECOBIKE uses high-quality lithium-ion batteries in its bicycles, which are light and do not
cause environmental pollution. It’s a typical source of so-called green energy.
In addition, they are characterized by:
✓No memory effect when charging.
✓Large energy capacity at low volume.
✓Long lifetime.
✓A wide operating temperature range: -10 ° C to + 40 °.
9.2 IMPORTANT INFORMATION ABOUT BATTERIES
✓If you do not intend to use the bicycle for a long period of time, recharge the
batteries to 80% and set aside at room temperature, repeat the operation after
approx. 3 months.
✓The lithium-ion battery should be used at -10 ° C to + 40 ° C, humidity 65 ± 20%; stored
at room temperature.
✓Never place the battery near a fire or hot element.
✓Never shake, hit or drop the battery.
✓Keep the battery out of the bicycle and keep it away from children.
✓Never use any metal tools to connect the rechargeable battery as it may cause an
electric short circuit and damage the battery.
9.3 CHARGER
✓Only the original charger should be used to charge the battery, otherwise the battery
may be damaged and the warranty voided.
✓When charging, both the charger and the battery must not be less than 10 cm away
from other objects.
✓It is forbidden to use the charger in places with a gas explosion risk or in the vicinity of
caustic substances.
✓Protect the charger from rain and moisture.
✓The charger should be stored and used at temperatures between 0 ° C and + 40 °.
9.4 INSERTION AND REMOVAL THE BATTERY
To remove the battery, turn the key, then
pull the battery towards you. To insert the
battery, place the battery in the holder,
pushing it all the way down, and then turn
the key, thus preventing it from slipping
out.
9.5 CHARGING THE BATTERY
The battery charge level indicates segments on the display located on the handlebar.
Charge the battery at ambient temperature, on a non-flammable and dry surface, away

10
from heat, moisture or flammable materials. In addition, it cannot be covered. When
charging the battery, please observe the following steps:
A. Insert the charger plug into the socket in the battery, and then connect the charger
cable to the power socket.
B. When the charger light is red, the battery is charging. When the red light turns green it
means that the battery is fully charged (Fig.1).
C. After charging is complete, disconnect the cable from the wall outlet first and then from
the battery.
D. Never leave the rechargeable battery unattended.
10. ELECTRIC MOTOR
✓Do not use the bicycle during heavy rain or during a storm because it can be
damaged.
✓Check regularly that the screws are tight on both sides of the rear hub.
✓Always make sure that the cables leading to the motor are securely connected.
✓Never try to make any repairs to the engine in your own.
11. DISPLAY LED
11.1 BUTTON DESCRIPTION
1. Press the ON / OFF button on the display to activate and deactivate the power
system.
2. The four LEDs that light up show the battery charge status. When the 4 lights are on
the battery is charged. When only 1 light are on - charge the battery.
3. The bike has 3 driving modes (LOW; MEDIUM; HIGH).
➢In LOW mode the speed of the power is about 5km/h, in the MED mode, about
15km/h, in HIGH mode about 25 km/h.

11
11.2 DRIVING INFORMATION
1. Press MODE to switch between modes.
2. Press Button “light” to ON/OFF front and rear light.
11.3 FAILURE INFORMATION ON THE DISPLAY
12. USER MANUAL OF LCD DISPLAY C600E USB
12.1 DISPLAY AND REMOTE APPEARANCE
12.2 TURNING ON/OFF THE DISPLAY
To turn the display on or off, press and hold the on / off" button for 3 seconds.
➢When the display is off, there is no battery consumption. The current flow is not more
than 2 µA.
➢The panel will revert to sleep mode when the speed is 0 km/h for 5 minutes.
12.3 MOTOR POWER INDICATOR
It indicates with what power the motor works, when all segments
are displayed, it means that the motor works at full power. The
battery consumption increases then.
12.4 MOTOR POWER SETTINGS
Three power modes are available to use (ECO/NORMAL/POWER).
The default option is NORMAL. The modes mean acceleration of
the bike, e.g. in the ECO mode the bike will accelerate from 0 km
/ h to 25 km / h in 15 seconds, while in the POWER mode the bike
will accelerate in 7 seconds (it also depend on road condition and
user weight).

12
12.5 BATTERY SOC INDICATOR
The battery level is indicated by five segments based in the battery
symbol in the upper left corner of the display. Each segment
corresponds to 20% battery charge.
12.6 SPEED INDICATION
The speed indicator shows the current speed while cycling. User
can change the unit to MPH, then the display will show the speed
in MPH.
12.7 BACKLIGHT INDICATOR
With the display on, click the on/off button to turn on the backlight
and the front light (optionally). Click the button again to turn off
the backlight. When the light is on, the display will show the icon as
in the picture beside.
12.8 WALK ASSIST
Hold the "MINUS" button to start the motor, which will run at 6km/h
without pedaling. The display will show the icon as in the picture
beside. When the user releases the button, the motor will
automatically shut down.
12.9 ASSIST LEVEL SELECTION
The level of electric assistance can be adjusted using the display.
Adjustments can always be made while driving. The support
system has 6 levels, depending on them the speed to which the
bike will accelerate. The default assistance level after turning the
display on is "1". To change the assistance level, use the PLUS
button to increase the assistance level or MINUS to decrease the
assistance level, respectively.
12.10 ERROR CODE INDICATION
If an error appears on the display, contact your dealer
immediately to resolve the problem. Each code has a different
type of error, more detailed information can be found in the table
below.
※ The display cannot return to normal until the problem is resolved. The e-bike will not work
until the problem is resolved.

13
Error code
Description
21
Current flow fault / Communication fault
22
Throttle fault
23
Motor fault
24
Hall sensor fult
25
Brake levers fault
9
Display conection fault
12.11 DISPLAY INTERFACE
The display shows four cycling parameters (ODO; TRIP 1; TRIP 2 and TIME). To change
displayed information, use the "SET" button, then the selected information will be displayed
in turn.
➢ODO –Odometer
➢TIME –Trip time indication
➢TRIP 1 –Trip distance indication. Use DOWN button to reset.
Over 500 km the TRIP 1 resets automatically.
➢TRIP 2 –Last trip distance indication. Resets automatically each
next trip.
12.12 BMS (BATTERY MANAGING SYSTEM) INDICATION
The BMS indicator display the exact voltage of the battery. BMS
indication is more precise than battery SOC indicator. When 42V
the battery is full. 36V indicates discharged battery.
13. USER SETTINGS
13.1 SETTINGS MENU
Hold the "SET" button for 3 seconds to enter the setting interface,
then the number 1 will appear, the display will flash at a frequency
of 1 Hz. By clicking the SET button you will switch from one to four
rotationally.
13.2 SETTING 1: TRIP 1 RESETING
Follow steps from point 14.1 and go to setting 1, then click MINUS
to delete TRIP 1.
13.3 SETTING 2: MOTOR POWER SETTINGS –POWER/NORMAL/ECO.
Follow steps from point 14.1 and go to setting 2, then click the MINUS or the PLUS button to
select the appropriate motor setting.

14
13.4 SETTING 3: WHEEL SIZE
Follow steps from point 14.1 and go to setting 3, then select the
exact value of the wheel diameter to ensure the display accuracy
in terms of speed and mileage - use the MINUS or the PLUS button
to select the wheel size of your bike.
Hold SET for three seconds to save settings.
13.5 SETTING 4: UNITS
Follow steps from point 14.1 and go to setting 4, then select km/h
or MPH for speed and distance units.
Hold SET for three seconds to save settings.
14. WARRANTY
1. The following terms contained in these warranty terms will have the following meanings:
a) "Guarantee" - means the rights and obligations arising from these Warranty Terms and the Civil Code,
in force in the Republic of Poland,
b) "Warranty Card" - means a document containing information regarding the Equipment to which these
Warranty Terms apply,
c) "Equipment" - means a device whose name, model, serial number, battery number and other
necessary information have been specified in the content of the Warranty Card,
d) "Guarantor" - means Ecobike Spółka z ograniczoną odpowiedzialnością, address: ul. Osiniecka nr 108,
54-530 Wrocław, entered in the Register of Entrepreneurs of the National Court Register kept by the District
Court for Wrocław Fabryczna in Wrocław, 6th Commercial Division of the National Court Register under
the KRS number: 0000715499, NIP: 8943124748, REGON: 369401457,
e) "Service Point" - means a service point authorized by the Guarantor, whose name, address and
telephone number is always indicated by the Guarantor,
f) "Seller" - means the entity that has sold the Equipment whose name, model, serial number, battery
number and other necessary information have been specified in the Warranty Card,
g) "Authorized from the guarantee" - means the person who purchased the Equipment from the Seller
and each subsequent owner of the Equipment holding the Guarantee Card, who effectively acquired
the right to exercise the rights under the Guarantee,
h) "Repair" - means specialist activities aimed at removing the defect of the Equipment covered by the
Guarantee made by the Service Point.
2. The warranty period for the Equipment offered by the Guarantor is calculated from the date of
purchase (the date on the original proof of purchase is decisive) and amounts to:
a) 24 months,
b) 12 months in the case of the purchase of the Equipment by persons running a business,
c) 12 months for the battery itself.

15
3. The basis for recognition of a claim during the warranty period is valid and completed with a Warranty
Card along with proof of purchase. The Warranty Card, not filled in or filled out only in part, i.e. it does not
include a bicycle model, battery number, date of sale, stamp or signature of the Seller, is invalid.
4. The holder of the guarantee undertakes to review the Equipment purchased after traveling between
70 and 120 km in any bicycle service of his choice. The cost of such a
review shall be borne by the person entitled to the guarantee. Failure to perform the review will result in
the loss of the Guarantee for mechanical components. Confirmation of the performance of the review is
a fiscal document from which the performance of the service results.
5. The warranty does not cover tires, brake pads, brake rods, centrifugal wheels, subassemblies that have
been excessively damaged by impacts or mechanical damage, paint splinters, crank thread breakage
and wear of light bulbs, natural wear of the chain, laces, natural battery wear (stated based on expert
judgment).
6. The holder of the guarantee shall lose its rights under the Guarantee if:
a) Uses the Equipment contrary to its purpose (jumps, acrobatics, competitive driving, etc.),
b) Mechanically damage Equipment,
c) The equipment is incorrectly stored,
d) Does not perform lubrication and maintenance of the Equipment,
e) Uses improper security materials or uses equipment not in accordance with the instructions,
f) Damage the Equipment due to a random event (e.g. a traffic accident),
g) Does not have a fiscal document for a bicycle inspection (item 4 of the Warranty Terms),
h) Attempts to repair the Equipment yourself or with the help of other unauthorized persons.
7. The obligations of the person entitled under the Guarantee shall be execution;
a) a) service and regulatory activities,
b) b) checking and removing any looseness of screw connections,
c) c) activities consisting in checking and updating air in the tires,
d) d) activities that boil down to cleaning all equipment, in particular chain, rack and other moving parts.
e) In the case of batteries, care should be taken first of all that:
f) a) the first time you use the battery or use the battery after a long period of non-use, so that the battery
is exhausted to the end and then it is charged to the maximum,
g) b) after the battery has been used up, recharge it within 24 hours,
h) if you do not use the Equipment for a longer period, remove the battery, which should be charged to
the maximum, then leave it in a dry and warm place, the minimum storage temperature should be about
10 Celsius,
i) if you do not use the Equipment, charge the battery once a month.
8. Defects or damage to the Equipment disclosed during the Warranty period should be notified to the
Guarantor immediately, however not later than within 14 days from the date
of their disclosure. If the defect is not reported to the Guarantor within the given time period, the person
entitled to the guarantee loses the right to further claims for damages. Equipment in which a defect has
been found should be immediately excluded from use. The Guarantor is not liable for damages resulting
from the use of faulty Equipment.

16
9. The necessity to make the Repair of the Equipment should be reported to the Service Point indicated
by the Guarantor, who assesses the given damage. The assessment is carried out on the terms set by the
manufacturer, which are the same for all users of the Equipment. The holder of the guarantee is obliged
to deliver the equipment to the Service Point in person or by means of a Carrier, the cost and risk of the
shipment being borne by the Eligible Person. Recognition of warranty claims of the holder of the
guarantee will be equivalent to a refund of the shipping costs incurred by the Eligible Person from the
Guarantee. Then, the Guarantor will reimburse the market costs of delivering the goods to the place
indicated by the Guarantor and cover the cost of returning the Equipment to the seat of the Eligible
Person. The complaint submitted for consideration should be cleaned of mud, sand and other dirt.
10. The complaint procedure starts when the Equipment reaches the Service Point indicated by the
Guarantor. The Guarantor undertakes to perform the warranty service within 14 business days from the
day of receiving the Equipment. If the defect requires a longer diagnosis or the transfer of the Equipment
or its part to the manufacturer, the Guarantor reserves the right to extend the above-mentioned time by
the time necessary to consider the complaint. On the necessity to extend the deadline for considering
the complaint, the Guarantor will notify the Beneficiary of the guarantee before the lapse of the 14th
day, counted from the date of delivery of the Equipment to the Service Point.
11. The warranty covers free removal of defects through the repair of physical defects of things, i.e.
constructional errors, assembly errors or material defects occurring in the course of normal operation. The
warranty does not cover the replacement of defective items with non-defective ones.
12. The warranty covers all Equipment as well as its individual parts. In the case of Repair of Equipment,
the duration of the warranty is extended by this period of Equipment failure, the same applies to the
situation when only a particular part is repaired.
13. The obligation to provide the Equipment entitled to the guarantee after its repair rests with the Service
Point. The exact date (by specifying the day and time) of delivery of the Equipment by the Service Point
will be agreed jointly by the Eligible Person of the guarantee and the Service Point. The holder of the
guarantee is obliged to collect the Equipment within which the defects covered by the Guarantee have
been removed. Otherwise, the entitled from the Guarantee shall bear the costs of the Equipment's re-
delivery by the Service Point.
14. In the case of an unreasonable complaint, all costs related to its consideration shall be borne by the
Holder of the guarantee. In particular, the entitled party is required to cover the costs of transport, travel
costs and working time according to the Guarantor's individual costs, material costs, rent of the necessary
equipment, as well as the cost of the delegation according to the applicable rates, if applicable, if
necessary accommodation of service staff - accommodation costs. The buyer undertakes to settle the
above receivables based on a relevant VAT invoice. Service protocol in the case of service technician's
journey also includes the number of kilometers traveled, travel time and working time. In addition, the
holder of the guarantee in the event of the complaint being unfounded is also obliged to cover other
costs, including expert costs incurred by the Guarantor in relation to the consideration of the complaint.
15. To the extent permitted by applicable law, the Guarantor excludes any liability for loss or damage,
loss of any benefits, loss of use of the Equipment, loss of functionality of the Equipment, loss of contracts,

17
loss of transactions, loss of revenue or anticipated savings, increased costs or expenses and for any
indirect, consequential or specific loss or damage.
16. For all claims arising from the granted Guarantee, only Polish law is in force.
17. To settle any disputes between the parties that may be related to relationships based on sales
agreements concluded by the parties or other agreements to which these Guarantee Terms would apply,
only the common court competent for the Guarantor's headquarters shall be competent.
18. The warranty does not exclude, limit or suspend the application of the rights resulting from the
provisions of the warranty for defects in the sold goods

18
15. GUARANTEE CERTIFICATE
MODEL: .........................................................
FRAME: ..............................................
BATTERY: ..........................................
MOTOR: ..........................................
DATE OF PURCHASE: ..............................................
SIGNATURE AND STAMP OF SELLER
……………………………………………………..
SERVICE
DATE OF
COMPLAIN
DATE OF
SERVICE
DOINGS
STAMP
SIGNATURE
COMPULSORY "ZERO" REVIEW AFTER 70-120 KM (the review is subject to a fee)

19
16. NOTES
…………………………………………………………………………………………………………………..
…………………………………………………………………………………………………………………..
…………………………………………………………………………………………………………………..
…………………………………………………………………………………………………………………..
…………………………………………………………………………………………………………………..
…………………………………………………………………………………………………………………..
…………………………………………………………………………………………………………………..
…………………………………………………………………………………………………………………..
…………………………………………………………………………………………………………………..
…………………………………………………………………………………………………………………..
…………………………………………………………………………………………………………………..
…………………………………………………………………………………………………………………..
…………………………………………………………………………………………………………………..
…………………………………………………………………………………………………………………..
…………………………………………………………………………………………………………………..
…………………………………………………………………………………………………………………..
…………………………………………………………………………………………………………………..
…………………………………………………………………………………………………………………..
…………………………………………………………………………………………………………………..
…………………………………………………………………………………………………………………..
…………………………………………………………………………………………………………………..
…………………………………………………………………………………………………………………..
…………………………………………………………………………………………………………………..
………………………………………………………………………………………………………………….

20
This manual suits for next models
3
Table of contents
Other Ecobike Bicycle manuals
