www.tillig.com
www.facebook.com/tilligbahn
368300 / 23.09.2016
– 2 –
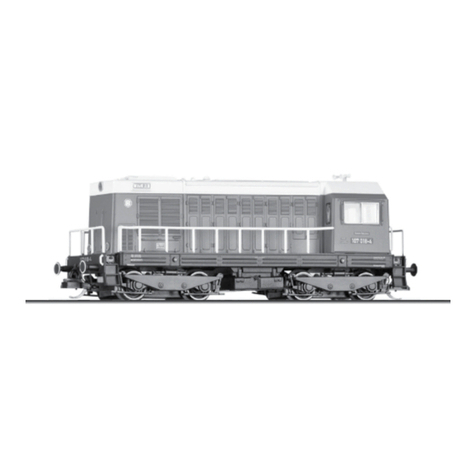
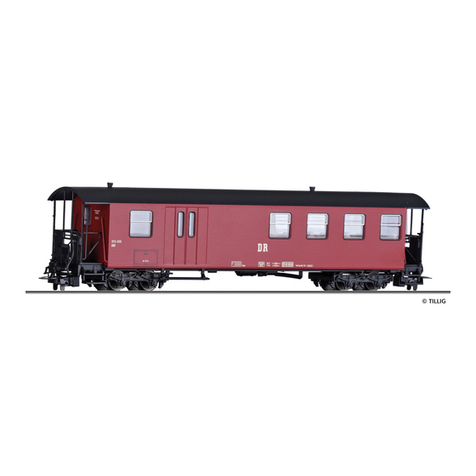
Güterwagen
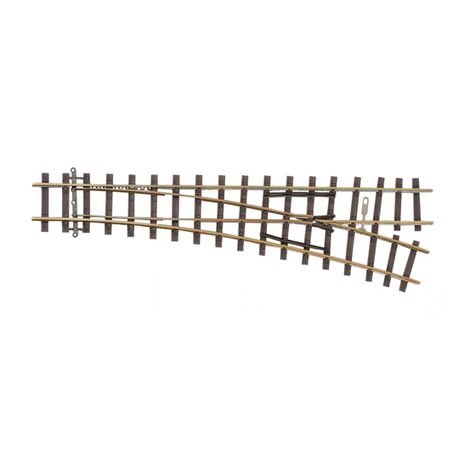
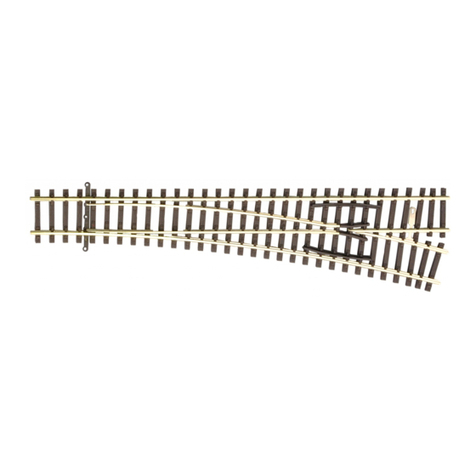
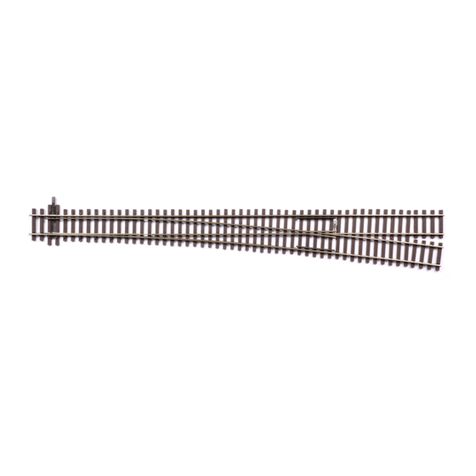
Bausatz EW 15°
MONTAGEANLEITUNG ASSEMBLY INSTRUCTIONS
Dieses Produkt darf am Ende seiner Nutzungsdauer nicht über den normalen Hausmüll
entsorgt werden, sondern muss an einem Sammelpunkt für das Recycling von elektri-
schen und elektronischen Geräten abgegeben werden.
Bitte fragen Sie bei Ihrem Händler oder der Gemeindeverwaltung nach der zuständigen
Entsorgungsstelle.
Technische Änderungen vorbehalten!
Bei Reklamationen wenden Sie sich bitte an Ihren Fachhändler.
TILLIG Modellbahnen GmbH
Promenade 1, 01855 Sebnitz
Tel.: +49 (0)35971 / 903-45
Fax: +49 (0)35971 / 903-19
Service-Hotline: unsere aktuellen Hotline-Zeiten finden Sie unter:
www.tillig.com
1. Die kurzen Strombrücken 3 an Schwelle Nr.16 jeweils zwischen Mit-
telschiene und Außenschiene, d. h. zwischen 5 und 11 bzw. zwischen
4 und 10 einbauen. Dazu werden die kurzen Strombrücken 3 nach
Abstand der Kernlöcher vorgebogen, von der Rückseite des Schwellen-
bandes 1 durch die entsprechenden Kernlöcher eingeschoben und die
nach oben aus den Kleineisen ragenden Enden in Einschieberichtung
der jeweiligen Schienen umgelegt.
2. Die Kontaktblättchen 6 so in die Kleineisen der Mittelschienen ab
Schwelle Nr.12 einschieben, dass sie mit der Bohrung über den Dreh-
zapfenlöchern in Schwelle Nr. 11 zu liegen kommen.
3. Die Mittelschiene Stammgleis 4 (28,6 mm) ab Schwelle Nr.12 in die
Kleineisen bis zur Flügelschiene des Herzstückes einschieben.
4. Die Mittelschiene Zweiggleis 5 (29,1 mm) an den Radius anpassen und
ab Schwelle Nr.12 in die Kleineisen bis an die Flügelschiene des Herz-
stückes einschieben.
5. Die langen Strombrücken 2 an der Schwelle Nr.22 zwischen Endschiene
Stammgleis 15 und Außenschiene Zweiggleis 10 sowie an Schwelle
Nr.23 zwischen Endschiene Zweiggleis 14 und Außenschiene Stamm-
gleis 11 einbauen. Dazu ist sinngemäß wie unter Punkt 1 zu verfahren.
6. Die Endschienen Zweiggleis 14 (31,1 mm) sowie Stammgleis 15 (31,8
mm) mit der gefrästen Schräge bis an das Herzstück einschieben.
7. Bei Verwendung des TILLIG-Weichenantriebes den kleineren Adapter
12 an Schwelle Nr.3 und den größeren Adapter 13 an Schwelle Nr.18
einhängen. Der TILLIG-Weichenantrieb kann mittels Adapter nur an der
Stammgleisseite angebaut werden.
8. Die Stellschwelle 9 mit den Stellkerben nach oben in das Stellfach zwi-
schen Schwelle Nr.4 und 5 einlegen.
9. Die Außenschiene Zweiggleis 10 gemäß dem Radius vorbiegen und
in die entsprechende Kleineisenreihe einschieben. Die Ausklinkung des
Schienenfußes muss auf der Zungenseite über dem Stellfach zwischen
Schwelle Nr.4 und 5 zu liegen kommen.
10. Die Außenseite Stammgleis 11 in die entsprechende Kleineisenreihe
einschieben. Die Ausklinkung des Schienenfußes muss auf der Zungen-
seite über dem Stellfach zwischen Schwelle Nr.4 und 5 zu liegen kom-
men.
11. Die Zunge Stammgleis 7 sowie die Zunge Zweiggleis 8 jeweils mit
den Drehzapfen durch das Kontaktblättchen 6 im Drehzapfenloch
in Schwelle Nr.11 einhängen und mit dem Stellzapfen im jeweiligen
Langloch der Stellschwelle 9 einhängen. Danach die Weiche mit der
Oberseite auf eine harte und glatte Unterlage (Stahlplatte) legen und
mittels Hammer und Körner die Drehzapfen und Stellzapfen leicht ver-
nieten.
12. Ausrichten der Außenschienen 10 bzw. 11 am Weichenende recht-
winklig zu den entsprechenden Endschienen 14 bzw. 15.
13. Aufstecken der Schienenverbinder 16 jeweils in Fahrtrichtung linke
Schiene.
14. Fixierung der Außen- und Endschienen durch Eindrücken von Plast-
und Sekundenkleber in einige Kernlöcher auf der Rückseite der Weiche.
EW 15° RECHTS –BAUSATZ EW 15° RIGHT BRANCH –KIT
2.Die kurzen S tro mbr ücke n 3 a n Sc hwe lle Nr. 16 jeweils zwischen Mittelschiene und Außenschiene, d. h. zwischen 5 und 11 bzw. zwischen 4 und 10 einbauen. Dazu werden die kurzen Strombrücken 3 nach Abstand der Kernlöcher vorgebogen, von der Rückseite des Schwellenbandes 1 durch die entsprechenden Kernlöcher eingeschoben und die nach oben aus den Kleineisen ragenden Enden in Einschieberichtung der jeweiligen Schienen umgelegt.Die Kontaktblättchen 6 so in die Kleineisen der Mittelschienen ab Schwelle Nr. 12 einschieben, dass sie mit der Bohrung über den Drehzapfenlöchern in Schwelle Nr. 11 zu liegen kommen.Die Mittelschiene Stammgleis 4 (28,6 mm) ab Schwelle Nr. 12 in die Kleineisen bis zur Flügelschiene des Herzstückes einschieben.Die Mittelschiene Zweiggleis 5 (29,1 mm) an den Radius anpassen und ab Schwelle Nr. 12 in die Kleineisen bis an die Flügelschiene des Herzstückes einschieben.Die langen Strombrücken 2 an der Schwelle Nr. 22 zwischen Endschiene Stammgleis 15 und Außenschiene Zweiggleis 10 sowie an Schwelle Nr. 23 zwischen Endschiene Zweiggleis 14 und Außenschiene Stammgleis 11 einbauen. Dazu ist sinngemäß wie unter Punkt 1 zu verfahren.Die Endschienen Zweiggleis 14 (31,1 mm) sowie Stammgleis 15 (31,8 mm) mit der gefrästen Schräge bis an das Herzstück einschieben.Bei Verwendung des TILLIG-Weichenantriebes den kleineren Adapter 12 an Schwelle Nr. 3 und den größeren Adapter 13 an Schwelle Nr. 18 einhängen. Der TILLIG-Weichenantrieb kann mittels Adapter nur an der Stammgleisseite angebaut werden.Die Stellschwelle 9 mit den Stellkerben nach oben in das Stellfach zwischen Schwelle Nr. 4 und 5 einlegen.Die Außenschiene Zweiggleis 10 gemäß dem Radius vorbiegen und in die entsprechende Kleineisenreihe einschieben. Die Ausklinkung des Schienenfußes muss auf der Zungenseite über dem Stellfach zwischen Schwelle Nr. 4 und 5 zu liegen kommen.Die Außenseite Stammgleis 11 in die entsprechende Kleineisenreihe einschieben. Die Ausklinkung des Schienenfußes muss auf der Zungenseite über dem Stellfach zwischen Schwelle Nr. 4 und 5 zu liegen kommen.Die Zunge Stammgleis 7 sowie die Zunge Zweiggleis 8 jeweils mit den Drehzapfen durch das Kontaktblättchen 6 im Drehzapfenloch in Schwelle Nr. 11 einhängen und mit dem Stellzapfen im jeweiligen Langloch der Stellschwelle 9 einhängen. Danach die Weiche mit der Oberseite auf eine harte und glatte Unterlage (Stahlplatte) legen und mittels Hammer und Körner die Drehzapfen und Stellzapfen leicht vernieten.Ausrichten der Außenschienen 10 bzw. 11 am Weichenende rechtwinklig zu den entsprechenden Endschienen 14 bzw. 15.Aufstecken der Schienenverbinder 16 jeweils in Fahrtrichtung linke Schiene.Fixierung der Außen- und Endschienen durch Eindrücken von Plast- und Sekundenkleber in einige Kernlöcher auf der Rückseite der Weiche.MONTAGEANLEITUNGA S S E M B LY I N S T R U C T I O N S368300-S.209.10.2012TILLIG Modellbahnen GmbHPromenade 1, 01855 SebnitzTel. +49 (0)35971 903-0, www.tillig.comNicht geeignet für Kinder unter 3 Jahren wegen abnehmbarer und verschluckbarer Kleinteile und Verletzungsgefahr durch funktionsbedingte scharfe Ecken und Kanten. Not suitable for children under 3 years due to danger of swallowing removable small parts and risk of injury on account of unavoidable sharp corners and edges.0-3
Dieses Produkt darf am Ende seiner Nutzungsdauer nicht über den normalen Hausmüll entsorgt werden, sondernmuss an einem Sammelpunkt für das Recycling von elektrischenund elektronischen Geräten abgegeben werden.iiiiiiiiiiiiiiiiiiiiiiiiiiiBitte fragen Sie bei Ihrem Händler oder der Gemeindeverwaltungnach der zuständigen Entsorgungsstelle.
1. 3. 4. 5. 6. 7. 8. 9. 10. 11. 12. 13. 14. 2.Insert the short current bridges 3 at sleeper number 16 between the centre and end rails, i.e. between 5 and 11, and between 4 and 10. The current bridges 3 must be pre-bend in accordance with the hole spacing and pushed through the corresponding core holes from the underside of the sleeper strip 1. The ends protruding up from the fittings are then bent over in the direction in which the individual rails are inserted.Match both contact plates 6 into the corresponding row of fittings from sleeper number 12. The drilling of the contact plates 6 have to be at the drilling of the sleepe strip 1 at sleeper number 11.Insert the centre rail of the main line 4 (28,6 mm) into the corresponding row of fittings from sleeper number 12 up to the wing rails of the frog.Match the pre-bend centre rail of the branch line 5 (29,1 mm) to the length and radius and insert it into the corresponding row of fittings from sleeper number 12 up to the wing rails of the frog.Insert the long current bridges 2 at sleeper number 22 between the main-line end rail 15 and the branch-line outer rail 10 and at sleeper number 23 between the branch-line end rail 14 and the main-line outer rail 11. Proceed in the same way as described for step 1.Slide the end rails of the branch line 14 (31,1 mm) and main line 15 (31,8 mm) (with the milled-off end first) into the corresponding rows of fittings up to the frog tip.If the TILLIG points operating gear is used, the little adapter 12 is hooked at sleeper 3 and the large adapter 13 is hooked at sleeper 18. It is only possible to mount the TILLIG points operating gear at the side of the main-line.Insert the switching sleeper 9 (switching notch upwards) between sleeper number 4 and sleeper number 5.Match the pre-bend branch-line outer rail 10 to the radius and slide into the corresponding row of fittings. The notch of the rail should be at the inner side at the position of the switching sleeper ( between sleeper number 4 and sleeper number 5).Match the pre-bent main-line outer rail 11 to the radius a n d slide into the corresponding row of fittings. The notch of the rail should be at the inner side at the position of the switching sleeper ( between sleeper number 4 and sleeper number 5).Mount the blade rail of main line 7 and the blade rail of branch line 8. Press the pivot of the blades 7 and 8 in the drilling of the contact plates 6 and the drilling of the sleepe strip 1 at sleeper number 11. Insert the switching pin of the blades 7 and 8 into the long hole of the switching sleeper 9. Further lay the point (upside down) onto a hard and plain plate (e.g. steel-plate) and rivet slightly the pivots and the switching pins of the blades by use of a hammer and a peening tool.Align the outer rails 10 and 11 at right angles to the corresponding end rails 14 and 15 at the end of the points.Fit the track connectors 16 to each left-hand rail (viewed in running direction).Fix the outer and end rails by filling a plastic or contact adhesive into some of the core holes on the underside of the points. 1. 3. 4. 5. 6. 7. 8. 9. 10. 11. 12. 13. 14.
121131510152025
E W 1 5 ° R E C H T S - B A U S AT Z1623231110697 84 5151416E W 1 5 ° R I G H T B R A N C H - K I TAchtung! Weichenbausätze sind mechanische Spielwaren. Ihr Gebrauch birgt Verletzungsgefahren an scharfkantigen Teilen. Für ihre Montage sind spezielle Fertigkeiten notwendig.
1. Insert the short current bridges 3 at sleeper number 16 between the
centre and end rails, i.e. between 5 and 11, and between 4 and 10. The
current bridges 3 must be pre-bend in accordance with the hole spacing
and pushed through the corresponding core holes from the underside of
the sleeper strip 1. The ends protruding up from the fittings are then bent
over in the direction in which the individual rails are inserted.
2. Match both contact plates 6 into the corresponding row of fittings from
sleeper number 12. The drilling of the contact plates 6 have to be at the
drilling of the sleepe strip 1 at sleeper number 11.
3. Insert the centre rail of the main line 4 (28,6 mm) into the corresponding
row of fittings from sleeper number 12 up to the wing rails of the frog.
4. Match the pre-bend centre rail of the branch line 5 (29,1 mm) to the
length and radius and insert it into the corresponding row of fittings
from sleeper number 12 up to the wing rails of the frog.
5. Insert the long current bridges 2 at sleeper number 22 between the main-
line end rail 15 and the branch-line outer rail 10 and at sleeper number
23 between the branch-line end rail 14 and the main-line outer rail 11.
Proceed in the same way as described for step 1.
6. Slide the end rails of the branch line 14 (31,1 mm) and main line 15 (31,8
mm) (with the milled-off end first) into the corresponding rows of fittings
up to the frog tip.
7. If the TILLIG points operating gear is used, the little adapter 12 is hooked
at sleeper 3 and the large adapter 13 is hooked at sleeper 18. It is only
possible to mount the TILLIG points operating gear at the side of the
main-line.
8. Insert the switching sleeper 9 (switching notch upwards) between sleeper
number 4 and sleeper number 5.
9. Match the pre-bend branch-line outer rail 10 to the radius and slide into
the corresponding row of fittings. The notch of the rail should be at the
inner side at the position of the switching sleeper ( between sleeper num-
ber 4 and sleeper number 5).
10. Match the pre-bent main-line outer rail 11 to the radius and slide into the
corresponding row of fittings. The notch of the rail should be at the inner
side at the position of the switching sleeper ( between sleeper number 4
and sleeper number 5).
11. Mount the blade rail of main line 7 and the blade rail of branch line 8.
Press the pivot of the blades 7 and 8 in the drilling of the contact plates
6 and the drilling of the sleepe strip 1 at sleeper number 11. Insert the
switching pin of the blades 7 and 8 into the long hole of the switching
sleeper 9. Further lay the point (upside down) onto a hard and plain plate
(e.g. steel-plate) and rivet slightly the pivots and the switching pins of the
blades by use of a hammer and a peening tool.
12. Align the outer rails 10 and 11 at right angles to the corresponding end
rails 14 and 15 at the end of the points.
13. Fit the track connectors 16 to each left-hand rail (viewed in running
direction).
14. Fix the outer and end rails by filling a plastic or contact adhesive into
some of the core holes on the underside of the points.
2.Di e ku rze n St romb rück en 3 an S chw elle Nr. 16 jeweils zwischen Mittelschiene und Außenschiene, d. h. zwischen 5 und 11 bzw. zwischen 4 und 10 einbauen. Dazu werden die kurzen Strombrücken 3 nach Abstand der Kernlöcher vorgebogen, von der Rückseite des Schwellenbandes 1 durch die entsprechenden Kernlöcher eingeschoben und die nach oben aus den Kleineisen ragenden Enden in Einschieberichtung der jeweiligen Schienen umgelegt.Die Kontaktblättchen 6 so in die Kleineisen der Mittelschienen ab Schwelle Nr. 12 einschieben, dass sie mit der Bohrung über den Drehzapfenlöchern in Schwelle Nr. 11 zu liegen kommen.Die Mittelschiene Stammgleis 4 (28,6 mm) ab Schwelle Nr. 12 in die Kleineisen bis zur Flügelschiene des Herzstückes einschieben.Die Mittelschiene Zweiggleis 5 (29,1 mm) an den Radius anpassen und ab Schwelle Nr. 12 in die Kleineisen bis an die Flügelschiene des Herzstückes einschieben.Die langen Strombrücken 2 an der Schwelle Nr. 22 zwischen Endschiene Stammgleis 15 und Außenschiene Zweiggleis 10 sowie an Schwelle Nr. 23 zwischen Endschiene Zweiggleis 14 und Außenschiene Stammgleis 11 einbauen. Dazu ist sinngemäß wie unter Punkt 1 zu verfahren.Die Endschienen Zweiggleis 14 (31,1 mm) sowie Stammgleis 15 (31,8 mm) mit der gefrästen Schräge bis an das Herzstück einschieben.Bei Verwendung des TILLIG-Weichenantriebes den kleineren Adapter 12 an Schwelle Nr. 3 und den größeren Adapter 13 an Schwelle Nr. 18 einhängen. Der TILLIG-Weichenantrieb kann mittels Adapter nur an der Stammgleisseite angebaut werden.Die Stellschwelle 9 mit den Stellkerben nach oben in das Stellfach zwischen Schwelle Nr. 4 und 5 einlegen.Die Außenschiene Zweiggleis 10 gemäß dem Radius vorbiegen und in die entsprechende Kleineisenreihe einschieben. Die Ausklinkung des Schienenfußes muss auf der Zungenseite über dem Stellfach zwischen Schwelle Nr. 4 und 5 zu liegen kommen.Die Außenseite Stammgleis 11 in die entsprechende Kleineisenreihe einschieben. Die Ausklinkung des Schienenfußes muss auf der Zungenseite über dem Stellfach zwischen Schwelle Nr. 4 und 5 zu liegen kommen.Die Zunge Stammgleis 7 sowie die Zunge Zweiggleis 8 jeweils mit den Drehzapfen durch das Kontaktblättchen 6 im Drehzapfenloch in Schwelle Nr. 11 einhängen und mit dem Stellzapfen im jeweiligen Langloch der Stellschwelle 9 einhängen. Danach die Weiche mit der Oberseite auf eine harte und glatte Unterlage (Stahlplatte) legen und mittels Hammer und Körner die Drehzapfen und Stellzapfen leicht vernieten.Ausrichten der Außenschienen 10 bzw. 11 am Weichenende rechtwinklig zu den entsprechenden Endschienen 14 bzw. 15.Aufstecken der Schienenverbinder 16 jeweils in Fahrtrichtung linke Schiene.Fixierung der Außen- und Endschienen durch Eindrücken von Plast- und Sekundenkleber in einige Kernlöcher auf der Rückseite der Weiche.MONTAGEANLEITUNGA S S E M B LY I N S T R U C T I O N S368300-S.209.10.2012TILLIG Modellbahnen GmbHPromenade 1, 01855 SebnitzTel. +49 (0)35971 903-0, www.tillig.comNicht geeignet für Kinder unter 3 Jahren wegen abnehmbarer und verschluckbarer Kleinteile und Verletzungsgefahr durch funktionsbedingte scharfe Ecken und Kanten. Not suitable for children under 3 years due to danger of swallowing removable small parts and risk of injury on account of unavoidable sharp corners and edges.0-3
Dieses Produkt darf am Ende seiner Nutzungsdauer nicht über den normalen Hausmüll entsorgt werden, sondernmuss an einem Sammelpunkt für das Recycling von elektrischenund elektronischen Geräten abgegeben werden.iiiiiiiiiiiiiiiiiiiiiiiiiiiBitte fragen Sie bei Ihrem Händler oder der Gemeindeverwaltungnach der zuständigen Entsorgungsstelle.
1. 3. 4. 5. 6. 7. 8. 9. 10. 11. 12. 13. 14. 2.Insert the short current bridges 3 at sleeper number 16 between the centre and end rails, i.e. between 5 and 11, and between 4 and 10. The current bridges 3 must be pre-bend in accordance with the hole spacing and pushed through the corresponding core holes from the underside of the sleeper strip 1. The ends protruding up from the fittings are then bent over in the direction in which the individual rails are inserted.Match both contact plates 6 into the corresponding row of fittings from sleeper number 12. The drilling of the contact plates 6 have to be at the drilling of the sleepe strip 1 at sleeper number 11.Insert the centre rail of the main line 4 (28,6 mm) into the corresponding row of fittings from sleeper number 12 up to the wing rails of the frog.Match the pre-bend centre rail of the branch line 5 (29,1 mm) to the length and radius and insert it into the corresponding row of fittings from sleeper number 12 up to the wing rails of the frog.Insert the long current bridges 2 at sleeper number 22 between the main-line end rail 15 and the branch-line outer rail 10 and at sleeper number 23 between the branch-line end rail 14 and the main-line outer rail 11. Proceed in the same way as described for step 1.Slide the end rails of the branch line 14 (31,1 mm) and main line 15 (31,8 mm) (with the milled-off end first) into the corresponding rows of fittings up to the frog tip.If the TILLIG points operating gear is used, the little adapter 12 is hooked at sleeper 3 and the large adapter 13 is hooked at sleeper 18. It is only possible to mount the TILLIG points operating gear at the side of the main-line.Insert the switching sleeper 9 (switching notch upwards) between sleeper number 4 and sleeper number 5.Match the pre-bend branch-line outer rail 10 to the radius and slide into the corresponding row of fittings. The notch of the rail should be at the inner side at the position of the switching sleeper ( between sleeper number 4 and sleeper number 5).Match the pre-bent main-line outer rail 11 to the radius a n d slide into the corresponding row of fittings. The notch of the rail should be at the inner side at the position of the switching sleeper ( between sleeper number 4 and sleeper number 5).Mount the blade rail of main line 7 and the blade rail of branch line 8. Press the pivot of the blades 7 and 8 in the drilling of the contact plates 6 and the drilling of the sleepe strip 1 at sleeper number 11. Insert the switching pin of the blades 7 and 8 into the long hole of the switching sleeper 9. Further lay the point (upside down) onto a hard and plain plate (e.g. steel-plate) and rivet slightly the pivots and the switching pins of the blades by use of a hammer and a peening tool.Align the outer rails 10 and 11 at right angles to the corresponding end rails 14 and 15 at the end of the points.Fit the track connectors 16 to each left-hand rail (viewed in running direction).Fix the outer and end rails by filling a plastic or contact adhesive into some of the core holes on the underside of the points. 1. 3. 4. 5. 6. 7. 8. 9. 10. 11. 12. 13. 14.121131510152025E W 1 5 ° R E C H T S - B AU S AT Z
1623231110697 84 5151416
E W 1 5 ° R I G H T B R A N C H - K I TAchtung! Weichenbausätze sind mechanische Spielwaren. Ihr Gebrauch birgt Verletzungsgefahren an scharfkantigen Teilen. Für ihre Montage sind spezielle Fertigkeiten notwendig.
Nicht geeignet für Kinder unter 14 Jahren wegen abnehmbarer und ver-
schluckbarer Kleinteile und Verletzungsgefahr durch funktionsbedingte
scharfe Ecken und Kanten. / Not suitable for children under 14 years due to
danger of swallowing removable small parts and risk of injury on account of
unavoidable sharp corners and edges.
Achtung! Weichenbausätze sind mechanische Spielwaren. Ihr Gebrauch birgt Verletzungs-
gefahren an scharfkantigen Teilen. Für ihre Montage sind spezielle Fertigkeiten notwendig.


