Timberline Gold Series Operating and maintenance instructions

INSTALLATION GUIDE FOR ALL CABINETRY
CARE AND CLEANING
WARRANTY
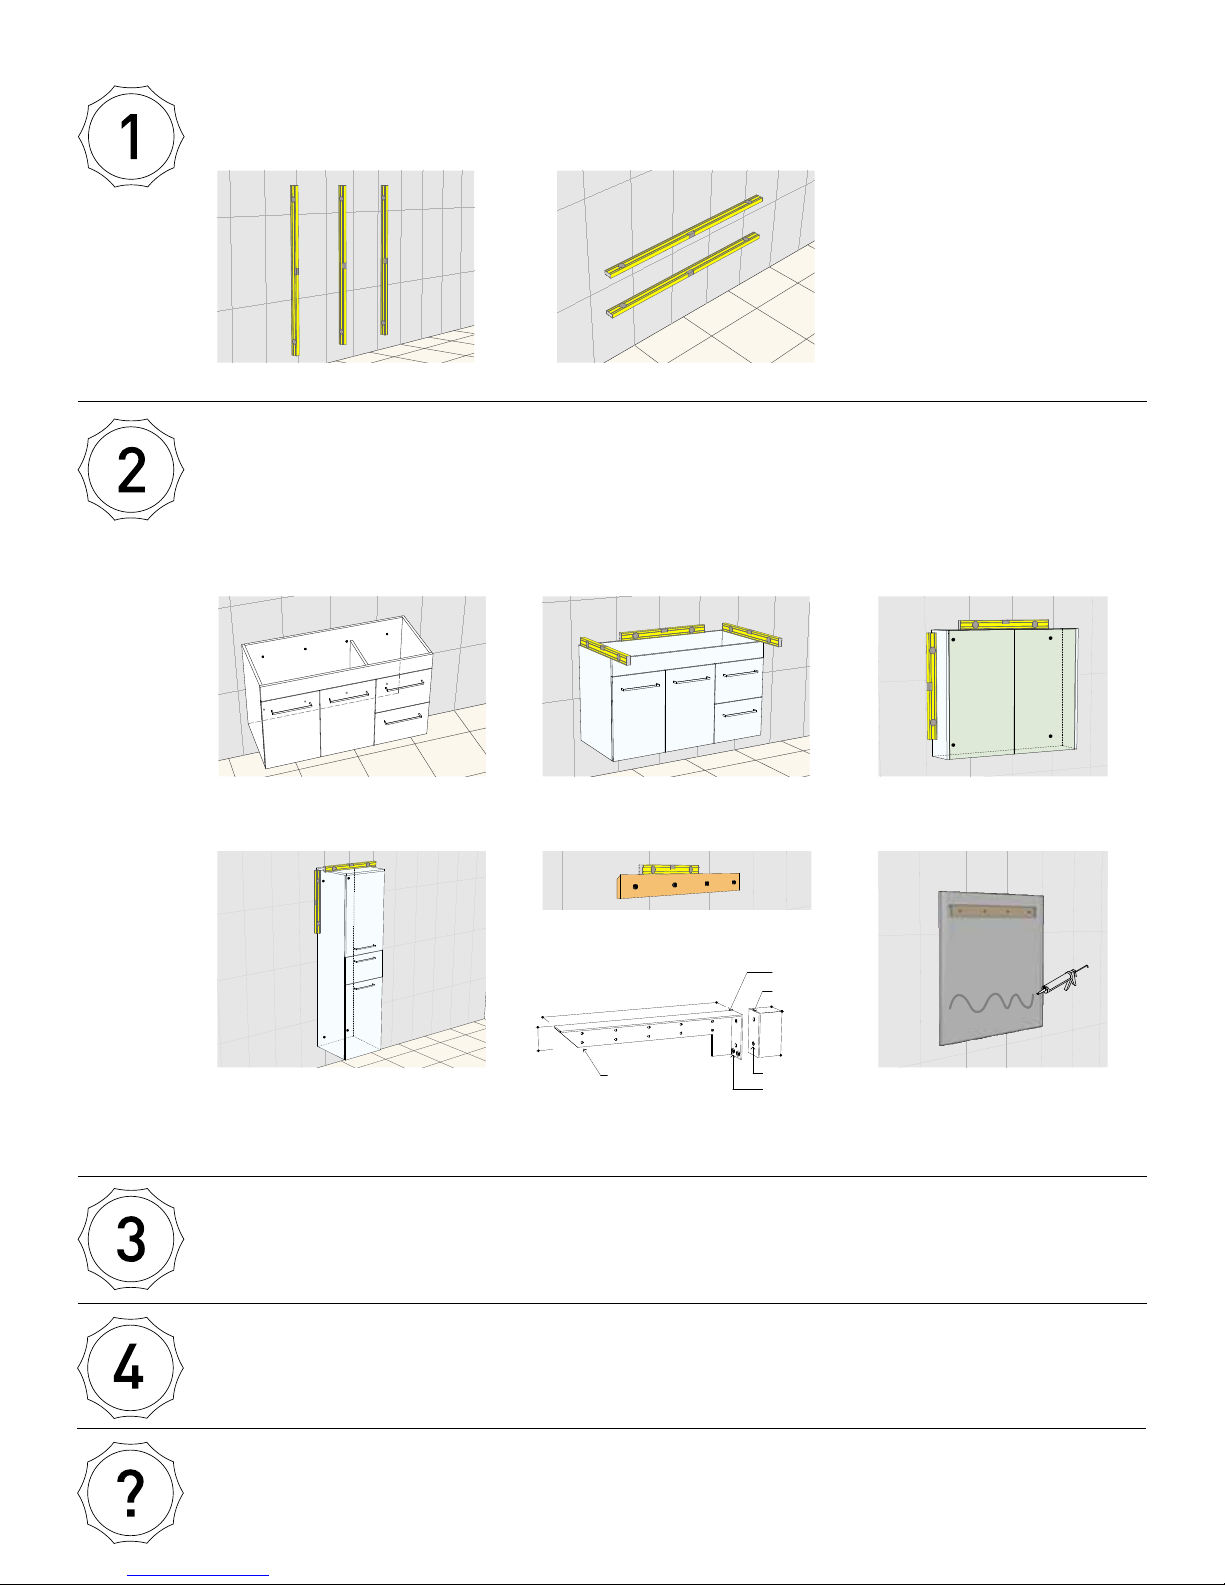
ENSURE YOUR WALL IS FLAT AND PLUMB
INSTRUCTIONS COVER ALL CABINETRY
FIX YOUR CABINET MAKING SURE IT IS LEVEL AND PLUMB
Ensure wall is plumb
Vanities: Fix as noted above
Vanities: Check cabinet is level and
plumb
Mirrors: Fix mounting batten with
suitable screws with maximum
300mm spacing
Splice Wall Hanging Bracket:
50x50x3 Angle with backing plate
and mounting holes
Mirrors: Hang mirror on mounting
batten and secure with silicone
Tallboys: Fix with suitable screws in
each corner and check that cabinet
is level and plumb
Shaving Cabinets: Fix with suitable
screws in each corner and check
that cabinet is level and plumb
Fix your cabinet using
ADJUST THE DOORS AND DRAWERS
After installation every cabinet will need some adjustment as the doors and drawers move during transport and
SOMETHING NOT QUITE RIGHT?
servic[email protected]
FIT THE TOP & SEAL CABINET
Tallboy
1:50
3D-07
Shaver
1:50
3D-08
410
50
100
50
5mm holes 8mm holes
M4 nuts with hole through bracket
vanity bracket
backing plate
Wall Hanging Bracket
50x50x3 Angle with backing plate and mounting holes

ADJUSTMENT OF TANDEMBOX DRAWERS ADJUSTMENT OF HARN STEEL DRAWERS
To adjust the drawer front UP or DOWN
To adjust the drawer front LEFT or RIGHT
Loosen the centre screw
Loosen two drawer front screws
Turn the bottom screw to move the
drawer front UP or DOWN
Slide drawer front LEFT or RIGHT
Tighten the centre screw
Tighten two drawer front screws To adjust angle of tall drawer fronts
with gallery rails, slide cover back and
To Remove Drawer Front To Remove Entire Drawer
Use the front screw for LEFT/RIGHT
Do this to both left and right side -
Use the back screws for UP/DOWN
adjustment
NOTE: Wide drawers also have screws under
Open fully then lift slightly and
continue pulling further
To adjust angle of tall drawer fronts with gallery
ADJUSTMENT OF DOOR HINGES
Use the front screw for LEFT/RIGHT
adjustment
Loosen two bracket screws to slide door
Use the back screw for IN/OUT
adjustment
pull the clip at the back of
ADJUSTMENT OF
LEGRABOX DRAWERS
Use the bottom screw for
LEFT/ RIGHT adjustment
Use the top screw to remove the
drawer front
Use the middle screw for
UP/DOWN adjustment
Use the back screw to adjust the
angle of the drawer front
WARRANTY
WARRANTY
REGISTER ONLINE at www.timberlinebp.com.au/contact-us/warranty/
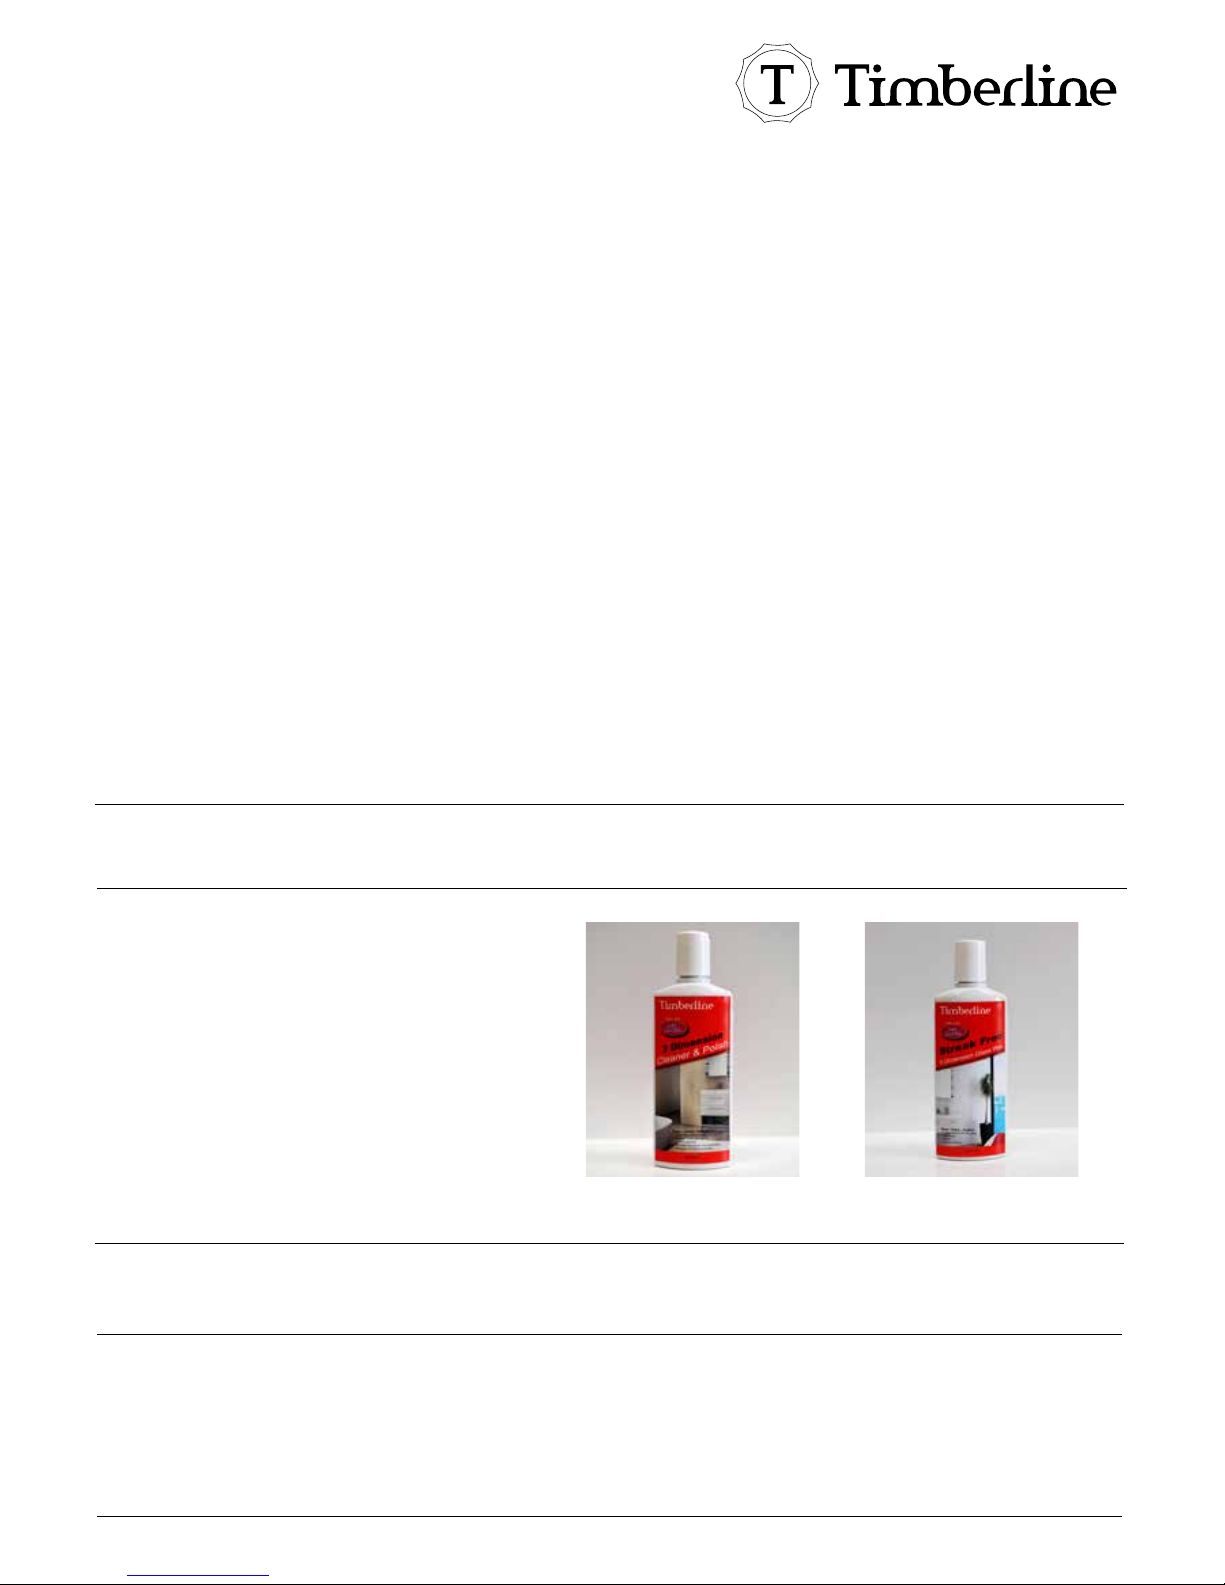
CARE AND CLEANING
For all surfaces use only a soft cloth and a weak solution of non-
To keep your bathroom furniture looking sparkling bright and for minor
scratches to acrylic or painted surfaces ask about our Timberline 3
Ask you nearest Timberline dealer now!
3 Dimension Cleaner and Polish
suitable for nearly all bathroom
surfaces
3 Dimension Streak Free glass and
either materials or workmanship within warranty period noted below, Timberline Bathroom Products will at its discretion, repair or, supply replacement for
WARRANTY PERIOdS:
SILVER VANITY CABINETS: 5 YEARS Acrylic Tops: Solid Timber Tops: 3 years
GOLD VANITY CABINETS: Stone/Solid Surface Tops: Aluminium Basins: 5 years
PLATINUM VANITY CABINETS: Dolomite Top: 5 years Mirrors:
Laminated Laundry Benchtops: 7 years Ceramic Tops/Bowls: 5 years Cabinet Lighting:
Commercial Use: ALL PRODUCTS: Shaving Cabinets: Tallboys:
Shelves: 5 years Laminate Tops: 5 years
Please note that installation of any product is regarded as acceptance of that product and therefore no claims for cabinet damage or faulty tops can be
made after installation. Any claim for freight damage must be made within 48 hours from receipt of product.
TIMBER VANITY TOPS
Please see www.timberline.com.au/downloads
For more information on the following refer to website:
This manual suits for next models
2
Table of contents
Other Timberline Indoor Furnishing manuals

Popular Indoor Furnishing manuals by other brands

VISIONARY DESIGNS
VISIONARY DESIGNS MOD-1198 Setup instructions

Time4Sleep
Time4Sleep COLMAR RATTAN BED Assembly instructions

JAWA
JAWA JWS328E3 Assembling Instruction

FUFU & GAGA
FUFU & GAGA Cupboard manual

Forever Redwood
Forever Redwood ROUND OUTDOOR PATIO TABLE Assembly instructions

Robern
Robern YC2430D4P1L3 Important safety instructions


AFi
AFi FR-PDA-STO Assembly instructions

Picket House Furnishings
Picket House Furnishings B.10253.NSE Assembly instruction

Rauch
Rauch M2803 Assembly instructions

Patterson Medical
Patterson Medical Metron Value 923544 Assembly instructions

Next
Next BRIGITTE 663963 Assembly instructions

Costway
Costway JV11149 manual