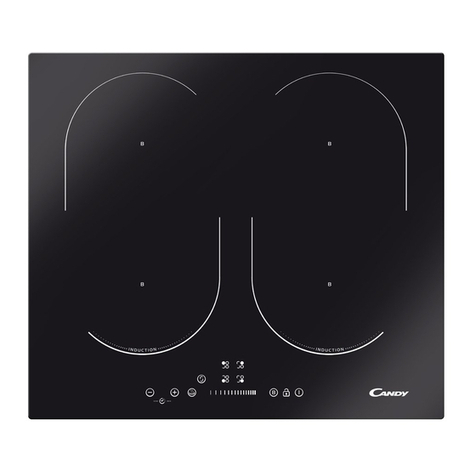
Tisira TCT63E User manual

TM
USER MANUAL
600 // CERAMIC HOB - TOUCH
TCT63E
IMPORTANT // Please ensure that you read through this manual prior to installation and use.
This user manual contains important information to ensure optimal performance and keep you
safe. Please retain your proof of purchase, as this will be needed in the event that you require a
warranty service. Remember to keep this user manual for future reference.
www.tisira.com
Version 1.0

Page 2 Ceramic Hob User Manual
Content
Content 2
Warning & Safety Instructions 3-4
Product Overview 5
Product Specications 6
Electrical Connection 6-7
Installation 8-9
Installation 10
Operation Instructions 11-31
Error Codes and Solutions 32
Maintenance and Cleaning 33
Troubles and Solution Proposals 33
Notes 34-35

Page 3Ceramic Hob User Manual
IMPORTANT // To ensure best performance, avoid risk of damage or accidents.
Please read the operating instructions prior to rst time use.
Installation
Electrical Shock Hazard
• Disconnect the appliance from the mains
electricity supply before carrying out any work
or maintenance on it.
• Connection to a good earth wiring system is
essential and mandatory.
• Alterations to the domestic wiring system must
only be made by a qualied electrician.
• Failure to follow this advice may result in
electrical shock or death.
Cut Hazard
• Take care - panel edges are sharp.
• Failure to use caution could result in injury or
cuts.
Important safety instructions
• No combustible material or products should be
placed on this appliance at any time.
• Please make this information available to the
person responsible for installing the appliance
as it could reduce your installation costs.
• In order to avoid a hazard, this appliance must
be installed according to these instructions for
installation.
• This appliance is to be properly installed and
earthed only by a suitably qualied person.
• This appliance should be connected to a circuit
which incorporates an isolating switch providing
full disconnection from the power supply.
• Failure to install the appliance correctly could
invalidate any warranty or liability claims.
Operation and Maintenance
Electrical Shock Hazard
WARNING // If the surface is cracked, switch o the
appliance to avoid the possibility of electric shock.
• Switch the cooktop o at the wall before
cleaning or maintenance.
• Failure to follow this advice may result in
electrical shock or death.
Health Hazard
• This appliance complies with electromagnetic
safety standards.
• However, persons with cardiac pacemakers
or other electrical implants (such as insulin
pumps) must consult with their doctor or
implant manufacturer before using this
appliance to make sure that their implants will
not be aected by the electromagnetic eld.
• Failure to follow this advice may result in death.
Hot Surface Hazard
• Do not let your body, clothing or any item other
than suitable cookware contact the ceramic
glass until the surface is cool.
• Never leave metal objects (such as kitchen
utensils) or empty pans on the cooktop as they
can become hot very quickly.
WARNING // magnetisable metal objects worn
on the body may become hot in the vicinity of
the cooktop. Gold or silver jewellery will not be
aected.
WARNING // Accessible parts may become hot
during use. To avoid burns young children should
be kept away.
• Handles of saucepans may be hot to touch.
Check saucepan handles do not overhang other
cooking zones that are on. Keep handles out of
reach of children.
Warning & Safety Instructions

Page 4 Ceramic Hob User Manual
• Failure to follow this advice could result in
burns and scalds.
Cut Hazard
• The razor-sharp blade of a cooktop scraper is
exposed when the safety cover is retracted.
• Use with extreme care and always store safely
and out of reach of children.
• Failure to use caution could result in injury or
cuts.
Important Safety Instructions
• Never leave the appliance unattended when
in use. Boil over causes smoking and greasy
spillovers that may ignite.
• Do not place or leave any magnetisable objects
(e.g. credit cards, memory cards) or electronic
devices (e.g. computers, MP3 players) near
the appliance, as they may be aected by its
electromagnetic eld.
• Never use your appliance as a work or storage
surface.
• Never leave any objects or utensils on the
appliance.
• Never use your appliance for warming or
heating the room.
• Aer use, always turn o the cooking zones and
the cooktop as described in this manual (i.e.
by using the touch controls). Do not rely on the
pan detection feature to turn o the cooking
zones when you remove the pans.
• Do not allow children to play with the
appliance or sit, stand, or climb on it.
• Do not store items of interest to children in
cabinets above the appliance. Children climbing
on the cooktop could be seriously injured.
WARNING // This appliance is not intended for
use by persons (including children) with reduced
physical, sensory or mental capabilities, or lack
of experience and knowledge, unless they have
been given supervision or instruction concerning
use of the appliance by a person responsible for
their safety.
WARNING // Children should be supervised
to ensure that they do not play with the
appliance.
• Do not repair or replace any part of the
appliance unless specically recommended in
the manual. All other servicing should be done
by a qualied technician.
• Do not use a steam cleaner to clean your
cooktop.
• Do not place or drop heavy objects on your
cooktop.
• Do not stand on your cooktop.
• Do not use pans with jagged edges or drag pans
across the ceramic glass surface as this can
scratch the glass.
• Do not use scourers or any other harsh abrasive
cleaning agents to clean your cooktop, as these
can scratch the ceramic glass.
• If the supply cord is damaged, it must be
replaced by the manufacturer or its service
agent or a similarly qualied person in order to
avoid a hazard.
• Do not operate your cooktop by means of an
external timer or separate remote-control
system.
• This appliance is intended to be used in
domestic households only.
Warning & Safety Instructions

Page 5Ceramic Hob User Manual
Product Overview
1. Heater Positions
2. Glass or Metal Surface
3. Control Switches
4. Hotplate
5. Ovaldual Heater
6. Double Heater

Page 6 Ceramic Hob User Manual
Product Specifications
Electrical Connection
Get electrical connection of your appliance done to authorized person in line with the
following scheme.
Cooktop Panel Visual of 60 cm
Cooktop Panel Visual of 45 cm
Cooktop Panel Visual of 30 cm

Page 7Ceramic Hob User Manual
Electrical Connection
Electrical Connection and Safety
1. Setting conditions of this appliance is
indicated in tag or data plate.
2. Your appliance should be plugged in
a fuse appropriate for electric power.
If necessary, it is recommended that
installation is done by authorized service.
3. Your appliance is congured in accordance
with electrical supply of 220-240V AC/380-
415V3N AC 50/60Hz.
4. If main electrical network is dierent from
these values, contact with your authorized
service.
5. Electrical connections of your appliance
should only be made to the fuses having
suitably wired grounding (grounded)
system. If no convenient fuse is available
in the place where your appliance is to be
installed, contact with authorized service
immediately. Manufacturing rm is not
responsible denitely for the damages
that fuses whose grounding is not made
and connected to the appliance can cause.
6. Plug of the appliance should be close
to be accessed easily to the fuse whose
grounding is made without use of
extension cord.
7. Do not allow contacting the power cable
of your appliance with hot regions.
Similarly, keep away it from sharp edges
and corners.
8. If feeder cord is damaged, this cord should
be replaced either by manufacturer or its
service agency or same degree qualied
personnel in order to hinder a dangerous
situation.
9. Wrong electrical connection may give
damage to the appliance.In this case, your
appliance will remain out of guarantee
scope. Electrical connection of your
appliance should be done by authorized
service.
10. During operation of cooktop, some parts
may be hot. When you also bring switches
closed position, it may remain hot for a
while. Children should be kept away every
time and not be le without observation.
Do not touch surface of cooktop while
warning lights ashes. When you bring
your appliance closed position, hot parts
being still dangerous are stated with
warning lights. (Vitroceran models).

Page 8 Ceramic Hob User Manual
Installation
1. Turn the cooktop down and place on smooth ground.
2. In order to prevent entrance of foreign substances and liquids between cooktop and counter,
apply the paste given in package to the sides of lower guard of counter. For corners, curl
paste and increase curls till lling corner gaps.
3. Turn cooktop again and align with and place on counter.
4. Fasten up your cooktop on counter by using the clamp and screws supplied.

Page 9Ceramic Hob User Manual
Installation
5. When product is mounted on a drawer, if it is possible to touch lower side of product, this
section should be separated with a wooden shelf.
6. While mounting cooktop on a closet, as shown in the gure above, in order to separate
between closet and cooktop, a shelf should be mounted. If it is mounted on a built-in oven,
there is no need to do that.
7. If your cooktop will be mounted next to right or le wall, the minimum distance between
wall and cooktop should be 50 mm.
Correct Place For Installation:
Product is designed in
accordance with the kitchen
counters supplied from market.
A safe distance should be le
between the product and
kitchen walls and furniture.
If hood/aspirator will be
installed over your appliance,
obey to the recommendation
of hood/aspirator
manufacturer for assembly
height. (min. 60 cm) The gap
that cooktop is to be placed on
the counter should be cut in
line with cooktop installation
dimensions.
For installation of the product,
the rules speci ed in local
standards related to electricity
should be complied.

Page 10 Ceramic Hob User Manual
Installation
Counter Cutting Sizes and Installation of Your Cooktop
NOTICE // Pay attention to the drawings and dimensions given below while making cooktop
installation and adjusting counter cutting sizes.

Page 11Ceramic Hob User Manual
Operation Instructions
Electrical Heater Power Values Quick
You can operate electric cooktops by turning the button on control panel you want to use to the
level you desire. Cooktop powers as per levels are given in the following table.
Ø140 mm ceramic heater 1200 W
Ø180 mm ceramic heater 1800 W
Ø140 / 250 mm ceramic heater 1800 W
Ø120 / 180 mm ceramic heater 1700 W
Ø220 / 300 mm ceramic heater 2400 W
LEVEL 1 LEVEL 2 LEVEL 3 LEVEL 4 LEVEL 5 LEVEL 6
80 mm 200W 250W 450W --- --- ---
145 mm 250W 750W 1000W --- --- ---
180 mm 500W 750W 1500W --- --- ---
145 mm Rapid 500W 1000W 1500W --- --- ---
180 mm Rapid 850W 1150W 2000W --- --- ---
145 mm 95W 155W 250W 400W 750W 1000W
180 mm 115W 175W 250W 600W 850W 1500W
145 mm Rapid 135W 165W 250W 500W 750W 1500W
180 mm Rapid 175W 220W 300W 850W 1150W 2000W

Page 12 Ceramic Hob User Manual
Operation Instructions
Control Panel Overview For:
30cm Built in Stove
45cm Built in Stove
60cm - 70cm Built in Stove

Page 13Ceramic Hob User Manual
60cm - 70cm Built in Stove
Lower left cooking area selection key
Upper left cooking area selection key
Upper right cooking area selection key
Lower right cooking area selection key
Plus key
Minus key
On / off key
Temperature display icon
Operation Instructions

Page 14 Ceramic Hob User Manual
Operation Instructions
Note // Unit becomes operational within 1 second a er it is plugged to the mains. All LEDs and
displays illuminate for 1 second.
Turning the Stove On
Residual Heat Display
Turning the Stove On
Unit is turned on by pressing the key. The icon
is displayed on all displays. (See Fig. 1)
If the temperature of the glass over the hobs is above
+ 60°C, and icons are displayed on the display of
the relevant successively. ( = 0.5 seconds, = 0.5
seconds) (See Fig. 2)
Unit is turned o by pressing the key. (see Fig. 3) You
may turn o the unit by pressing the key even if the
child lock is active.
If the icon on the display of the stove is illuminated,
this means that the relevant hob is still hot. It may be
used for heating a small amount of food. (See Fig. 4)
WARNING // Residual heat display is not illuminated,
and thus it does not warn the user against heat in case
of a power outage.
WARNING // Electronic components remain active for 20 seconds. If there is no cooking level
within this period, unit switches to ‘‘off mode’’ automatically with a signalling sound.
WARNING // Residual heat display of each cooking area remains active until the measured glass
temperature is below + 60 °C.
Figure 2
Figure 3
Figure 4
Figure 1
Unit is turned on by pressing the key. The icon
Unit is turned o by pressing the key. (see Fig. 3) You
may turn o the unit by pressing the key even if the
If the temperature of the glass over the hobs is above
+ 60°C, and icons are displayed on the display of
If the icon on the display of the stove is illuminated,
+ 60°C, and icons are displayed on the display of
the relevant successively. ( = 0.5 seconds, = 0.5
Unit is turned on by pressing the key. The icon
the relevant successively. ( = 0.5 seconds, = 0.5
If the temperature of the glass over the hobs is above
+ 60°C, and icons are displayed on the display of

Page 15Ceramic Hob User Manual
Operation Instructions
Turning the Stove Cooking Areas On
Turn the stove on by pressing the button.
(See Fig. 5)
Press the relevant hob selection key. The icon shall
be displayed in the relevant hob when you touch for the
rst time. (See Fig. 6)
Cooking level of the relevant hob may be set from 1 to
9 using the and the keys or from to 9 as per
the option of the stove. (See Fig. 7)
Turn the stove on by pressing the button.
(See Fig. 8)
WARNING // If the hob selected is hot, icon shall be displayed instead of icon a er the selection
is made.
Keep Warm Function (Optional)
Keep warm function keeps the cooked food placed on a cooking area warm. The selected
hob is operated with a lower power in this function. Keep warm function is also a cooking level.
To activate the keep warm function
Figure 5
Figure 6
Figure 7
Figure 8
Turn the stove on by pressing the button.
Turn the stove on by pressing the button.
Press the relevant hob selection key. The icon shall
9 using the and the keys or from to 9 as per
9 using the and the keys or from to 9 as per
9 using the and the keys or from to 9 as per
Keep warm function keeps the cooked food placed on a cooking area warm. The selected

Page 16 Ceramic Hob User Manual
Operation Instructions
Press the relevant hob selection key once. The icon is
displayed when you touch for the rst time. (See Fig. 9)
Then, press the key once. The icon shall be
displayed in the relevant hob with this touch. (see Fig.
10) Thus, the keep warm shall be activated.
Using the and keys, bring the temperature on all
hobs t . (see Fig. 12) Stove shall be turned o by itself
a er 20 seconds.
If any hob is still hot a er 20 seconds, symbol is
displayed until the temperature of the relevant hob
becomes lower than +60 °C. (see Fig. 13) No icon is
displayed a er the stove is turned o if the relevant hob
is not hot.
Auto heating function allows the stove to be operated at full power for a speci c period of time as
per the cooking level selected.
You may turn the stove o by pressing the button.
(See Fig. 11)
Figure 9
Figure 10
Figure 12
Figure 13
Figure 11
hobs t . (see Fig. 12) Stove shall be turned o by itself
Press the relevant hob selection key once. The icon is
Then, press the key once. The icon shall be
Then, press the key once. The icon shall be
Using the and keys, bring the temperature on all
Turning the Stove Cooking Areas O :
Turning the Stove Cooking Areas O :
You may turn the stove o by pressing the button.
Using the and keys, bring the temperature on all
If any hob is still hot a er 20 seconds, symbol is

Page 17Ceramic Hob User Manual
Operation Instructions
Press front le hob selection key and minus key
simultaneously, you shall hear a short warning signal at
this time. (see Fig. 14) Then, remove your ngers from
the stove control panel.
Press the front le hob selection key again.
(See Fig. 15)
The child lock is activated at this time and the icon
is displayed on all hobs to indicate this condition. (see
Fig. 16) The and icons are displayed alternatively
if any hob is hot.
The icon is displayed on all displays when the
stove is on and the child lock is active. (see Fig. 17)
The and icons are displayed alternatively if any
hob is hot. You may turn the stove on or o with the
key only.
Press front le hob selection key and minus
key ( ) simultaneously. (see Fig. 18) You shall
hear a short warning signal at this time. Then, remove
your ngers from the stove control panel.
Figure 14
Figure 15
Figure 16
Figure 17
Figure 18
key only.
is displayed on all hobs to indicate this condition. (see
Fig. 16) The and icons are displayed alternatively
stove is on and the child lock is active. (see Fig. 17)
The and icons are displayed alternatively if any
is displayed on all hobs to indicate this condition. (see
Fig. 16) The and icons are displayed alternatively
The child lock is activated at this time and the icon
stove is on and the child lock is active. (see Fig. 17)
The and icons are displayed alternatively if any
The icon is displayed on all displays when the
Activating the Child Lock Function
Deactivating the child lock until the stove is turned o ;
Press front le hob selection key and minus key
Press front le hob selection key and minus
Press front le hob selection key and minus key
Press front le hob selection key and minus
Press the front le hob selection key again.

Page 18 Ceramic Hob User Manual
Operation Instructions
The icon is displayed on all displays. (see Fig. 19) The
and icons are displayed alternatively if any hob is
hot.
Press the key again. (see Fig. 22) This shall be
performed right a er the 2nd step. Child lock is
deactivated permanently. In other words, child lock
shall continue to be deactivated even if the unit is
turned o and on again.
Unit switches to stand-by mode a er these procedures.
However, the icon shall be displayed in case of a hot
hob even if the unit switches to stand-by mode. (See
Fig. 23)
Figure 19
Figure 20
Figure 22
Figure 23
Figure 21
The icon is displayed on all displays. (see Fig. 19) The
The icon is displayed on all displays. (see Fig. 19) The
and icons are displayed alternatively if any hob is
The icon is displayed on all displays. (see Fig. 19) The
and icons are displayed alternatively if any hob is
WARNING // Child lock is deactivated until the stove is turned o only with the steps performed
in this section. In other words, child lock shall be activated again if the unit is turned o and on
again. Thus, the child lock shall be activated whenever the stove is turned o and on.
WARNING // Child lock shall be deactivated in case of a power outage.
Activating the Child Lock Completely
The icon is displayed on all displays when the
stove is on and the child lock is active. (see Fig. 12)
The and icons are displayed alternatively if any
hob is hot. You may turn the stove on or o with the
key only.
key only.
stove is on and the child lock is active. (see Fig. 12)
The and icons are displayed alternatively if any
stove is on and the child lock is active. (see Fig. 12)
The and icons are displayed alternatively if any
The icon is displayed on all displays when the
Press front le hob selection key and minus
key simultaneously. (see Fig. 21) You shall
hear a short warning signal at this time. Then, remove
your ngers from the stove control panel.
Press front le hob selection key and minus
Press the key again. (see Fig. 22) This shall be
Press front le hob selection key and minus
However, the icon shall be displayed in case of a hot

Page 19Ceramic Hob User Manual
Upper left cooking area selection key
Upper left cooking area selection key
Upper left cooking area selection key
Plus key
Minus key
On / off key
Temperature display icon
45cm Built in Stove
Operation Instructions

Page 20 Ceramic Hob User Manual
Operation Instructions
NOTE // Unit becomes operational within 1 second a er it is plugged to the mains. All LEDs and
displays illuminate for 1 second.
WARNING // Residual heat display of each cooking area remains active until the measured glass
temperature is below + 60 °C.
WARNING // Electronic components remain active for 20 seconds. If there is no cooking level
within this period, unit switches to ‘‘off mode’’ automatically with a signalling sound.
Turning the Stove On
Residual Heat Display
Unit is turned on by pressing the key. The icon
is displayed on all displays. (See Fig. 1)
Figure 1
Unit is turned on by pressing the key. The icon
Unit is turned on by pressing the key. The icon
If the temperature of the glass over the hobs is above
+ 60°C, and icons are displayed on the display of
the relevant successively. ( = 0.5 seconds, = 0.5
seconds) (See Fig. 2)
Figure 2
If the temperature of the glass over the hobs is above
+ 60°C, and icons are displayed on the display of
the relevant successively. ( = 0.5 seconds, = 0.5
the relevant successively. ( = 0.5 seconds, = 0.5
+ 60°C, and icons are displayed on the display of
Turning the Stove O
Unit is turned o by pressing the key. (see Fig. 3)
You may turn o the unit by pressing the key even
if the child lock is active.
Figure 3
Figure 4
Unit is turned o by pressing the key. (see Fig. 3)
Unit is turned o by pressing the key. (see Fig. 3)
You may turn o the unit by pressing the key even
If the icon on the display of the stove is illuminated,
this means that the relevant hob is still hot. It may be
used for heating a small amount of food. (See Fig. 4)
WARNING // Residual heat display is not illuminated,
and thus it does not warn the user against heat in case
of a power outage.
If the icon on the display of the stove is illuminated,
Table of contents
Other Tisira Hob manuals

Tisira
Tisira TIT60 User manual

Tisira
Tisira TGF64E User manual

Tisira
Tisira TIT63E User manual

Tisira
Tisira TIT60 User manual

Tisira
Tisira TCT60 User manual
Tisira
Tisira TCT90 User manual

Tisira
Tisira tIs90b User manual

Tisira
Tisira TGWF30G User manual

Tisira
Tisira tIs90b User manual

Tisira
Tisira TG60 User manual
Popular Hob manuals by other brands

Hafele
Hafele PBZ4VI517FTB4SCO instruction manual
Siemens
Siemens ET6 MN31 Series instruction manual
FireMagic
FireMagic Diamond 32884-1 Installation and operating instruction
Adventys
Adventys INDUC STONE user guide
Electrolux
Electrolux EHC30200K user manual
Innocenti
Innocenti UBINDFX60PF instruction manual


