manuals.online logo
Brands
  1. Home
  2. •
  3. Brands
  4. •
  5. TitanGPS
  6. •
  7. GPS
  8. •
  9. TitanGPS TT1SPSATsolar User manual

TitanGPS TT1SPSATsolar User manual

These guidelines are meant to maximize
the performance of the unit.
STEP 1: Determine Installation Type
STEP 2:
Determine Mounting Location
QUICK INSTALL GUIDETT1SPSATsolar
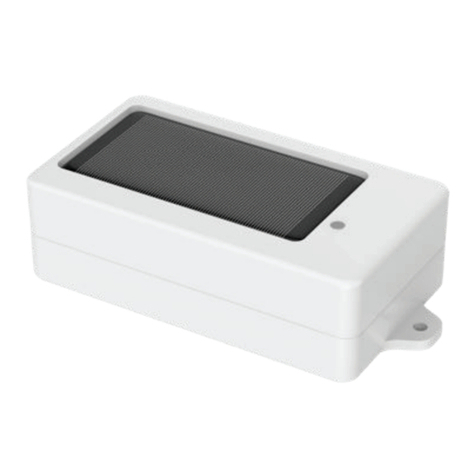
Device should be mounted face up on a flat horizontal surface that is
perpendicular to the sun with a clear view of the sky
Secure with double-sided adhesive tape and/or screw directly to the asset
If using double-sided adhesive tape:
Surface must be clean, smooth and dry
Ambient temperature must be above 10C
Apply at 80lb (350N) force to the asset for a minimum of three seconds to
achieve full bonding strength
Failure to adhere to these instructions could lead to the device becoming
detached from the asset in the field
If using screws:
Use existing mounting holes with four #6 machine screws (Pan head
recommended). Use 316 grade stainless steel for longevity
DO NOT use countersunk screws as this may damage housing
DO NOT over-tighten screws (DO NOT exceed 1.2 N.m (10 in.lb) torque)
Mounting hole diameter = 3.81mm (0.150”)
Depending upon the requirements, the TT1SPSATsolar can be installed in two
Option1: TT1SPSATsolar ONLY
Option2: TT1SPSATsolar with Input Cable (optional)
The input cable allows for transmission of up to two input statuses, as well as
connecting to a power source
There are two ways the inputs can be connected
Type A: “Dry Contact” – Input without voltage
Type B: “With Voltage” – Input with voltageways.
STEP 3: Complete Mounting and Wire Connections (if necessary)
Option 1: Mounting the device WITHOUT Input Cable
a) Mount device as per “Determine Mounting Location” recommendations
b) Proceed to “Testing the Device”
Option 2: Mounting the device WITH Input Cable
a) Connect Input(s) and/or power according to Input Types below
IMPORTANT: The Input TYPE must be pre-programmed into the device. If unsure of
which method to use, please contact us as incorrect installation may damage the device.
INPUT CONNECTIONS
POWER CONNECTION
IMPORTANT: Connect to 10-48V DC Only
b) Mount device as per “Determine Mounting Location” recommendations
c) Connect Input Cable into TT1SPSATsolar
d) Tighten Input Cable Connections (Be careful not to over-tighten)
e) Proceed to “Testing the Device”
Type A : “Dry Contact” – Input WITHOUT Voltage
IMPORTANT: If device programmed for Dry Contact input(s) then DO NOT CONNECT DIRECTLY
TO ANY POWER SOURCE Doing so may void the warranty.
INPUT1: White: Dry Contact 1 (Recommended for Ignition/Engine Status Input)
Dark Blue: Ground
INPUT2: Light Blue: Dry Contact 2
Green: Ground
Type B : “With Voltage” – Input WITH Voltage
IMPORTANT: If device programmed for “With Voltage” Inputs connect to 10 to 48V DCI
INPUT1: White: Ignition/Engine Status Input (+) (10 to 48V DC)
Dark Blue: Ground
INPUT2: Light Blue: Input 2 (+)
Green: Ground
Violet (+): Line Power + MUST FUSE within 1 foot of source (1 Amp Fuse)
Grey(-): Line Power-
IMPORTANT: Always be sure to “test” the device BEFORE sending the asset into the field
a) Move the asset outside so the TT1SPSATsolar has a clear view of the sky
b) If Input(s) connected, turn input(s) ON
c) Remove the Magnetic Grommet from the TT1SPSATsolar (Store for future use)
DO NOT remove the screw attaching the Magnetic Grommet, simply pull the grommet
over the screw to remove it
d) Login to the Titan GPS platform to ensure device reports at your location and show
Input status(es) as ON (May take up to 35 minutes for first report to come through)
OR
CARE AND USE
The clear plastic on the TT1SPSATsolar should be kept free of soil or debris to
maximize battery charging capacity
Solar panels produce the most electricity when they are perpendicular to the sun
Shading and weather conditions may negatively aect the charging of the batteries
from the solar panels
If the batteries of the TT1SPSATsolar are fully depleted, it is recommended to allow
the device to receive a full day (6+ hours) of adequate sunlight to fully charge the
batteries
If the clear plastic panel covering the solar panel becomes cracked, the device should
be replaced
The device should provide up to 10 years of maintenance-free operation based on
adequate sun exposure to recharge the battery pack. The internal battery pack is not
replaceable.
If the asset is to be stored indoors for extended periods of time, the TT1SPSATsolar
should be shut down be installing the Magnetic Grommet to avoid draining the
battery pack. Be careful to store the Magnetic Grommet when removed.
A fully charged TT1SPSATsolar should remain operational up to 6 months with a
clear view of the sky in the absence of sunlight if programmed with two GPS locations
per day
STEP 4: Testing the Device
QUICK INSTALL GUIDE
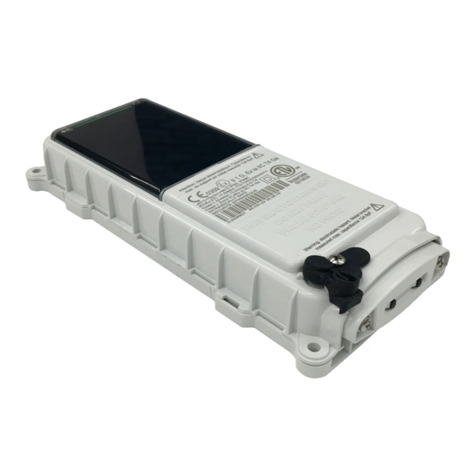
Magnetic Grommet
TT1SPSATsolar
CALL US
we’ll test with you!
1 855 287 4477 | 1-780-391-3800
8AM to 5PM Monday to Friday MST
titangps.ca
titangpstracking.com

Other TitanGPS GPS manuals

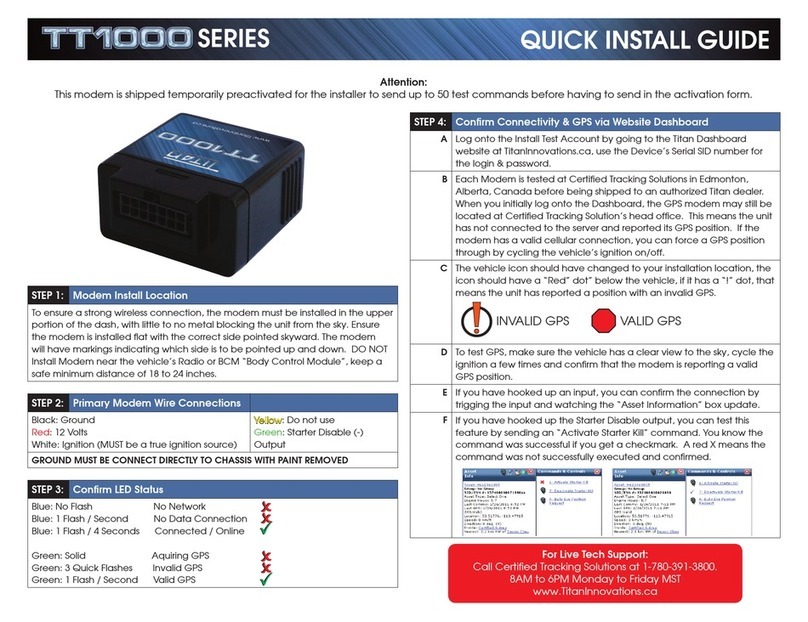
TitanGPS TT1000 Series User manual

TitanGPS

TitanGPS TT1000 Series User manual

TitanGPS TT13003G Series User manual

TitanGPS

TitanGPS TT13003G Series User manual

TitanGPS CP4 User manual

TitanGPS

TitanGPS CP4 User manual

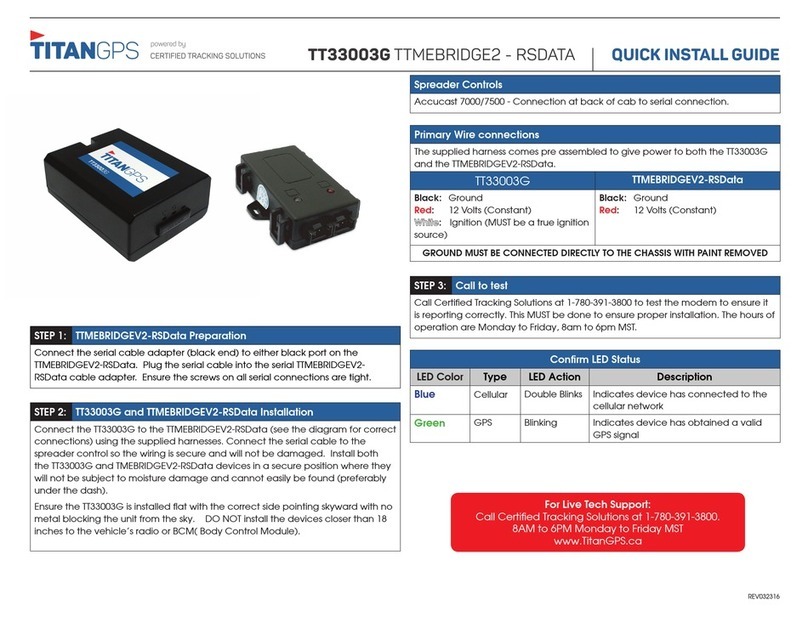
TitanGPS TT33003G User manual

TitanGPS

TitanGPS TT33003G User manual

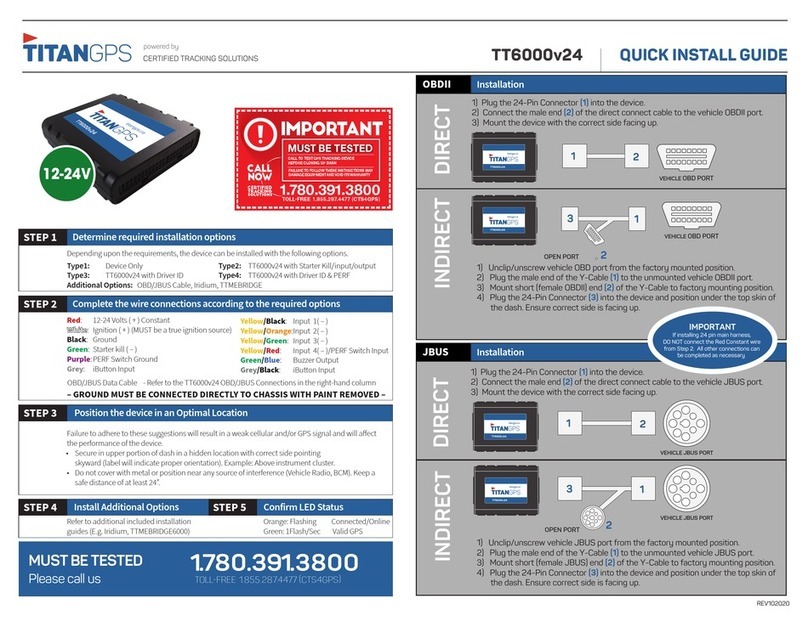
TitanGPS TT6000v24 User manual

TitanGPS

TitanGPS TT6000v24 User manual

TitanGPS TT6000V24 User manual

TitanGPS

TitanGPS TT6000V24 User manual

TitanGPS TT-IoTSolar User manual

TitanGPS

TitanGPS TT-IoTSolar User manual

TitanGPS TT4200 User manual

TitanGPS

TitanGPS TT4200 User manual

TitanGPS TT6000v24 User manual

TitanGPS

TitanGPS TT6000v24 User manual

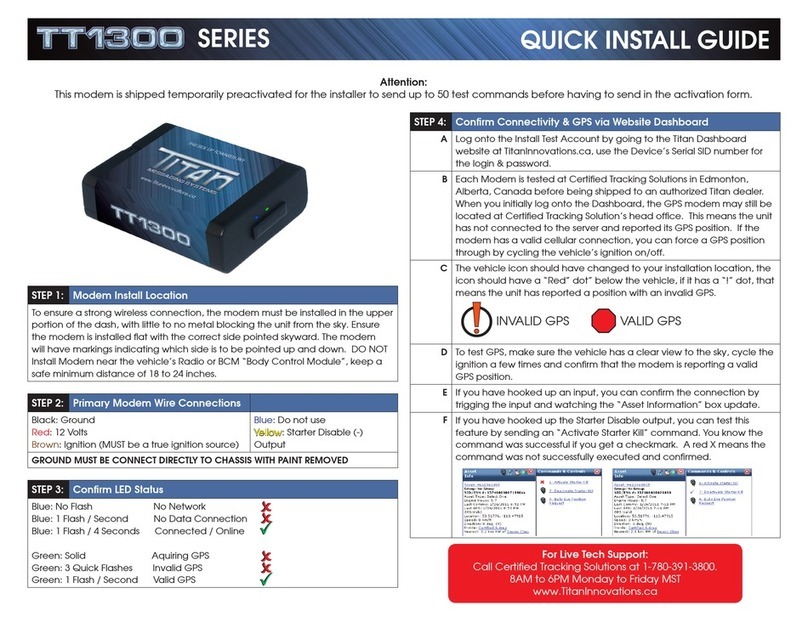
TitanGPS TT1300 Series User manual

TitanGPS

TitanGPS TT1300 Series User manual

TitanGPS TT1SPSATsolar User manual

TitanGPS

TitanGPS TT1SPSATsolar User manual

TitanGPS TT33003G User manual

TitanGPS

TitanGPS TT33003G User manual

TitanGPS TT3601i User manual

TitanGPS

TitanGPS TT3601i User manual

TitanGPS TT6000v24 User manual

TitanGPS

TitanGPS TT6000v24 User manual

Popular GPS manuals by other brands

Viewgate VTX900GPS user guide

Viewgate

Viewgate VTX900GPS user guide

Garmin GNS 480 pilot's guide

Garmin

Garmin GNS 480 pilot's guide

Pioneer AVIC-U220 quick start guide

Pioneer

Pioneer AVIC-U220 quick start guide

ROUTE 66 Mobile 7 WMS user manual

ROUTE 66

ROUTE 66 Mobile 7 WMS user manual

ESAB PAV instruction manual

ESAB

ESAB PAV instruction manual

Invion GPS-3V106-IUS Hardware instruction manual

Invion

Invion GPS-3V106-IUS Hardware instruction manual

BHCnav NAVA 200 owner's manual

BHCnav

BHCnav NAVA 200 owner's manual

Garmin GPSMAP 296 - Aviation GPS Receiver Features

Garmin

Garmin GPSMAP 296 - Aviation GPS Receiver Features

Garmin Oregon 600 owner's manual

Garmin

Garmin Oregon 600 owner's manual

Flexcom LK209B Installation and operating instructions

Flexcom

Flexcom LK209B Installation and operating instructions

Garmin GTS 8 Series installation manual

Garmin

Garmin GTS 8 Series installation manual

Neomatica ADM333 BLE Operation manual

Neomatica

Neomatica ADM333 BLE Operation manual

ARUSNAVI ELECTRONICS ARNAVI PLC user manual

ARUSNAVI ELECTRONICS

ARUSNAVI ELECTRONICS ARNAVI PLC user manual

Onwa KP-6299 Operator's manual

Onwa

Onwa KP-6299 Operator's manual

Tipronet TE-207S user guide

Tipronet

Tipronet TE-207S user guide

Vicon Vero quick start guide

Vicon

Vicon Vero quick start guide

Teltonika FMB920 Quick manual

Teltonika

Teltonika FMB920 Quick manual

Teltonika Telematics FMC880 Quick manual

Teltonika

Teltonika Telematics FMC880 Quick manual

manuals.online logo
manuals.online logoBrands
  • About & Mission
  • Contact us
  • Privacy Policy
  • Terms and Conditions

Copyright 2025 Manuals.Online. All Rights Reserved.