TitanGPS TT6000V24 User manual

QUICK INSTALL GUIDETT6000v24 TTMEBRIDGE6000
STEP 1: Determine Spreader Controller and Plow Types
There are numerous spreader controller types. Some of these types require
specific hardware and/or optional equipment.
- Determine the spreader controller type and refer to “Supported Spreader Controllers”
at the end of this document for specific instructions
- Determine which plows the asset is equipped with (Left/Right/Belly/Front etc)
- Ensure you have all hardware necessary to complete the installation
IMPORTANT: Refer to the AVL Spreader Setup section. Not completing the AVL setup
before connecting to the spreader controller can cause issues with some spreaders.
STEP 2: Plow Sensor Testing and Calibration
- Determine state of each plow sensor when the plows are down (if applicable)
- The sensors will be one of three states when plow is down (ground (-), positive(+)
or neutral)
- Some sensors are neutral and an additional relay will be needed. See the
diagram for wiring information.
- The sensors should change state when plow is raised 25% off of the ground. If
not, sensor calibration is required.
- Some spreaders including Accucast 7000 and Rexroth CS550 are data based
and do not require analog plow input connections.
REV062419
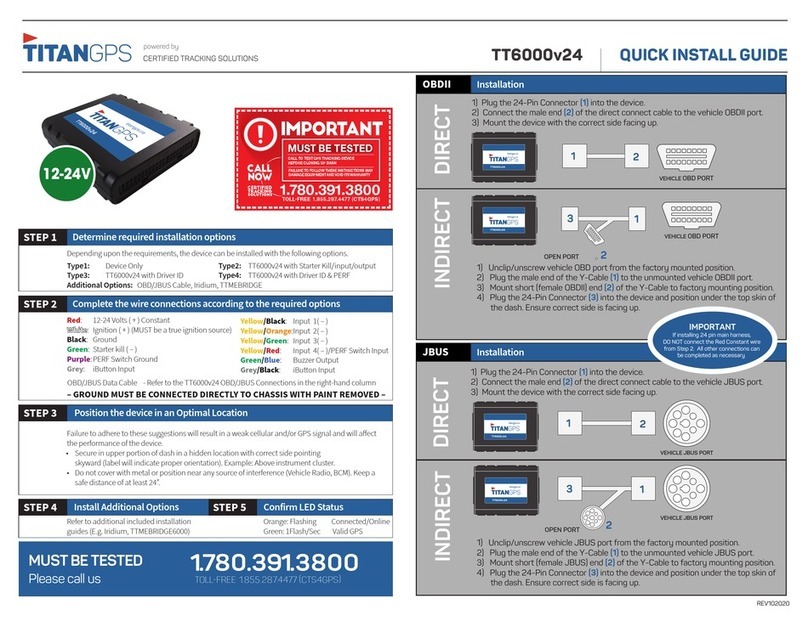
STEP 5: Position the TT6000v24 & TTMEBRIDGE6000 in an Optimal Location
Failure to adhere to these suggestions will result in a weak cellular and/or GPS
signal and will affect the performance of the device.
- Secure in upper portion of dash in a hidden location with correct side pointing
skyward (label will indicate proper orientation). Example: Above instrument cluster
- Do not cover with metal or position near any source of interference (Vehicle
Radio, BCM etc). Keep a safe distance of at least 24”.
STEP 6: Call Certified Tracking Solutions to test
Call Certified Tracking Solutions at 780-391-3800 to test all plow functions.
This MUST be done to ensure proper operation.
* Not Compatible with Dickey John Spreader’s
TTMEBRIDGE6000 Plow Input Detection and Monitoring
Positive* Negative
Input 1 Front Plow
Input 2 Belly Plow
Input 3 Left Wing
Input 4 Right Wing
Black/Brown
Black/ Green
Black/ Yellow
Black/Blue
Grey
Grey/Black
Green
Black/White
12-24V
IMPORTANT
CALL
NO
W
MUST BE TESTED
CERTIFIED
TRACKING
SOLUTIONS
1.780.391.3800
FAILURE TO FOLLOW THESEINSTRUCTIONS MAY
DAMAGEEQUIPMENTAND VOID ITS WARRANTY
CALL TO TESTGPSTRACKING DEVICE
BEFORE CLOSING UP DASH
TOLL-FREE 1.855.287.4477 (CTS4GPS)
b) Plow Sensor Wires
- Connect applicable wire from TTMEBRIDGE6000 to each plow sensor (If applicable)
- The sensors will be one of 3 states when plow is down (ground (-), positive (+) or neutral)
- If sensor shows neutral when down, an additional relay will be required.
See the diagram for wiring information.
- The sensors should change state when plow is raised 25% off of the ground (if not,
the sensor will need to be calibrated)
c) By default the billing wire will be connected to the ignition line of the TT6000. This
may be disconnected and re-wired to a physical “Billing” switch if necessary.
- Cut the wire as marked on the wiring diagram.
- Connect source wire to billing switch in such a way that the PINK billing wire
receives a positive signal with the switch ON.
- Ensure that the billing switch is connected so that if the switch is left on, it will be
turned off automatically if the vehicle is turned off
STEP 4: Continued...
Ensure that all connections have been made according to the full TT6000v24 Quick Install
Guide. Next complete the additional required TTMEBRIDGE6000 connections below.
Please refer to the "Wiring Harness & Diagram" section.
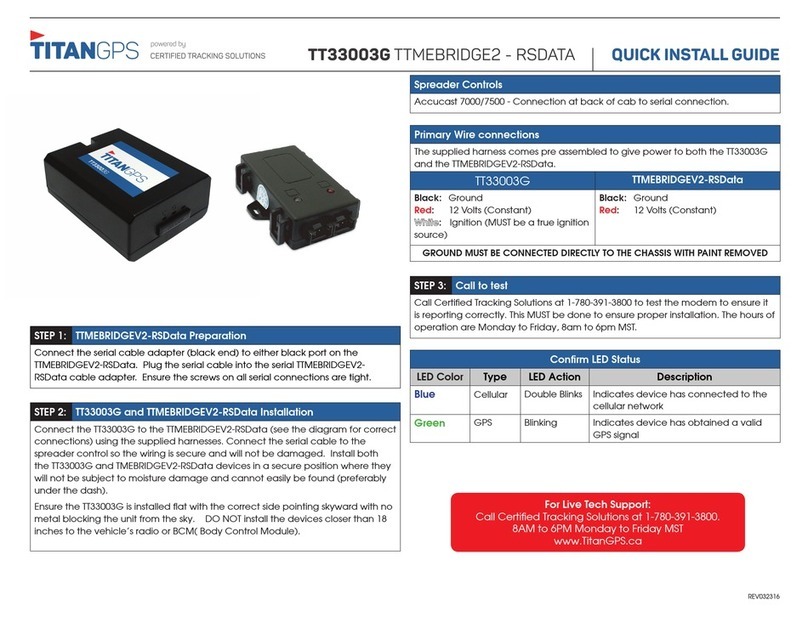
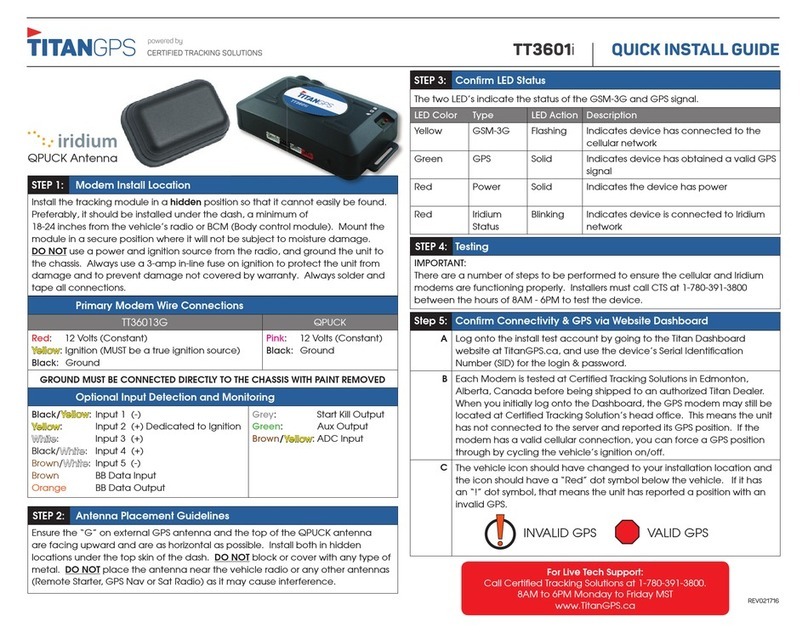
a) Connect Serial Cables
- Securely connect the supplied Serial Cable to the spreader control/AVL
cable located inside the vehicle
- Connect the supplied Serial Cable to TTMEBRIDGE6000 serial cable adapter
- See “Supported Spreader Controllers” page at the end of this document for
common controller/AVL cable locations
STEP 4: Complete wiring connections
STEP 3: Complete AVL Spreader Setup

Wiring Harness & Diagram
The use of an optional relay will
be required when the state of
the sensor is neutral when the
plow is down.
Constant 12V Ignition
Green - Left Plow (-)
Black/White - Right Plow (-)
Grey/Black - Belly Plow (-)
Grey - Front Plow (-)
Serial of TTMEBRIDGE6000 to
Output of Plow Controller
PLOW SENSORS
PLOW SENSORS
Billing Switch or Ignition
TTMEBRIDGE6000
TT6000
GND
Black White
*Connector color must match!
YELLOW - Do not connect
NOTE: Positive inputs
are not compatible with
DICKEY JOHN SPREADERS
WHITE
BLUE - To input of TTMEBRIDGE6000
BLACK (Plow Sensor)
RED - Ground (-)
Sections in diagram that are enlarged need to be connected
OPTIONAL
RELAY
If plow is up and sensor =
positive , then connect to
ground .
If plow is up and sensor =
ground , then connect to
ignition.
QUICK INSTALL GUIDETT6000v24 TTMEBRIDGE6000
Black/Yellow - Left Plow (+)
Black/Green - Belly Plow (+)
Black/Blue - Right Plow (+)
Black/Brown - Front Plow (+)
Blue
Red
Red
Black
Pink
White
Black
Brown
Black/Green
If connecting
billing to a
sepatare switch
cut here and
connect switch
Negative
Input
ONLY

QUICK INSTALL GUIDE
AVL Spreader Setup
ACCUCAST
CIRUS
DICKEY JOHN
3000 Model
5000 Model
7000 Model
TT6000v24 TTMEBRIDGE6000
The information below lists additional hardware required to complete an installation for
each supported spreader type. Some hardware may need to be obtained from the
spreader manufacturer. Please ensure you have all necessary hardware before beginning
the installation. We have also listed “Common” controller/AVL cable locations. Actual
locations can vary widely.
Plow input: Analog
Additional hardware required: None
Controller/AVL Cable location: Commonly found at the rear of the vehicle cab
near Accucast labeled junction box.
Otherwise, the control box itself will have a
physical female serial port to connect with.
Spreader Controller AVL Setup: No special setup required
Final Testing: Ensure vehicle is outside and in an area where
the plows can be used.
Plow input: Analog
Additional hardware required: None
Controller/AVL Cable location: Unused female lead is commonly found
coming out of or near the Accucast labeled
junction box at rear of vehicle or a physical
female serial port located below the AC5000
control box on right hand side if looking from
above control box downward.
Spreader Controller AVL Setup: No special setup required
Final Testing: Ensure vehicle is outside and in an area where
the plows can be used.
SpreadSmart
Stormguard XDS
Plow input: Data (No analog connections required)
Additional hardware required: None
Controller/AVL Cable location: Physical female serial cable lead commonly
located at ground level, near rear of
vehicle cab
Spreader Controller AVL Setup: No special setup required
Final Testing: Ensure vehicle is outside and in an area where
the plows can be used.
Plow input: Analog
Additional hardware required: None
Controller/AVL Cable location: Vehicle potentially contains multiple “control”
junction boxes on back wall of vehicle cab
and as such, will have to locate a female serial
cable lead and there could potentially be
more than one. Trial and error while on phone
with techs may be necessary.
Spreader Controller AVL Setup: No special setup required
Final Testing: Ensure vehicle is outside and in an area where
the plows can be used. Vehicle may need to be
driven to test certain functions.
Plow input: Analog
Additional hardware required: Requires custom Dickey John serial cable
adapter( Available from Certified
Tracking Solutions)
Controller/AVL Cable location: No common location
Spreader Controller AVL Setup: No special setup required
Final Testing: Ensure vehicle is outside and in an area where
the plows can be used. Vehicle may need to be
driven to test certain functions.
EPOKE
Plow input: Analog
Additional hardware required: None
Controller/AVL Cable location: Female serial cable lead commonly located at
rear of the vehicle cab toward passenger side
Spreader Controller AVL Setup: No special setup required
Final Testing: Ensure vehicle is outside and in an area where
the plows can be used.
Plow input: Analog /Data
Additional hardware required: a) Null Modem Connector
b) Mini Gender Changer
Controller/AVL Cable location: Data port directly on the spreader controller
Spreader Controller AVL Setup: BEFORE connecting the DB9 cable. Ensure that
the Telematics Message format is set to "String
Format 1". Changing settings while the DB9 is
connected will cause major errors on the XDS
and could cause the controller to revert to
factory default settings.
Final Testing: Ensure vehicle is outside and in an area where
the plows can be used.

QUICK INSTALL GUIDE
Supported Spreader Types - continued
TT6000v24 TTMEBRIDGE6000
FORCE AMERICA
Plow input: Analog
Additional hardware required: iButton key to enter calibration menu (from
spreader manufacturer)
Controller/AVL Cable location: Female serial cable lead commonly located
along back wall of vehicle cab near floor.
Spreader Controller AVL Setup: The FA5100 requires NUMEROUS controller
setting changes in order for data to be sent to
the TT6000 device. Please see the FA5100
Setup Guide available from Certified Tracking
Solutions for full details.
Final Testing: Ensure vehicle is outside and in an area where
the plows can be used.
FA5100
Compuspread CS440
Plow input: Analog
Additional hardware required: Requires an “AVL Event Logging Module” that
is specifically keyed to the vehicles VIN. This is
only available directly from Force America.
Spreader Controller AVL Setup: a) Plug in AVL Event Logging Module to plug on
harness (Diagram is available)
b) Connect serial cable to plug in same
location
c) Slide navigation stick right to calibration
d) Enter access code (Commonly “111111”)
e) Turn ON “AVL Setting” (Configuration/Enabled
Options/Event Logging = AVL)
f) Enable 30 second interval
(Configuration/Enabled Options/Event
Logging/Intervals/Enable time – Set to 30 sec)
NOTE: If successful you will see an “AVL” icon
at the top right of the screen
Final Testing: Ensure vehicle is outside and in an area where
the plows can be used.
Plow input: Data (No analog connections required)
Additional hardware required: a) Rexroth USB Programming Key
(Available from Rexroth)
b) Rexroth GPS / Temp Cable (Part# R987376776).
Available from Rexroth.
c) Null modem connector: This piece plugs into
the 6 foot serial cable. Available from
Certified Tracking Solutions.
Controller/AVL Cable location: Rexroth proprietary data cable will be threaded
into mating port on CS550 controller screen, at
bottom left of controller. Proprietary data cable
will have two serial cable leads on opposite side
from controller connection, one female and one
male. They will be labeled as “temp” and “AVL”.
The null modem adapter best fits between the
supplied serial cable and the AVL serial lead as
opposed to between the serial lead coming from
the TTMEBRIDGE6000
Spreader Controller AVL Setup: a) Insert Rexroth USB Programming Key BEFORE
controller is powered ON. This is located at
the top of the display.
b) Tap and hold “Gear” icon on bottom right
of controller screen (It will enter setup menu)
c) Check off “AVL” option
d) Exit setup menu
Final Testing: Ensure vehicle is outside and in an area where
the plows can be used.
FA6100
REXROTH
Plow input: Analog
Additional hardware required:
Rexroth Programming Key to enter simulation
mode (Available from Rexroth)
Controller/AVL Cable location: Female serial cable lead will be located near
floor at back wall of vehicle cab within short
distance from control box
Spreader Controller AVL Setup: None
Final Testing: Ensure vehicle is outside and in an area where
the plows can be used.
IMPORTANT: CS440 needs to be in simulation
mode. Refer to CS440 Setup Guide.
Compuspread CS550
This manual suits for next models
1
Other TitanGPS GPS manuals

TitanGPS
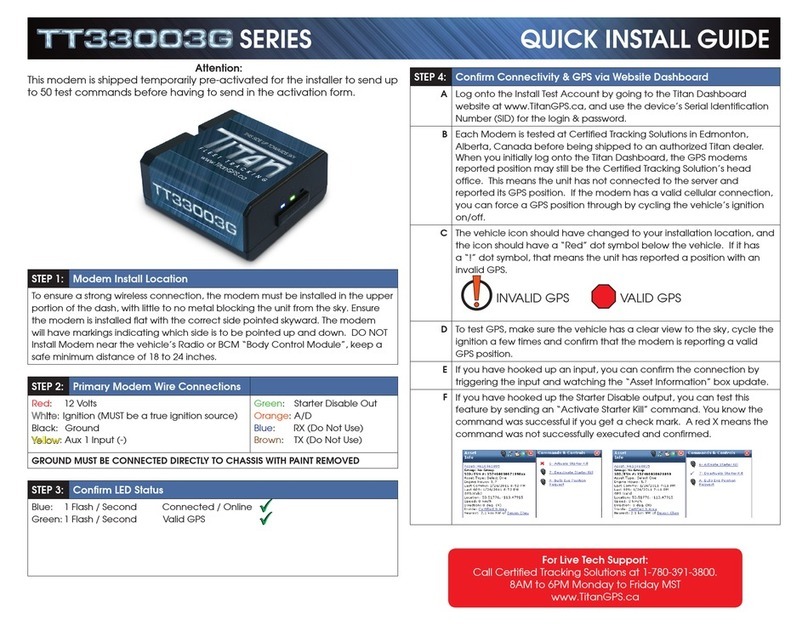
TitanGPS TT33003G User manual
TitanGPS
TitanGPS TT13003G Series User manual
TitanGPS
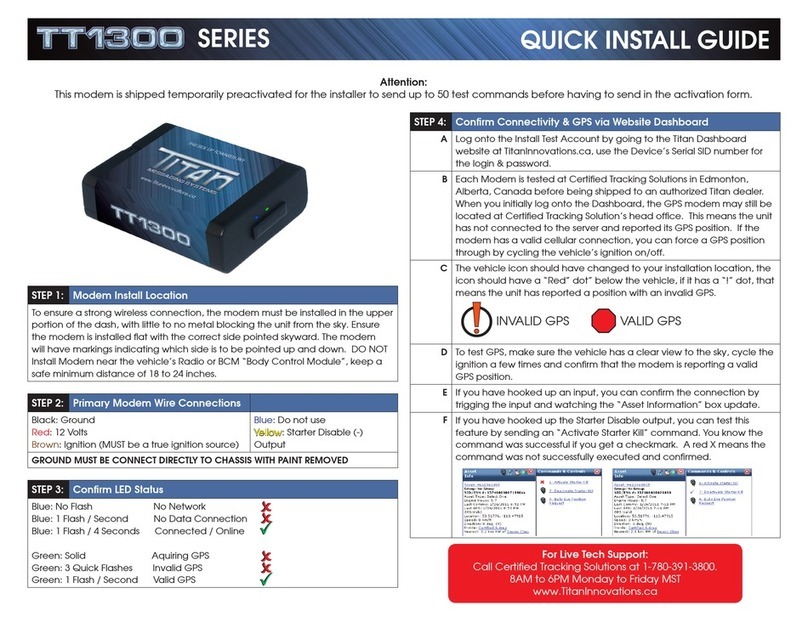
TitanGPS TT1300 Series User manual
TitanGPS
TitanGPS CP4 User manual
TitanGPS
TitanGPS TT1SPSATsolar User manual
TitanGPS
TitanGPS TT1000 Series User manual

TitanGPS
TitanGPS TT6000v24 User manual

TitanGPS
TitanGPS TT4200 User manual
TitanGPS
TitanGPS TT1SPSATsolar User manual
TitanGPS
TitanGPS TT-IoTSolar User manual
