!
"#$!
%&
%'
()*
"+
*,-.'/
$!*
"#$)
0
&**0
**0
/,"/12**-/1(-/,-
3110.'
04.005/30.6/
5!
"/3.0.6/
6! 6/1 ! !3 !1
"/3.0.6/1 ! !3 !1
&.
3!
2*.
)
4.)
)
$!7
8.
#%*
9.*.
5:';.
<'
;#*
;#
8.
=.
%3 ,/1,%*9.<
=.
8.
;#
;#*
<'
5:';.
9.*.
#%*
8.
$!7
)
4.)
)
2*.
3!
&. "/3.0.6/1 ! !3 !1
6! 6/1 ! !3 !1
"/3.0.6/
5!
04.005/30.6/
3110.'
/,"/12**-/1(-/,-
**082.3
&**0
0
"#$)
$!*
*,-$$.'/
"+
(,)*
%'
%&
"#$!
!
$.. #$
&** !
** !
)
"# $
). . . 0 . ' ! . ! . . .
..
) . .. ! .' . ! . !! . *. 3 ?.
.33'
&3!*!'.
%&&'(&)'%&'
#!.'..!'
. ! 3! . ! ! *.3
0 2.3 .! *' 3
. 3.@'?..'
*3
2...!*!.!.*.
!0 8/*..!
! . . .0' 3
.@'
A0.!..! >
.*.. 5 . . . *'
! . 3 *
*3.0.@'
%3!!0.'8!!
0 ! . .. @. . .
<!..@'
2. . *. ! .. /. .
. <0. %! *.3 0 0
*30'/<<0..'3
!. !!..@'
%B 1)&%B 1&%B ,)&%B ,
&%B )&%B &='
!3.....
...#...!33.
!..3.
@'&. ! 3 ! !
3.!.
%B 1)$ & %B 1$ & %B ,)$
& %B ,$ & %B )$ & %B
$&='
! 3 ! ! . '
.*.<. .*'3.
!#!. .!!*'
3.@
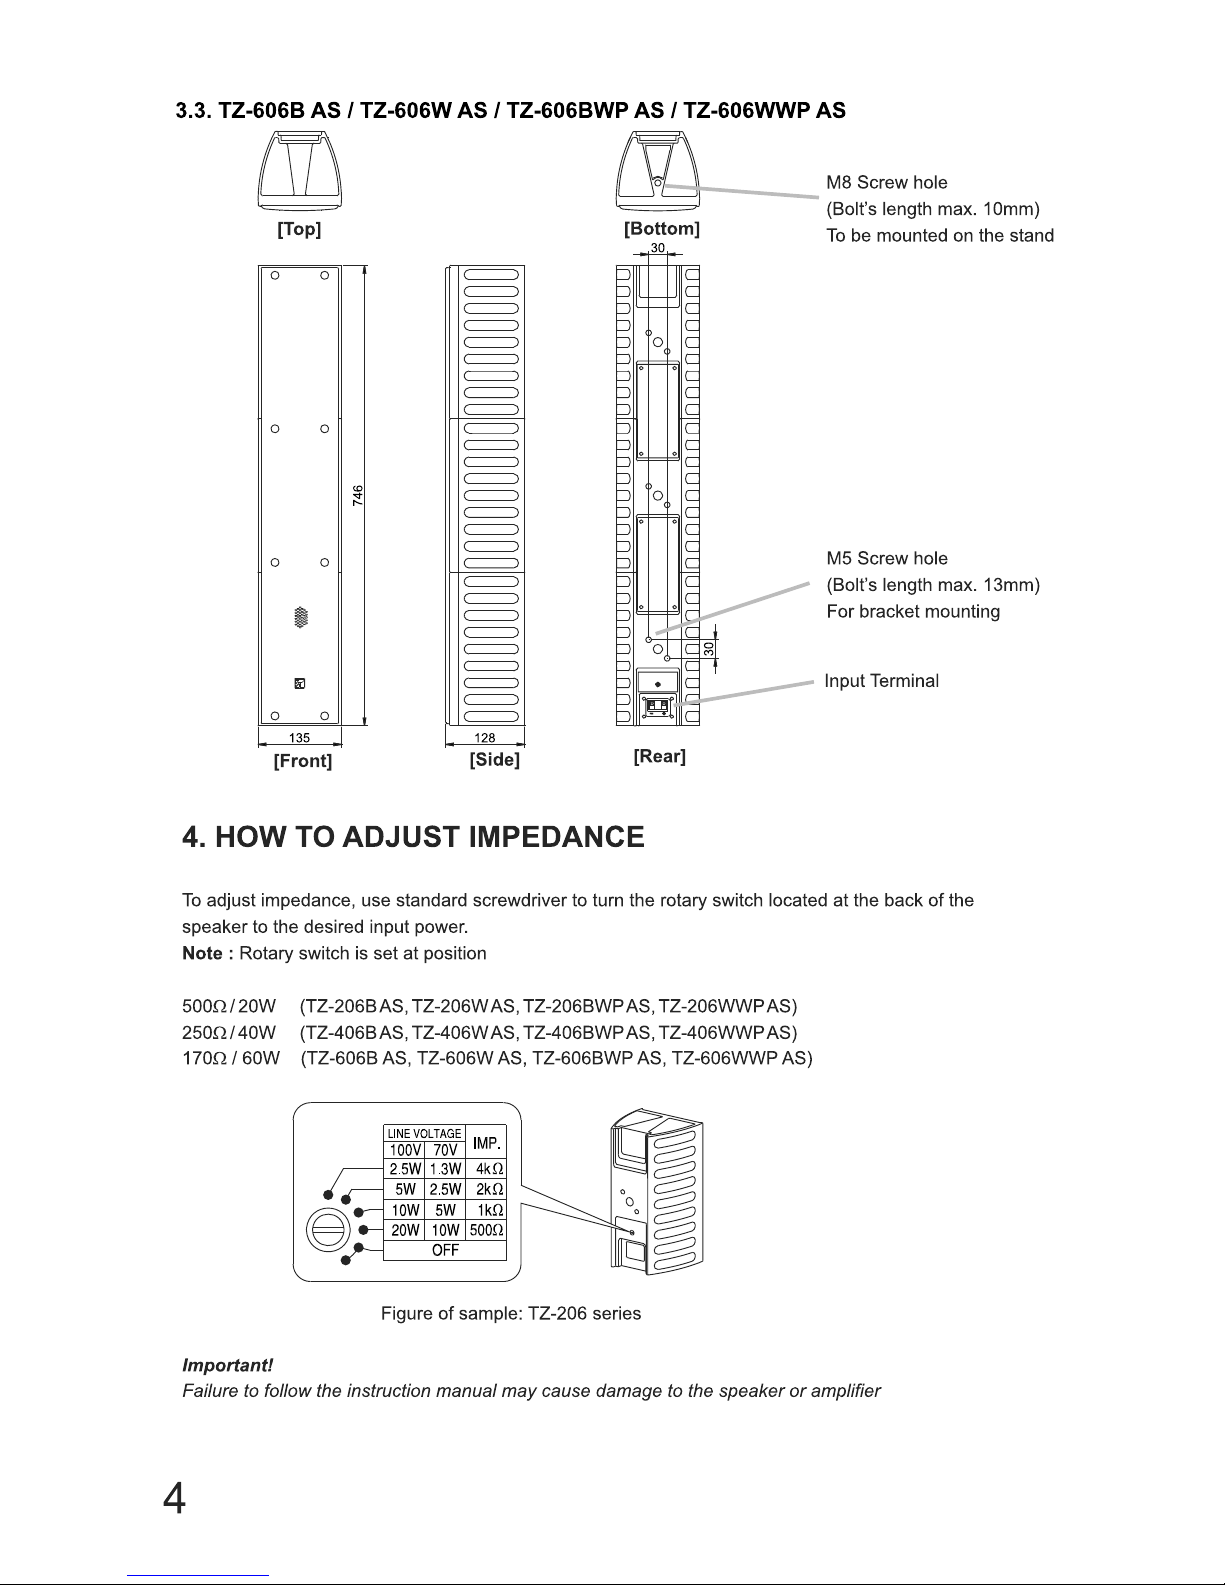
%&*+&'&),(-&'
&1.:...
!0./#! . *'.
@'
&<.!!3.!.<'@'
%.<!.*%A;782
=55 !.3.!
%&,(-&'&+.'+&&/
2..'!<'.0@.! !!
*'!.3.
@'.*3.!%!<.0@
.!*..!
2...!./..
* ! . .%! *.
..*'!
2...!3.!2.3
. *' ! . 3
.@'.*3.!
9.3!.'*3.!
.....!*.30'
.05...*'!.
3.@'
#.'!+.. !!
*! . ! . .
.@'
#.'!+.. !!
*!.*.@'..'
*3
2..'0 *3!
.00 !
!.3.
@'
2. . *. ! !* ..* . ..
<.) '3'*.
!..3!.
3.@'
1