1.
1.1.
1.
SAFETY PRECAUTIONS
SAFETY PRECAUTIONSSAFETY PRECAUTIONS
SAFETY PRECAUTIONS
● Pr or to nstallat on or use of the speaker un t, please read carefully the nstruct on manuals.
● You must thoroughly understand the safety precaut ons and mportant safety warn ngs stated n the
Instruct on manual.
•
After read ng, please keep the nstruct on manual for future use at any t me.
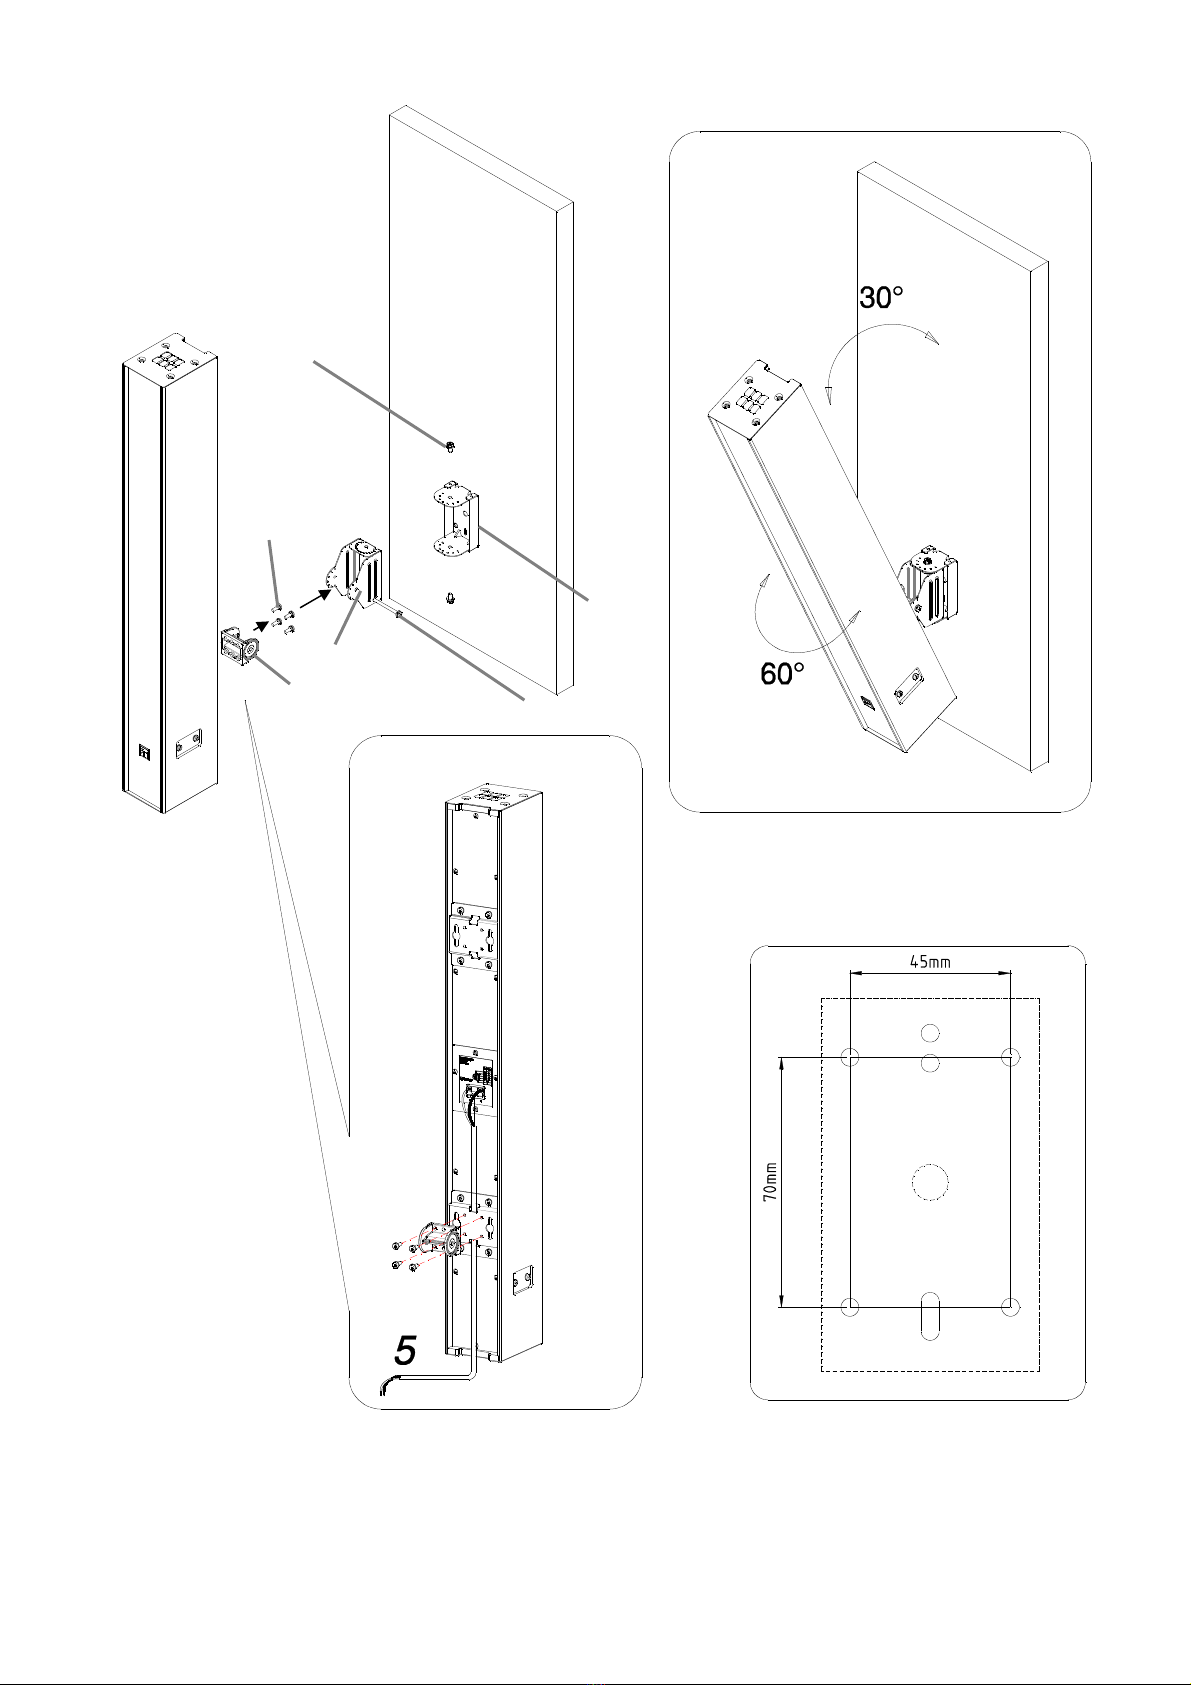
Install ng the speaker un t w th mount ng brackets
Install ng the speaker un t w th mount ng bracketsInstall ng the speaker un t w th mount ng brackets
Install ng the speaker un t w th mount ng brackets
•Mount the un t on a locat on strong enough to
support the we ght of the un t and mount ng
bracket. Do ng otherw se may cause the speaker
un t to fall and result n personal njury /
equ pment damage.
•Do not apply other methods to mount the
Mount ng Bracket other than the method
spec f ed n the nstruct on manual. Speaker
un t may fall and cause personal njury.
•Use the screw compat ble w th the compos t on
and structure of the wall. Do ng otherw se may
cause the speaker to fall and result n personal
njury.
•T ghten each screw securely. Ensure no loose
bolt after speaker un t s mounted to prevent t
from fall ng and caus ng personal njury.
•Do not mount on a locat on exposed to constant
v brat on because t may d smount or drop the
speaker.
•The speaker s des gned for ndoor use therefore
do not use t outdoors. Do ng otherw se may
br ng damage to the speaker or cause t to fall,
result ng n personal njury. If the speaker s wet
due to ra n, t may cause short c rcu t.
•Do not nstall or place the un t on locat ons that
are not stable, l ke on frag le table or on
slanted surface. Do ng otherw se may cause the
speaker un t to fall and result n personal njury.
•Do not mount the un t n a hum d room or poor
vent lat on. Bracket w ll eas ly get rusty f
mounted n such a locat on, caus ng the speaker
un t to fall and result ng n personal njury.
•It s w se to use safety w re due to the un t
we ght. Please consult w th your contractor the
us ng of safety w re.
When mount ng Speaker Un t
When mount ng Speaker Un tWhen mount ng Speaker Un t
When mount ng Speaker Un t
•At least 2 people are requ red to l ft t up or put t
nto the box. If the un t topples, t may cause
personal njury.
•Avo d the sharp edge of the un t to prevent any
njury.
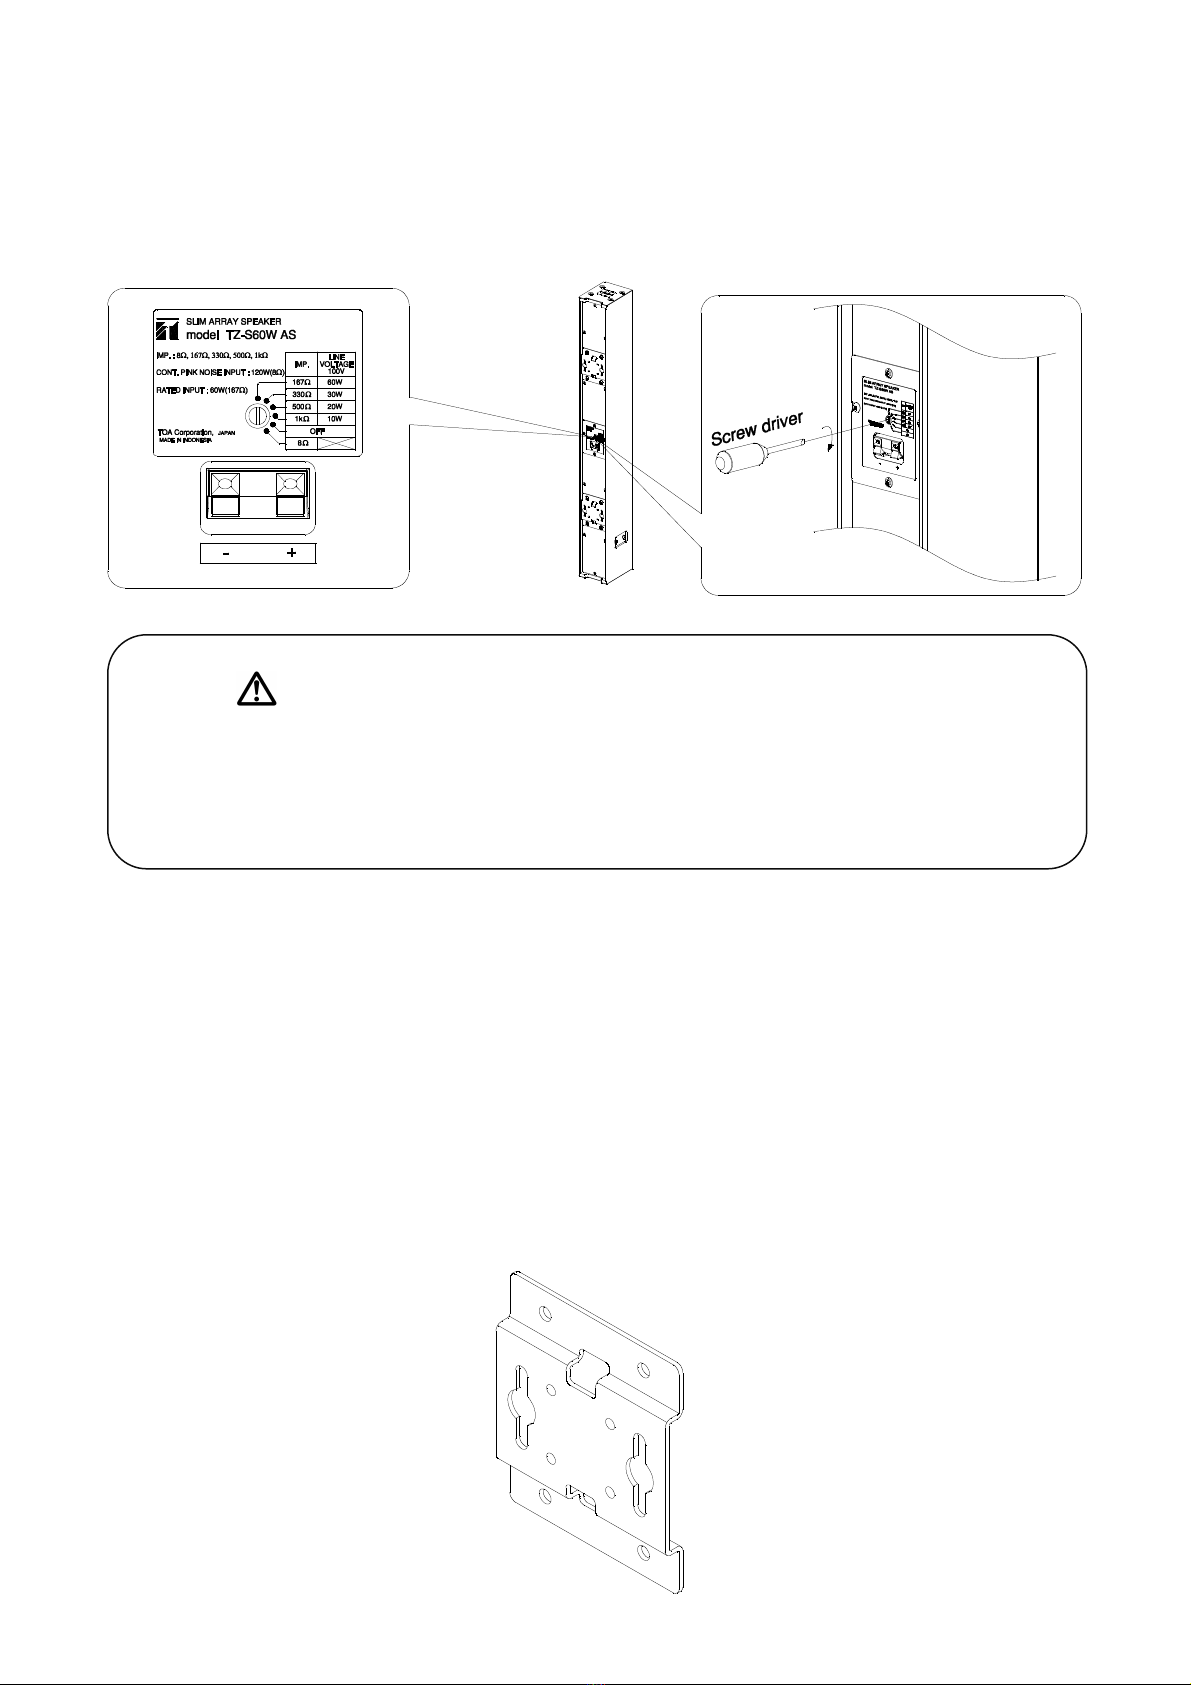
•To prevent short-c rcu t, ensure ampl f er s
TURNED OFF when connect ng t to the speaker
un t.
Ind cates a dangerous s tuat on, mproper act on may result n
death or ser ous njury.
WARNING
WARNINGWARNING
WARNING
CAUTION
CAUTIONCAUTION
CAUTION
Ind cates potent al danger, mprope
r act on may result n m nor
njury or equ pment damage.
WARNING
WARNINGWARNING
WARNING
CAUTION
CAUTIONCAUTION
CAUTION