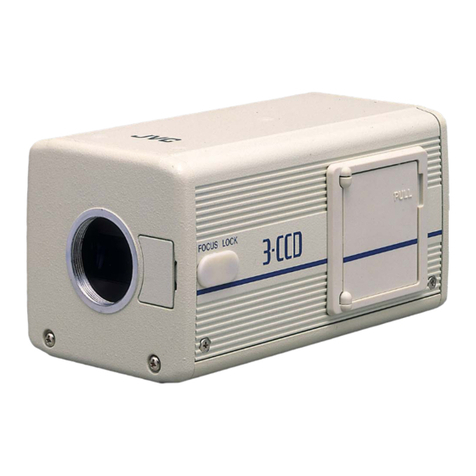
Tokyo Electronic CS3730DC User manual

D3000000A
B/W CCD Camera
Model CS3730DC
Operation Manual
TOKYOELECTRONICINDUSTRYCO.,LTD.
2001-08-21

D3000000A
BEFORE USE
-
GENERAL SAFETY INSTRUCTIONS
This instruction manual contains important information for the operator (user) and/or people
around him/her to avoid personal injury, or property damage to him/her or people around
him/her by using this product correctly. Prior to use, read this operation manual carefully to
fully understand its instructions for correct use.
OWNER’S RECORD
Please fill in the blank below the model name and product serial number, which is found on
bottom chassis of your device. Keep this number for your record.
Model Name
Serial No.
WARNINGS & CAUTIONS
[Definition of markings]
The meaning of each mark used in this instruction manual is given below.
DANGER
This mark warns the user that improper use, indicated with this mark,
may cause death or severe personal injuries against the user or people
around him/her.
CAUTION
This mark warns the user that improper use, indicated with this mark,
may cause personal injuries (*1) or material damages (*2) against the
user or people around him/her.
Notes
*1 : Personal injuries mean wounds, burns, electric shocks, and others for which the person
injured need not to be hospitalized nor to be cared for the long term.
*2 : Material damages mean any direct or consequential damages related to property or
material loss.
This mark indicates what the user SHOULD NOT DO. The details of things which the
user should not do are described next to this mark.
This mark indicates what the user MUST DO. The details of things which the user must
do are described next to this mark.
This mark indicates that the user must be alert against a possible DANGER. The details
of the danger which the user must be aware of are described next to this mark.
This mark indicates that the user are given a CAUTION against possible hazards. The
details of the caution which the user must be aware of are described next to this mark.

D3000000A
Handling Precautions
DANGER
MUST
If any overheating sign is observed, discontinue use immediately.
In the event that smoke, smell, or any other overheating sign is observed, turn its
power switch OFF immediately, and remove its camera cable from camera
connector. Do NOT try to continue to use your camera. To do so in spite of a
clear sign of a malfunction invites a fire, an electric shock hazard, or any other
serious damage. In such case, after confirming that there is no risk of a fire
accident, contact us or our dealer/distributor through which you purchased this
device for repair service. To avoid hazard, do NEVER attempt to repair it
yourself.
MUST
If any malfunctioning sign is observed, discontinue use immediately.
Do NOT try to use this device when it is obviously malfunctioning. (Example: No
images on the monitor) In the event of a malfunction, turn its power switch OFF
immediately, and remove its camera cable from camera connector. In such case,
contact us or our dealer/distributor through which you purchased this device for
repair service.
MUST
If any liquid gets into the device, discontinue use immediately.
In the event that water, or any other type of liquid gets into the body, do NOT try
to continue to use the device. To do so invites a fire or an electric shock hazard. In
such case, turn its power switch OFF immediately, and then remove its camera
cable from camera connector. After that, contact us or our dealer/distributor
through which you purchased this device for repair service/technical advice.
Unplug
If any foreign object gets into the body, discontinue the use immediately.
In the event that grits, small particles, or any other foreign objects get inside, do
NOT try to continue to use the device. To do so invites fire or electric shock
hazard. In that case, turn its power switch OFF immediately, and then remove the
plug from the outlet. After that, contact us or our dealer/distributor from which
you purchased this device for repair service/technical advice.
Unplug
If any outer strong impact is given to this device, discontinue the use immediately.
In the event that this device is dropped onto the ground, or its cabinet is damaged,
turn its power switch OFF immediately, and remove the plug from the outlet. Do
NOT try to continue to use the device. To do so invites fire or electric shock
hazard. In such case, contact us or our dealer/distributor from which you
purchased this device for repair service.
NEVER pull apart
Do NOT disassemble this device.
Do NOT attempt to pull apart, repair, or modify your camera yourself. To do so
might lead to a fire or an electric shock accident. Contact us or the
dealer/distributor from which you purchased the device for repair/modification.
DON’T
Do NOT supply any power other than specified.
This device is designed to work only under specified voltage. Do NOT attempt to
supply the device with power other than specified. Supplying the device with any
unspecified power invites a fire or an electric shock hazard.
(CS3730DC --- DC+12V)

D3000000A
Avoid
Do NOT place the device unstably.
Do NOT place the device on an unstable table, slanted surface, etc.. Make sure
that the device do not fall nor roll over to prevent an accident.
Avoid
Do NOT place any potentially-hazardous things on this device.
Do NOT place any things on the device which may, if it gets into the inside of the
body, damage the inner parts of the device (such as a flower vessel, glass,
cosmetics, a container filled with liquids or chemicals, as well as small metal parts,
etc.). If tumbled, the liquids inside the bottle, etc. may get into the chassis, causing
fire or electric shock accident.
Avoid
Do NOT insert any foreign object through air-vent
Avoid inserting any foreign object, especially metal part, combustible, through
ventilation slits. To do so may cause fire or electric shock accident.
Avoid
Do NOT damage the power cord.
Do NOT damage, break, re-process, nor bend forcefully the power cord. Pulling
forcefully/Twisting/Placing a heavy object on/Applying heat on the cord should
also be avoided. Otherwise, the cord may be damaged, causing a fire or an electric
shock accident. If the cord is damaged, contact us or our dealer/distributor from
which you purchased this device for repair service.
Avoid
Do NOT remove the protective cover
Avoid removing its protective cover. If you touch the inner high-voltage part, you
might get electrically shocked. For inner part/circuit checkup, maintenance, or
repair, contact us or the dealer/distributor from which you purchased this device.
Handling Precautions CAUTION
Unplug
Unplug the power-plug when the your device is not in use.
For safety, make sure to unplug the power-plug before you give your device a
cleanup, or when it is not used. Keeping the power-cord connected might invite
fire or electric shock hazard.
Avoid
Do NOT expose your device to direct sunlight, nor intensive heat.
Do NOT place this device where it is exposed to direct sunlight, dust, or in a high
temperature condition. To do so may cause the inner temperature of the device to
go up, resulting in burning-down of inner parts, circuits or fire accident.
Avoid
Do NOT attempt to make connection before turning power off
Make sure to check the CCU power is OFF before connection. Otherwise, you
might get an electric shock.

D3000000A
Avoid
Do NOT pull the cord itself
When disconnecting the power-plug out of the outlet, make sure to hold the plug,
and then pull it out. Do NEVER try to pull the cord itself. Otherwise, the cord
may be damaged or broken, leading to a fire or an electric shock accident.
Avoid
Do NOT handle the power cord with your hand in an wet condition.
Do NOT plug in/out the power cord with an wet hand. Otherwise, it may cause an
electric shock accident.
Avoid
Do NOT block ventilating slits.
You should avoid;
nPlacing your device upside down, or with wrong side up.
nInstalling your device in a poor natural draft condition, recessed area.
nPlacing your device on carpet, cushion.
nPutting a tablecloth, curtain on your device.
Blocking the ventilation slits prevents inner heat from escaping, which might lead
to a fire accident.
Avoid
Do NOT place your device too close to a heater.
Do NOT place your device or its power cord too close to any heating appliance.
Otherwise, the coating of its switch and/or power-cord may melt, leading to a fire
or an electric shock accident.
Avoid
Do NOT use chemical solvent for cleanup.
When giving your camera a cleanup, avoid using a benzene, alcohol, and thinner.
These chemicals might cause its coating or markings to come off or become
degraded.
Avoid
Do NOT “hot-plug”the connector.
Before connecting/disconnecting a connector, make sure that the power of a
power unit is turned OFF. Otherwise, it may cause a malfunction or an electric
shock accident.

D3000000A
RESTRICTION FOR USE
Avoid irregular signal interface.
Do not attempt irregular signal interface other than specified. Under signal interface other than
recommended/specified in this instruction manual, the device might fail to exert the maximum
performance. In much worse case, if you continue to use your device under incorrect signal
interface, part(s) of inner circuits might burn down.
DISCLAIMER (LIMITED WARRANTY)
We assume no responsibility and shall be held harmless for damage or loss incurred by the user
in the following cases.
1.In the case where damage or loss is caused by fire, earthquake, or other acts of Gods, acts
by a third party, misuse by the user deliberately or erroneously, or use under extreme
operating conditions.
2.In the case where any indirect, additional, consequential damages(e.g. loss of expected
interest, suspension of business activities) are incurred as results of a malfunction or
non-functioning of this device, we shall be exempted from assuming responsibility for such
damages.
3.In the case where damage or loss is caused by incorrect use which is not in line with the
instructions given in this operation manual.
4.In the case where damage or loss is caused by a malfunction resulting from bad connection
with other equipment.
5.In the case where damage or loss is caused by repair or modification done by the user.
OTHER INSTRUCTIONS
Do NOT use power other than specified
Be sure to use DC12V power supply. The camera is designed to work only under the specified
voltage. Do NOT attempt to drive the camera with the power other than DC12V. Operating the
camera under power other than DC12V invites a fire or a electric shock hazard.
Avoid intensive light
Do NOT expose the camera’s image-pickup-plane to sunlight or other intense light directly. If the
part of CCD is exposed to spot-intensive light, you might get a picture problem like blooming
and/or smear. You might observe vertical stripes on your monitor if your camera is exposed to
sunlight (or any other intensive light), however, this is not a malfunction. Redirect your CH
(camera-head) to different directions in such case.

D3000000A
Use under right operation condition
This equipment is designed and guaranteed to work under the temperature range of 0 to 40 degrees
C and 30 through 90% humidity range. Avoid using theequipment beyond that limits.
Handle with care
Take care not to drop the equipment, nor give strong impact, as this may cause breakdown.
Do NOT tamper with switches
Read this operation guide thoroughly before you touch switches and adjusters on the rear panel. Do
NEVER attempt to disassemble the camera and/or tamper with any inner switches, potentiometers,
etc.
Avoid liquid
Avoid placing the camera where it is likely to be splashed with water or any other fluids. Operating
the camera with its inner parts/circuits in an wet condition might cause a damage or an electric shock
accident.
Avoid placing near TV/radio
This camera might cause an interference (e.g. noise) if used around radio / TV set. In such a case,
change the location of your camera (or radio / TV).
Abnormal operation
In the event that any abnormal condition is observed, turn the power switch OFF immediately. Do
NOT try to continue to use the camera. To do so reckless of visible signs of malfunction invites a
fire, an electric shock hazard, or any other serious damage to the camera. In such case, contact us or
our dealer/distributor from which you purchased the camera for repair service.

D3000000A
CONTENTS
1. PRODUCT DESCRIPTION
2. FEATURES
3. CONFIGURATION
4. OPTION UNIT
5. DESIGNATION OF EACH PART
6. HOW TO MOUNT YOUR CAMERA
7. CONNECTION
8. FUNCTION OF EACH SWITCH / MODE
9. TIMING CHART
10.SPECIFICATIONS
11.SUPPLEMENTAL DRAWINGS

1
1. Product Description
Model CS3730DC is a one-piece-type (single-body) B/W CCD camera employing a 1/2 type
all-pixel-data readout CCD. This model has twice driving frequency of conventional models to
achieve fast-speed data-processing. The model is suited for high-speed, high-resolution image
processing use.
2. Features
(1) Double-speed scan
Model CS3730DC reads out image-data twice as fast as conventional CCD cameras do.
(2) All pixel's data readout
With all-pixel-data-readout CCD built in, CS3730DC readsout image-data in approximately
1/100 sec. Also fitted is frame-shutter, which reads out all data even under RTS mode.
(3) High vertical resolution
As all pixel's data are read out even under RTS (Random Trigger Shutter) mode (in
1/100 sec.), images with no deterioration in vertical resolution are obtained.
(4) Square grid pattern CCD
Pixel's in CCD are aligned in a square grid pattern. This makes it easier to perform computation
correctly for image processing use.
(5) External Sync.
The camera is switched over to external synchronization operation automatically when external
HD/VD signal is input.
(6) Random trigger shutter function
With a built-in RTS (Random Trigger Shutter), the camera’s CCD startslight-exposure in
synchronization with external trigger signals. This function enables the camera to capture
fast-moving subjects at constant position for precise image processing.
(7) Restart / Reset
Under the restart / reset mode, this model can capture images at an arbitrary timing cued by
external VD signal.
(8) Multiple shutter
With this shutter, this model capture images at an arbitrary timing cued by external trigger signal,
and then outputs video at an arbitrary timing cued by external VD signal.
(9) Partial-scan (Option)
Under the partial scan mode, only 1/2 or 1/4 screen center portion of image information is read
out, resulting in a faster operation.
lThe function/features noted as “option”or shown with the OPTION mark in this document is
available as optional function/feature (= Production on order) and not provided as standard
function. Please contact our sales staff for details.
lUnder standard version, partial-scan function is not available. (Normal mode only)

2
3. Configuration
(1) Camera body 1
(2) Accessory
Operation Manual (English / Japanese) 1
4. Optional Accessories
(1) DC SYNC IN cable (Model name: CPRC3700)1
(2) Camera adapter (Model name: CA170) 1
(3) Camera mounting kit 1
lPlease contact our sales staff for details.

3
5. Designation of Each Part
(5-1) Front-view
(5-2) Rear-view
(5-3) Bottom-view
Lens-mount
DC IN / SYNC Connector
MANU Gain Adjustment
Potentiometer
DIP SW
Camera Mounting Screw Holes
*See Section 6 How To Mount Your
Camera for details.
DC IN / SYNC Connector
Lens-mount

4

5
6. How To Mount Your Camera
(1)Option 1 : Using a camera tripod fixing kit [Tripod screws (1/4-20UNC)]
Use an optional tripod fixing kit to fix the camera onto the tripod.
(See the diagrammatic sketch shown below)
: Tripod : Comes With Mounting Hardware
: + Screw (M3X8) : Mounting Screw
: Parts Number
(2)Option 2 : Using the mounting holes (Bottom side)
Put M3 screws through these holes to fix the camera. Be sure to use screws which are shorter than
specified length. Longer screws may damage the inner circuit board.
To fix your camera by using mounting holes (a) above (= 2 places), be sure to use 3mm or
shorter screws.
To fix your camera by using mounting holes (b) above (= 4 places), be sure to use 5mm or
shorter screws.
To fix your camera by using mounting holes (c) above (= 2 places), be sure to use 5mm or
shorter screws.

6
7. Connection
7-1. Connection example
Camera body
(Rear side)
Note: Make sure that video output is correctly 75-ohm terminated.
AC100V
50/60Hz
HIGH-75VIDEO IN
VIDEO
OUT
Video Monitor (Rear side)
BNC
BNC
Video Cable
*These connectors are to be
connected to a sync generator if your
application so requires.
BNC
HD
BNC
VD
DC IN/SYNC cable
CPRC3700
Camera Adapter
CA170
TIRG IN WEN OUT HD IN
CLK OUT
VD/VS(SYNC) IN
VIDEO.1 OUT VIDEO.2 OUT CAMERA
AC100V 20W
50/60Hz
TYPE TP2197A1 TOKYOELECTRONICINDUSTRYCO.,LTD. MADE IN JAPANCA170
AC100V
50/60Hz

7
7-2. DC IN/SYNC connector
(1)Compatible connector: HR10A-10P-12S (HIROSE ELEC.)
(2)Pin layout
Pin No.
Signal Name
1
DC12V GND
2
DC12V
3
VIDEO GND
4
VIDEO 1 OUT
5
GND
6
HD IN
7
VD IN
8
VIDEO GND
9
VIDEO 2 OUT
10
WEN OUT
11
TRIG IN
12
PARTIAL IN (OPTION)
*1: The 12 pin is provided for partial signal input under optional partial-scan mode.
lThe function/features noted as “option”or shown with the OPTION mark in this document is
available as optional function/feature (= Production on order) and not provided as standard
function. Please contact our sales staff for details.
lUnder standard version, partial-scan function is not available. (Normal mode only)
*2: Before connecting / disconnecting your connector, make sure to confirm that the power of power supply unit is
in OFF position to avoid breakdown.
*3: The GND pin is grounded to the camera chassis.
8. Function of Each Switch / Mode
8-1. Camera function
8-1-1 GAIN selection (See 8.2 for setting details) [Camera rear-panel DIP SW]
--- Switches sensitivity setting
(a) FIX: Factory-prefixed gain
(b) MANU: Gain is adjustable via the manual gain potentiometer (M.GAIN)
8-1-2 Video output mode selection (See 8.2 for setting details) [Camera rear-panel DIP SW]
--- Switches video format
(a) 1/100I: 1/100s ----- 2:1 Interlace mode (Dual tap)
--- ODD field images and EVEN field images are output in 1/100 second in interlace mode
via VIDEO 1 OUT and VIDEO 2 OUT.
VIDEO1 OUT
VIDEO2 OUT
Image A
ODD Image B
EVEN Image C
ODD Image E
ODD
Image D
EVEN
Image D
ODD
Image A
EVEN Image B
ODD Image E
EVEN
Image C
EVEN
ODD Phase EVEN Phase
ODD Phase
ODD Phase EVEN Phase ODD Phase
EVEN Phase ODD Phase EVEN Phase ODD Phase
WEN OUT

8
(b) 1/50N: 1/50s ----- Non-interlace mode (Single tap)
--- All pixel data is output only through VIDEO 1 OUT in 1/50 second.
lCorrect output signal does not come out from VIDEO 2 OUT.
8-1-3. Shutter mode selection (See 8.2 for setting details)
--- Switches shutter modes / There are 4 shutter modes.
8-1-3.(1) NOR mode Normal electronic shutter
Exposure control via internal sync signal
8 positions, including OFF, 1/250s, 1/500s, 1/1000s, 1/2000s,
1/4000s, 1/8000s, 1/20000s
8-1-3.(2) RDM mode Random trigger shutter
Exposure control via ex-trigger input
Non-reset or V-reset
Exposure-time setting: Inner DIP SW or Ex-trigger pulse width
8-1-3.(3) Multiple Multiple shutter
The camera goes into multiple shutter mode when more than one
trigger signal input is made before external VD input.
8-1-3.(4) R.R. Restart / Reset
The R.R. function is activated by external VD signal. Under the
R.R. mode, you can get an arbitrary shutter speed slower than
normal shutter or RTS.
8-1-4.Partial-scan mode selection OPTION (See 8.2 for setting details)
Three types of partial scan modes are available.
8-1-4.(1) 1/2 partial-scan mode
8-1-4.(2) 1/4 partial-scan mode
8-1-4.(3) Programmable partial-scan mode
lThe function/features noted as “option”or shown with the OPTION mark in this document is
available as optional function/feature (= Production on order) and not provided as standard
function. Please contact our sales staff for details.
lUnder standard version, partial-scan function is not available. (Normal mode only)
8-1-5.External-sync input impedance selection (See 8.3 for setting details)
There are two types of external-sync input impedance.
8-1-5.(1) High-impedance
8-1-5.(2) 75-ohm
8-1-6.External trigger signal input polarity selection (See 8.3 for setting details)
There are two types of external trigger signal input polarity.
VIDEO1 OUT
Image C
Image A Image B
WEN OUT

9
8-1-6.(1) Positive (Rising-edge)
8-1-6.(2) Negative (Falling-edge)
8-2. Camera rear-panel DIP SW and Manual GAIN adjustment potentiometer
(1) MANU gain adjustment potentiometer
When you turn this potentiometer clockwise, the camera’s sensitivity goes up. This adjuster is
enabled when the DIP SW #4 pin (GAIN selection) as detailed below is set in ON position.
(2) DIP SW
No. SW Function SW Status Selected Function
1
2
3
E shutter-speed setting
ED Please refer to the E shutter-speed table
(Table 1)
OFF Factory setting
4GAIN selection
GAIN.SWON Setting via GAIN potentiometer
OFF 1/100s 2:1 interlace mode
5VIDEO output mode selection
VIDEO.MDON 1/50s non-interlace mode
6
7Exposure time setting
EXP Please refer to the exposure time setting
table (Table 2)
OFF Non-reset
8RTS mode setting
SMDON V reset
9
10 Partial-scan mode setting
PARTIALOPTION Please refer to the partial-scan mode
setting table (Table 3)
[NOTES]
lThe factory setting is shown with boldface underlined font.
lThe function shown with the OPTION mark in this document is available as optional function (=
Production on order) and not provided as standard function. Please contact our sales staff for
details.
lUnder standard version, partial-scan function is not available. (Normal mode only)
1
O
N
2
3
4
5
6
7
8
9
10
Manual GAIN potentiometer
DIP switch

10
Table 1E-shutter speed setting
E-shutter speed No.1 No.2 No.3
OFF OFF OFF OFF
1/250s ON OFF OFF
1/500s OFF ON OFF
1/1,000s ON ON OFF
1/2,000s OFF OFF ON
1/4,000s ON OFF ON
1/8,000s OFF ON ON
1/20,000s ON ON ON
[NOTES]
lDon’t set E-shutter SW in OFF under RTS mode.
lThe factory setting is shown with boldface underlined font.
Table 2Exposure-time setting
Exposure-time setting No.6 No.7
DIP SW setting OFF OFF
TRIG signal pulse width ON OFF
Restart / Reset enabled OFF ON
* TEST (Not assigned) ON ON
[NOTES]
lRestart / Reset is enabled when E shutter-speed SW is in OFF.
lThe factory setting is shown with boldface underlined font.
Table 3Partial-scan mode switching OPTION
Exposure-time setting No.9 No.10
Normal-scan mode OFF OFF
1/2 partial-scan mode ON OFF
1/4 partial-scan mode OFF ON
Programmable partial-scan mode ON ON
[NOTES]
lThe factory setting is shown with boldface underlined font.
lThe function shown with the OPTION mark in this document is available as optional function (=
Production on order) and not provided as standard function. Please contact our sales staff for
details.
lUnder standard version, partial-scan function is not available. (Normal mode only)

11
8-3. Camera rear-panel DIP SW and Manual GAIN adjustment potentiometer
(1) External-sync IN impedance selection
To switch the input impedance of external sync signal, open the camera chassis, and select the
position of the slide switch mounted on the bottom board (REG board).
No. SW Function SW Status Selected Function
High High impedance
1Ex-sync input impedance SW 75 75-ohm
[NOTES]
lThe factory setting is shown with boldface underlined font.
(2) External trigger signal input polarity selection
To switch the input polarity of external trigger input, open the camera chassis, and select the
position of the slide switch mounted on the top board (PROCESS board).
No. SW Function SW Status Selected Function
OFF Positive (Rising-edge)
1Ex-trigger signal input polarity
selection SW ON Negative (Falling-edge)
2TEST OFF NC
[NOTES]
lThe factory setting is shown with boldface underlined font.
1
O
N
2
Ex-trigger Input
Polarity Selection
1O
N
2
Lens-mount
PROCESS Board
Camera Connector
Lens-mount
High 75
Ex-SYNC IN Input
Impedance Switch

12
9. Timing Chart
9-1. Output waveform timing chart
(1) Horizontal
Optical
Optical
black
black H-transfer
H-transfer
pause
pause Dummy
Dummy
pixels
pixels OB
OB Effective pixel =
Effective pixel =
782
782
H blanking = 177 (6 micro s)
H blanking = 177 (6 micro s)
Effective VO pixels
Effective VO pixels
= 767
= 767
VIDEO
OUT
22
22
(0.75s)
(0.75s) 73
73
(2.47s)
(2.47s) 82
82
(2.78s)
(2.78s) 767
767
(26.0s)
(26.0s)
1 H-transfer (1H)
1 H-transfer (1H)
944 (32.0 micro s)
944 (32.0 micro s)
H.SYNC
H.SYNC
Ext-HD
±0.5us
102(3.46s)
102(3.46s)
Int-HD
6
638
38 102
102 9
9767
767 6
6
19
19 3
3
O
B
3
8
O
B
1
O
B
2
O
B
3
1 9 1
0
7
7
6
7
7
7
7
8
2
7
7
7
7
8
2
7
7
6D
1
D
1
9
O
B
1
WEN OUT
Table of contents
Other Tokyo Electronic Security Camera manuals

Tokyo Electronic
Tokyo Electronic CS8530-01 User manual
Tokyo Electronic
Tokyo Electronic CS8320B User manual

Tokyo Electronic
Tokyo Electronic CS8320B User manual

Tokyo Electronic
Tokyo Electronic CS3910H User manual
Tokyo Electronic
Tokyo Electronic CS8550D User manual

Tokyo Electronic
Tokyo Electronic CS8541D series User manual

Tokyo Electronic
Tokyo Electronic CS8550i-01 User manual

Tokyo Electronic
Tokyo Electronic CS9200 User manual
