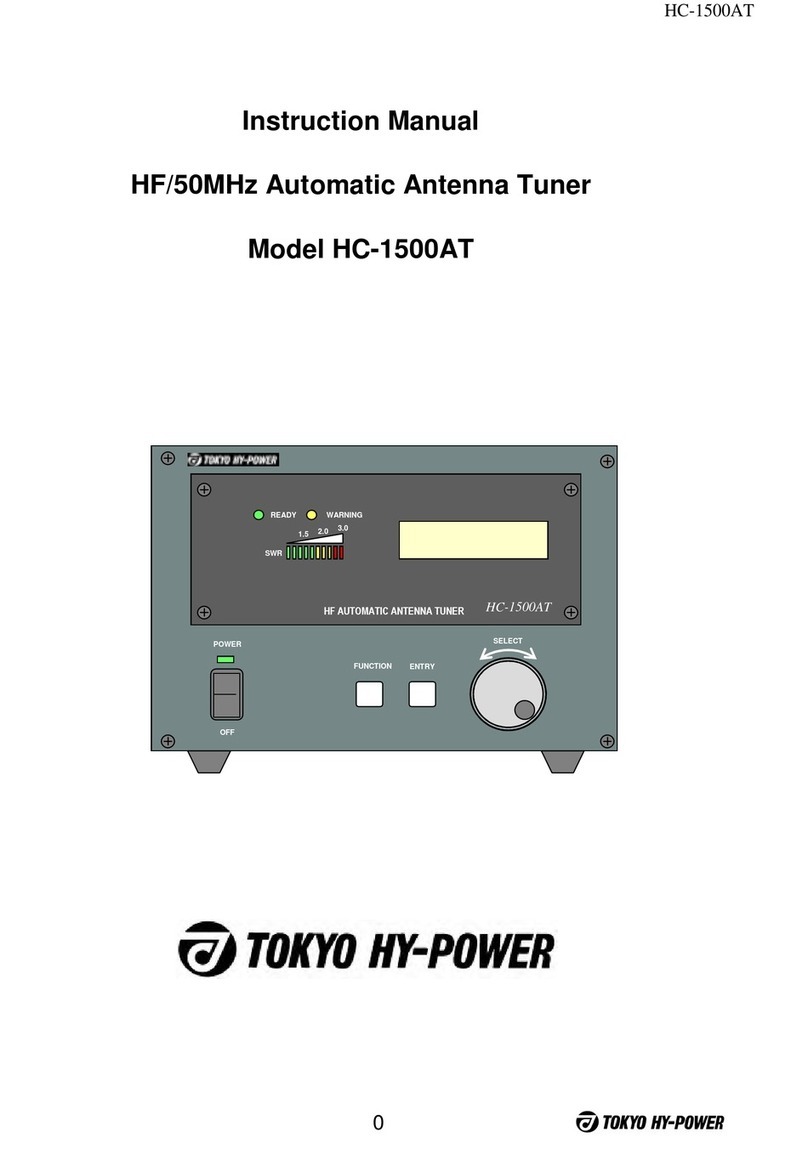
Tokyo Hy-Power HC-1.5KAT User manual

INSTRUCTION MANUAL
MODEL : HC-1.5KAT
HF BAND 1.5kW
AUTO ANTENNA TUNER

Contents
1.Foreword Page 1
2. Features Page 1
3. Cautions Page 2
4. Specifications Page 4
5. Explanations of Front & Rear Panels Page 5
6. Connections (Setting) Page 9
7. Operation Page10
1) Initial Status When Power Turned On Page10
2) Operation Mode and Setting Mode Page10
3) Manual Tuning Mode Page11
4) Flow of Operation Page11
5) Conditions for Self Tuning Initiation Page13
6) Menu Map Page14
8. Explanation of Various Functions Page15
9. Technical Information Page17
1

1. Foreword
HC-1.5KAT is an HF high power auto antenna tuner with a maximum power handling
capability of 1.5kW.
It works in an auto band set mode when combined with Tokyo Hy-Power Linear amps of
HL-1.5KFX and HL-2.5KFX. Also, it features an extremely fast tuning speed of 1 sec. max.
in most cases. When the transmitter is keyed, the tuner detects the antenna impedance
(resistance and reactance) directly, and two variable capacitors are auto-adjusted so that
tuner matches the antenna impedance.
2. Features
High speed and precision tuning due to the high resolution stepping motors: Usually
less than one second of tuning time and auto tracking (re-tune) during on air.
•
•
•
•
•
•
•
Auto band-set operation with Tokyo Hy-Power HL-1.5KFX and HL-2.5KFX amps: Our
original inter-face design for a combined auto operation.
Linear amps other than those two models can be combined, if band set only is manually
made.
Simple operation: Auto tunes even with ssb/voice as well as keyed codes.
During the auto-tuning time period linear amp is held at STBY (stand-by), and is
automatically turned on to OPER. (operate) as soon as the tuning is completed.
High power quality components used throughout such as 3 kV air variable capacitors
and power relays.
There are three antenna ports of SO-239 provided that can be programmed to the
specific operating bands as desired.
Also these ports may be programmed “Thru (through)”, as needed to by-pass the tuner
network.
Pre-set positioning system is incorporated to set the initial variable capacitors positions
at mid points of respective frequency bands.
This makes the tuning time relatively fast and more advantageous.
“Forced tune” function is incorporated.
As you move the frequency on the radio, auto-tuning may or may not be initiated.
If the exact tuning is desired in such a case, forced tuning is available by pressing the
SELECT dial knob.
1

3. Cautions
Note the followings for the safety of the operator.
A If any smoke, odor, or fire is detected, take the following steps for safety.
①Cease the transmission.
Turn off the power of linear amp and radio.②
③
B
Turn off the power of tuner.
High RF Voltage
A high RF voltage is generated during the transmission period.
Never remove the top cover.•
•
•
•
•
•
•
C
Never operate without connecting an antenna.
Never touch RF connectors.
Be careful of the tuner cabinet as it may bear RF voltage depending on the
antenna type connected.
Those operators with heart pacemaker must not approach the tuner.
Avoid the risk of RF burn from a high SWR antenna. Long wire antenna
generates an extremely high RF voltage depending on its element length.
Never touch cooling fan inside as well as L, C components as they generate
much heat during operation.
Limited Application
This tuner is designed for the use of the amateur radio station operated by qualified
operator. Application for other than designed purpose leads to the failure of the
device and/or the severe damage to the surrounding devices.
Never exceed the maximum handling power of 1.5kW.
D Setting
Internal parts such as tuning coils and motors are forced air cooled and need air
ventilations. Keep at least a few inches of space from the rear wall, and a space of
rubber feet height at the bottom.
Keep out of direct sun light, in a clean dry environment.
E Power Derating for High SWR Antenna
When the antenna has high SWR of 3 to 4, reduce RF output power by at least a
half not to damage the tuning components.
Also never attempt to tune to very high SWR antenna, even if the tuner happens to
work, or the tuning relays and capacitors will be severely damaged.
F Order of Turning Powers On
It is recommended to turn on in the order of transceiver at first, then linear, and the
2

auto tuner.
G 50MHz (6m)
The tuner does not cover 6m band.
When combined with HL-1.5KFX amp, “50MHz BAND THRU” is displayed on LCD
panel for the band selection of 50MHz with HL-1.5KFX.
H 1.8 and 3.5 MHz Bands
These bands are divided into three segments as follows;
160m 1.8, 1.9, 2.0
80m 3.5, 3.8, 4.0
Depending on your operation, you can program your favorite segments into
memory.
(This helps reduce the loads of tuning elements of the network.)
I. Power Off/Thru
When the POWER switch is turned off, “IN” (coax input from the linear) is
by-passed to ANT1 port.
3

4. Specifications Model HC-1.5KAT Specifications
Parameter Description Remarks
Frequency Range 1.8-29.7 MHz
Output Impedance Range 12.5-200 Ω
(*16.6-150 Ω) *Reduced range on 1.8, 3.5
and 28 MHz.
Maximum Handling Power 1.5 kW (P.E.P./CW) RTTY 1kW
Input Impedance 50 Ω
Tuning Power 50 W (80W max.)
Tuning Time 1 sec. (typ.)
2.5 sec. (max.) Under typical worst SWR
condition
4.0 sec. (max.) Under absolute worst SWR
condition
DC Power Voltage DC 12 V - 14 V From external DC power
supply (Power supply not
included.).
Current Drain 1.5 A max.
Quiescent Current 0.7 A
DC Power Polarity Negative ground
Display LCD Module
Operating Temp. Range 0 deg. to +40 deg. C
VSWR (Max.) 1.5 (typ.) or lower After tuning
Circuit Type T-shaped
Driving Motors Stepping Motors for Two Air
Variable Capacitors 0.25 deg. resolution/step
L Changes Relays to short
Matching Algorithm Analog Control with MPU Phase and |Z| Magnitude
Detected
Dimension 200 x 140 x 300 mm
(W x H x D) Approx. 8 x 5.6 x 12 inches
Weight Approx. 5 kg, or 11 lbs.
Input Connector SO-239 (UHF)
Output Connectors Three SO-239’s
Cooling Partial air forced cooling fan
Accessories DC power cable with 3.5 mm dia.
plug (4 feet)
Band control cable with DIN 7 pin
plugs To connect to THP amps.
PTT Out cable with RCA plugs To connect to amps.
4

5. Explanations of Front and Rear Panels
<FRONT PANEL>
WARNING
READY
HF AUTOMATIC ANTENNA TUNER
HC‑1.5K
AT
POWER
OFF
UNCTION
F
SEL
ECT
push for
ENY
RY
①
④
⑤
⑥
②③
①POWER
Power switch to turn on and off.
When turned off, the tuner becomes “through” state, leaving tuning network out of the
antenna feeder.
②FUNCTION
Function button to call for operation menu.
(See 7. 2)Operation Mode and Setting Mode at page10)
③SELect / Push for ENTry
Complex dial of setting dial (rotating) and entry (determination push button) to set
various mode functions and parameters.
Turn to set BAND (freq. band) and ANT/THRU (antenna) ports.
Press to go out of exit (to AUTO mode), after either BAND or ANT/THRU setting is
finished.
Also press to change C1and C2positioning during manual tuning mode.
5

④LCD (Display)
Panel to display various status of operation.
⑤ LED Lamp / Warning (Orange)
Lights when the tuning is made at critical conditions of L and C.
Blinks to indicate tuning failure. (Press “FUNCTION” key to reset.)
⑥ LED Lamp / Ready (Green)
Lights when auto-tuning is completed and the system is ready.
Blinks when tuning is not finished and/or tuner is waiting for RF drive to initiate auto-tune
process.
6

<REAR PANEL>
PTT IN
PTT OUT
CONT
DC12V IN
TRXANT 1ANT 2ANT 3
GND
⑭
⑬⑫
⑩
⑨
⑧
⑪
⑦
⑦DC12V
DC input jack to connect external power supply of DC12 V (11 - 14V / 1.5 A).
CONT⑧
⑨
⑩
⑪
DIN Socket (7 pin) to connect a control cable from “TUNER” of HL-1.5KFX or
HL-2.5KFX.
PTT OUT
Phono jack to connect PTT cable to SEND (or STBY, REMOTE) socket of linear amp.
PTT IN
Phono jack to connect PTT cable from SEND (or TX GND, REMOTE, RELAY etc.)
socket of transceiver.
TX
SO-239. Connect a coax jumper cable from the ANT (antenna) connector of the linear
amplifier.
⑫⑬⑭ ANT -1, -2, -3
SO-239. Connect a coax cable from the antenna.
7

<Explanations of LCD Display>
C2position*C1position*
Tuning mode display
(Auto or MANU)
Auto band set status display
(Auto or MANU)
Band Display
1.8 Mz BAND AUTO
C1=XXX C2=XXX ANT1
A
ntenna select
display
*C1, C2 Definitions
A
NTTX
L
C1C2
8

6. Connections (Setting)
PTT IN
PTT OUT
CONT
DC12V IN
TRXANT 1ANT 2ANT 3
GND
FUSE FUSE
A
NT3
A
NT1
A
NT2
Supplied Band Control Cable
CONT
Power Supply + ●
( or AC Adaptor )
12V 1.5A − ● To transceiver
antenna terminal
Supplied
DC Power Cable
Linear Amplifier
(ex. HL-1.5KFX)
HC-1.5KAT
ANT1 terminal
COAX
PTT IN
PTT OUT
Xceiver’s SEND (TX GND)
STBY
*For other connections of the
Linear Amplifier, please refe
r
to the amplifier’s manual.
Supplied DC Power Cable
−:Black Line (Negative)
+:White Line (Positive)
Center is +
(Positive)
9

7. Operation
1) Initial Status When Power Turned On
Fig.1 is initially displayed for a second after the power is ON. Then Fig.2 is displayed,
where 1.8Mz ant ANT1 are default.
(Note: Other than 1.8Mz may be displayed if Band Control Cable is connected to the
amplifier or if the tuner has been once operated after the purchase.)
<Fig1> <Fig2>
HC-1.5K AT VerXX
TOKYO HY-POWER 1.8 Mz BAND AUTO
C1=XXX C2=XXX ANT1
2) Operation Mode and Setting Mode
Operation Mode is a status waiting for RF drive, i.e. auto tuner is ready to work. <Fig2>
LCD displays Fig.3 at this time.
If Function button is pressed one time or more, Operation Mode changes to Setting
Mode. <Fig4, 5 and 6>
<Fig3>
(X is a value actually set for the specific band.)
Xxx Mz BAND AUTO
C1=XXX C2=XXX ANTx
Setting Mode is a mode to set band, and antenna selections as well as C1/C2 positions
of manual tuning.
During this mode, auto tuning can not be accepted if the transmitter is keyed.
<Fig4> <Fig5> <Fig6>
To Select Band
>Xxx Mz MANU FUNC
C1=XXX C2=XXX ANTx
To Select ANT
Xxx Mz BAND FUNC
C1=XXX C2=XXX>ANTx
C1/C2positions of Manual
Tuning Mode
Xxx Mz BAND MANU
C1>XXX C2=XXX ANTx
“ >” mark is displayed at this time to urge the setting of Band, Ant, and C1/C2
respectively.
If ANT (antenna) is selected as desired, press FUNCTION button twice, and you can
return to AUTO tuning mode (or Operation Mode).
10

3) Manual Tuning Mode
After the ANT (antenna) selection is finished, you may enter the manual tuning mode
by pressing FUNCTION button one more time.
<Fig6> shows a status where you can manually tune C1by SELECT dial.
Then pressing the ③SELECT dial, prompt (>) sign shifts to C2(C2>XXX), and you
can tune C2by dial.
C1and C2must be reciprocally changed to tune for minimal SWR (or Pr) on SWR/PWR
meter.
If the minimal SWR (or Pr/ reflected power) is obtained, you may start to transmit with
full power.
(Note: Auto band set will not track at Manual Tuning mode, if you change the band of
radio.)
4) Flow of Operation
① To set the BAND: If your tuner is connected to HL-1.5KFX and/or HL-2.5KFX with a
supplied band control cable, skip this step ①and go to ②(To set the ANT
selection).
If the amplifier is other than two models above of Tokyo Hy-Power Labs., you need
to set the BAND manually as follows;
Press Function button once. On LCD, “ >”mark is displayed and requests you to
further put in the data.
<Fig7>
>1.8 Mz MANU FUNC
C1=XXX C2=XXX ANT1
Turn Select dial to the desired band of operation.
Press ENTry dial and tuner will be back to Operation Mode. If above setting is
finished, motors will run to drive variable capacitors to the respective pre-set
positions.
“WAIT” is displayed just for a short period, until the pre-setting finishes. <Fig8>
<Fig8>
Xxx Mz BAND WAIT
C1=XXX C2=XXX ANTx
11

② To set the ANT selection:
Program the desired antenna system to the current BAND being displayed, as
follows;
Press Function button twice, (if you are in Operation Mode), so that “ >” sign
appears in front of ANTX. <Fig9>
<Fig9>
Xxx Mz BAND FUNC
C1=XXX C2=XXX>ANTx
Turn Select dial to select the antenna (1, 2, or 3) and/or thru (1, 2, or 3).
Press Function button to finish this setting to return to Operation Mode.
③ Manual Tuning
You can enter the manual tuning mode (to tune C1/C2variable capacitors manually)
following the above step of ②ANT selection.
(See 7.3)Manual Tuning Mode at page11.)
④ To key radio/amp to auto tune:
There are two options to auto-tune the HC-1.5KAT.
A is the safest method not to damage the amp or tuner in any case.
B is the easier way but “Reflected Power Prot” of linear amp may trip occasionally.
A. Switch the amplifier to STBY (Stand-By) position. Starting from Operation Mode,
drive a carrier (CW) voice/SSB signal of approximately 50 W (80 W max.), and
the tuning will start automatically. See Fig10. Tuning will be finished within a
second or so in most cases. LCD displays Fig11. At this point, you may adjust
RF Power level of your radio to fully drive the amplifier.
<Fig10> <Fig11>
“TUNE” indicates now tuning.
Xxx Mz BAND TUNE
C1=XXX C2=XXX ANTx
Tune completed, AUTO displayed
Xxx Mz BAND AUTO
C1=XXX C2=XXX ANTx
12

B.Look for the vacant frequency channel not to interfere with other stations.
Switch the amplifier to OPER (operate) position, and drive a signal of any mode
(CW, SSB/voice, RTTY etc.) with 50W (80W max.) from the radio.
Then the tuner will automatically start to tune in STBY (stand by) mode of
amplifier.
When the tuning is finished, tuner will issue the command to the amplifier to
switch to OPER position.
*Note1. When the tuner fails to tune, reduce the drive power and reset the
FUNCTION button. Antenna may have a critically high SWR of 4.0 or
more.
*Note2. Linear amp may trip with high reflected power protection while tuning.
Reset the amp, and complete the tuning step.
⑤To start full power transmission:
Even if the tuner is once tuned, it will automatically try to re-tune, when SWR
becomes approximately 1.5 or higher during transmission.
(Caution: This tuner is designed to automatically track the change of SWR.
However, if the sudden sharp SWR change is expected in such an
occasion as when the transmitting frequency is swept from one band
edge to the other, be sure to re-tune with the amplifier in Stand-By
mode, or reset the amplifier to finish the auto tuning if Pr prot has
tripped during tuning process.)
5) Conditions for Self Tuning Initiation
Self auto tuning is not initiated, unless any one of the following condition is satisfied.
a. Matching status has deviated out of SWR=1.5
b. Forced tuning button (ENTry) has been pressed.
13

6) Menu Map Operation Mode
(Command Waiting)
Tuning
Completed Auto Tuning
TX
C1/C2preset
A
uto Ban
d
Initiate
d
Auto Band Recognized
C1/C2 preset
Display for Band Setting
C1/C2 preset
Display for Antenna Setting
Display for Tuning C1
Display for Tuning C2
Operation Mode
Band Setting Mode
Function
Function
Function
Xxx Mz BAND AUTO
C1=XXX C2=XXX ANTx
Xxx Mz TRCK WAIT
C1=XXX C2=XXX ANTx
Xxx Mz TRCK AUTO
C1=XXX C2=XXX ANTx
Xxx Mz MANU WAIT
C1=XXX C2=XXX ANTx
>Xxx Mz MANU FUNC
C1=XXX C2=XXX ANTx
Xxx Mz MANU WAIT
C1=XXX C2=XXX ANTx
Press Entry
Dial Select to set 1.8-28 MHz.
Function
Xxx Mz BAND FUNC
C1=XXX C2=XXX>ANTx
Select
Select
Dial Select to tune C2.
Dial Select to tune C1.
MANUAL
TUNING
MODE Press Entry to select
C1and C2reciprocally.
C1/C2Tuning Mode
Dial Select to select
Ant 1-3 / Thru 1-3.
Antenna Setting Mode
Xxx Mz BAND MANU
C1=XXX C2>XXX ANTx
Xxx Mz BAND MANU
C1>XXX C2=XXX ANTx
Xxx Mz BAND TUNE
C1=XXX C2=XXX ANTx
Operation Mode (Auto)
14

8. Explanation of Various Functions
1) Manual Tuning
Tuner is manually tunable as needed.
Press Function three times when in Operation Mode.
Press Entry to select either C1or C2reciprocally. (See Fig 12, Fig13)
Drive a CW/RTTY carrier (50W to 80W) from radio.
Turn Select dial for C1and C2so that SWR (or PR) meter deflection gets minimal.
And now you are ready to be on air.
<Fig12> <Fig13>
Xxx Mz BAND MANU
C1>XXX C2=XXX ANTx Xxx Mz BAND MANU
C1=XXX C2>XXX ANTx
Note: SWR/Power meter should be connected between the amplifier and the tuner.
C1/C2positions should be recorded for future reference, as needed.
To return to Operation Mode (Auto), simply press Function.
Minimum and maximum capacitances of C1and C2are 15 pF and 200 pF
respectively.
LCD panel display of 0〜99 corresponds to 15 pF〜200 pF respectively.
2) Forced Tuning
This is a function to initiate auto re-tuning, in case SWR value gets slightly worse in
transmission (TX) mode.
Press Entry button.
15

3) Collaboration with HL-1.5KFX/ HL-2.5KFX
Connecting the band control cable, “EVENT” and “FREQ” data are communicated
between the amplifier and the tuner.
Note: “BAND” changes to “TRCK” (track), while amplifier is sending a new data to the
tuner.
It changes back to “BAND” upon finishing the band change.
<Wiring>
②GND
④EVENT
⑦FREQ
HC-1.5KAT
DIN7pin
HL-1.5KFX/HL-2.5KFX
DIN7pin
②
④
⑦
FREQ data: Freq. data signal is sent to tuner.
EVENT signal: When tuner is pre-setting or auto-tuning, this signal is emitted for
the amplifier to become through state.
16

9. Technical Information
C2
200pF1 2
C1 200pF
1 2
C1, C2= 200 pF max, 3 kV
L = Switched by relays
Fixed C = Mica caps., 3 kV
•
•
•
Tuner circuit is a T-shaped network.
Series of coils are switched in and out to match antennas of SWR up to 4:1.
Fixed value caps are added on 1.8 and 3.5 MHz.
Min/Max C1, C2positions displayed and pre-set positions
C1 C2Freq Fixed C min max min max C1
Pre-set C2
Pre-set
MHz pf LCD LCD LCD LCD LCD LCD
1.85 200 0 99 0 99 34 34
3.5 150 0 99 0 99 47 44
7.1 32 94 32 94 52 48
10 21 83 21 83 38 36
14.2 13 51 13 51 23 21
18.1 8 35 8 28 16 13
21 6 29 6 25 13 10
24.9 10 27 9 27 16 13
29 2 18 1 18 7 5
TOKYO HY-POWER LABS., INC.
1-1 Hatanaka 3-chome, Niiza,
Saitama 352-0012 JAPAN
Phone: +81(48)481-1211 / Fax: +81(48)478-7453
Email: [email protected]
Web: http://www.thp.co.jp/
TOKYO HY-POWER LABS., INC.-USA(USA Office)
28301 Tomball Pkwy #500-210
Tomball, Texas 77375
Phone: 713-818-4544
Email: [email protected]
(H20, 04, 22)
17
Table of contents
Other Tokyo Hy-Power Tuner manuals
