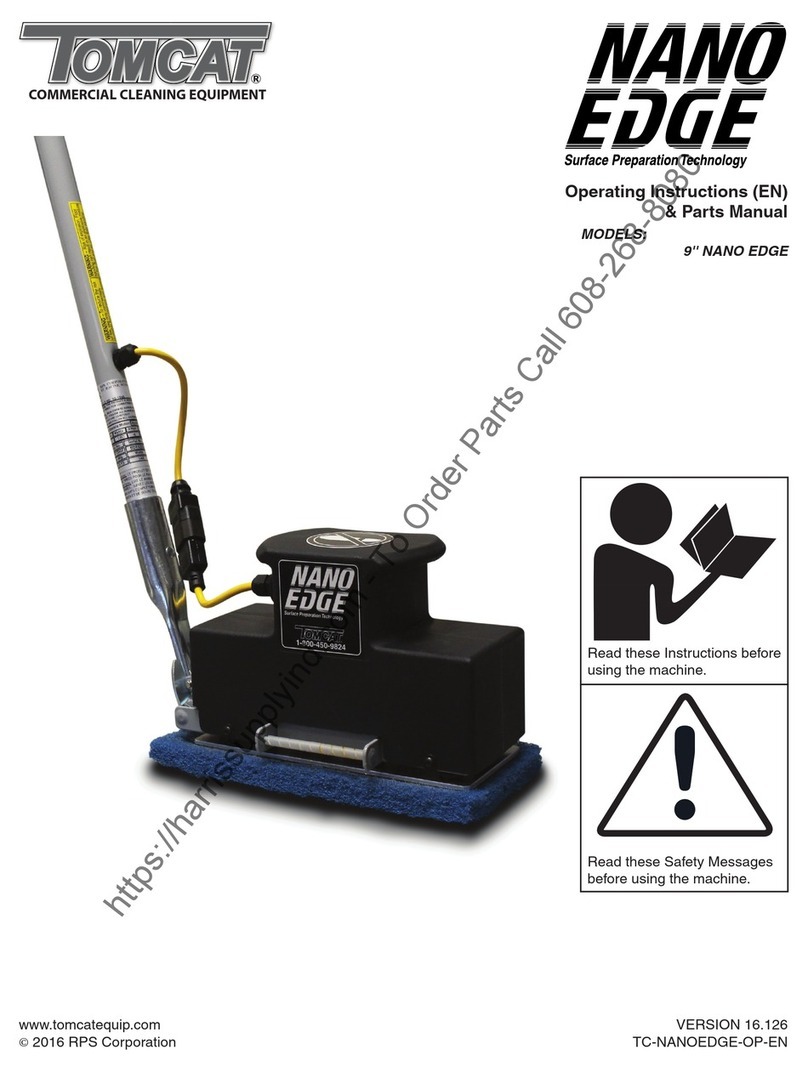
Tomcat edge 20" stick st User manual

EDGE
Operating Instructions (EN)
& Parts Manual
MODELS:
20'' EDGE Stick ST
20'' EDGE Stick HD
28'' EDGE Stick HD
Read these Instructions before
using the machine.
Read these Safety Messages
before using the machine.
COMMERCIAL CLEANING EQUIPMENT
Scan With Phone for more Information
www.tomcatequip.com
1711 South Street
Racine, WI 53404 (USA)
(800) 450-9824 | (+001) 262-681-6470 VERSION 16.055
©2016 RPS Corporation TC-EDGESTICK-OP-EN

- 2 - EDGESTICK-OP-EN
INTRODUCTION
This manual is furnished with each new machine. This manual will allow the Operator to get the best performance out of
your RPS manufactured Scrubber-Drier, Sweeper, Burnisher, or Orbital Scrubber. Read this manual thoroughly before
operating or servicing the machine.
This machine will provide excellent performance, but the best results will be obtained at the most minimum costs if:
• The machine is regularly maintained - per the machine Preventative Maintenance instructions provided.
• The machine is operated with reasonable care and caution.
• The machine is maintained with manufacturer supplied parts.
ABOUT THIS MANUAL
TABLE OF CONTENTS: Tells you where to look in the manual.
SAFETY MESSAGES: Section contains important information regarding hazard or unsafe practices of the machine. Lev-
els of hazards are identified that could result in product or personal injury, or severe injury resulting in death.
OPERATION CONTROLS / MACHINE COMPONENTS: Shows you the different machine controls and features.
MACHINE SETUP: Tells you how to setup machine from un-crating to installing Pads.
MACHINE OPERATION: Section is to familiarize the operator with the operation and function of the machine.
MAINTENANCE: This section contains preventative maintenance to keep the machine and it’s components in good work-
ing condition. They are listed in this general order:
• Scrub Pads
• Service Schedule
• Machine Trouble Shooting
TROUBLE SHOOTING: A list of common problems that may occur.
MACHINE SPECS: Tells you Machine Specifications for the various parts of the machine.
MACHINE INSTALL FORM: Should be filled out upon machine installation and faxed to 1-866-632-6961 or on-line at
www.rpscorporation.com.
WARRANTY POLICY: Tells you coverage, exclusions and limitations to warranty.
PARTS: Exploded views of the machine with part breakdowns.
NOTE: The serial number of your machine is located on the back of the handlebars.
AS OUR POLICY IS ONE OF CONSTANT IMPROVEMENT - ALL INFORMATION AND
SPECIFICATIONS ARE SUBJECT TO CHANGE WITHOUT NOTICE.
SERIAL NUMBER

EDGESTICK-OP-EN - 3 -
TABLE OF CONTENTS
Table of Contents 3
Safety Messages 4
Operation Controls 6
Machine Setup 7
Installing EDGE pads: 7
Pre-Cleaning Checklist: 7
Operating - Scrubbing: 7
Machine Operation 7
Maintenance 8
Daily Maintenance: 8
Weekly Maintenance: 8
Monthly maintenance: 8
Yearly Maintenance: 8
Storing Machine: 8
EDGE PM Records 9
Motor Information 10
Common Wear Parts 11
EDGE Pads and Screens: 11
EDGE Diamonds For Polishing Marble/Terrazzo: 11
EDGE Isolator Replacement Kits: 12
BackPack Accessories: 12
PARTS SECTION 13
Handlebar Versions 14
Locking Handlebar 15
Scrubdeck Assembly 16
Scrubdeck Weights 17
Water Tank and Handlebar 18
Isolated Handlebars 19
Onboard Vacuum 20

- 4 - EDGESTICK-OP-EN
SAFETY MESSAGES
You will see four kinds of safety reminders in this manual:
WARNING
WARNING indicates a potentially hazardous situation
which, if not avoided, could result in death or serious
injury.
CAUTION
CAUTION indicates a potentially hazardous situation
which, if not avoided, could result in minor or moderate
injury or damage to this machine or nearby objects. CAU-
TION also can be used to alert against unsafe practices.
NOTICE
NOTICE indicates information considered important, but
not hazard-related. This safety message may be related
to property damage or warranty warnings.
Your safety, and that of others, is very important. Operating this machine safely is an important responsibility.
DO NOT OPERATE THIS MACHINE:
• Unless you are trained and authorized to do so
• Unless you have read and understood this Operator’s Manual
• On surfaces with greater than a 2% grade unless this machine is equipped with a functional parking brake
• On surfaces with greater than an 8% grade at any time
• On Loading Docks
WHEN OPERATING THIS MACHINE:
• Remove loose objects from the floor that could be projected from the oscillating Pad
• Keep your hands and feet away from the oscillating Pad
• Do not operate this machine where flammable liquids are present
• Use caution when maneuvering close to walls
BEFORE LEAVING THE MACHINE:
• Turn the machine OFF and unplug the power cord
BEFORE SERVICING THE MACHINE:
• Unplug the power cord

EDGESTICK-OP-EN - 5 -
WARNING
Do not operate this machine around fuels, solvents,
flammable floor finishes, thinners, wood dust or any
flammable materials. Cigarette lighters, pilot lights,
electrical sparks and all other sources of ignition
should be extinguished or avoided. Work areas should
be well ventilated.
WARNING
Always wear safety goggles when operating this ma-
chine to avoid eye injury from debris projected from the
oscillating Pad.
WARNING
To avoid electrical shock, do not use this machine if it
has been rained on or sprayed with water.
WARNING
To avoid electrical shock, unplug the power cord before
adjusting the Handlebar height or replacing the Pad.
WARNING
Always turn off this machine and unplug the power
cord before leaving it unattended. Do not allow un-
trained persons to operate this machine.
WARNING
Always wear a dust mask when operating this machine
to avoid inhaling dust created by the oscillating Pad. In-
haling dust created by this machine can cause serious
respiratory injury.
WARNING
To avoid electrical shock, do not pull on the power cord
to move the machine or unplug the power cord from
the electrical outlet.
WARNING
Do not remove, paint over or destroy warning decals. If
warning decals become damaged, call 1-262-681-3583
for free replacements.
WARNING
To avoid electrical shock, do not operate this machine
over electrical floor outlets.
WARNING
Dress safely. Keep hands, feet and loose clothing away
from moving parts on this machine.
WARNING
To avoid electrical shock, always keep the power cord
clear of the oscillating Pad and in good condition. Al-
ways lift the power cord over the machine.
WARNING
Never operate this machine under the influence of
alcohol or drugs. Do not allow anyone under the age of
18 to operate this machine.
WARNING
This machine weighs over 130 pounds. Do not attempt
to lift this machine alone. Two persons are required to lift
this machine.
CAUTION
To avoid personal injury and/or damage to this ma-
chine, the persons lifting the machine should grasp the
lifting bars on the base of the machine with one hand,
and the handle with the other.
CAUTION
Always unplug the power cord and wrap the cord on
the cord wrap and handle before attempting to lift this
machine.
CAUTION
Always raise and lock the handle into position before
attempting to lift this machine. Always leave the pad on
the machine before transporting the machine to avoid
damage to the pad face.
CAUTION
Tilt the machine onto its wheels and transport it slowly
and carefully. Do not operate this machine if any parts
have been damaged or removed.
CAUTION
Alterations to this machine may result in personal injury
or property damage, and WILL void the warranty.

- 6 - EDGESTICK-OP-EN
OPERATION CONTROLS
1. HANDLEBAR: Foam padded handlebars provide
ergonomic support
2. SOLUTION CONTROL LEVEL (OPTIONAL): Controls
solution flow (Down = RELEASE, Up = OFF)
3. MAIN POWER SWITCH (OPTIONAL): Turns the
machine ON and OFF
4. POWER CORD: Hospital grade 50 ft cord
5. HOUR METER (OPTIONAL): Sows the total amount of
hours that the machine has been used
6. HANDLEBAR TRIGGER: Depressing the trigger
activates the Scrubdeck motor
7. WATER SOLUTION TANK (OPTIONAL): 5 Quart
solution tank for allowing water dispersement on the
deck level
8. SWIVEL CORD WRAP: Rotate the cord wrap to allow
for easy coiling and uncoiling of the Power cord
9. LIFT HANDLES (OPTIONAL): Allows two persons to
lift machine
10. SLOTTED WEIGHT PLATES (OPTIONAL): 12.5 or
22.5 lb weight plates for different Pad and application
usage
11. DUST SKIRT (OPTIONAL): Skirt around outside of
Scrubdeck helps control dust and water during usage
12
3
4
5
6
7
8
9
10
11

EDGESTICK-OP-EN - 7 -
MACHINE SETUP
INSTALLING EDGE PADS:
To install or replace a Pad:
NOTICE
Before installing or replacing any Pad, disconnect the
EDGE Scrubber from its power source.
1. Lock handle (A) in the upright position (SEE BELOW).
2. Tilt machine back until the handle rests on the floor
(SEE BELOW).
3. Remove existing Pad and replace with new Pad -
ensure proper 1/2''overhang on all edges of Grip Face.
4. Press Pad firmly into place.
5. Return machine to upright position.
NOTICE
NEVER place aggressive Pads (Maroon Prep, Dominator
HD Strip, etc.) directly onto the Grip Face. Always use
Red or Blue Spacer pad to prevent Grip Face damage.
PRE-CLEANING CHECKLIST:
Read and understand the Safety Messages section on
Pages 3 and 4 before operating the machine.
6. Check and make sure that there is electrical outlets
available for use or large gauge extension cords.
7. Check the condition of the Pads or Brushes.
8. If there is debris on the floor area that is about to be
scrubbed - pre-sweep area.
OPERATING - SCRUBBING:
1. Move machine to work location. Never transport or
store the machine without a Pad to protect the grip
face.
2. Check the Pad. If it has become reduced to a
thickness of less than 1⁄2’’, replace the Pad. Pad will
depend based off of the application needs, contact
your Local Servicing Dealer for correct Pads for your
application.
3. Connect machine cord to power source. When
scrubbing an area, move so that you are moving
away from the power supply. This will help avoid
entanglement with the cord as well as reduce the need
to move do a different power source.
4. Adjust the handlebars to a comfortable position.
Lock the handlebar into position. The best operating
position is at arms length to help with control of
machine and to improve operator comfort. Maintain
the machine flat on the floor for ease of operation.
Raising or lowering the handlebar can cause the
machine to pull to the right or left, and uneven
pressure/wear on the pad surface. A neutral handlebar
position will provide a neutral operation and uniform
contact of the Pad to the floor surface.
5. Squeegee the Handlebar trigger with both hands to
start the machine. Release the Handlebar trigger to
stop the machine.
NOTICE
Releasing the Handlebar trigger will immediately stop
the machine.
A
MACHINE OPERATION

- 8 - EDGESTICK-OP-EN
MAINTENANCE
DAILY MAINTENANCE:
1. Remove the clean Pads / Brushes. Never use soiled
Pads / Brushes when cleaning. Replace Pads /
Brushes when they become packed with residue.
2. Drain and rinse Tanks thoroughly and flush out solution
feed to Scrubdeck (If applicable to your model).
3. Inspect Vacuum Hose for any objects obstructing the
air flow.
4. Wipe down machine if needed. Use a non-abrasive,
non-solvent cleaner or a clean damp cloth.
5. Store in a clean area.
WEEKLY MAINTENANCE:
6. Flip EDGE pads.
7. Drain and rinse tanks thoroughly. To thoroughly flush
out any solution chemicals in solution line valves, refill
Solution Tank with a few gallons of warm, clean water
and run the machine until Tank is empty.
MONTHLY MAINTENANCE:
1. Check Scrubhead for wear.
2. Check machine for water leaks and loose nuts and
bolts.
YEARLY MAINTENANCE:
Call your local dealer for yearly maintenance.
STORING MACHINE:
1. Be sure to flush the tanks out completely. To
thoroughly flush out any solution chemicals in solution
line and valves, refill Solution Tank with a few gallons
of warm clean water and run machine until Tank is
empty.
2. Tip Scrubdeck to alleviate pressure on the Grip Face
or Pads for extended periods of time.

EDGESTICK-OP-EN - 9 -
EDGE PM RECORDS
CUSTOMER INFORMATION
CUSTOMER EMAIL
ADDRESS PHONE
CITY STATE ZIP CONTACT
MACHINE INFORMATION
MODEL #: SERIAL #:
WORK ORDER#: HOUR METER:
DECK CONDITION
EDGE PAD GRIP FACE GOOD WORN NEEDS REPLACEMENT
SPACER PAD GOOD WORN NEEDS REPLACEMENT
CHECK OPERATION AND CONDITION OF: IN SPEC REPAIR PROBLEM
TRIGGER KEY SWITCH (OPTIONAL)
SOLUTION ON/OFF LEVER (OPTIONAL)
SCRUBDECK MOTOR
INSPECT AC CORD (REPLACE IF DAMAGED)
INSPECT EDGE OF ALUMINUM DECK (REPORT IF DAMAGED)
VACUUM MOTOR PERFORMANCE (OPTIONAL)
VISUALLY INSPECT IN SPEC REPAIR PROBLEM
VACUUM HOSES (OPTIONAL)
SOLUTION HOSES (OPTIONAL)
DUST SKIRTS (OPTIONAL)
MACHINE WHEELS
MEASURE GAP AT 4 CORNERS FRONT RIGHT FRONT LEFT BACK RIGHT BACK LEFT
BETWEEN ALUMINUM AND STEEL DECKS
VISUALLY INSPECT IN SPEC REPAIR PROBLEM
VACUUM HOSES (OPTIONAL)
SOLUTION HOSES (OPTIONAL)
DUST SKIRTS (OPTIONAL)
MACHINE WHEELS
COMMENTS
SERVICING DISTRIBUTOR: ____________________________________
TECHNICIAN’S NAME: _______________________ DATE: ____________ SIGNATURE: ____________________
CUSTOMER’S NAME: ________________________ DATE: ____________ SIGNATURE: ____________________

- 10 - EDGESTICK-OP-EN
MOTOR INFORMATION
There is a sticker with the above information on the motor of your EDGE Stick machine unit. Below are explana-
tions for the units of measurement.
FLA = Full Load Ampere Rating
Line current drawn by motor while operating under full load at supply voltage indicated. On dual voltage motors, higher
voltage amps are one-half lower voltage amps.
SFA = Service Factor Amps
Current drawn by the motor when operated at service factor load. Unless motor is operated extensively at service factor
load (not recommended), use full load current when selecting circuit protection.
SF = Service Factor
The service factor shown on the motor nameplate indicates the amount of continuous overload the motor can be subject-
ed to, under nameplate conditions, without damaging the motor. When the voltage and frequency are at the same values
as shown on the motor nameplate, the motor may be overloaded up to the horsepower indicated by multiplying the rated
horsepower by the service factor. When operated at service factor load, the motor may have an efficiency, power factor,
and speed slightly different from those shown on the nameplate.
A motor designed to operate at its nameplate horsepower rating has a service factor of 1.0. This means the motor can
operate at 100% of its rated horsepower. Some applications may require a motor to exceed the rated horsepower. In these
cases a motor with a service factor of 1.15 can be specified. The service factor is a multiplier that may be applied to the
rated power. A 1.15 service factor motor can be operated 15% higher than the motor’s nameplate horsepower. The 30
HP motor with a 1.15 service factor, for example can be operated at 34.5 HP. It should be noted that any motor operating
continuously at a service factor greater than 1 will have a reduced life expectancy compared to operating it at its rated
horsepower. In addition, performance characteristics, such as full load RPM and full load current, will be affected.
EF = Efficiency Factor
AC motor efficiency is expressed as a percentage. It is an indication of how much input electrical energy is converted to
output mechanical energy. The nominal efficiency of this motor is 93.6%. The higher the percentage the more efficiently
the motor converts the incoming electrical power to mechanical horsepower. A 30 HP motor with a 93.6% efficiency would
consume less energy than a 30 HP motor with an efficiency rating of 83%. This can mean a significant savings in energy
cost. Lower operating temperature, longer life, and lower noise levels are typical benefits of high efficiency motors.
FLPF = Full Load Power Factor
The ratio of real or true power and the apparent power that is supplied [PF=P(watts)/S(va)]
IEC34-1
IEC34-5
MODEL: M6K28FC3A
CAT. NO: 117536.00 DATE: G12B
TYPE: KF
ENCL: TEFC
DESIGN:l
HP/KW: 1 1/2 / 1.12 1 1/2 / 1.12
RPM:
VOLT:
FLA: 13.2/6.6 15.6/7.8-7.5
SFA: 14.8/17.4 18/9-8.4
SF:1.15
NP,BF1461412-1,122060009
READ WARNING LABEL ON MOTOR BEFORE
CONNECTING, INSTALLING OR SERVICING
FAILURE TO FOLLOW ALL SAFETY INFORMATION
C
AN RE
SU
LT IN PER
SO
NAL IN
JU
RY
O
R DEATH.
EFF:75.5 IP:
:41
:::
:
FL PF:99(0.99)
115/230 100/200-220
3450 2850
HZ: 60 50
CC:
CUST: PN:
DUTY:CONT
INS:F4
PH:1
CODE:H
FR:56CZ
THERMALLY PROTECTED
AMB:40 C
LOW VOLTAGE
CCW ROTATION FACING LEAD END AS SHOWN
INTERCHANGE LEADS T5 & T8 FOR CW
HIGH VOLTAGE
P1 P2 T3 TB T2 T4 T5 P1 P2 T3 TB T2 T4 T5
COOLING
CODE
INVERTER
SPD RANGE
PROT.
CODE
INV
TYPE
INV.
LOAD
L1
L2 L1 L2
E57948 LR33543
®
®

EDGESTICK-OP-EN - 11 -
COMMON WEAR PARTS
EDGE PADS AND SCREENS:
DESCRIPTION 28''×14''
SCRUBDECK
20''×14''
SCRUBDECK
13''×19''
White Pad EDGE-4054 EDGE-4005 N/A
Red Pad EDGE-4053 EDGE-4004 N/A
Blue Pad EDGE-4052 EDGE-4003 N/A
Green Pad EDGE-4051 EDGE-4002 N/A
Black Pad EDGE-4050 EDGE-4001 N/A
White Driver Pad EDGE-4058 EDGE-4025 EDGE-4019
60 Grit Sand Screen EDGE-4059 EDGE-4026 EDGE-4020
80 Grit Sand Screen EDGE-4060 EDGE-4027 EDGE-4021
100 Grit Sand Screen EDGE-4061 EDGE-4028 EDGE-4022
120 Grit Sand Screen EDGE-4062 EDGE-4029 EDGE-4023
150 Grit Sand Screen EDGE-4063 EDGE-4030 EDGE-4024
20 Grit Sand Paper N/A EDGE-4031 N/A
36 Grit Sand Paper N/A EDGE-4032 N/A
60 Grit Sand Paper N/A EDGE-4033 N/A
80 Grit Sand Paper N/A EDGE-4034 N/A
100 Grit Sand Paper N/A EDGE-4035 N/A
100 Grit Diamond Polishing Pad N/A EDGE-4012 N/A
400 Grit Diamond Polishing Pad N/A EDGE-4013 N/A
800 Grit Diamond Polishing Pad N/A EDGE-4014 N/A
1500 Grit Diamond Polishing Pad N/A EDGE-4015 N/A
3000 Grit Diamond Polishing Pad N/A EDGE-4016 N/A
6000 Grit Diamond Polishing Pad N/A EDGE-4070 N/A
Tile/Grout Renovator Pad EDGE-4048 EDGE-4018 N/A
Microfiber Pad N/A EDGE-4036 N/A
Abrader Plate N/A N/A EDGE-4011
Dominator HD Strip Pad EDGE-4055 EDGE-4006 N/A
Maroon ECO Prep Pad EDGE-4056 EDGE-4007 N/A
Remover Burnishing Pad EDGE-4057 EDGE-4008 N/A
Porko Burnishing Pad N/A EDGE-4017 N/A
Velcro Pad N/A 300-4023 N/A
EDGE DIAMONDS FOR POLISHING MARBLE/TERRAZZO:
DESCRIPTION PART NUMBER
30 Grit Diamond Strip 300-30GRIT4
50 Grit Diamond Strip 300-50GRIT4
100 Grit Diamond Strip 300-100GRIT4
200 Grit Diamond Strip 300-200GRIT4
400 Grit Diamond Strip 300-400GRIT4
800 Grit Diamond Strip 300-800GRIT4
1500 Grit Diamond Strip 300-1500GRIT4
3000 Grit Diamond Strip 300-3000GRIT4

- 12 - EDGESTICK-OP-EN
EDGE ISOLATOR REPLACEMENT KITS:
DESCRIPTION PART NUMBER
Kit for 20" AC Stick Machines EDGE-7217
Kit for 28" AC Stick Machines EDGE-7221
Kit for 28" DC Stick Machines EDGE-7218
Kit for 32" DC Stick Machines EDGE-7219
Kit for 20" DC Machines EDGE-7209
Kit for 24" DC Machines EDGE-7209
Kit for 28" DC Machines EDGE-7210
Kit for 32" DC Machines EDGE-7216
Bracket Kit for DC Machines EDGE-7220
EDGE/ORBITZ GRIP FACE:
DESCRIPTION PART#
20'' Velcro Grip Face 300-1037
28'' Velcro Grip Face 300-1039
20'' Mighty Lok Grip Face 300-01037Z
28'' Mighty Lok Grip Face 300-01037Z
BACKPACK ACCESSORIES:
DESCRIPTION PART #
Micro Lined Filter Bag 6 Qt, Standard (10pk) 800-5210
Micro Lined Filter Bag 10 Quart, Standard (10pk) 800-5211
Micro Lined Filter Bag 2 Ply 6 Qt, Ultra (10pk) 800-5310
Micro Lined Filter Bag 2 Ply 10 Qt, Ultra (10pk) 800-5311
Micro Lined Filter Bag 3 Ply 6 Qt, Ultimate HEPA (10pk) 800-5410
Micro Lined Filter Bag 3 Ply 10 Qt, Ultimate HEPA (10pk) 800-5411
Cloth Bag w/ Gasket, 6 Quart 800-6021
Cloth Bag w/ Gasket, 10 Quart 800-6020
HEPA Dome Filter 800-9130

EDGESTICK-OP-EN - 13 -
PARTS SECTION

- 14 - EDGESTICK-OP-EN
HANDLEBAR VERSIONS
.YJR 5FWY3T 5FWY)JXHWNUYNTS 6Y^
-&3)1*'&7(1&25
? -&3)1*'&75.*(*869:'*
? -&3)1*'&75.*(*869:'*
? -&3)1*'&774:3)9:'*
? -&3)1*14(0*>*'419
? -&3)1*14(089&>
?1 1*+9-&3)1*14(089&>
?7 7.,-9-&3)1*14(089&>
? <-**1
? 14<*7-&3)1*'&7
? -&3)1*'&7(4:51*7
- 8-(8=88
- ?.3074:3))4:'1*<.7*83&55*75.3UFW
- +1&3,*)3>140
- +1&3,*)3>140
- <<.)=4)88
- 8-&+9(411&7.)=1,
- 3>1
- -(8=88
- +<.)=4)88
- +<.)=4)88
- -(8=88
- -(8=88
- +3<.)=4)88
2FHMNSJX\NYMYMNX-FSIQJGFW
:XJMFWI\FWJXJJSMJWJ
2FHMNSJX\NYMYMNX-FSIQJGFW
:XJMFWI\FWJXJJSMJWJ
2FHMNSJX\NYMYMNX-FSIQJGFW
:XJMFWI\FWJXJJSMJWJ
4SQ^ZXJ\NYMRFHMNSJX
\NYMWTZSIYZGGNSL
+TW:8KYHTWIZXJUFWYSZRGJW?
+TW-_KYHTWIFSI
5QZLY^UJ*ZXJUFWYSZRGJW?*
5QZLY^UJ+ZXJUFWYSZRGJW?+
5QZLY^UJ,ZXJUFWYSZRGJW?,
5QZLY^UJ.ZXJUFWYSZRGJW?.
5QZLY^UJ/ZXJUFWYSZRGJW?/
5QZLY^UJ>ZXJUFWYSZRGJW?>
5QZLY^UJ*ZXJUFWYSZRGJW?*

EDGESTICK-OP-EN - 15 -
LOCKING HANDLEBAR
.YJR 5FWY3T 5FWY)JXHWNUYNTS 6Y^
? <-**1
1 1*+9-&3)1*14(089&>
7 7.,-9-&3)1*14(089&>
-&3)1*'&7(1&25
-&3)1*'&73*<14(0.3,
- +1&3,*)3>140
- <<.)=4)88
- 8-&+9(411&7.)=1,
- +<=3>143
- -(8=88
- +3<.)=4)88
- =0:718*98(7*<

- 16 - EDGESTICK-OP-EN
SCRUBDECK ASSEMBLY
.YJR 5FWY3T 5FWY)JXHWNUYNTS 6Y^
? 249478-&+985&(*7
?& *((*397.('*&7.3,&88*2'1>
? (7:8-<&8-*7
? 7:''*7.841&947
? 85&(*7
? .3(-&1:2.3:25&))7.;*7
? ,7.5+&(*
? 841:9.43+**)9:'*
'*&7.3,,&80*9
+**)9:'*):89(:79&.3
*),* 7*)5&)=
- +1&3,*)3>140
- -(8=88
- 55-=
- +-5=
- '-8(8=88
- +-8(8=88
-0 =0*>
20 =869:'*51:,

EDGESTICK-OP-EN - 17 -
SCRUBDECK WEIGHTS
.YJR 5FWY3T 5FWY)JXHWNUYNTS 6Y^
-&3)1*'&7(1&25
?1 1*+9-&3)1*14(089&>
?7 7.,-9-&3)1*14(089&>
? <-**1
? '&8*+4786-&3)1*'&7
1.+9-&3)1*
034'
942(&989.(0*7
*),* .3(-*),*89.(0*7
89752-_:8*5&79?
89752-_:8*5&79?
-)752-_:8*5&79?
-)752-_:8*5&79?
1'8<*.,-9:8*43-)2&(-.3*8431>
.YJR 5FWY3T 5FWY)JXHWNUYNTS 6Y^
- +1&3,*)3>140
- -(8=+:119-7*&)88
- <<.)=4)88
- 8-&+9(411&7.)=1,
- 3>1
- +<.)=4)88
- 1<88
- -(8=88
- =0:718*98(7*<
+TWXYFSIFWI:8NSHMIJHPXZXJQG\JNLMYXFSIQG\JNLMYX
+TW-):8NSHMIJHPXZXJQG\JNLMYXFSIQG\JNLMYX
+TWXYFSIFWI-_NSHMIJHPXZXJQG\JNLMYXFSIQG\JNLMYX
+TWXYFSIFWI:8IJHPXZXJQG\JNLMYXFSIQG\JNLMYX
+TWFQQNSHMIJHPXZXJQG\JNLMYX?'FSIQG\JNLMYX?(

- 18 - EDGESTICK-OP-EN
WATER TANK AND HANDLEBAR
.YJR 5FWY3T 5FWY)JXHWNUYNTS 6Y^
-&3)1*,7.5'1:*
359;&1;*
9&311.),&80*9
9&301.)
841:9.439&30
359='&7'=)*,
? -&3),7.5
? -&3)1*51:,
? 8<.9(-'&7
? 8<.9(-857.3,
? 2.(748<.9(-
? (47)897&.37*1.*+
? (4;*7
? 8<.9(-&(9:&947,:.)*
? (47)<7&5
? -&3)1*'&75.*(*869:'*
;&1;*1*;*7
5:1174)
8*7.&13:2'*751&9*
-4:72*9*7
)4<357*88:7*(439741857.3,
*),* .3(-*),*89.(0*7
- +1&3,*)3>140
.YJR 5FWY3T 5FWY)JXHWNUYNTS 6Y^
- ('=88
- ('=88
- +<3>143
- +'=
- 03
- 3>14088
- 3>14088
- -41*51:,
- +<88
- +<.)=4)88
- 1<88
- =8*1+9&55.3,8(7*<
- 55-=2888
- 55-=88
- 55-=88
- +-5=88
- '-8(8=
- -(8=88
20 2359=+359'7&88
20 4)=.)=1,81**;*
20 ,7422*9.)=4)=9-
20 ==47.3,

EDGESTICK-OP-EN - 19 -
ISOLATED HANDLEBARS
.YJR 5FWY3T 5FWY)JXHWNUYNTS 6Y^
-&3)1*,7.5'1:*
359;&1;*
9&311.),&80*9
9&301.)
841:9.439&30
359='&7'=)*,
? -&3),7.5
? 8<.9(-'&7
? 8<.9(-857.3,
? 2.(748<.9(-
? (47)897&.37*1.*+
? 8<.9(-&(9:&947,:.)*
8<.9(-74(0*7)5)9434++
? 14<*7-&3)1*'&7869:'*
? -&3)1*'&7(4:51*7
? (47)<7&5
? ;&(-48*(4:51*7
? (4;*7
? :55*7.841&9*)-&3)1*'&7
? ;&(-48*(4:51*7
? 841.).841&9*)-&3)1*'&7
;&1;*1*;*7
5:1174)
8*7.&13:2'*751&9*
-4:72*9*7
)4<357*88:7*(439741857.3,
- ,7422*9.)=4)':3&3
- ?.3074:3))4:'1*<.7*83&55*75.3UFW
.YJR 5FWY3T 5FWY)JXHWNUYNTS 6Y^
- +1&3,*)3>140
- +1&3,*)3>140
- ('=88
- ('=88
- +<3>143
- +'=
- 03
- -(8=88
- 3>14088
- 3>14088
- 3>14088
- -41*51:,
- +<88
- +<.)=4)88
- 1<88
- +3<.)=4)88
- =8*1+9&55.3,8(7*<
- 55-=2888
- 55-=88
- 55-=88
- +-5=88
- '-8(8=
- -(8=88
20 2359=+359'7&88
20 4)=.)=1,81**;*
20 ,7422*9.)=4)=9-
20 ==47.3,

- 20 - EDGESTICK-OP-EN
ONBOARD VACUUM
.YJR 5FWY3T 5FWY)JXHWNUYNTS 6Y^
;&('7&(0*9
8<.9(-74(0*7)5)9434++
<*113:9
NSHM5NLYFNQ5T\JW(TWI
)ZFQ(JQQ3TNXJKNQYJWVY
'FHPWJXY5FI\RFIMJXN[J
.SQJYQNIVY
+NSLJW,ZFWI2TYTW
;&(::2-48*
;&(24947
(149-'&,69
-4:8.3,'&(05&(069
,FXPJY2TYTWMTZXNSL
2TYTW2TZSYNSL7NSL
-*5&)TRJ+NQYJW
- +<.)=4)88
- 898=88
- '-8(8=88
;FH2TYTW
;-_
2NHWTQNSJIKNQYJWGFLUQ^
VY:QYWFUP
2NHWTQNSJIKNQYJWGFLUQ^
VY:QYNRFYJ-*5&UP
This manual suits for next models
1
Table of contents
Other Tomcat Floor Machine manuals
